使用matplotlib绘制大量点时内存不足

10

我有一个简单格式的大型文本文件(约6GB)

x1 y1 z1
x2 y2 z2
...

由于我可能会加载此数据超过一次,出于效率考虑,我已经创建了一个np.memmap文件:

X,Y,Z = np.memmap(f_np_mmap,dtype='float32',mode='r',shape=shape).T

我将尝试绘图:
plt.scatter(X, Y, 
           color=custom_colorfunction(Z), 
           alpha=.01, s=.001, marker='s', linewidth=0)

这对于小型数据集非常有效。但是,对于这个更大的数据集,我会遇到内存不足的问题。我已经确认 plt.scatter 占用了所有内存;我可以正常地逐步执行 X,Y,Z。有没有一种方法可以“栅格化”画布,以便我不会遇到内存不足的问题?我不需要在图像上进行缩放和平移,它直接被保存在磁盘中。我知道我可以将数据分组并绘制出来,但我不确定如何使用自定义颜色映射 alpha 值。


"Matplotlib"出于自我保护的原因创建了内部数据拷贝(如果只是保留引用,数据可能会在其下发生变化)。我建议直接使用“PathCollection”(或其底层使用的工具)。 - tacaswell
1
另一种选择是编写一个自定义的Axes子类,覆盖draw函数并为每个点生成一个艺术家,将其光栅化和合成,然后在制作下一个之前丢弃艺术家。 - tacaswell
1
我认为问题在于内部表示,某个地方有着 _internal_data = np.array(input_data) 的道德等价物,如果你正在进行颜色映射,那么散点对象最终将至少占用 6N64 B(N 行,6 或 7 个浮点数(XYZ、RGB(可能是 A)、64 位))。 - tacaswell
给我一点时间看看能否让它工作,但是先看看matplotlib.axes.Axes.draw的代码。 - tacaswell
我非常喜欢 @JoeKington 的想法,比我的好多了。 - tacaswell
显示剩余2条评论
3个回答

9
@tcaswell的建议是覆盖Axes.draw方法,这绝对是一种最灵活的方法。
但是,你可以使用/滥用blitting来在不子类化Axes的情况下做到这一点。只需每次使用draw_artist而不恢复画布即可。
有一个额外的技巧:我们需要一个特殊的save方法,因为所有其他方法都会在保存之前绘制画布,这将擦除我们之前绘制的所有内容。
另外,正如tcaswell所指出的那样,为每个项目调用draw_artist速度相当慢,因此对于大量数据,您需要把输入数据块划分成若干份进行处理。划分会显著提高速度,但是这种方法始终比绘制单个PathCollection要慢。
总之,这两个答案都应该缓解您的内存问题。以下是一个简单的示例。
import numpy as np
import matplotlib.pyplot as plt
from matplotlib import _png
from itertools import izip

def main():
    # We'll be saving the figure's background, so let's make it transparent.
    fig, ax = plt.subplots(facecolor='none')

    # You'll have to know the extent of the input beforehand with this method.
    ax.axis([0, 10, 0, 10])

    # We need to draw the canvas before we start adding points.
    fig.canvas.draw()

    # This won't actually ever be drawn. We just need an artist to update.
    col = ax.scatter([5], [5], color=[0.1, 0.1, 0.1], alpha=0.3)

    for xy, color in datastream(int(1e6), chunksize=int(1e4)):
        col.set_offsets(xy)
        col.set_color(color)
        ax.draw_artist(col)

    save(fig, 'test.png')

def datastream(n, chunksize=1):
    """Returns a generator over "n" random xy positions and rgb colors."""
    for _ in xrange(n//chunksize):
        xy = 10 * np.random.random((chunksize, 2))
        color = np.random.random((chunksize, 3))
        yield xy, color

def save(fig, filename):
    """We have to work around `fig.canvas.print_png`, etc calling `draw`."""
    renderer = fig.canvas.renderer
    with open(filename, 'w') as outfile:
        _png.write_png(renderer._renderer.buffer_rgba(),
                       renderer.width, renderer.height,
                       outfile, fig.dpi)

main()

enter image description here

同时,您可能会注意到顶部和左侧的脊柱被覆盖了。为了解决这个问题,您可以在保存之前重新绘制这两个脊柱(ax.draw_artist(ax.spines['top'])等)。


2
谢谢,这个很好用。我只想为其他使用它的人添加一点内容,通过在 fig, ax = plt.subplots(facecolor='none', dpi=700) 调用中设置dpi,可以获得更高分辨率的图像,而不是在保存函数中设置,因为那时似乎已经太晚了。 - Hooked
@Hooked - 很好的观点!对于图形的任何其他更改也是如此... 基本上,在初始调用fig.canvas.draw()之前,需要设置所有内容。 在那之后,我们只是在“固定”的光栅图像上绘制。 - Joe Kington

6

类似这样的代码(很抱歉代码有点长,大部分是从标准的axes.Axes.draw复制过来的):

from operator import itemgetter
class generator_scatter_axes(matplotlib.axes.Axes):
    def __init__(self, *args, **kwargs):
        matplotlib.axes.Axes.__init__(self, *args, **kwargs)
        self._big_data = None
    def draw(self, renderer=None, inframe=None):
        # copied from original draw (so you can still add normal artists ect)
        if renderer is None:
            renderer = self._cachedRenderer

        if renderer is None:
            raise RuntimeError('No renderer defined')
        if not self.get_visible():
            return
        renderer.open_group('axes')

        locator = self.get_axes_locator()
        if locator:
            pos = locator(self, renderer)
            self.apply_aspect(pos)
        else:
            self.apply_aspect()


        artists = []

        artists.extend(self.collections)
        artists.extend(self.patches)
        artists.extend(self.lines)
        artists.extend(self.texts)
        artists.extend(self.artists)
        if self.axison and not inframe:
            if self._axisbelow:
                self.xaxis.set_zorder(0.5)
                self.yaxis.set_zorder(0.5)
            else:
                self.xaxis.set_zorder(2.5)
                self.yaxis.set_zorder(2.5)
            artists.extend([self.xaxis, self.yaxis])
        if not inframe:
            artists.append(self.title)
            artists.append(self._left_title)
            artists.append(self._right_title)
        artists.extend(self.tables)
        if self.legend_ is not None:
            artists.append(self.legend_)

        # the frame draws the edges around the axes patch -- we
        # decouple these so the patch can be in the background and the
        # frame in the foreground.
        if self.axison and self._frameon:
            artists.extend(self.spines.itervalues())

        if self.figure.canvas.is_saving():
            dsu = [(a.zorder, a) for a in artists]
        else:
            dsu = [(a.zorder, a) for a in artists
                   if not a.get_animated()]

        # add images to dsu if the backend support compositing.
        # otherwise, does the manaul compositing  without adding images to dsu.
        if len(self.images) <= 1 or renderer.option_image_nocomposite():
            dsu.extend([(im.zorder, im) for im in self.images])
            _do_composite = False
        else:
            _do_composite = True

        dsu.sort(key=itemgetter(0))

        # rasterize artists with negative zorder
        # if the minimum zorder is negative, start rasterization
        rasterization_zorder = self._rasterization_zorder
        if (rasterization_zorder is not None and
            len(dsu) > 0 and dsu[0][0] < rasterization_zorder):
            renderer.start_rasterizing()
            dsu_rasterized = [l for l in dsu if l[0] < rasterization_zorder]
            dsu = [l for l in dsu if l[0] >= rasterization_zorder]
        else:
            dsu_rasterized = []

        # the patch draws the background rectangle -- the frame below
        # will draw the edges
        if self.axison and self._frameon:
            self.patch.draw(renderer)

        if _do_composite:
            # make a composite image blending alpha
            # list of (mimage.Image, ox, oy)

            zorder_images = [(im.zorder, im) for im in self.images
                             if im.get_visible()]
            zorder_images.sort(key=lambda x: x[0])

            mag = renderer.get_image_magnification()
            ims = [(im.make_image(mag), 0, 0, im.get_alpha()) for z, im in zorder_images]

            l, b, r, t = self.bbox.extents
            width = mag * ((round(r) + 0.5) - (round(l) - 0.5))
            height = mag * ((round(t) + 0.5) - (round(b) - 0.5))
            im = mimage.from_images(height,
                                    width,
                                    ims)

            im.is_grayscale = False
            l, b, w, h = self.bbox.bounds
            # composite images need special args so they will not
            # respect z-order for now

            gc = renderer.new_gc()
            gc.set_clip_rectangle(self.bbox)
            gc.set_clip_path(mtransforms.TransformedPath(
                    self.patch.get_path(),
                    self.patch.get_transform()))

            renderer.draw_image(gc, round(l), round(b), im)
            gc.restore()

        if dsu_rasterized:
            for zorder, a in dsu_rasterized:
                a.draw(renderer)
            renderer.stop_rasterizing()

        for zorder, a in dsu:
            a.draw(renderer)
        ############################    
        # new bits
        ############################
        if self._big_data is not None:

            for x, y, z in self._big_data:
                # add the (single point) to the axes
                a = self.scatter(x, y, color='r',
                            alpha=1, s=10, marker='s', linewidth=0)
                # add the point, in Agg this will render + composite
                a.draw(renderer)
                # remove the artist from the axes, shouldn't let the render know
                a.remove()
                # delete the artist for good measure
                del a
        #######################
        # end new bits
        #######################    
        # again, from original to clean up
        renderer.close_group('axes')
        self._cachedRenderer = renderer

使用方法如下:

In [42]: fig = figure()

In [43]: ax = generator_scatter_axes(fig, [.1, .1, .8, .8])

In [44]: fig.add_axes(ax)
Out[44]: <__main__.generator_scatter_axes at 0x56fe090>

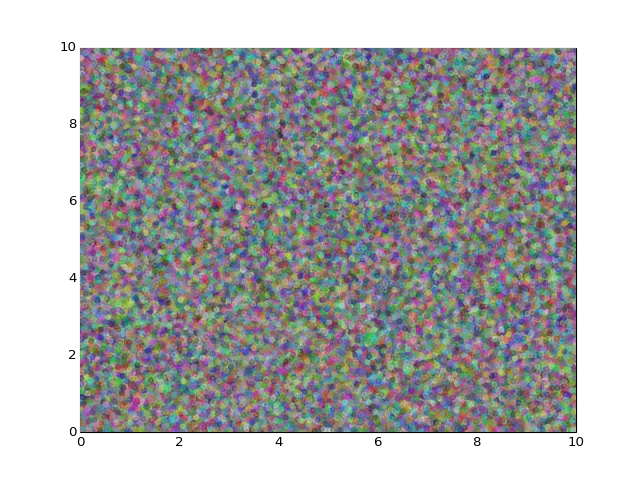
In [45]: ax._big_data = rand(500, 3)

In [46]: draw()

我将你的散点函数更改为在小数量下可见的形状。由于您每次都在设置一个scatter对象,因此这将非常慢。我建议您要么采取合理的数据块并绘制它们,要么替换对scatter的调用以使用底层的艺术家对象,或者使用Joe的建议仅更新单个艺术家。

draw中是否可以获取缩放级别,并根据缩放和dpi绘制矩形(具有数据块的最小值和最大值)或绘制数据本身?类似于细节级别绘图,以便我们可以绘制大量数据,然后只有在缩放后才能看到细节。也许我需要为此开发一个新的艺术家。但是想知道是否可以知道缩放级别。 - dashesy
1
在绘制时,轴知道它的视图限制是什么。请查看Line2Ddraw方法,它使用这些信息来(在某些情况下)只查看数据的子集。 - tacaswell

1

为了扩展已接受的答案,看起来“workaround”保存函数不再起作用,因为write_png的签名已更改。我的解决方法如下:

import numpy as np
from PIL import Image

def png_write(fig, filename):
    width, height = map(int, fig.get_size_inches() * fig.get_dpi())
    image = np.frombuffer(fig.canvas.tostring_argb(), dtype='uint8')
    image = image.reshape(width, height, 4)
    image = np.roll(image, -1, 2)
    Image.fromarray(image, 'RGBA').save(filename)

网页内容由stack overflow 提供, 点击上面的
可以查看英文原文,
原文链接