Seaborn绘制带有第二Y轴的图表

10
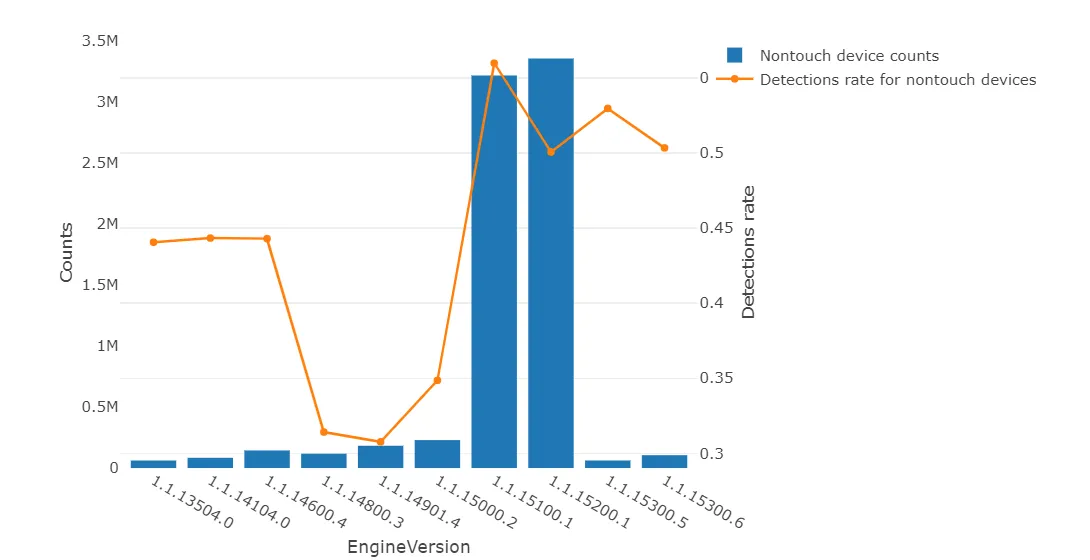
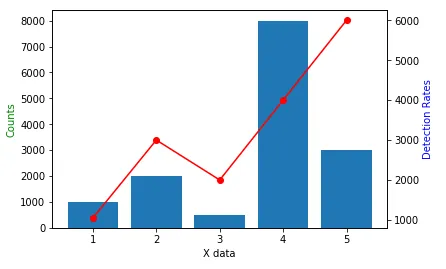
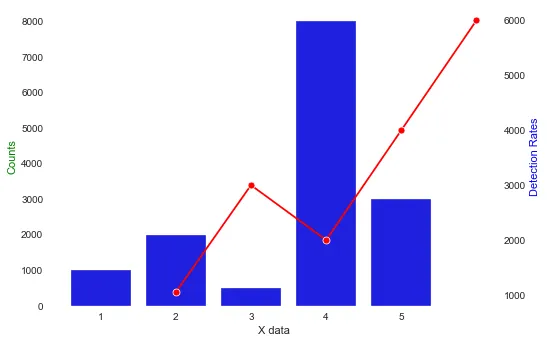
我想知道如何做一个带有两个y轴的图表,使我的图表看起来像这样:
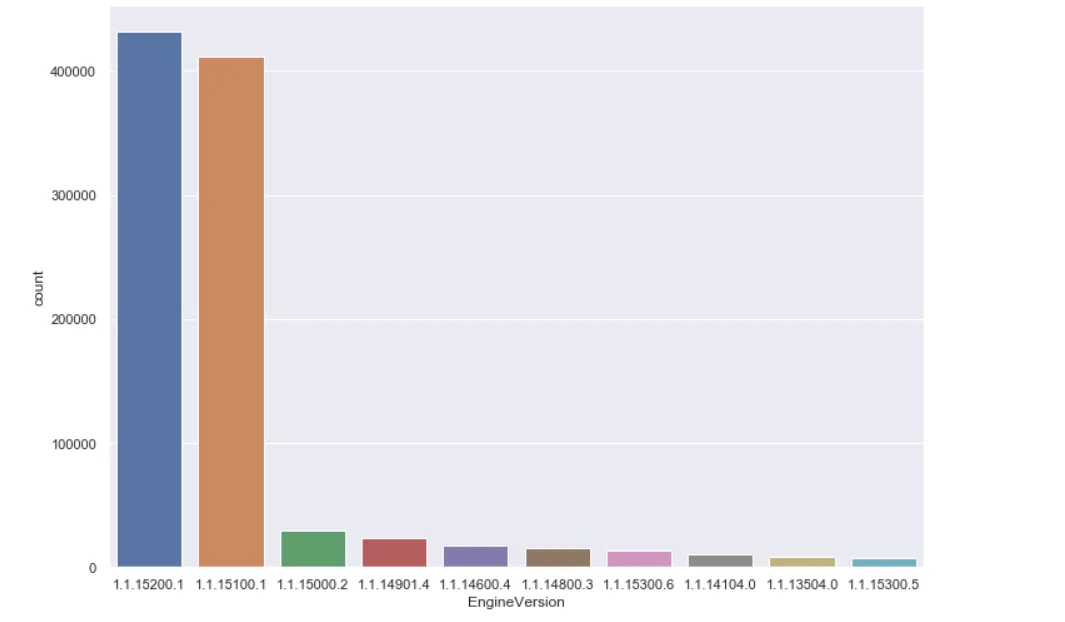
enter image description here 通过添加另一个y轴,将它变成更像这个: enter image description here 
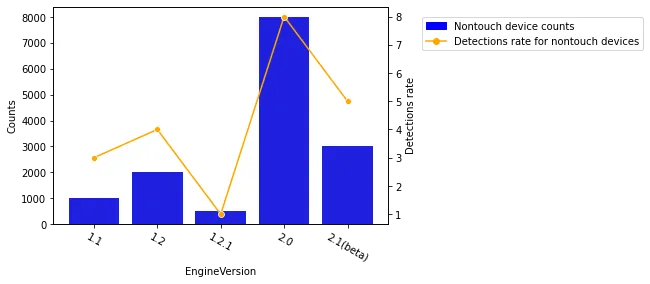
为了从我的数据框中获取前10个EngineVersions,我只使用了以下代码行:
sns.countplot(x='EngineVersion', data=train, order=train.EngineVersion.value_counts().iloc[:10].index);
3个回答

19

我认为你正在寻找这样的内容:

import matplotlib.pyplot as plt
x = [1,2,3,4,5]
y = [1000,2000,500,8000,3000]
y1 = [1050,3000,2000,4000,6000]

fig, ax1 = plt.subplots()

ax2 = ax1.twinx()
ax1.bar(x, y)
ax2.plot(x, y1, 'o-', color="red" )

ax1.set_xlabel('X data')
ax1.set_ylabel('Counts', color='g')
ax2.set_ylabel('Detection Rates', color='b')

plt.show()

输出:

enter image description here


5
您好,如何使用社交媒体完成此操作? - gdubs
6
可能对@gdubs来说已经太晚了,但如果有人感兴趣的话,可以使用Seaborn(sns)像往常一样绘制您的图形,只需创建新的ax(ax2 = ax1.twinx()),然后使用“ax”参数将相应的Axes对象传递给您的Seaborn函数,例如: ax1.bar(x, y) => sns.barplot(x=x, y=y, ax=ax1) ax2.plot(x, y1, 'o-', color="red") => sns.lineplot(x=x, y=y1, color="red", ax=ax2) - r02
@r02,感谢您的评论,点赞+1。 - BetaDev

14

@gdubs 如果你想使用Seaborn库来完成这个任务,这段设置代码对我来说可行。在matplotlib中,不需要像之前那样在绘图函数之外设置ax变量,而是在Seaborn的绘图函数中将其赋值给变量ax

import seaborn as sns # Calls in seaborn

# These lines generate the data to be plotted
x = [1,2,3,4,5]
y = [1000,2000,500,8000,3000]
y1 = [1050,3000,2000,4000,6000]

fig, ax1 = plt.subplots() # initializes figure and plots

ax2 = ax1.twinx() # applies twinx to ax2, which is the second y axis. 

sns.barplot(x = x, y = y, ax = ax1, color = 'blue') # plots the first set of data, and sets it to ax1. 
sns.lineplot(x = x, y = y1, marker = 'o', color = 'red', ax = ax2) # plots the second set, and sets to ax2. 

# these lines add the annotations for the plot. 
ax1.set_xlabel('X data')
ax1.set_ylabel('Counts', color='g')
ax2.set_ylabel('Detection Rates', color='b')

plt.show(); # shows the plot. 

输出: Seaborn输出示例


1
您可以尝试使用此代码获取与最初所需非常相似的图像。
import seaborn as sb
from matplotlib.lines import Line2D
from matplotlib.patches import Rectangle

x = ['1.1','1.2','1.2.1','2.0','2.1(beta)']
y = [1000,2000,500,8000,3000]
y1 = [3,4,1,8,5]
g = sb.barplot(x=x, y=y, color='blue')
g2 = sb.lineplot(x=range(len(x)), y=y1, color='orange', marker='o', ax=g.axes.twinx())
g.set_xticklabels(g.get_xticklabels(), rotation=-30)
g.set_xlabel('EngineVersion')
g.set_ylabel('Counts')
g2.set_ylabel('Detections rate')
g.legend(handles=[Rectangle((0,0), 0, 0, color='blue', label='Nontouch device counts'), Line2D([], [], marker='o', color='orange', label='Detections rate for nontouch devices')], loc=(1.1,0.8))

enter image description here


网页内容由stack overflow 提供, 点击上面的
可以查看英文原文,
原文链接