我在使用Python和Pygame编写以下代码时,遇到了渲染等角2D瓦片世界的一些问题:
'''
Map Rendering Demo
rendermap.py
By James Walker (trading as Ilmiont Software).
Copyright (C)Ilmiont Software 2013. All rights reserved.

This is a simple program demonstrating rendering a 2D map in Python with Pygame from a list of map data.
Support for isometric or flat view is included.
'''

import pygame
from pygame.locals import *

pygame.init()

DISPLAYSURF = pygame.display.set_mode((640, 480), DOUBLEBUF)    #set the display mode, window title and FPS clock
pygame.display.set_caption('Map Rendering Demo')
FPSCLOCK = pygame.time.Clock()

map_data = [
[1, 1, 1, 1, 1],
[1, 0, 0, 0, 1],
[1, 0, 0, 0, 1],
[1, 0, 0, 0, 1],
[1, 0, 0, 0, 1],
[1, 1, 1, 1, 1]
]               #the data for the map expressed as [row[tile]].

wall = pygame.image.load('wall.png').convert()  #load images
grass = pygame.image.load('grass.png').convert()

tileWidth = 64  #holds the tile width and height
tileHeight = 64

currentRow = 0  #holds the current map row we are working on (y)
currentTile = 0 #holds the current tile we are working on (x)

for row in map_data:    #for every row of the map...
    for tile in row:
        tileImage = wall

        cartx = currentTile * 64    #x is the index of the currentTile * the tile width
        print(cartx)
        carty = currentRow * 64     #y is the index of the currentRow * the tile height
        print(carty)
        x = cartx - carty
        print(x)
        y = (cartx + carty) / 2
        print(y)
        print('\n\n')
        currentTile += 1    #increase the currentTile holder so we know that we are starting rendering a new tile in a moment

        DISPLAYSURF.blit(tileImage, (x, y)) #display the actual tile
    currentTile = 0 #reset the current working tile to 0 (we're starting a new row remember so we need to render the first tile of that row at index 0)
    currentRow += 1 #increment the current working row so we know we're starting a new row (used for calculating the y coord for the tile)

while True:
    for event in pygame.event.get():
        if event.type == QUIT:
            pygame.quit()
            sys.exit()
        if event.type == KEYUP:
            if event.key == K_ESCAPE:
                pygame.quit()
                sys.exit()

    pygame.display.flip()
    FPSCLOCK.tick(30)
使用的瓷砖尺寸为64x64;当运行上述代码时,会生成以下输出:
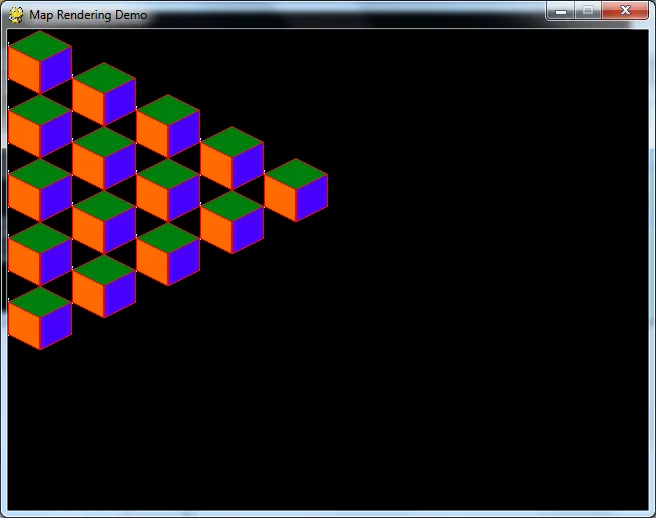 所有瓷砖都具有透明边缘,此示例仅显示“墙”瓷砖,但显然出了些问题,因为所有瓷砖之间的距离都太远了。
我已经尝试阅读一些在线教程,但似乎找不到一个真正用Python编写的教程,请告诉我我错在哪里。
提前致谢, Ilmiont