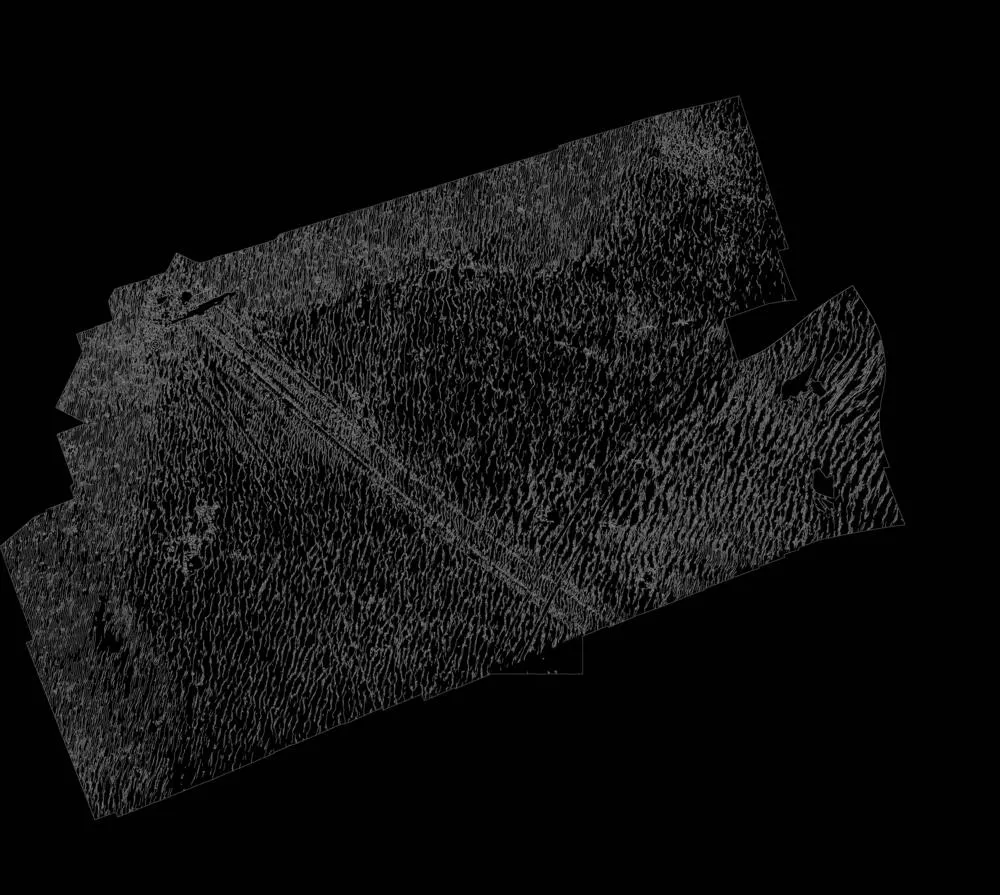
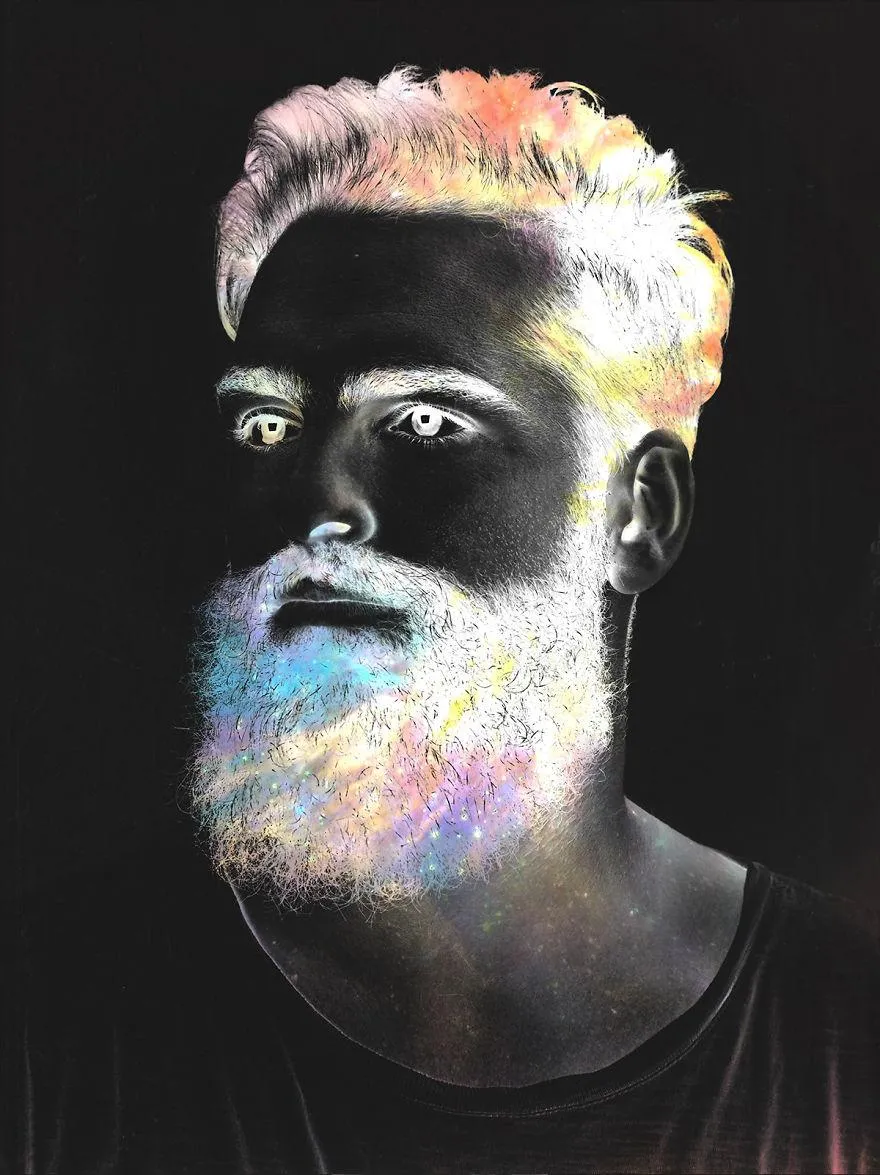
所以我有一张沙丘的图片,看起来像是这样的。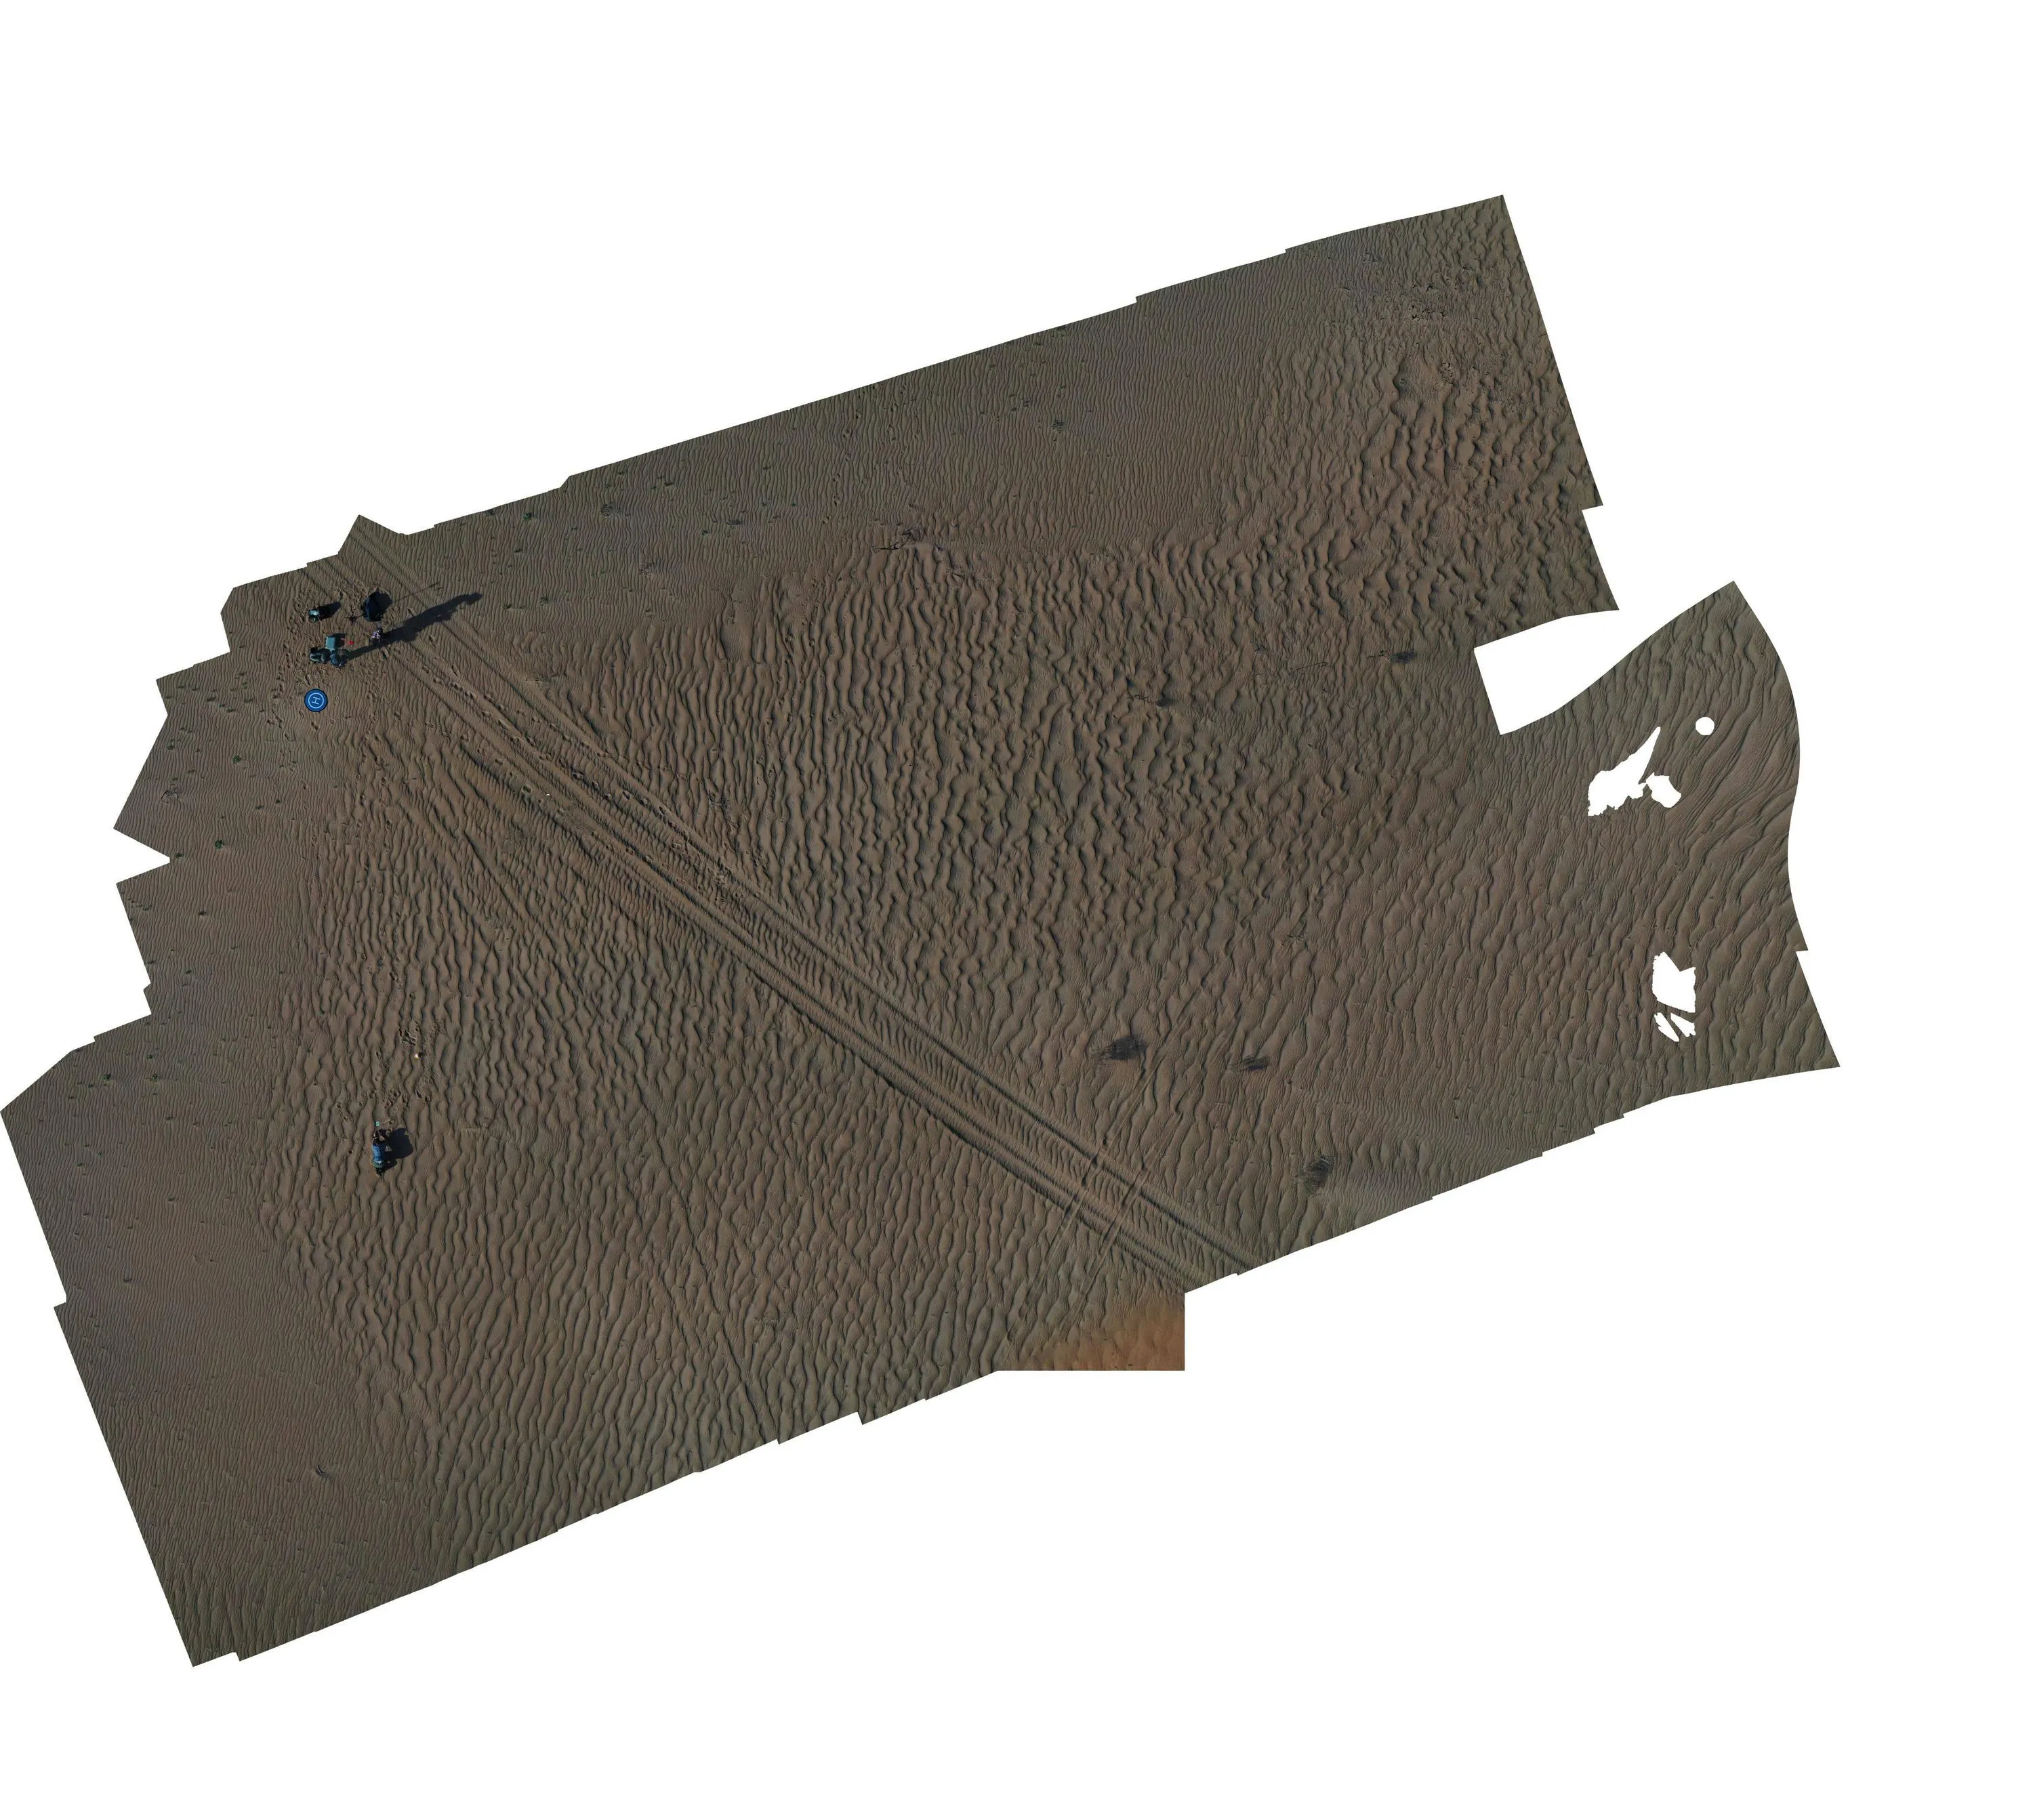 我的目标是使用Python中的opencv识别图片中的波纹。我正在学习这个库,因此我不知道库内所有的细节。我做了一些研究,但没有找到类似于这种问题的解决方案,这个问题特别困难,因为波纹会产生阴影。我预期的结果应该是相反的,使所有的波纹比其他特征更加突出。下面是一个男人头发突出的图片,我想用同样的方法处理下面沙丘中的波纹。
我的目标是使用Python中的opencv识别图片中的波纹。我正在学习这个库,因此我不知道库内所有的细节。我做了一些研究,但没有找到类似于这种问题的解决方案,这个问题特别困难,因为波纹会产生阴影。我预期的结果应该是相反的,使所有的波纹比其他特征更加突出。下面是一个男人头发突出的图片,我想用同样的方法处理下面沙丘中的波纹。
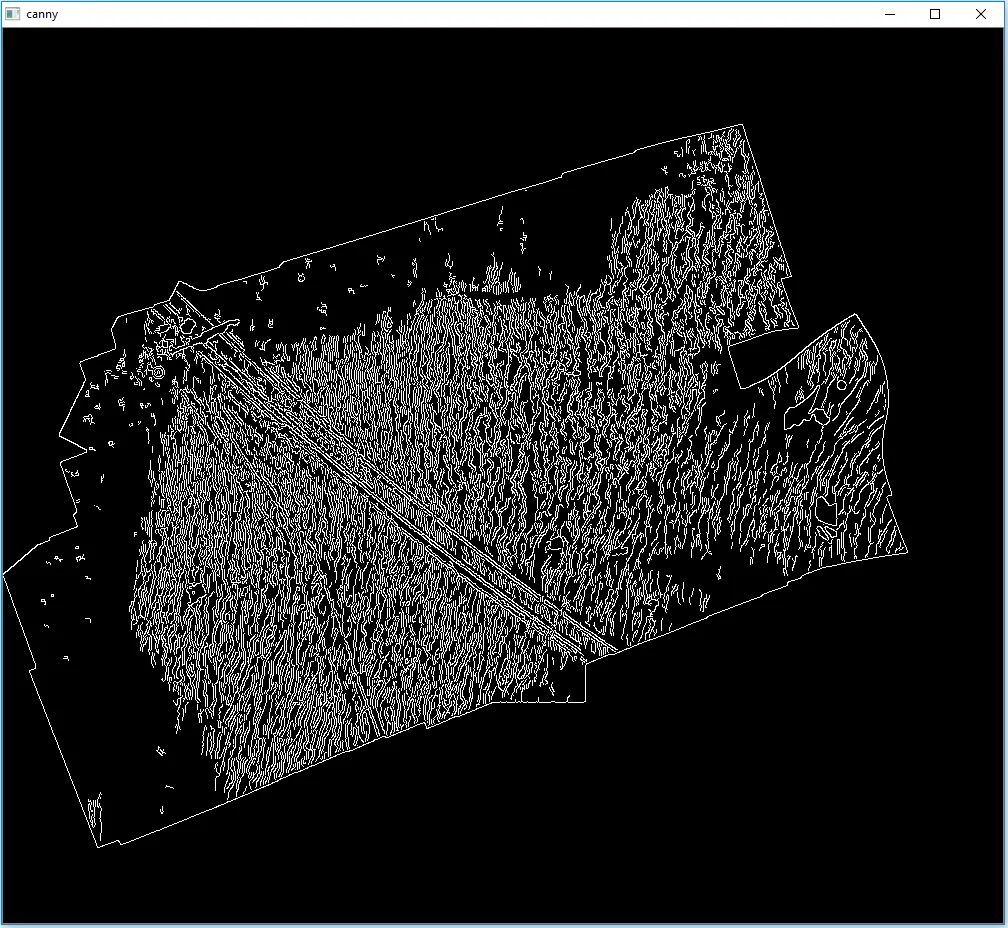
 以下是我现在已有的代码及其最终产品的输出,但仍需要进行一些改进。
 path = "C:/some path//to get//to my picture//Dune field_resize.jpg"


# image I'm using
img = cv2.imread ( path , cv2.IMREAD_GRAYSCALE )
kernel = np.ones ( (5 , 5) , np.uint8 )

# Canny edge detecting
edges = cv2.Canny ( img , 75 , 200 )
th , img = cv2.threshold ( img , 220 , 255 , cv2.THRESH_BINARY_INV );

# Copy the thresholded image.
img_floodfill = img.copy ()

# Mask used to flood filling.
# Notice the size needs to be 2 pixels than the image.
h , w = img.shape[:2]
mask = np.zeros ( (h + 2 , w + 2) , np.uint8 )

# Floodfill from point (0, 0)
cv2.floodFill ( img_floodfill , mask , (0 , 0) , 255 );

# Invert floodfilled image
img_floodfill_inv = cv2.bitwise_not ( img_floodfill )

# Combine the two images to get the foreground.
img_out = img | img_floodfill_inv

# Display images.
cv2.imwrite ( "Thresholded Image.png" , img )
cv2.imwrite ( "Floodfilled Image.png" , img_floodfill )
cv2.imwrite ( "Inverted Floodfilled Image.png" , img_floodfill_inv )
cv2.imwrite ( "Foreground.png" , img )
cv2.waitKey ( 0 )

cv2.imwrite ( "canny_edge.png" , edges )

img_erosion = cv2.erode ( img , kernel , iterations=1 )

cv2.waitKey ( 0 )
cv2.destroyAllWindows ()