如何使用OpenCV检测图像中的彩色补丁?

8
我正在尝试通过移动相机在室内条件下检测图片(黑白素描)是否有彩色。
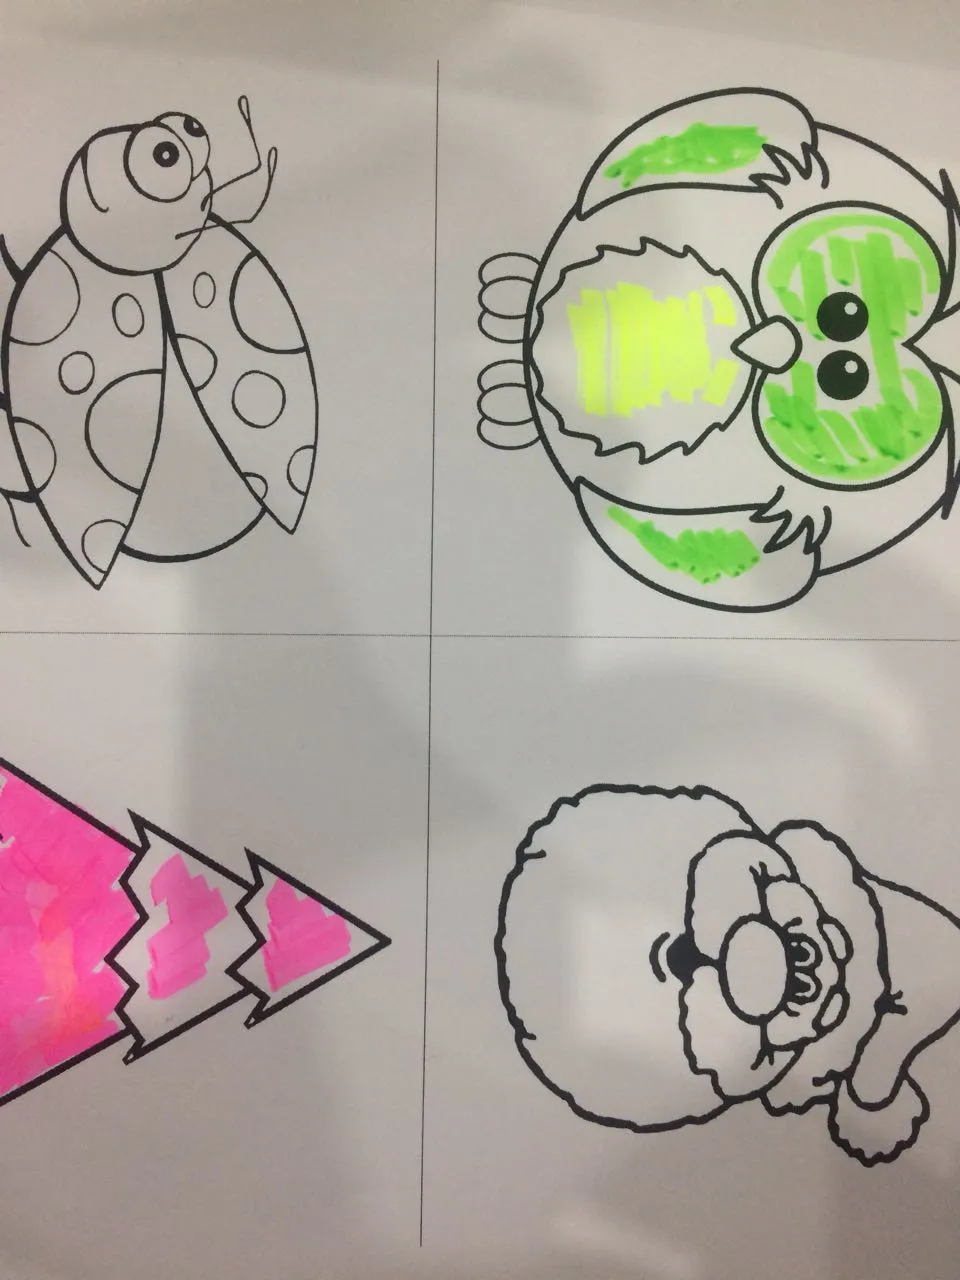
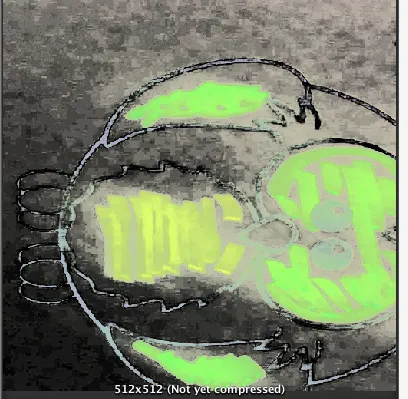
enter image description here

我已经能够得到这个结果

enter image description here

使用以下代码
Mat dest = new Mat (sections[i].rows(),sections[i].cols(),CvType.CV_8UC3);
Mat hsv_image = new Mat (sections[i].rows(),sections[i].cols(),CvType.CV_8UC3);

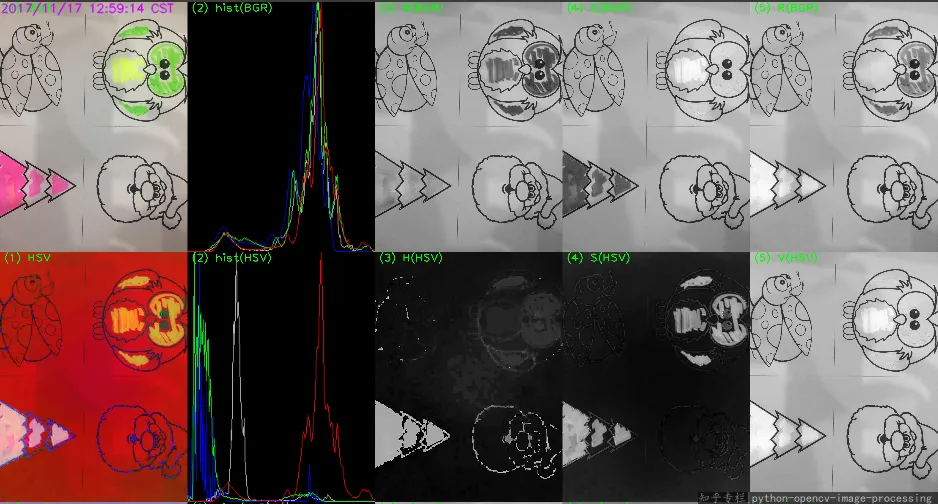
Imgproc.cvtColor (sections[i],hsv_image,Imgproc.COLOR_BGR2HSV);

List <Mat> rgb = new List<Mat> ();
Core.split (hsv_image, rgb);
Imgproc.equalizeHist (rgb [1], rgb [2]);
Core.merge (rgb, sections[i]);
Imgproc.cvtColor (sections[i], dest, Imgproc.COLOR_HSV2BGR);

Core.split (dest, rgb);

我该如何成功地判断图片是否为彩色?颜色可以是任何颜色,并且有室内条件。由于我是初学者,请帮助我解决这个问题。

谢谢

2个回答

18

在编程中,处理彩色图像时使用HSV颜色空间是一个不错的方向。我将通道分离后发现S通道非常好用,因为S代表颜色的饱和度(Saturation)

enter image description here

然后使用阈值100S进行二值化,您将得到以下结果。

enter image description here

在二值化的图像中很容易分离出彩色区域。


如@Mark所建议,我们可以使用自适应阈值而不是固定阈值。因此,在标志中添加THRESH_OTSU。
核心Python代码如下所示:
##(1) read into  bgr-space
img = cv2.imread("test.png")

##(2) convert to hsv-space, then split the channels
hsv = cv2.cvtColor(img, cv2.COLOR_BGR2HSV)
h,s,v = cv2.split(hsv)

##(3) threshold the S channel using adaptive method(`THRESH_OTSU`)  
th, threshed = cv2.threshold(s, 100, 255, cv2.THRESH_OTSU|cv2.THRESH_BINARY)

##(4) print the thresh, and save the result
print("Thresh : {}".format(th))
cv2.imwrite("result.png", threshed)


## >>> Thresh : 85.0

enter image description here

相关答案:

  1. 检测图像中的彩色分段
  2. 在opencv android中进行边缘检测
  3. OpenCV C++/Obj-C:检测纸张/正方形

1
好的解决方案!更进一步地说,如果您取出最终的阈值图像并计算其平均值,然后乘以100,您将得到有色像素的百分比,这将使确定图像是否包含颜色变得容易 - 这似乎是OP所要求的。 - Mark Setchell
谢谢您的建议,我将
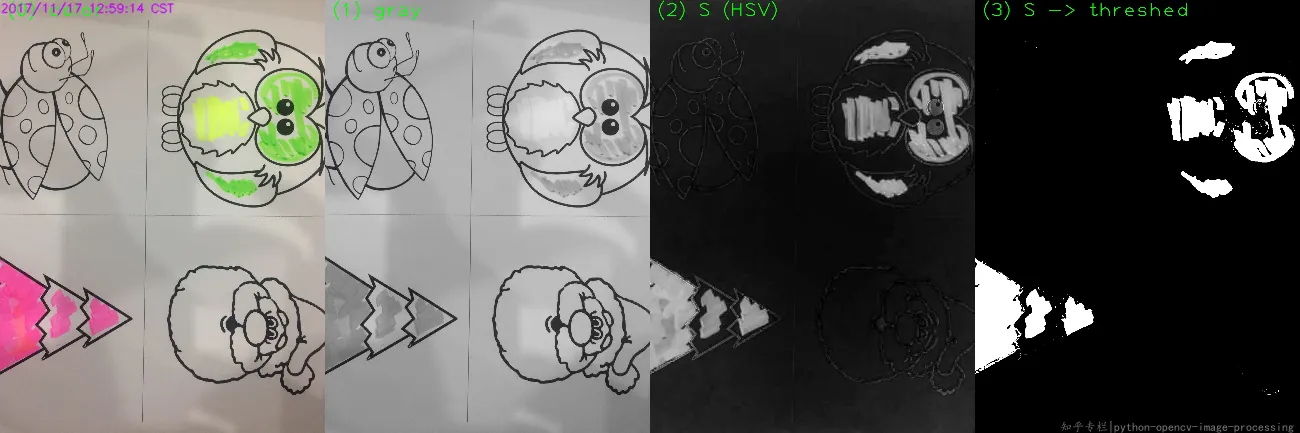
THRESH_OTSU添加到标志中,结果很好。 - Kinght 金
1
你们太棒了。非常感谢你们的回复。 - Aqeel Raza

0

使用LAB颜色空间也可以对颜色块进行分割。

背景:

与其他常见的颜色空间一样,LAB有三个通道,即亮度通道和两个色彩通道:

  • L通道:表示图像中的亮度值
  • A通道:表示图像中的红色和绿色
  • B通道:表示图像中的蓝色和黄色

观察以下图表中的A通道:

enter image description here

红色代表A通道上的正值,而绿色代表同一通道上的负值。这使我们能够轻松地分割这两种颜色。

同样,蓝色和黄色也可以沿着B通道进行分割。

白色、黑色和灰度色调等颜色位于图表中心,使得从图像中分割出明亮的颜色更加容易。

解决方案:

将BGR图像转换为LAB空间:

lab = cv2.cvtColor(img, cv2.COLOR_BGR2LAB)
a_channel = lab[:,:,1]

enter image description here

彩色补丁已经看起来很清晰。

将上述内容标准化以充分利用范围[0-255]:

norm_a_channel = cv2.normalize(a_channel, dst=None, alpha=0, beta=255,norm_type=cv2.NORM_MINMAX, dtype=cv2.CV_8U)

enter image description here

现在我们需要巧妙地分割所需的区域。我们不会手动查找阈值,而是根据图像的中位数进行阈值处理:
median = int(np.median(norm_a_channel))

中值为112,是图像的近似中心值。
现在我们将获得2个阈值:
- `upper_threshold`: 中值加上(中值的33%) - `lower_threshold`: 中值减去(中值的33%)
```python upper_threshold = int(median * 1.33) lower_threshold = int(median * 0.66) ```
使用这两个阈值获得2个二值化图像。
th1 = cv2.threshold(norm_a_channel, upper_threshold, 255 ,cv2.THRESH_BINARY)[1]
th2 = cv2.threshold(norm_a_channel, lower_threshold, 255, cv2.THRESH_BINARY_INV)[1]

th1:

enter image description here

th2:

enter image description here

最后,使用cv2.add()添加这两个图像。与手动相加不同,cv2.add()确保像素值保持在[0-255]范围内。
result = cv2.add(th1, th2)

enter image description here

注意:在LAB空间中,您不需要手动设置任何范围来获取颜色,而不像在HSV颜色空间中。 LAB可用于分割明亮/占主导地位的颜色。 HSV可用于分割更细的颜色,例如各种绿色调等。
代码:
img = cv2.imread('color_patch.jpg')
lab = cv2.cvtColor(img, cv2.COLOR_BGR2LAB)
a_channel = lab[:,:,1]
norm_a_channel = cv2.normalize(a_channel, dst=None, alpha=0, beta=255,norm_type=cv2.NORM_MINMAX, dtype=cv2.CV_8U)
median = int(np.median(norm_a_channel))
upper_threshold = int(median * 1.33)
lower_threshold = int(median * 0.66)
th1 = cv2.threshold(norm_a_channel, upper_threshold, 255 ,cv2.THRESH_BINARY)[1]
th2 = cv2.threshold(norm_a_channel, lower_threshold, 255, cv2.THRESH_BINARY_INV)[1]
result = cv2.add(th1, th2)
cv2.imshow('Result', result)

网页内容由stack overflow 提供, 点击上面的
可以查看英文原文,
原文链接