我需要在屏幕上画一个800x600的正方形。我想要在它上面“切”出圆形(其中alpha值将为0)。基本上,我需要在地图上绘制整个矩形,所以在我绘制的这些“圆形”中,你可以看到地图,否则你会看到灰色的正方形。
1个回答
29
我猜你正在尝试将雾战效果添加到游戏中?
几周前,我为当地一所大学制作了一个小演示以展示A*路径规划算法,所以我想我可以为您添加雾战效果。这是结果:
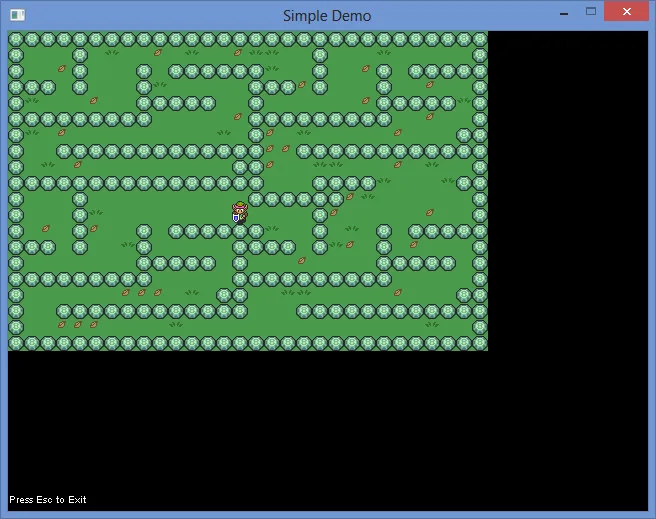
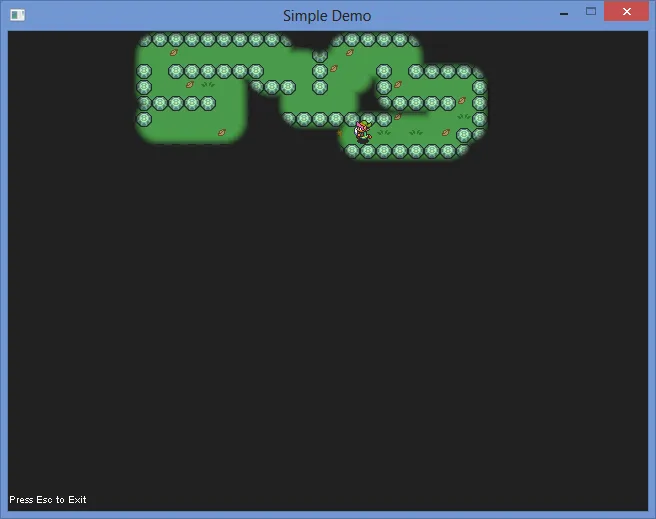
初始地图
首先,您会得到完整的地图,全部可见。
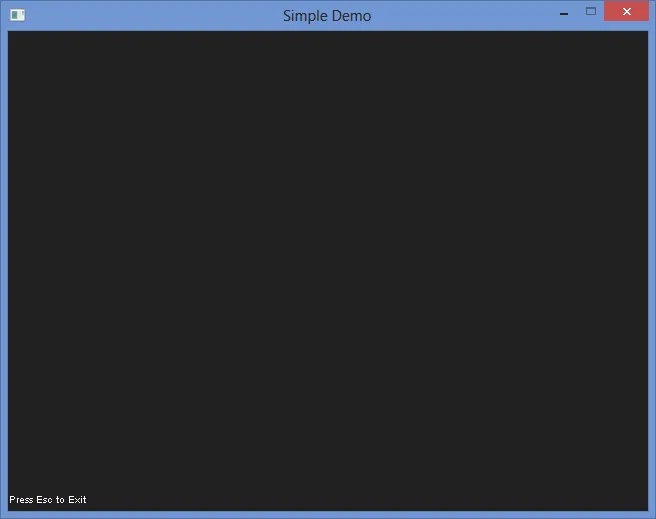
迷雾
接下来,我添加了一个表面覆盖整个屏幕(请注意,我的地图比屏幕小,因此对于这种情况,我只在屏幕上添加了雾战效果,但如果您有滚动,请确保它与每个地图像素1:1匹配)。
mFogOfWar = SDL_CreateRGBSurface(SDL_HWSURFACE, in_Width, in_Height, 32, 0x00ff0000, 0x0000ff00, 0x000000ff, 0xff000000);
SDL_Rect screenRect = {0, 0, in_Width, in_Height};
SDL_FillRect(mFogOfWar, &screenRect, 0xFF202020);
然后,您需要将其绘制...在绘制游戏对象之后并在绘制UI之前,我添加了此调用。
DrawSurface(mFogOfWar, 0, 0);
在哪里
void RenderingManager::DrawSurface(SDL_Surface* in_Surface, int in_X, int in_Y)
{
    SDL_Rect Dest = { in_X, in_Y, 0, 0 };
    SDL_BlitSurface(in_Surface, NULL, mScreen, &Dest);
}
这应该会给你以下结果:
"打孔表面"
然后我创建了一个32位的 .png,看起来像这样(棋盘格显示透明度):

在渲染我的主角时,我添加了这个调用:
gRenderingManager.RemoveFogOfWar(int(mX) + SPRITE_X_OFFSET, int(mY) + SPRITE_Y_OFFSET);
偏移量仅用于将打孔与精灵居中,基本上,我传递给 RemoveFogOfWar 的是我的精灵中心。
消除战争迷雾
现在是关于战争迷雾的核心。我做了两个版本,一个是永久性地消除战争迷雾,另一个是重置战争迷雾。我的战争迷雾重置依赖于我的 punch 表面具有轮廓,其中 alpha 被重置为 0 ,并且我的角色移动的像素比轮廓每帧包含的像素少,否则我会保留我应用 punch 的 Rect ,并在绘制新 punch 之前重新填充它。
由于我在 SDL 中找不到“乘法”混合,因此我决定编写一个简单的函数,迭代 punch 表面并更新战争迷雾表面的 alpha。最重要的部分是确保您保持在表面的边界内,所以它占用了大部分代码……可能会有一些裁剪函数,但我没有检查:
void RenderingManager::RemoveFogOfWar(int in_X, int in_Y)
{
    const int halfWidth = mFogOfWarPunch->w / 2;
    const int halfHeight = mFogOfWarPunch->h / 2;

    SDL_Rect sourceRect = { 0, 0, mFogOfWarPunch->w, mFogOfWarPunch->h };
    SDL_Rect destRect = { in_X - halfWidth, in_Y - halfHeight, mFogOfWarPunch->w, mFogOfWarPunch->h };

    // Make sure our rects stays within bounds
    if(destRect.x < 0)
    {
        sourceRect.x -= destRect.x; // remove the pixels outside of the surface
        sourceRect.w -= sourceRect.x; // shrink to the surface, not to offset fog
        destRect.x = 0;
        destRect.w -= sourceRect.x; // shrink the width to stay within bounds
    }
    if(destRect.y < 0)
    {
        sourceRect.y -= destRect.y; // remove the pixels outside
        sourceRect.h -= sourceRect.y; // shrink to the surface, not to offset fog
        destRect.y = 0;
        destRect.h -= sourceRect.y; // shrink the height to stay within bounds
    }

    int xDistanceFromEdge = (destRect.x + destRect.w) - mFogOfWar->w;
    if(xDistanceFromEdge > 0) // we're busting
    {
        sourceRect.w -= xDistanceFromEdge;
        destRect.w -= xDistanceFromEdge;
    }
    int yDistanceFromEdge = (destRect.y + destRect.h) - mFogOfWar->h;
    if(yDistanceFromEdge > 0) // we're busting
    {
        sourceRect.h -= yDistanceFromEdge;
        destRect.h -= yDistanceFromEdge;
    }

    SDL_LockSurface(mFogOfWar);

    Uint32* destPixels = (Uint32*)mFogOfWar->pixels;
    Uint32* srcPixels = (Uint32*)mFogOfWarPunch->pixels;

    static bool keepFogRemoved = false;

    for(int x = 0; x < destRect.w; ++x)
    {
        for(int y = 0; y < destRect.h; ++y)
        {
            Uint32* destPixel = destPixels + (y + destRect.y) * mFogOfWar->w + destRect.x + x;
            Uint32* srcPixel = srcPixels + (y + sourceRect.y) * mFogOfWarPunch->w + sourceRect.x + x;

            unsigned char* destAlpha = (unsigned char*)destPixel + 3; // fetch alpha channel
            unsigned char* srcAlpha = (unsigned char*)srcPixel + 3; // fetch alpha channel
            if(keepFogRemoved == true && *srcAlpha > 0)
            {
                continue; // skip this pixel
            }

            *destAlpha = *srcAlpha;
        }
    }

    SDL_UnlockSurface(mFogOfWar);
}
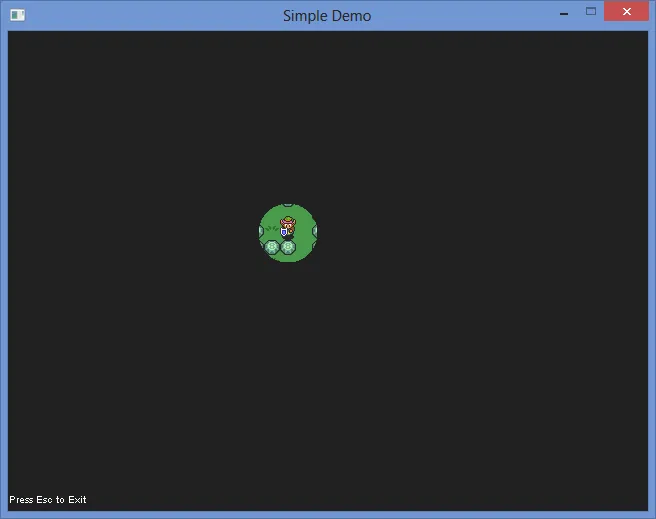
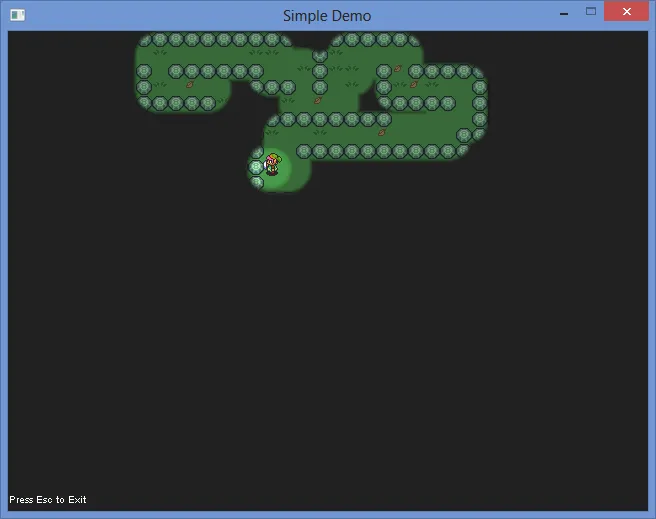
即使角色移动了,使用keepFogRemoved = false仍会导致以下结果:
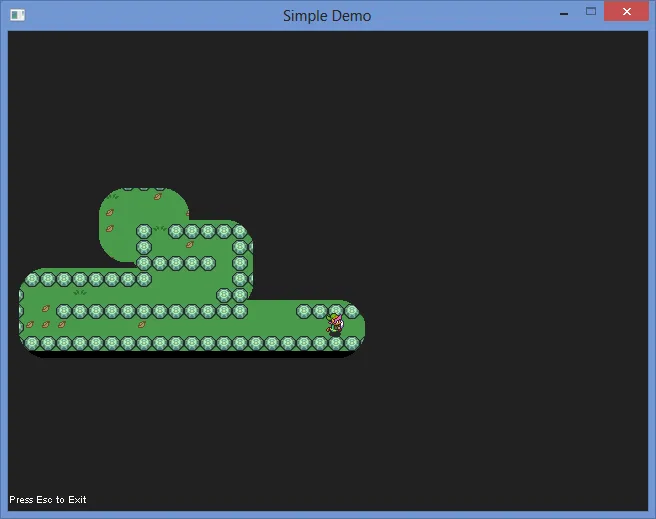
使用keepFogRemoved = true会得到以下结果:
验证
确保不要在像素缓冲区之外写入数据非常重要,因此请注意负偏移量或将您超出宽度或高度的偏移量。为了验证我的代码,我添加了一个简单的调用RemoveFogOfWar函数,当鼠标被点击时,并尝试访问边角来确保没有"off by one"问题。
case SDL_MOUSEBUTTONDOWN:
    {
        if(Event.button.button == SDL_BUTTON_LEFT)
        {
            gRenderingManager.RemoveFogOfWar(Event.button.x, Event.button.y);
        }
        break;
    }
注释
显然,对于“拳击”你不需要一个32位的纹理,但这是我能想到的最清晰的方法来向您展示如何完成它。可以使用每像素仅1位(开/关)来完成它。您还可以添加一些渐变,并更改
if(keepFogRemoved == true && *srcAlpha > 0)
{
    continue; // skip this pixel
}
翻译成类似这样的内容:
if(*srcAlpha > *destAlpha)
{
    continue;
}
为了保持这样的平滑混合效果:
 3状态雾战争
我认为我应该添加这个... 我添加了一种方法来创建一个3状态雾战争:可见,已看到和模糊。
3状态雾战争
我认为我应该添加这个... 我添加了一种方法来创建一个3状态雾战争:可见,已看到和模糊。为了实现这一点,我只需保留上次“插入”雾战争的
SDL_Rect,如果alpha低于某个值,则将其夹在该值处。因此,通过简单地添加
for(int x = 0; x < mLastFogOfWarPunchPosition.w; ++x)
{
    for(int y = 0; y < mLastFogOfWarPunchPosition.h; ++y)
    {
        Uint32* destPixel = destPixels + (y + mLastFogOfWarPunchPosition.y) * mFogOfWar->w + mLastFogOfWarPunchPosition.x + x;
        unsigned char* destAlpha = (unsigned char*)destPixel + 3;

        if(*destAlpha < 0x60)
        {
            *destAlpha = 0x60;
        }
    }
}
mLastFogOfWarPunchPosition = destRect;
在追踪炸弹的循环之前,我得到了一种类似于星际争霸等游戏中的“战争迷雾”的迷雾效果:
 现在,由于“被发现”的迷雾是半透明的,因此您需要调整渲染方法来正确剪切在迷雾中的“敌人”,这样您就看不到它们,但您仍然可以看到地形。
希望这会有所帮助!
- emartel
网页内容由stack overflow 提供, 点击上面的可以查看英文原文,
原文链接
原文链接