我正在尝试使用UIBezierPath的addArcWithCenter方法绘制一个圆形:
UIBezierPath *bezierPath =
  [UIBezierPath bezierPathWithOvalInRect:CGRectMake(0., 0., 100., 100.)];

[bezierPath addArcWithCenter:center
                      radius:0.
                  startAngle:0 endAngle:2 * M_PI clockwise:YES];

CAShapeLayer *progressLayer = [[CAShapeLayer alloc] init];

[progressLayer setPath:bezierPath.CGPath];
[progressLayer setStrokeColor:[UIColor colorWithWhite:1. alpha:.2].CGColor];
[progressLayer setFillColor:[UIColor clearColor].CGColor];
[progressLayer setLineWidth:.3 * self.bounds.size.width];
[progressLayer setStrokeStart:_volumeValue/100.];
[progressLayer setStrokeEnd:volume/100.]; // between 0 and 100

[_circleView.layer addSublayer:progressLayer];
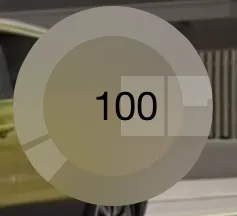
但是我得到的是以下内容:
我尝试了不同的参数,但没有运气。
谢谢
更新:
如果我没有解释清楚我正在尝试做什么,我很抱歉:
*背景圆是使用以下方式绘制的:
[UIBezierPath bezierPathWithOvalInRect:CGRectMake(0., 0., 100., 100.)]
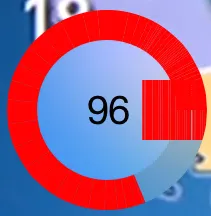
我正在尝试使用bezierPathWithOvalInRect逐步绘制红色圆圈,在两个值_volumeValue和volume之间。
但是我无法得到完美的圆形,而是在某个值后得到了水平部分。
volume和_volumeValue是什么? - Fogmeister