将导航抽屉放置在状态栏下方

20

我正在尝试让我的导航抽屉栏出现在状态栏下面。我已经广泛阅读了与ScrimInsetsFrameLayout视图相关的文章,并尝试实现它,但由于某些原因它不会出现在下方。

这是我使用/编写的代码。

XML DrawerLayout:

<android.support.v4.widget.DrawerLayout
    android:id="@+id/drawer_layout"
    xmlns:android="http://schemas.android.com/apk/res/android"
    android:layout_width="match_parent"
    android:layout_height="match_parent">

    <FrameLayout
        android:layout_width="match_parent"
        android:layout_height="match_parent"
        android:orientation="vertical">

        <FrameLayout
            android:id="@+id/content_frame"
            android:layout_width="match_parent"
            android:layout_height="match_parent" />

        <include layout="@layout/toolbar" />

    </FrameLayout>

    <com.andrewq.planets.util.ScrimInsetsFrameLayout
        xmlns:app="http://schemas.android.com/apk/res-auto"
        android:id="@+id/linearLayout"
        android:layout_width="304dp"
        android:layout_height="match_parent"
        android:layout_gravity="start"
        android:fitsSystemWindows="true"
        app:insetForeground="#4000">

        <ListView
            android:id="@+id/left_drawer"
            android:layout_width="match_parent"
            android:layout_height="match_parent"
            android:choiceMode="singleChoice" />
    </com.andrewq.planets.util.ScrimInsetsFrameLayout>


</android.support.v4.widget.DrawerLayout>

ScrimInsetsFrameLayout.java:

package com.andrewq.planets.util;

/*
* Copyright 2014 Google Inc.
*
* Licensed under the Apache License, Version 2.0 (the "License");
* you may not use this file except in compliance with the License.
* You may obtain a copy of the License at
*
*     http://www.apache.org/licenses/LICENSE-2.0
*
* Unless required by applicable law or agreed to in writing, software
* distributed under the License is distributed on an "AS IS" BASIS,
* WITHOUT WARRANTIES OR CONDITIONS OF ANY KIND, either express or implied.
* See the License for the specific language governing permissions and
* limitations under the License.
*/

import android.content.Context;
import android.content.res.TypedArray;
import android.graphics.Canvas;
import android.graphics.Rect;
import android.graphics.drawable.Drawable;
import android.support.v4.view.ViewCompat;
import android.util.AttributeSet;
import android.widget.FrameLayout;

import com.andrewq.planets.R;

/**
 * A layout that draws something in the insets passed to {@link #fitSystemWindows(Rect)}, i.e. the area above UI chrome
 * (status and navigation bars, overlay action bars).
 */
public class ScrimInsetsFrameLayout extends FrameLayout {
    private Drawable mInsetForeground;

    private Rect mInsets;
    private Rect mTempRect = new Rect();
    private OnInsetsCallback mOnInsetsCallback;

    public ScrimInsetsFrameLayout(Context context) {
        super(context);
        init(context, null, 0);
    }

    public ScrimInsetsFrameLayout(Context context, AttributeSet attrs) {
        super(context, attrs);
        init(context, attrs, 0);
    }

    public ScrimInsetsFrameLayout(Context context, AttributeSet attrs, int defStyle) {
        super(context, attrs, defStyle);
        init(context, attrs, defStyle);
    }

    private void init(Context context, AttributeSet attrs, int defStyle) {
        final TypedArray a = context.obtainStyledAttributes(attrs,
                R.styleable.ScrimInsetsView, defStyle, 0);
        if (a == null) {
            return;
        }
        mInsetForeground = a.getDrawable(R.styleable.ScrimInsetsView_insetForeground);
        a.recycle();

        setWillNotDraw(true);
    }

    @Override
    protected boolean fitSystemWindows(Rect insets) {
        mInsets = new Rect(insets);
        setWillNotDraw(mInsetForeground == null);
        ViewCompat.postInvalidateOnAnimation(this);
        if (mOnInsetsCallback != null) {
            mOnInsetsCallback.onInsetsChanged(insets);
        }
        return true; // consume insets
    }

    @Override
    public void draw(Canvas canvas) {
        super.draw(canvas);

        int width = getWidth();
        int height = getHeight();
        if (mInsets != null && mInsetForeground != null) {
            int sc = canvas.save();
            canvas.translate(getScrollX(), getScrollY());

            // Top
            mTempRect.set(0, 0, width, mInsets.top);
            mInsetForeground.setBounds(mTempRect);
            mInsetForeground.draw(canvas);

            // Bottom
            mTempRect.set(0, height - mInsets.bottom, width, height);
            mInsetForeground.setBounds(mTempRect);
            mInsetForeground.draw(canvas);

            // Left
            mTempRect.set(0, mInsets.top, mInsets.left, height - mInsets.bottom);
            mInsetForeground.setBounds(mTempRect);
            mInsetForeground.draw(canvas);

            // Right
            mTempRect.set(width - mInsets.right, mInsets.top, width, height - mInsets.bottom);
            mInsetForeground.setBounds(mTempRect);
            mInsetForeground.draw(canvas);

            canvas.restoreToCount(sc);
        }
    }

    @Override
    protected void onAttachedToWindow() {
        super.onAttachedToWindow();
        if (mInsetForeground != null) {
            mInsetForeground.setCallback(this);
        }
    }

    @Override
    protected void onDetachedFromWindow() {
        super.onDetachedFromWindow();
        if (mInsetForeground != null) {
            mInsetForeground.setCallback(null);
        }
    }

    /**
     * Allows the calling container to specify a callback for custom processing when insets change (i.e. when
     * {@link #fitSystemWindows(Rect)} is called. This is useful for setting padding on UI elements based on
     * UI chrome insets (e.g. a Google Map or a ListView). When using with ListView or GridView, remember to set
     * clipToPadding to false.
     */
    public void setOnInsetsCallback(OnInsetsCallback onInsetsCallback) {
        mOnInsetsCallback = onInsetsCallback;
    }

    public static interface OnInsetsCallback {
        public void onInsetsChanged(Rect insets);
    }
}

最后,这是我在values-v21文件夹下的styles.xml文件:

<?xml version="1.0" encoding="utf-8"?>
<resources>

    <style name="AppThemeNavDrawer" parent="Theme.AppCompat.NoActionBar">
        <item name="colorAccent">#F8F8F8</item>
        <item name="android:windowTranslucentStatus">true</item>

        <item name="windowActionBar">false</item>
        <item name="windowActionModeOverlay">true</item>
        <item name="android:windowDrawsSystemBarBackgrounds">true</item>
        <item name="android:statusBarColor">@android:color/transparent</item>
    </style>
</resources>

我查看了2014年I/O应用程序的源代码,以及此问题,但是我不知道有何不同。

这是一个截图,展示了除状态栏下方抽屉之外的所有内容:Screenshot

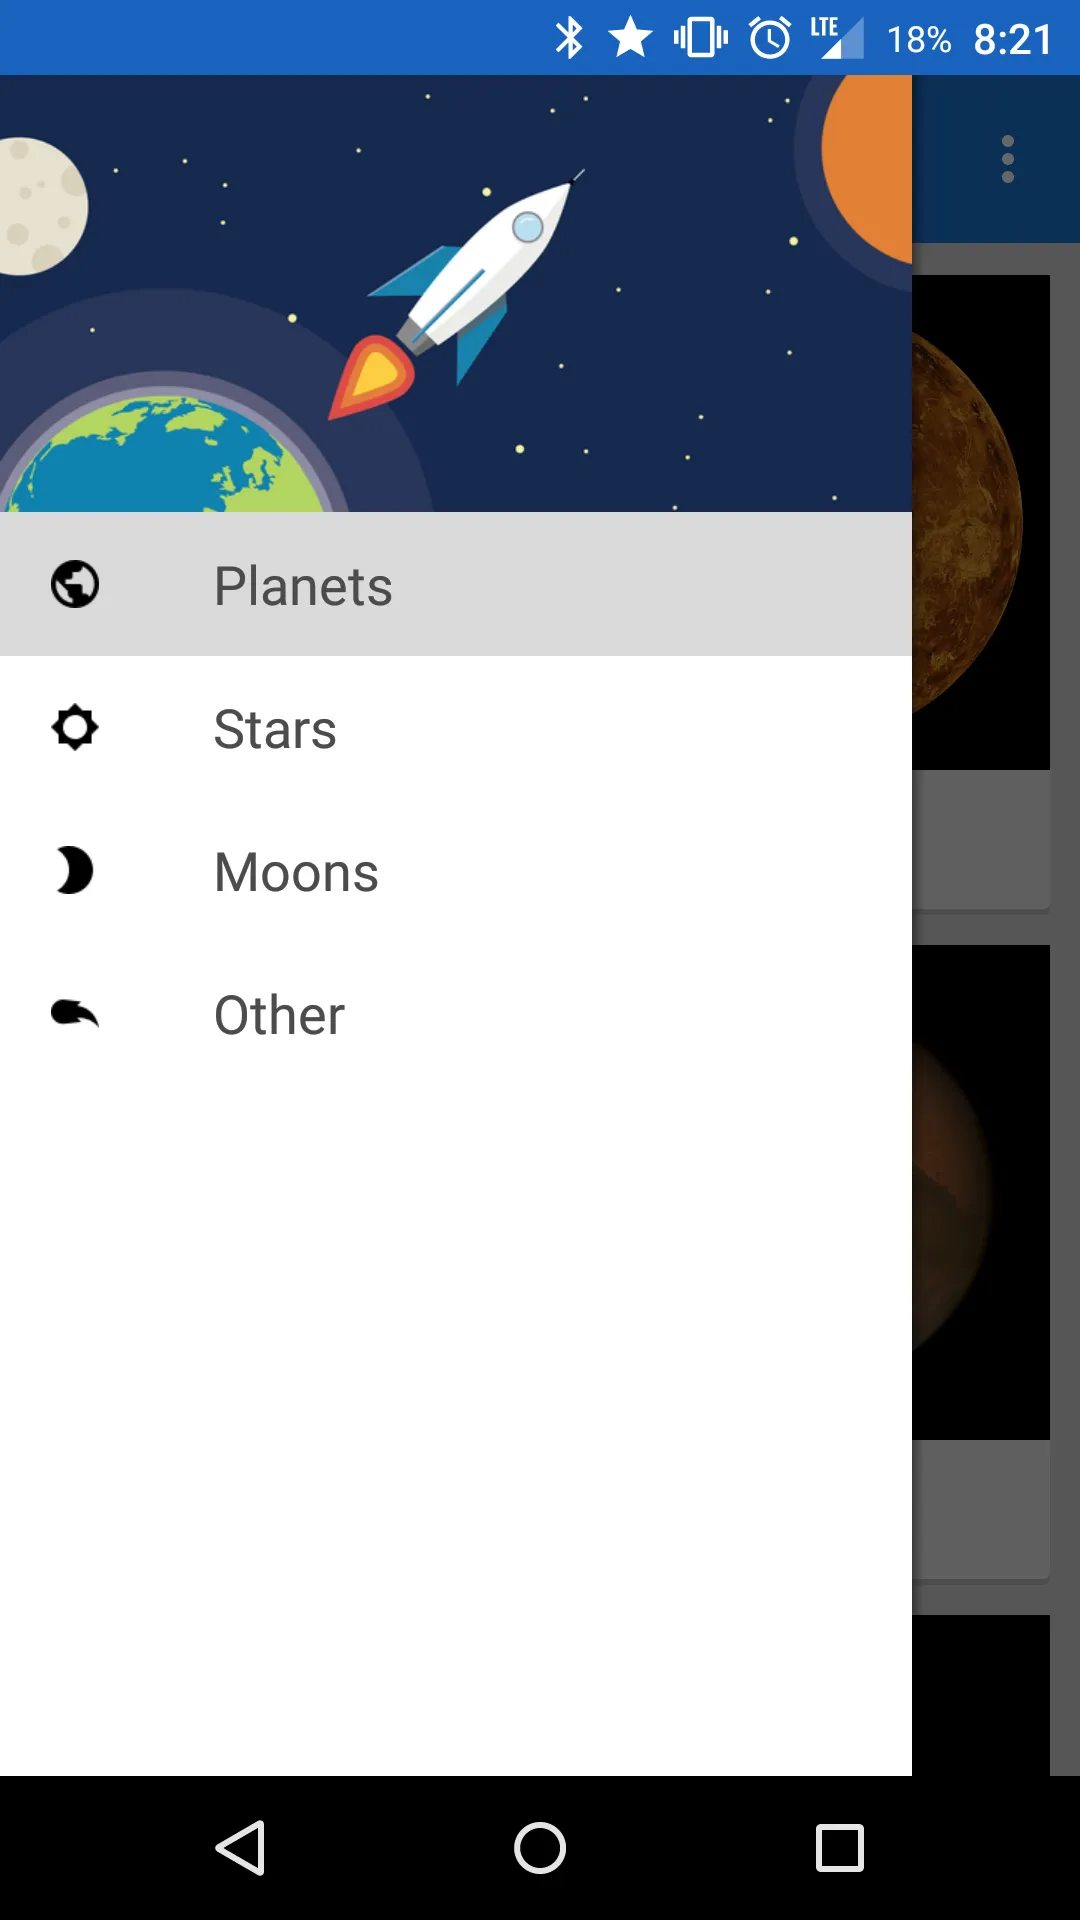
我已经让其他所有内容都运行得非常完美,现在只剩下这最后一步。非常感谢您的帮助!

编辑:

澄清一下,我想要图片在状态栏下方被染色,就像大多数Google应用程序和Google Now一样。


1
你在清单文件中是否为你的活动应用了样式? - Nathan Walters
我做了。这是我检查是否忘记它的第一件事情之一。 - Andrew Quebe
你有得到任何答案吗?我也遇到了同样的问题。 - Parth Anjaria
@Parth Anjaria - 请看下面的答案。 - Andrew Quebe
我不想使用任何库来完成这个。 - Parth Anjaria
然后在广阔的互联网上找到另一个解决方案。这个使用了一个库,而且它对我很有效,所以我不会去寻找其他答案。 - Andrew Quebe
5个回答

56

在DrawerLayout中添加android:fitsSystemWindows="false"可以解决该问题。


也适用于我。 - Berat Cevik
12
将 android:fitsSystemWindows="false" 添加到 NavigationView 中解决了问题。 - Vinay
对我来说运行良好。谢谢! - Luis E. Fernandez
运行完美。谢谢。 - Nikita Vishwakarma
最简单的答案 :) - Nikita Vishwakarma
显示剩余2条评论

26
有不同的方法可以达到所需的结果。您可以通过样式或代码启用半透明效果。
我创建了一个MaterialDrawer(遵循Android Material Design Guidelines),它实现了所有这些并为您处理了一切。在此处阅读更多信息:https://github.com/mikepenz/MaterialDrawer/ 如果您想自己创建它,您总是需要决定您要支持的最低API,并且/或者是否需要拆分您的样式。
因此,要启用translucentStatusbar,您必须至少在API v19上,或者您可以为v19+创建单独的样式values-v19。这将看起来像这样。
<style name="YourTheme.TranslucentStatus" parent="Theme.AppCompat.Light.NoActionBar">
    <item name="android:windowTranslucentStatus">true</item>
</style>

现在,这将使您的整个布局移动到状态栏下方。几乎在所有情况下,您现在都需要在抽屉内容和常规视图内容顶部添加填充。

您可以通过添加 24dp 的填充来实现此目的。

这不是一个真正好的实现方式。因此,有一种不同的方法是使用 ScrimInsetsLayout,在 Google IO 2014 应用程序中使用。 https://github.com/google/iosched/blob/master/android/src/main/java/com/google/samples/apps/iosched/ui/widget/ScrimInsetsFrameLayout.java

这将是您的内容布局,您可以在其上设置状态栏的颜色。您可以在此处找到关于如何使用它的详细说明:https://dev59.com/D18d5IYBdhLWcg3wgya4#26932228

需要一些时间来熟悉样式和/或ScrimInsetsLayout

编辑:

以下是更复杂的示例,说明如何以编程方式处理这个问题:

if (Build.VERSION.SDK_INT >= 19 && Build.VERSION.SDK_INT < 21) {
    //enable translucent statusbar via flags
    setTranslucentStatusFlag(true);
}
if (Build.VERSION.SDK_INT >= 19) {
    mActivity.getWindow().getDecorView().setSystemUiVisibility(View.SYSTEM_UI_FLAG_LAYOUT_STABLE | View.SYSTEM_UI_FLAG_LAYOUT_FULLSCREEN);
}
if (Build.VERSION.SDK_INT >= 21) {
    //we don't need the translucent flag this is handled by the theme
    setTranslucentStatusFlag(false);
    //set the statusbarcolor transparent to remove the black shadow
    mActivity.getWindow().setStatusBarColor(Color.TRANSPARENT);
}

//add a padding to the content of the drawer (25dp on devices starting with api v19)
mDrawerContentRoot.setPadding(0, mActivity.getResources().getDimensionPixelSize(R.dimen.tool_bar_top_padding), 0, 0);

// define the statusBarColor
mDrawerContentRoot.setInsetForeground(mStatusBarColor);


private void setTranslucentStatusFlag(boolean on) {
    if (Build.VERSION.SDK_INT >= 19) {
        Window win = mActivity.getWindow();
        WindowManager.LayoutParams winParams = win.getAttributes();
        final int bits = WindowManager.LayoutParams.FLAG_TRANSLUCENT_STATUS;
        if (on) {
            winParams.flags |= bits;
        } else {
            winParams.flags &= ~bits;
        }
        win.setAttributes(winParams);
    }
}

EDIT2:

解决此问题的完整方案是清理项目中的所有布局。某些布局和样式的组合导致了问题。

完整的更改可以在此拉取请求中找到: https://github.com/Andrew-Quebe/Planets-Gradle/commit/83e28c09253af6e807b6f4e94baca8fbca3fc7c8


我该如何在我的XML代码中实现ScrimInsetsView?我尝试的方法正确吗?目前,我正在努力让抽屉框只在Lollipop设备上下移...暂时这样。我的v21主题已经有了<item name="android:windowTranslucentStatus">true</item> - Andrew Quebe
据我所知,一切看起来都很好。我会仔细查看你在 @github 上的源代码。 - mikepenz
我已经在 @github 上修复了你的问题。这是一个巨大的提交。问题在于你的布局和样式有很多问题。 - mikepenz
@mikepenz 你从哪里得到了 setInsetForeground?我在任何地方都找不到它。 - Mark13426
1
@Mark13426 这个答案是从2015年的,自那时以来可能已经发生了变化。 - mikepenz

4

因为在 Android 4.4 之前的设备上不支持状态栏半透明方法,所以需要创建一个新的 styles.xml 文件并将其放置在 style-v19 文件夹中。

<style name="AppTheme" parent="Theme.AppCompat.Light.NoActionBar" >
    <item name="android:windowTranslucentStatus">true</item>
</style>

之后您会发现应用程序出现在状态栏下方,但您需要为工具栏添加内边距以进行精确实现。创建一个名为dimen-v19的文件并添加:

<dimen name="ToolBarPaddingTop">24dp</dimen>

将其用于工具栏。

<android.support.v7.widget.Toolbar xmlns:android="http://schemas.android.com/apk/res/android"
    android:layout_width="match_parent"
    android:layout_height="wrap_content"
    android:background="@color/accent_material_light"
    android:theme="@style/ThemeOverlay.AppCompat.Dark"
    android:fitsSystemWindows="true"
    android:paddingTop="@dimen/ToolBarPaddingTop">

</android.support.v7.widget.Toolbar>

我已经有一个values-v19文件夹,它具有特定于Kitkat的样式。我不认为这会有什么区别。 - Andrew Quebe
我刚刚尝试了你说的,它只是在工具栏顶部添加了24dp的填充...抽屉根本没有被覆盖。 - Andrew Quebe

3

以下是对我有效的方法:

  • 在v21文件夹中的默认样式中将android:windowTranslucentStatus设置为true。这将使得自Android Lollipop开始状态栏几乎透明。
  • 通过在样式中使用android:colorPrimary参数定义Toolbar的颜色。
  • 不要在布局中设置android:fitsSystemWindows="true"
  • 在您的Toolbar和抽屉顶部添加24dp的填充,但仅限于从Lollyipop开始时。最好的方法是在dimens文件中添加一个新的维度。在values文件夹中将其设置为0,在values-v21文件夹中将其设置为24dp,并将其用于ToolbarDrawer

2
所有设备都没有24dp的状态栏。例如,在某些Android版本中,默认值为25dp。 - Marc Plano-Lesay

1
我认为您需要在android.support.v4.widget.DrawerLayout标签中添加android:fitsSystemWindows="true"

2
不好意思...遗憾的是...那没起作用。 - Andrew Quebe
我看到你的状态栏本身不是透明的。很奇怪。 - Krypton Nite
将fitSystemWindows应用于drawerLayout也会将其向下移动。而不透明的状态栏是由ScrimInsetsLayout引起的(据我所知)。 - mikepenz
@mikepenz 嗯,我使用ScrimInsetsLayout和不使用它都可以得到透明状态栏。 - Krypton Nite

网页内容由stack overflow 提供, 点击上面的
可以查看英文原文,
原文链接