在Numpy和Python中如何“拉伸”(调整)直方图(级别)。

4
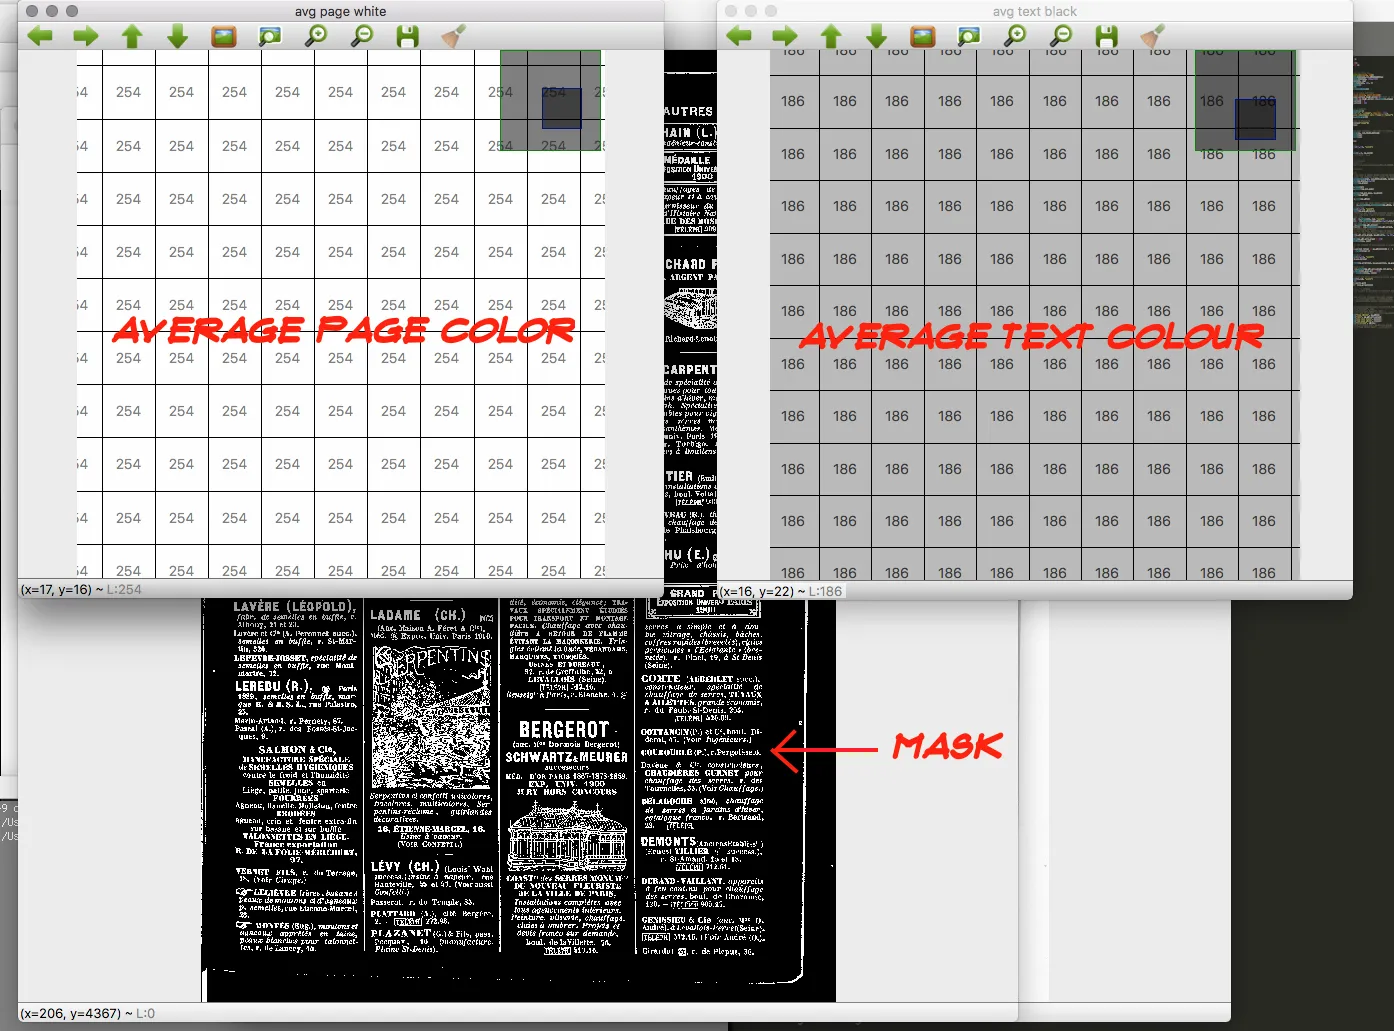
我有一张灰度图像,背景是中等白色,使用0-255的颜色比例来衡量,平均像素颜色值为246;前景是中等灰色,平均像素颜色值为186。
我想将每个像素值大于246的像素移动到255,每个像素值小于186的像素移动到0,并且“拉伸”介于两者之间的所有像素。在numpy或python中是否有任何现成的算法/进程可以执行此操作,还是必须手动计算新的级别/直方图(就像我迄今为止所做的那样)?
这相当于在Gimp或Photoshop中打开级别窗口并分别选择白色和黑色滴管工具,选择我们要变为白色的亮区域和我们要变为黑色的暗区域:应用程序会相应地修改级别/直方图(“拉伸”所选点之间的值)。
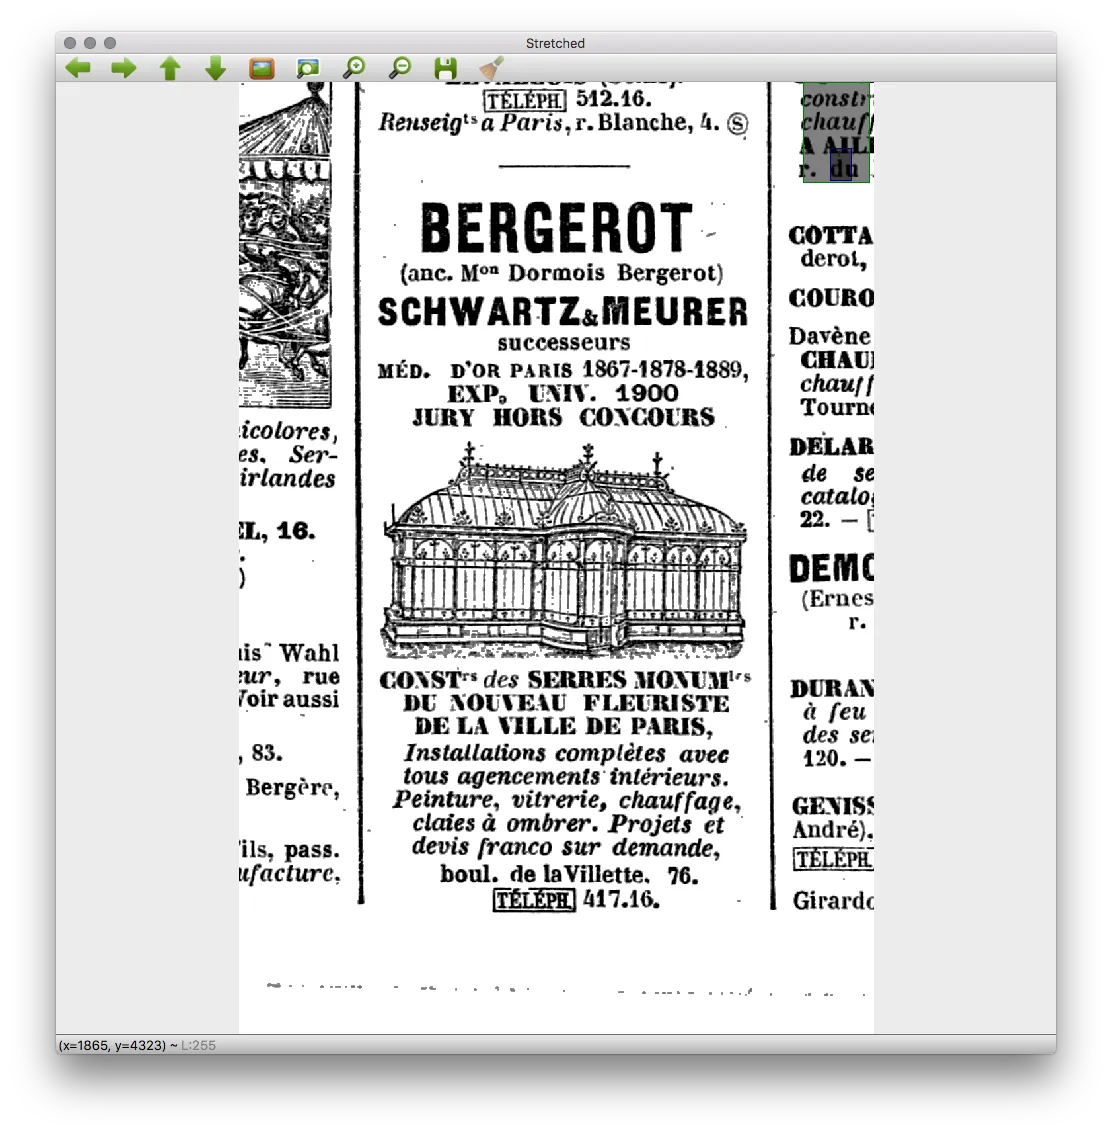
以下是我尝试的一些图像:

page after page shadow elimination Sampled colours Result


请展示您尝试过的内容,最好附带图片。 - amanb
有很多事情正在发生,但我试图将它们总结成几个截图。 - Josef M. Schomburg
1
注意:我这样做的原因是现有的算法会导致文本虽然是黑色,但存在缺失和间隙。OpenCV 能够很好地找到轮廓,并使用它们来创建定义应该被平均的区域的掩码,从而得出需要上调和下调的两个值。 - Josef M. Schomburg
1
你可以按照你所描述的做: (1)将所有大于246的像素阈值设为255 (2)将所有小于186的像素阈值设为零 (3)将介于两者之间的所有像素归一化到最大值244。 我认为没有现成的算法可以实现这个,因为要达到你想要的结果,需要完成的三个步骤都很简单。 - T A
2个回答

2
以下是一种方法:-
最初的回答
def stretch(a, lower_thresh, upper_thresh):
    r = 255.0/(upper_thresh-lower_thresh+2) # unit of stretching
    out = np.round(r*(a-lower_thresh+1)).astype(a.dtype) # stretched values
    out[a<lower_thresh] = 0
    out[a>upper_thresh] = 255
    return out

根据原帖,所设条件如下:
  • 将每个像素值大于 246 的像素变为 255,因此大于等于 247 的像素应变为 255

  • 将每个像素值小于 186 的像素变为 0,因此小于等于 185 的像素应变为 0

  • 因此,基于上述两个要求,186 应该变成大于 0 的某个值,以此类推直到 246,它应该比 255 小。

或者,我们也可以使用 np.where 来使代码更简洁 -

def stretch(a, lower_thresh, upper_thresh):
    r = 255.0/(upper_thresh-lower_thresh+2) # unit of stretching
    out = np.round(r*np.where(a>=lower_thresh,a-lower_thresh+1,0)).clip(max=255)
    return out.astype(a.dtype)

最初的回答

示例运行 -

# check out first row input, output for variations
In [216]: a
Out[216]: 
array([[186, 187, 188, 246, 247],
       [251, 195, 103,   9, 211],
       [ 21, 242,  36,  87,  70]], dtype=uint8)

In [217]: stretch(a, lower_thresh=186, upper_thresh=246)
Out[217]: 
array([[  4,   8,  12, 251, 255], 
       [255,  41,   0,   0, 107],
       [  0, 234,   0,   0,   0]], dtype=uint8)

1
两个答案都很好,但是选择这个是因为它的解释性更强(适合学习Python的人)。 - Josef M. Schomburg

1
如果您的图片是 uint8 类型并且大小典型,一种高效的方法是设置查找表:
L, H = 186, 246
lut = np.r_[0:0:(L-1)*1j, 0.5:255.5:(H-L+3)*1j, 255:255:(255-H-1)*1j].astype('u1')

# example
from scipy.misc import face
f = face()

rescaled = lut[f]

针对较小的图片(在我的设置中,大约在100,000个灰度像素左右),直接进行转换速度更快:
fsmall = (f[::16, ::16].sum(2)//3).astype('u1')

slope = 255/(H-L+2)
rescaled = ((1-L+0.5/slope+fsmall)*slope).clip(0, 255).astype('u1')

网页内容由stack overflow 提供, 点击上面的
可以查看英文原文,
原文链接