如果可以避免,我不想使用子视图。我想要一个带有背景图片、文本和图像的UIButton。目前,当我这样做时,图像在文本的左侧。背景图片、文本和图像都有不同的高亮状态。
如何将图片放在UIButton文本的右侧?
380
- jasongregori
1
在这里增加另一个“hack”:您可以将按钮的attributedTitle设置为包含按钮标题+空格+图像(作为NSTextAttachment)的属性字符串。您可能需要调整附件的边界以使其对齐(请参见https://dev59.com/L18e5IYBdhLWcg3wFnPm)。 - Manav
35个回答
17
如果需要在UIBarButtonItem中完成此操作,则应使用附加包装视图的方法。
这样做是可行的。
let view = UIView()
let button = UIButton()
button.setTitle("Skip", for: .normal)
button.setImage(#imageLiteral(resourceName:"forward_button"), for: .normal)
button.semanticContentAttribute = .forceRightToLeft
button.sizeToFit()
view.addSubview(button)
view.frame = button.bounds
navigationItem.rightBarButtonItem = UIBarButtonItem(customView: view)
这样行不通
let button = UIButton()
button.setTitle("Skip", for: .normal)
button.setImage(#imageLiteral(resourceName:"forward_button"), for: .normal)
button.semanticContentAttribute = .forceRightToLeft
button.sizeToFit()
navigationItem.rightBarButtonItem = UIBarButtonItem(customView: button)
- tt.Kilew
1
UIBarButtonItem的问题让我抓狂了几个小时,直到我找到了这个答案。向您致敬。 - nayem14
iOS 15 带来了一个新更新,现在你可以更简单地处理按钮中的图片布局,即无需使用插入(insets)。
在 XIB/Storyboards 中:
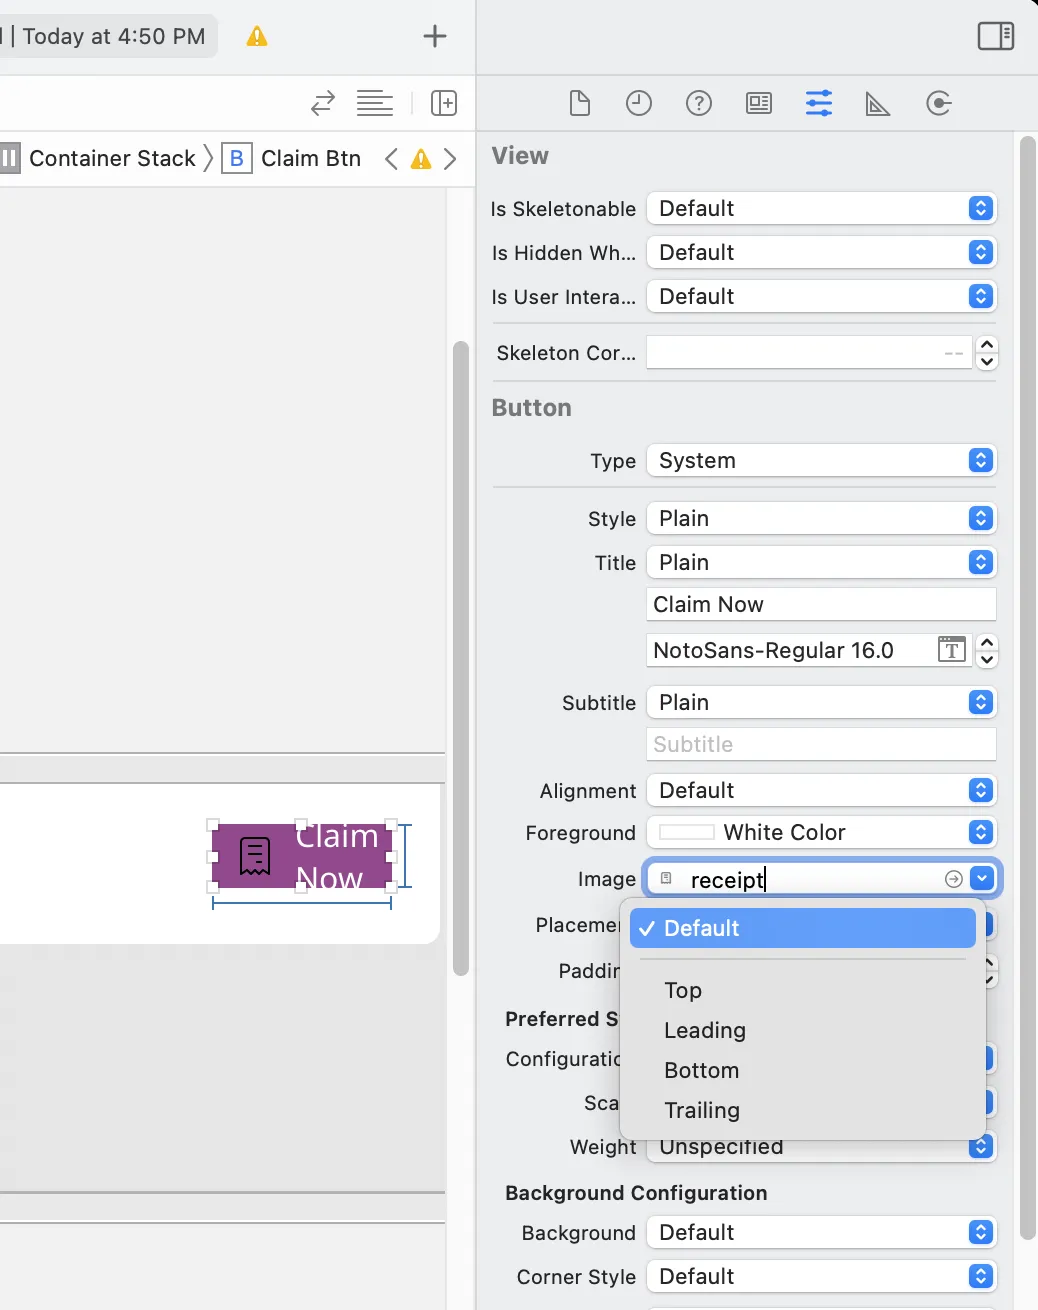 只需添加图片属性到按钮后,简单地将按钮的“placement”属性设置为leading/training/top/bottom。由于它是 leading/training,所以它还支持RTL。
**在代码中(编程):**
使用 Button Configuration 属性程序化地实现
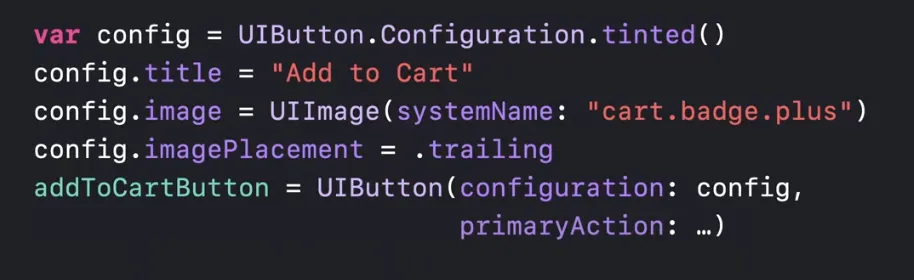
这不是向后兼容的功能,并且仅在 iOS15+ 中有效,正如 WWDC '21 所演示的那样 - https://developer.apple.com/videos/play/wwdc2021/10064/?time=236
开发人员文档:https://developer.apple.com/documentation/uikit/uibutton/configuration?changes=_4
- akashlal.com
2
1这是现代项目中任何人的最佳答案。 - Pouria Almassi
3use code instead images - Zaporozhchenko Oleksandr
13
自己动手。Xcode10,swift4,
用于编程的UI设计

 lazy var buttonFilter : ButtonRightImageLeftTitle = {
    var button = ButtonRightImageLeftTitle()
    button.setTitle("Playfir", for: UIControl.State.normal)
    button.setImage(UIImage(named: "filter"), for: UIControl.State.normal)
    button.backgroundColor = UIColor.red
    button.contentHorizontalAlignment = .left
    button.titleLabel?.font = UIFont.systemFont(ofSize: 16)
    return button
}()
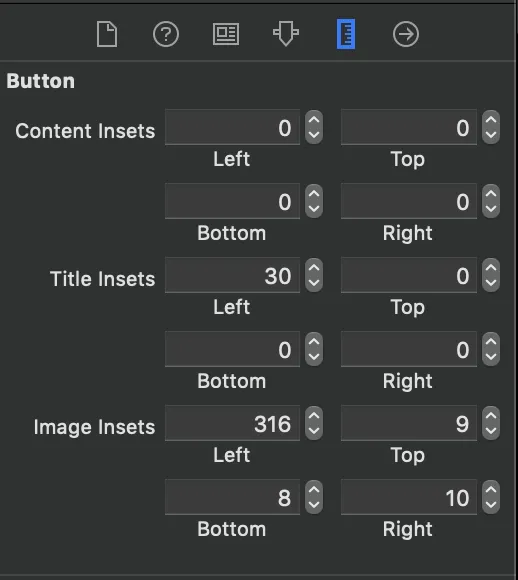
边缘插图值应用于矩形以缩小或扩大该矩形所表示的区域。通常,在视图布局期间使用边缘插图来修改视图的框架。正值会导致框架被内嵌(或收缩)指定的量。负值会导致框架被外扩(或扩张)指定的量。
class ButtonRightImageLeftTitle: UIButton {

    override func layoutSubviews() {
        super.layoutSubviews()

        guard imageView != nil else { return }

        imageEdgeInsets = UIEdgeInsets(top: 5, left: (bounds.width - 35), bottom: 5, right: 5)
        titleEdgeInsets = UIEdgeInsets(top: 0, left: -((imageView?.bounds.width)! + 10), bottom: 0, right: 0 )

    }
}
适用于 StoryBoard 用户界面设计
- Nazmul Hasan
2
有没有更优雅的方式来实现它? - Zaporozhchenko Oleksandr
你有任何想法如何移除标题前的空格吗? - Hein Htet Aung
7
这是一个关于
UIButton居中对齐内容的解决方案。
该代码使图像右对齐,并允许使用imageEdgeInsets和titleEdgeInsets进行精确定位。
使用您的自定义类对UIButton进行子类化,然后添加:
- (CGRect)imageRectForContentRect:(CGRect)contentRect {
    CGRect frame = [super imageRectForContentRect:contentRect];
    CGFloat imageWidth = frame.size.width;
    CGRect titleRect = CGRectZero;
    titleRect.size = [[self titleForState:self.state] sizeWithAttributes:@{NSFontAttributeName: self.titleLabel.font}];
    titleRect.origin.x = (self.frame.size.width - (titleRect.size.width + imageWidth)) / 2.0 + self.titleEdgeInsets.left - self.titleEdgeInsets.right;
    frame.origin.x = titleRect.origin.x + titleRect.size.width - self.imageEdgeInsets.right + self.imageEdgeInsets.left;
    return frame;
}

- (CGRect)titleRectForContentRect:(CGRect)contentRect {
    CGFloat imageWidth = [self imageForState:self.state].size.width;
    CGRect frame = [super titleRectForContentRect:contentRect];
    frame.origin.x = (self.frame.size.width - (frame.size.width + imageWidth)) / 2.0 + self.titleEdgeInsets.left - self.titleEdgeInsets.right;
    return frame;
}
- Vitalii Gozhenko
1
1同时,您可以在类头中添加IBDESIGNABLE以在storyboard中查看它。https://yadi.sk/i/fd6Si-BJqzCFD - Nikolay Shubenkov
7
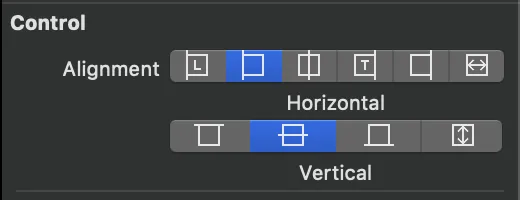
我觉得这里最简单的解决方案就是告诉按钮水平布局去“填充”按钮的宽度,而不是像你最初想做的那样对齐.left:
contentHorizontalAlignment = .fill
应该可以在这里解决问题。只需确保告诉你的按钮具有尾随图像位置:configuration.imagePlacement = .trailing,然后您应该会得到以下结果:
configuration.contentInsets发送到您喜欢的任何位置,以使按钮具有美观的填充。- Will Von Ullrich
2
如何在这里更改图像大小? - George
配置仅适用于iOS 15或更高版本。 - Hassy
6
扩展方式
使用扩展来设置图像在右侧并具有自定义偏移量
   extension UIButton {
    func addRightImage(image: UIImage, offset: CGFloat) {
        self.setImage(image, for: .normal)
        self.imageView?.translatesAutoresizingMaskIntoConstraints = false
        self.imageView?.centerYAnchor.constraint(equalTo: self.centerYAnchor, constant: 0.0).isActive = true
        self.imageView?.trailingAnchor.constraint(equalTo: self.trailingAnchor, constant: -offset).isActive = true
    }
}
- Musa almatri
5
由于转换解决方案在iOS 11中不起作用,我决定采用一种新的方法。
调整按钮的semanticContentAttribute属性可以使图像很好地显示在右侧,而无需重新布局即可更改文本。因此,这是理想的解决方案。但是,我仍然需要RTL支持。应用程序在同一会话中无法更改其布局方向,因此解决此问题非常容易。
说了这么多,其实很简单。
extension UIButton {
    func alignImageRight() {
        if UIApplication.shared.userInterfaceLayoutDirection == .leftToRight {
            semanticContentAttribute = .forceRightToLeft
        }
        else {
            semanticContentAttribute = .forceLeftToRight
        }
    }
}
- cnotethegr8
3
这会打乱 VoiceOver,因此当用户聚焦于 UIButton 时,向右滑动会变成向左,反之亦然。这非常令人困惑。 - Ian Dundas
大多数应用程序不使用VoiceOver - 这是不正确的,VoiceOver已启用整个手机,而不是每个应用程序,因此应该作为良好行为的辅助功能得到支持。请注意:默认情况下,原生控件中的VoiceOver支持正常工作。这就是为什么像这样的黑客技巧(这不是
semanticContentAttribute API的目的,请不要假装它是..)是一个纯粹的坏主意。在我看来,这值得被踩。 - Ian Dundas你显然误解了。很明显,操作系统提供功能。诸如标签等无障碍功能需要由开发人员提供。当您拥有一个应用程序,比如说高度图形化且即使使用无障碍也无法为盲人使用时(这仅是众多例子之一),则对于这些应用程序,这对其构成一个有效的解决方案。因为没有人会期望与它们一起使用无障碍性。考虑以上原因,“因此应作为无障碍功能支持”是荒谬的。例如,您构建了多少个支持应用程序级XXXL动态类型的应用程序? - cnotethegr8
4
Swift - 扩展UiButton并添加以下行
    if let imageWidth = self.imageView?.frame.width {
        self.titleEdgeInsets = UIEdgeInsetsMake(0, -imageWidth, 0, imageWidth);
    }

    if let titleWidth = self.titleLabel?.frame.width {
        let spacing = titleWidth + 20
        self.imageEdgeInsets = UIEdgeInsetsMake(0, spacing, 0, -spacing);
    }
- Pramod
4
使用 Xcode 13.3,我通过以下几个步骤解决了问题,并添加了图像填充。
创建按钮后,按照以下方式进行操作:
- First define the image:
let symbol = UIImage(named: "put name of your symbol here") - Then in
viewDidLoadwhere you created the button, initialise the above defined image in 1, to add the image to the button & set the properties:button.setImage(symbol, for: .normal) button.semanticContentAttribute = .forceRightToLeft button.configuration?.imagePadding = 2
不要忘记将按钮添加到视图中。
- Mary Jones
1
1这会破坏VoiceOver,因此当用户将焦点放在UIButton上时,向右滑动变成了向左滑动,反之亦然。这非常令人困惑。 - Ian Dundas
3
在 Piotr Tomasik 的优雅解决方案基础上:如果您想在按钮标签和图像之间增加一些 间距,则可以在边缘插图中包含它,如下所示(这是我完美工作的代码):
    CGFloat spacing          = 3;
    CGFloat insetAmount      = 0.5 * spacing;

    // First set overall size of the button:
    button.contentEdgeInsets = UIEdgeInsetsMake(0, insetAmount, 0, insetAmount);
    [button sizeToFit];

    // Then adjust title and image insets so image is flipped to the right and there is spacing between title and image:
    button.titleEdgeInsets   = UIEdgeInsetsMake(0, -button.imageView.frame.size.width - insetAmount, 0,  button.imageView.frame.size.width  + insetAmount);
    button.imageEdgeInsets   = UIEdgeInsetsMake(0, button.titleLabel.frame.size.width + insetAmount, 0, -button.titleLabel.frame.size.width - insetAmount);
感谢Piotr提供的解决方案! Erik
- Erik van der Neut
2
@lulian:我最近使用了廖健杰的解决方案(这里所接受的答案),它非常出色,是一个非常优雅的解决方案。 - Erik van der Neut
这对我也不起作用,因为它会改变文本的对齐方式。 - Iulian Onofrei
网页内容由stack overflow 提供, 点击上面的可以查看英文原文,
原文链接
原文链接