基于calcOpticalFlowFarneback的OpenCV图像扭曲

12

我正在尝试使用稠密光流对图像进行复杂的变形。我试图将第二个图像变形成大致与第一个图像相同的形状。

cv::Mat flow;
cv::calcOpticalFlowFarneback( mGrayFrame1, mGrayFrame2, flow, 0.5, 3, 15, 3, 5, 1.2, 0 );

cv::Mat newFrame = cv::Mat::zeros( frame.rows, frame.cols, frame.type() );
cv:remap( frame, newFrame, flow, cv::Mat(), CV_INTER_LINEAR );

我从两个灰度帧计算流量。现在,我正在尝试使用这些流量信息使用cv :: remap函数重新映射我的原始(即非灰度)图像。然而,我得到了一个非常扭曲的图像。最终我仅得到了一个橙色和黑色的图像,与我的原始图像有一点点相似。

如何使用计算出来的flowcv::remap一起使用?


1
你好,我看到了这篇帖子,我的问题与你的大致相同(确切地说是完全一样),我想知道你是否找到了解决方法?(我知道这篇帖子已经很旧了,对此我感到抱歉,但我现在没有找到任何实时的回复:o) 非常感谢! - Raph Schim
@RaphaelSchimchowitsch:最好自己提出问题。我不确定我是否还有编写此代码的代码...但我确实让某些东西起作用了。现在不确定它是否使用光流... - Goz
啊哈,好的,我已经发布了自己的问题,但我发现了这篇帖子,所以我想知道您是否可以帮助我 :) 但是好的^^非常感谢您的回复 :) - Raph Schim
2个回答

18

remap 函数无法直接与 flow 配合使用。必须使用单独的 map,该映射是通过获取反向流(从 frame2frame1)计算得出的,然后将每个流向量的 (x, y) 位置在像素网格上进行补偿。请参见下面的详细信息。

回想一下反向光流公式:

frame1(x, y) = frame2(x + flowx(x, y), y + flowy(x, y))

remap函数使用指定的map转换源图像:

dst(x, y) = src(mapx(x, y), mapy(x, y))

通过比较上述两个方程,我们可以确定remap需要的map

mapx(x, y) = x + flowx(x, y)
mapy(x, y) = y + flowy(x, y)

例子:

Mat flow; // backward flow
calcOpticalFlowFarneback(nextFrame, prevFrame, flow);

Mat map(flow.size(), CV_32FC2);
for (int y = 0; y < map.rows; ++y)
{
    for (int x = 0; x < map.cols; ++x)
    {
        Point2f f = flow.at<Point2f>(y, x);
        map.at<Point2f>(y, x) = Point2f(x + f.x, y + f.y);
    }
}

Mat newFrame;
remap(prevFrame, newFrame, map);

1
太棒了,这解释了很多问题。不幸的是,流程中并没有我想要的数据,所以得重新开始规划,很快就会有另一个问题!谢谢! - Goz
4
请注意反向流的使用,即从“nextFrame”到“prevFrame”。这是必要的,因为流向量是针对源像素给出的(“它去哪里了”),而我们感兴趣的是目标像素(“它来自哪里”)。 - lapis

2
这是一个用Python编写的光流图像扭曲解决方案。
import cv2
import numpy as np

def warp_flow(flow, img1=None, img2=None, interpolation=cv2.INTER_LINEAR):
    """Use remap to warp flow, generating a new image. 
Args:
    flow (np.ndarray): flow
    img1 (np.ndarray, optional): previous frame
    img2 (np.ndarray, optional): next frame
Returns:
    warped image
If img1 is input, the output will be img2_warped, but there will be multiple pixels corresponding to a single pixel, resulting in sparse holes. 
If img2 is input, the output will be img1_warped, and there will be no sparse holes. The latter approach is preferred.
    """
    h, w, _ = flow.shape
    remap_flow = flow.transpose(2, 0, 1)
    remap_xy = np.float32(np.mgrid[:h, :w][::-1])
    if img1 is not None:
        uv_new = (remap_xy + remap_flow).round().astype(np.int32)
        mask = (uv_new[0] >= 0) & (uv_new[1] >= 0) & (uv_new[0] < w) & (uv_new[1] < h)
        uv_new_ = uv_new[:, mask]
        remap_xy[:, uv_new_[1], uv_new_[0]] = remap_xy[:, mask]
        remap_x, remap_y = remap_xy
        img2_warped = cv2.remap(img1, remap_x, remap_y, interpolation)
        mask_remaped = np.zeros((h, w), np.bool8)
        mask_remaped[uv_new_[1], uv_new_[0]] = True
        img2_warped[~mask_remaped] = 0
        return img2_warped
    elif img2 is not None:
        remap_x, remap_y = np.float32(remap_xy + remap_flow)
        return cv2.remap(img2, remap_x, remap_y, interpolation)


img1 = cv2.imread("img1.jpg")
img2 = cv2.imread("img2.jpg")

flow = cv2.calcOpticalFlowFarneback(
    img1.mean(-1), img2.mean(-1), None, 0.5, 3, 15, 3, 5, 1.2, 0
)

img2_warped = warp_flow(flow, img1=img1)
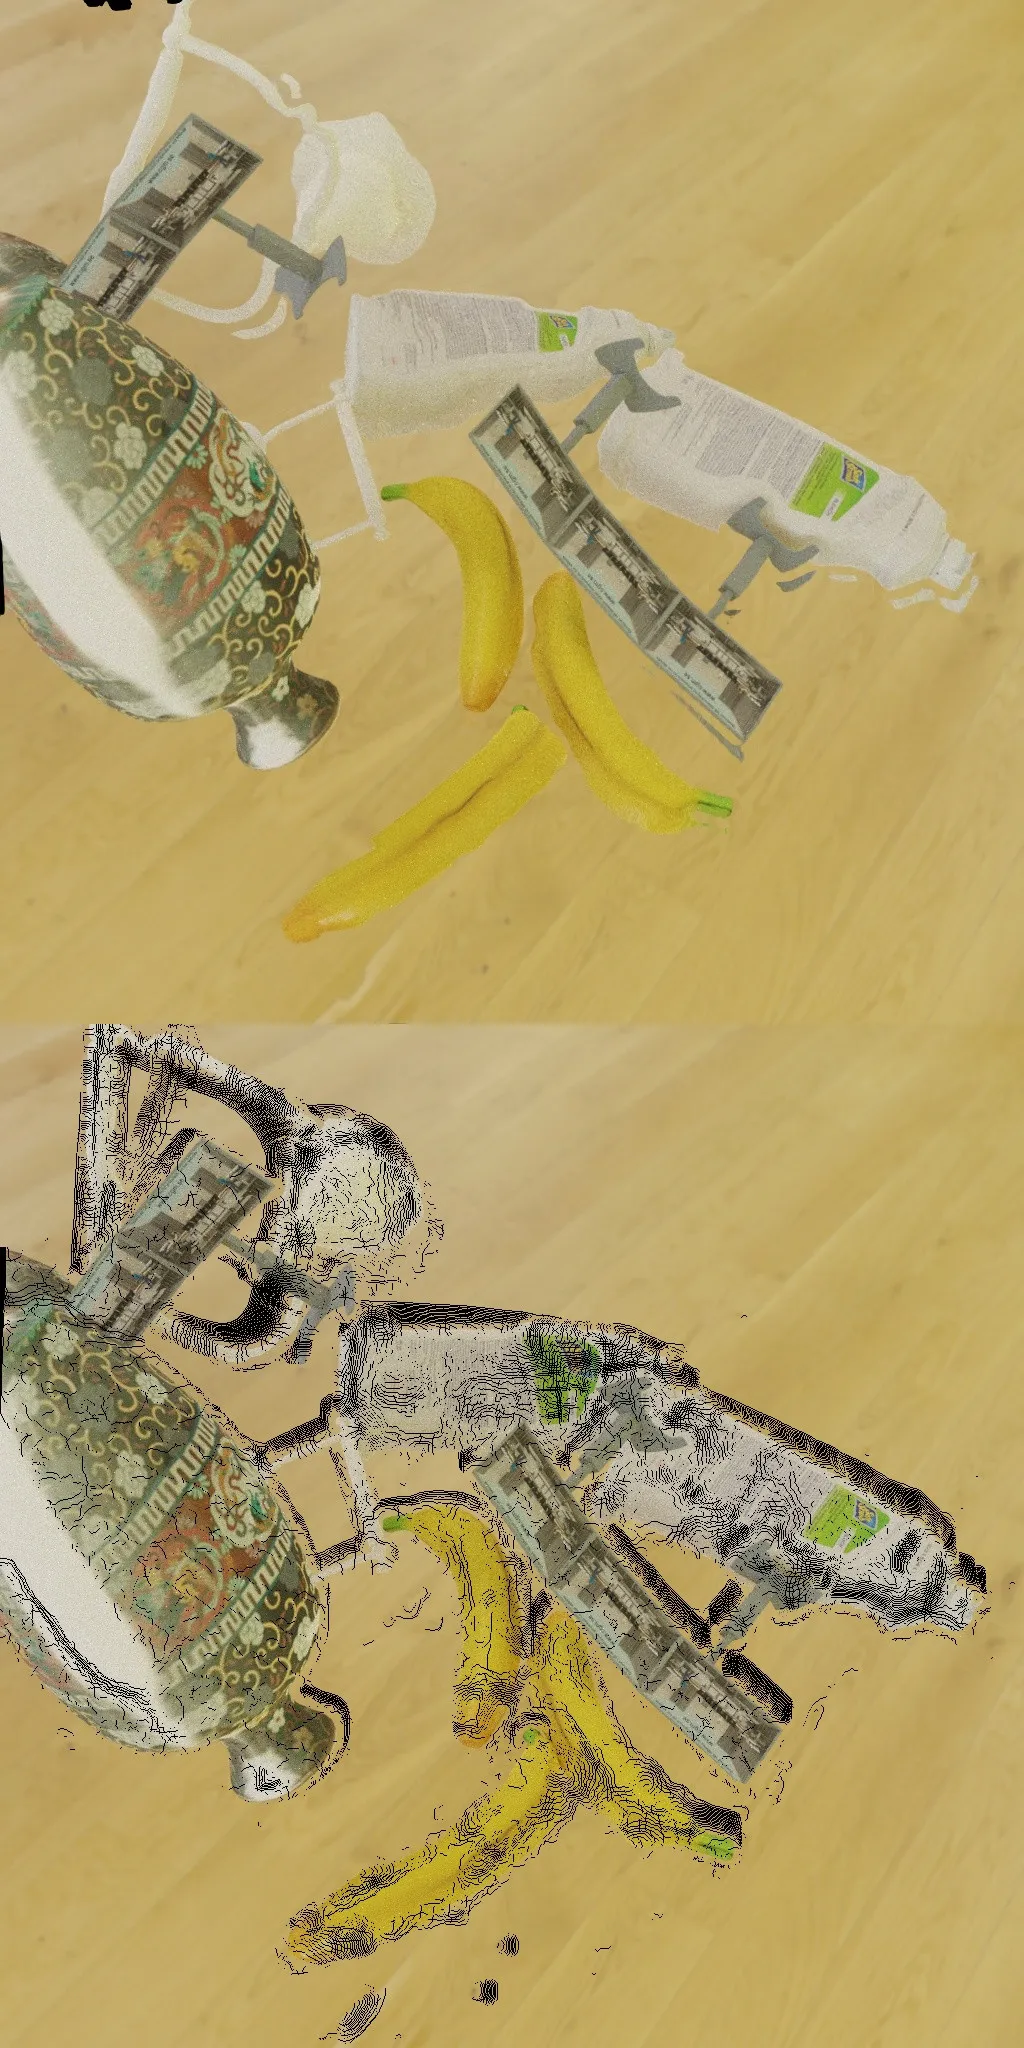
img1_warped = warp_flow(flow, img2=img2)

cv2.imwrite("warped.jpg", np.vstack([img1_warped, img2_warped]))
cv2.imwrite("target.jpg", np.vstack([img1, img2]))
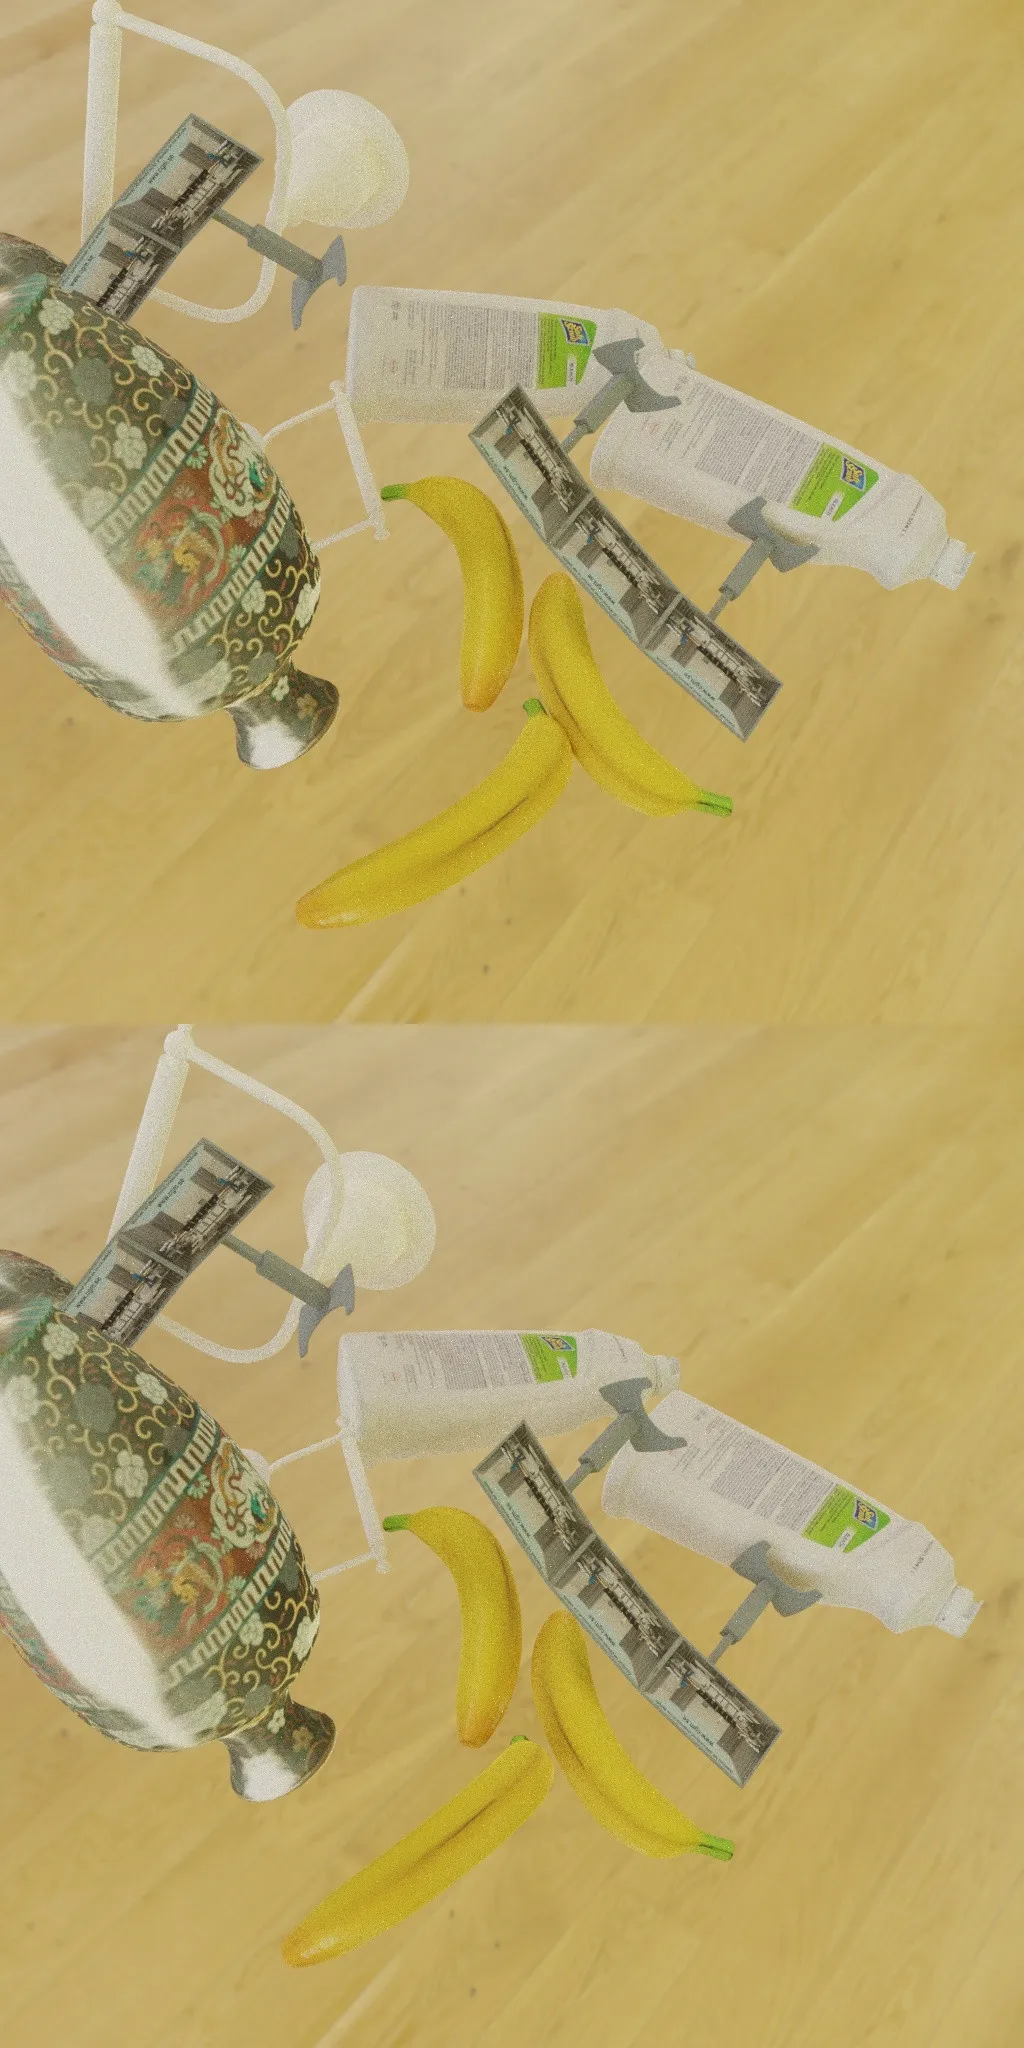
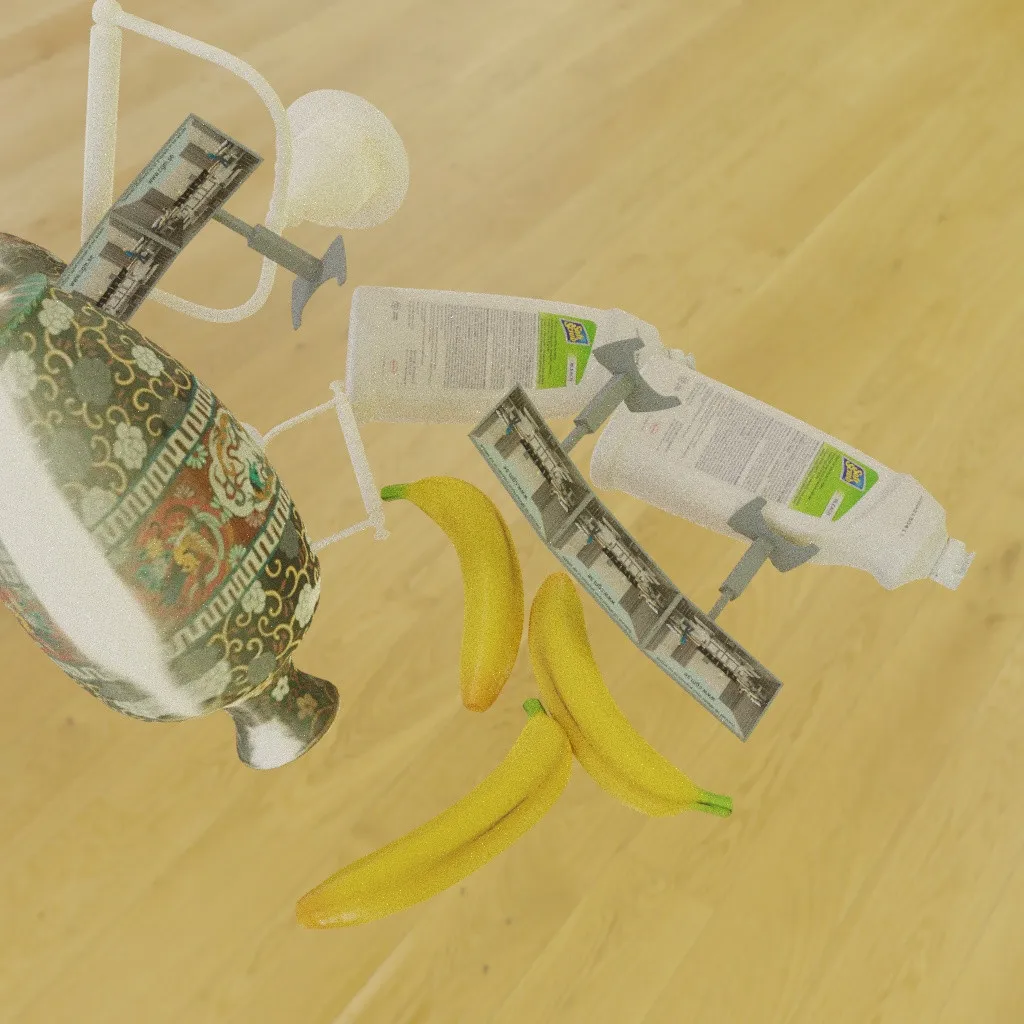
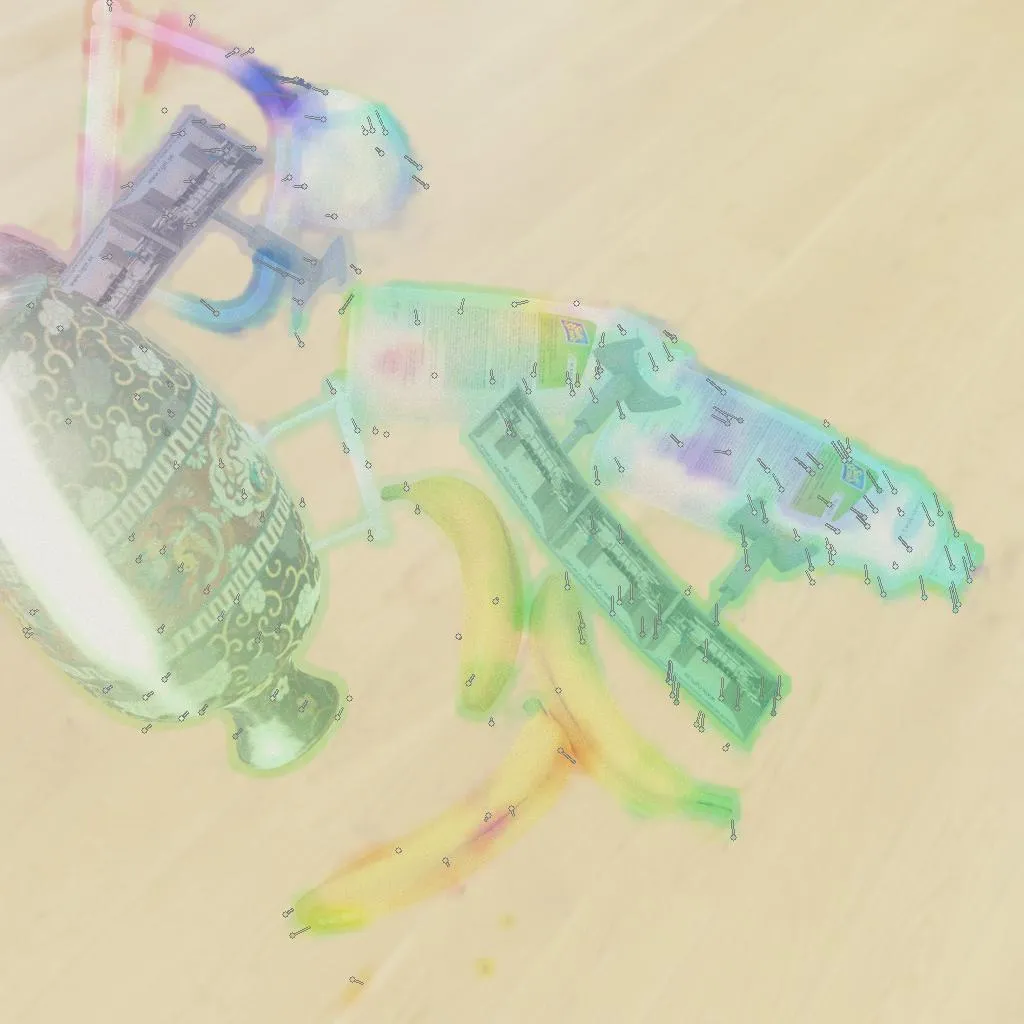
示例img1,img2和流动可视化:

结果,左侧:warped.jpg,右侧:target.jpg:

网页内容由stack overflow 提供, 点击上面的
可以查看英文原文,
原文链接