3D表面图(3d surface plot)与XYZ坐标

43

我希望有经验的人能够帮助解决如何从xyz数据准备形状文件的问题。可以看到这里是一个准备得很好的数据集的很好的例子,用于彗星Churyumov-Gerasimenko,尽管创建shape file的前置步骤没有提供。

我正在尝试更好地理解如何将表面应用于给定的XYZ坐标集。使用笛卡尔坐标系和R软件包“rgl”很直观,但是环绕形状似乎更困难。我发现了R软件包“geometry”,它提供了一个接口到QHULL函数。我尝试使用这个函数计算Delaunay三角剖分的面,然后可以在rgl中绘制。我无法弄清楚与函数delaunayn相关的一些选项,以可能控制计算这些面的最大距离。我希望在这里有人能够提出一些改进从xyz数据构建表面的想法。
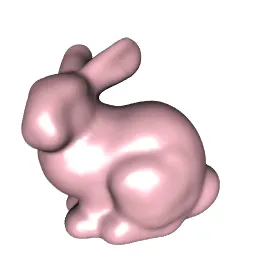
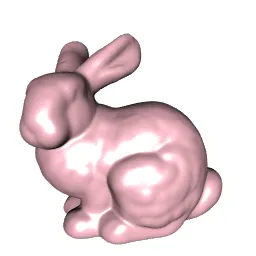
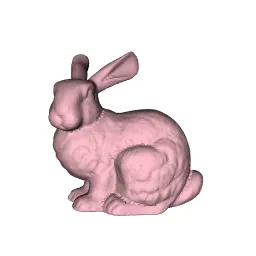
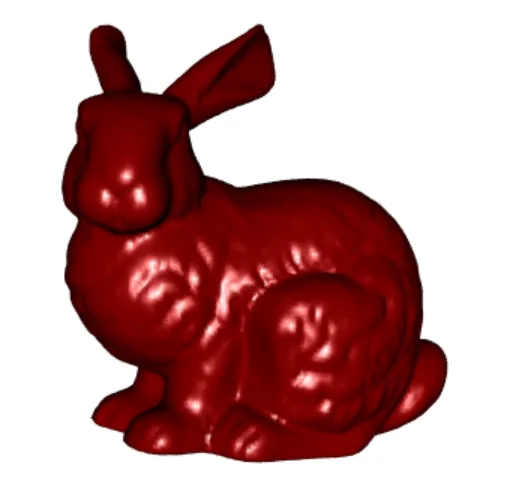
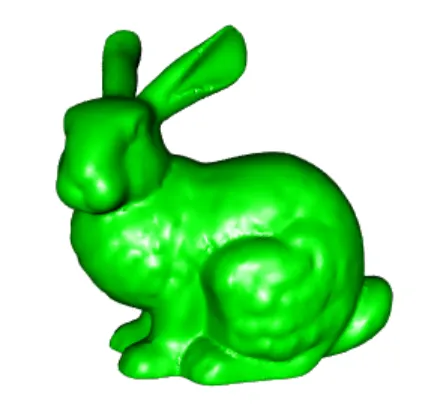
使用“斯坦福兔子”数据集的示例:

library(onion)
library(rgl)
library(geometry)
data(bunny)

#XYZ point plot
open3d()
points3d(bunny, col=8, size=0.1)
#rgl.snapshot("3d_bunny_points.png")

#Facets following Delaunay triangulation
tc.bunny <- delaunayn(bunny)
open3d()
tetramesh(tc.bunny, bunny, alpha=0.25, col=8)
#rgl.snapshot("3d_bunny_facets.png")

enter image description here

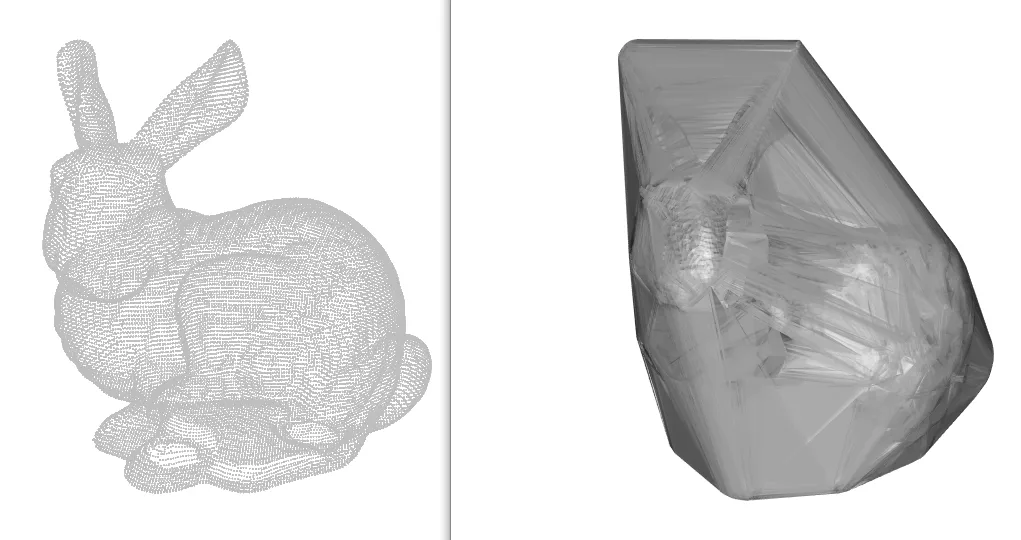
这个回答让我相信R实现Qhull时可能存在问题。此外,我已经尝试了各种设置(例如delaunayn(bunny, options="Qt")),但效果不大。 Qhull选项在这里概述。

编辑:

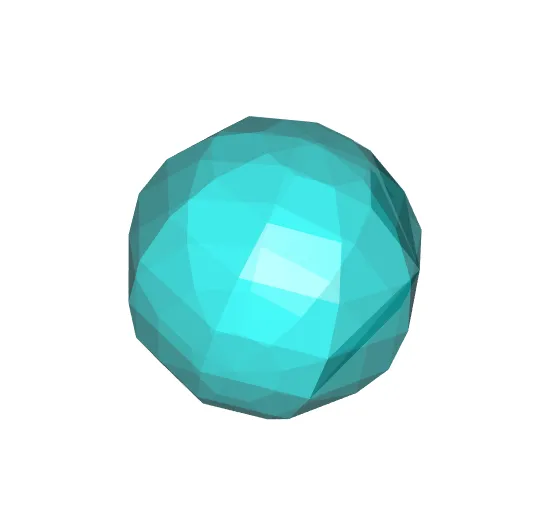
这里是一个额外的(更简单的)球体示例。即使在这里,面的计算也不总是找到最近的相邻顶点(如果您旋转球体,您将看到一些面穿过内部)。

library(rgl)
library(geometry)
set.seed(1)
n <- 10
rho <- 1
theta <- seq(0, 2*pi,, n) # azimuthal coordinate running from 0 to 2*pi 
phi <- seq(0, pi,, n) # polar coordinate running from 0 to pi (colatitude)
grd <- expand.grid(theta=theta, phi=phi)

x <- rho * cos(grd$theta) * sin(grd$phi)
y <- rho * sin(grd$theta) * sin(grd$phi)
z <- rho * cos(grd$phi)

set.seed(1)
xyz <- cbind(x,y,z)
tbr = t(surf.tri(xyz, delaunayn(xyz)))
open3d()
rgl.triangles(xyz[tbr,1], xyz[tbr,2], xyz[tbr,3], col = 5, alpha=0.5)
rgl.snapshot("ball.png")

enter image description here


你尝试过
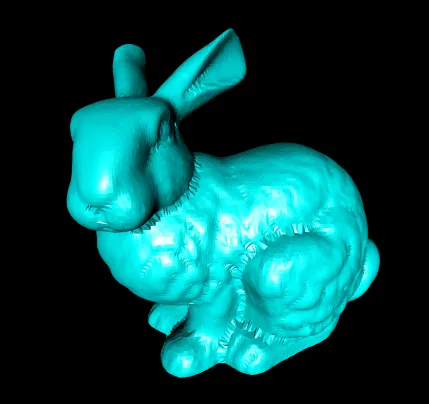
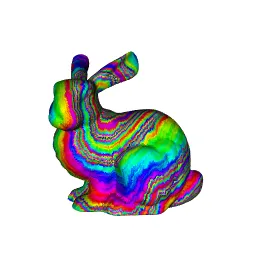
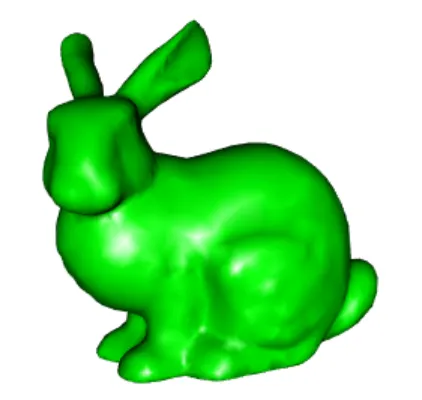
alphashape3d包吗?我不确定它是否完全符合你的需求,但你可以尝试这个更好的绘图方法:ashp <- ashape3d(bunny, alpha = c(0.005)); plot(ashp, col=c(8,8,8)) - Jota
@Frank - 感谢您的建议,但是这个例子似乎有相同的问题 - 例如更改 alpha = 0.5 - Marc in the box
R语言中的geometry包中Qhull的实现没有问题:一组点的Delaunay三角剖分与该组点的凸包的Delaunay三角剖分始终相同。因此,您的“Delaunay化”的兔子是凸的。 - Stéphane Laurent
4个回答

19

这里提供一种使用核密度估计和来自 misc3dcontour3d 函数的方法。我进行了试验,直到找到一个适当的levels值。它并不完全精确,但你可以调整一些参数以获得更好、更准确的曲面。如果您拥有超过8GB的内存,则可以将n增加到比我这里做的更多。

library(rgl)
library(misc3d)
library(onion); data(bunny)

# the larger the n, the longer it takes, the more RAM you need
bunny.dens <- kde3d(bunny[,1],bunny[,2],bunny[,3], n=150, 
    lims=c(-.1,.2,-.1,.2,-.1,.2)) # I chose lim values manually

contour3d(bunny.dens$d, level = 600, 
    color = "pink", color2 = "green", smooth=500)
rgl.viewpoint(zoom=.75)

enter image description hereenter image description here

右边的图片是从底部拍摄的,只是展示了另一种视角。

您可以在kde3d中使用更大的n值,但这会花费更长时间,如果数组变得太大,则可能会耗尽RAM。您也可以尝试不同的带宽(默认值在此处使用)。我采用了《在R中计算和显示等值面- Feng和Tierney 2008》的方法。


非常相似的等值面方法使用Rvcg包:

library(Rvcg)
library(rgl)
library(misc3d)
library(onion); data(bunny)

bunny.dens <- kde3d(bunny[,1],bunny[,2],bunny[,3], n=150, 
    lims=c(-.1,.2,-.1,.2,-.1,.2)) # I chose lim values manually

bunny.mesh <- vcgIsosurface(bunny.dens$d, threshold=600)
shade3d(vcgSmooth(bunny.mesh,"HC",iteration=3),col="pink") # do a little smoothing

enter image description here

由于这是一种基于密度估计的方法,我们可以通过增加兔子的密度来获得更多信息。我在这里使用n = 400。这样做会显著增加计算时间,但得到的表面质量会更好。

bunny.dens <- kde3d(rep(bunny[,1], 10), # increase density.
                    rep(bunny[,2], 10),
                    rep(bunny[,3], 10), n=400, 
                    lims=c(-.1,.2,-.1,.2,-.1,.2))

bunny.mesh <- vcgIsosurface(bunny.dens$d, threshold=600)
shade3d(vcgSmooth(bunny.mesh,"HC",iteration=1), col="pink")

在此输入图像描述


还有更好、更高效的表面重建方法(例如power crust,Poisson表面重建,ball-pivot算法),但我不知道是否已经有任何一种方法在R中实现。

这里有一个相关的Stack Overflow帖子,其中包含一些很棒的信息和链接(包括代码链接):从3D点云进行表面重建的鲁棒算法?


2
来自Feng和Tierney(2008)的优秀参考资料 - 正是我一直在寻找的。我认为这将为我寻找相关文献提供很好的起点。感谢您的所有帮助。 - Marc in the box
感谢您在这个话题上的努力,Frank - 您让我更深入地了解了它。我喜欢您对愚蠢的弹性泥兔子的演绎! - Marc in the box

13

我认为使用alphashape3d包可以找到一种可能的解决方案。我需要试验不同的alpha值,它与给定数据集中的距离有关(例如bunnysd让我有了一些见解)。我仍在努力弄清如何更好地控制顶点和边缘线条的宽度,以便不会主导绘图,但这可能与rgl中的设置有关。

示例:

library(onion)
library(rgl)
library(geometry)
library(alphashape3d)

data(bunny)
apply(bunny,2,sd)
alphabunny <- ashape3d(bunny, alpha = 0.003)
bg3d(1)
plot.ashape3d(alphabunny, col=c(5,5,5), lwd=0.001, size=0, transparency=rep(0.5,3), indexAlpha = "all")

编辑:

只有通过调整plot.ashape3d函数,我才能够去除边缘和顶点:

plot.ashape3d.2 <- function (x, clear = TRUE, col = c(2, 2, 2), byComponents = FALSE, 
                             indexAlpha = 1, transparency = 1, walpha = FALSE, ...) 
{
  as3d <- x
  triangles <- as3d$triang
  edges <- as3d$edge
  vertex <- as3d$vertex
  x <- as3d$x
  if (class(indexAlpha) == "character") 
    if (indexAlpha == "ALL" | indexAlpha == "all") 
      indexAlpha = 1:length(as3d$alpha)
  if (any(indexAlpha > length(as3d$alpha)) | any(indexAlpha <= 
                                                   0)) {
    if (max(indexAlpha) > length(as3d$alpha)) 
      error = max(indexAlpha)
    else error = min(indexAlpha)
    stop(paste("indexAlpha out of bound : valid range = 1:", 
               length(as3d$alpha), ", problematic value = ", error, 
               sep = ""), call. = TRUE)
  }
  if (clear) {
    rgl.clear()
  }
  if (byComponents) {
    components = components_ashape3d(as3d, indexAlpha)
    if (length(indexAlpha) == 1) 
      components = list(components)
    indexComponents = 0
    for (iAlpha in indexAlpha) {
      if (iAlpha != indexAlpha[1]) 
        rgl.open()
      if (walpha) 
        title3d(main = paste("alpha =", as3d$alpha[iAlpha]))
      cat("Device ", rgl.cur(), " : alpha = ", as3d$alpha[iAlpha], 
          "\n")
      indexComponents = indexComponents + 1
      components[[indexComponents]][components[[indexComponents]] == 
                                      -1] = 0
      colors = c("#000000", sample(rainbow(max(components[[indexComponents]]))))
      tr <- t(triangles[triangles[, 8 + iAlpha] == 2 | 
                          triangles[, 8 + iAlpha] == 3, c("tr1", "tr2", 
                                                          "tr3")])
      if (length(tr) != 0) 
        rgl.triangles(x[tr, 1], x[tr, 2], x[tr, 3], col = colors[1 + 
                                                                   components[[indexComponents]][tr]], alpha = transparency, 
                      ...)
    }
  }
  else {
    for (iAlpha in indexAlpha) {
      if (iAlpha != indexAlpha[1]) 
        rgl.open()
      if (walpha) 
        title3d(main = paste("alpha =", as3d$alpha[iAlpha]))
      cat("Device ", rgl.cur(), " : alpha = ", as3d$alpha[iAlpha], 
          "\n")
      tr <- t(triangles[triangles[, 8 + iAlpha] == 2 | 
                          triangles[, 8 + iAlpha] == 3, c("tr1", "tr2", 
                                                          "tr3")])
      if (length(tr) != 0) 
        rgl.triangles(x[tr, 1], x[tr, 2], x[tr, 3], col = col[1], 
                      , alpha = transparency, ...)
    }
  }
}

alphabunny <- ashape3d(bunny, alpha = c(0.003))
plot.ashape3d.2(alphabunny, col=5, indexAlpha = "all", transparency=1)
bg3d(1)

enter image description here


所以,我的答案对你有用!我没有将其发布为答案,因为我不确定它是否是你需要的。无论如何,如果您在调用ashape3d时使用了多个alpha值并且希望绘制您尝试的所有alpha值的结果,则只需要使用indexAlpha =“all” - Jota
@Frank - 老实说,我没有意识到这是你推荐的同一个软件包!我是通过另一个谷歌搜索发现它的,而软件包的说明帮助我弄清楚了设置。我会尝试你的建议。干杯! - Marc in the box
@Frank - 看起来我把alphatransparency搞混了。你应该在这里写一个正式的答案。 - Marc in the box
你的调整后的 plot.ashape3d.2 的第二个图看起来很酷!我发现 alpha = 0.0015 可以得到一个非常好的图像。 - Jota
1
@Frank - 是的,alpha = 0.0015 在某些地方能够得到更好的结果,但是仔细观察会发现有许多孔洞。 - Marc in the box

3

2016年7月,Rvcg软件包更新至0.14版本,并添加了球极面重建功能,对应函数为vcgBallPivoting

library(Rvcg) # needs to be >= version 0.14
library(rgl)
library(onion); data(bunny)

# default parameters
bunnybp <- vcgBallPivoting(bunny, radius = 0.0022, clustering = 0.2, angle = pi/2)
shade3d(bunnybp, col = rainbow(1000), specular = "black")
shade3d(bunnybp, col = "pink", specular = "black") # easier to see problem areas.

enter image description here enter image description here

球拍转和默认参数并不完美适用于斯坦福兔子(正如cuttlefish44在评论中指出的,radius = 0.0022比默认值radius = 0更好),因此表面上留下了一些空隙。实际的兔子底部有2个孔,一些扫描限制导致还存在其他一些孔(如这里所述:https://graphics.stanford.edu/software/scanview/models/bunny.html)。您可能能够找到更好的参数,使用vcgBallPivoting非常快速(我的机器上约为0.5秒),但需要额外的努力/方法来关闭空隙。


这真的很快 - 感谢您的回答。不幸的是,我无法通过调整参数来消除那些洞。顺便说一下,在使用RStudio时,vcgBallPivoting函数会导致R崩溃。我已经通知了包的作者。 - Marc in the box
你的回答对我来说非常有趣。“radius=0.0022”可以得到更好的输出,但并不完美。 - cuttlefish44

0

我目前正在制作一个名为RCGAL的软件包,它目前提供了两种类型的表面重建。它基于RcppCGAL软件包,该软件包链接到C++库CGAL(计算几何算法库)的头文件。

这是斯坦福兔子的高级前沿表面重建

enter image description here

这是使用默认参数的斯坦福兔子的泊松表面重建结果:Poisson surface reconstruction

enter image description here

这个网格不是很精确。通过使用较小的spacing参数值,可以获得更精确的网格:

enter image description here

请查看 这篇博客文章以获取更多信息。


这看起来非常不错。也许你应该提供代码,以便其他人可以复制。 - Marc in the box
@Marcinthebox 添加了指向我的博客的链接。 - Stéphane Laurent

网页内容由stack overflow 提供, 点击上面的
可以查看英文原文,
原文链接