填补轮廓/线条的空隙

8

我有以下图片:

带间隔轮廓的图像

我想要填充轮廓(即在此图像中填充线条)。

我尝试过用大小为3x310次迭代的矩形核进行形态学闭运算,但没有填满整个边界。我还使用了21x21大小的核及1次迭代,也没有成功。

更新:

我在OpenCV(Python)中尝试过以下操作:

cv2.morphologyEx(img, cv2.MORPH_CLOSE, cv2.getStructuringElement(cv2.MORPH_RECT, (21,21)))

并且

cv2.morphologyEx(img, cv2.MORPH_CLOSE, cv2.getStructuringElement(cv2.MORPH_RECT, (3,3)), iterations=10)

还有scikit-image相关的内容:

closing(img, square(21))

我的最终目标是获得整个图像的填充版本,而不会扭曲覆盖区域。

您指定的结构元素可能太小了。如果使用3 x 3,那么内核太小,无法将相邻区域连接在一起。您尝试过增大吗?例如9 x 9?另外,您使用的是哪个平台?我看到您已经标记了OpenCV,但没有指定使用的语言。是C++还是Python? - rayryeng
1
考虑使用膨胀算法将所有间隙连接在一起,然后使用形态学细化算法将对象细化到其最小表示。这里提供了一个使用OpenCV C++的算法:https://opencv-code.com/quick-tips/implementation-of-thinning-algorithm-in-opencv/ - 您可以轻松地将其转换为Python。该算法使用经典的Zhang-Suen算法。 - rayryeng
2个回答

8
在以下代码片段中,我计算了反向图像的距离映射。 我对其进行阈值处理以获取当前对象的大轮廓,然后对其进行骨架化以获得中心线。 这可能已经足够满足您的需求。 但为了使其与给定的线条粗细一致,我扩张了骨架并将其添加到原始图像中,从而关闭任何间隙。 我还删除了与边界接触的唯一剩余对象。
from skimage import io, morphology, img_as_bool, segmentation
from scipy import ndimage as ndi
import matplotlib.pyplot as plt

image = img_as_bool(io.imread('/tmp/gaps.png'))
out = ndi.distance_transform_edt(~image)
out = out < 0.05 * out.max()
out = morphology.skeletonize(out)
out = morphology.binary_dilation(out, morphology.selem.disk(1))
out = segmentation.clear_border(out)
out = out | image

plt.imshow(out, cmap='gray')
plt.imsave('/tmp/gaps_filled.png', out, cmap='gray')
plt.show()

1
如果目标图像周围的黑色边框增加,那么该解决方案将无法正常工作。例如使用OpenCV:image = cv2.copyMakeBorder(image, 200, 200, 200, 200, cv2.BORDER_CONSTANT) - Alex Rothberg
只需调整阈值即可。对于该图像,0.01 对我来说效果很好。 - Stefan van der Walt
1
我希望找到一个解决方案,至少能够经受得住黑边大小的变化。 - Alex Rothberg
3
你是否曾经玩过代码以了解它的功能? - Stefan van der Walt
这是一个很好的答案。尽管有一般共识,但我实际上已经运行了代码。看起来不错! - rayryeng

2
假设你想在第二步中使用这些轮廓进行轮廓检测,我有一个更直接的解决方案。使用膨胀操作会放大白色区域,从而填补空隙:

enter image description here

import cv2
import numpy as np

image = cv2.imread('lineswithgaps.png')
gray = cv2.cvtColor(image, cv2.COLOR_BGR2GRAY)

# apply dilation on src image
kernel = np.ones((3,3),np.uint8)
dilated_img = cv2.dilate(gray, kernel, iterations = 2)

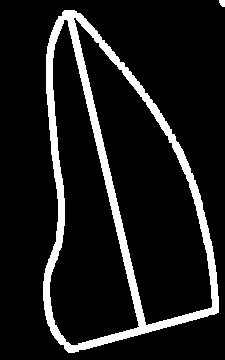
cv2.imshow("filled gaps for contour detection", dilated_img)
cv2.waitKey(0)
cv2.destroyAllWindows()

作为一个缺点,边缘变得更厚了,但是如果您不需要高精度的话,这可能不是一个问题... 如果您现在想要检测轮廓,只需将以下代码添加到第一个代码片段中即可:

enter image description here

canvas = dilated_img.copy() # Canvas for plotting contours on
canvas = cv2.cvtColor(canvas, cv2.COLOR_GRAY2RGB) # create 3 channel image so we can plot contours in color

contours, hierarchy = cv2.findContours(dilated_img, cv2.RETR_CCOMP, cv2.CHAIN_APPROX_NONE)

# loop through the contours and check through their hierarchy, if they are inner contours
# more here: https://docs.opencv.org/master/d9/d8b/tutorial_py_contours_hierarchy.html
for i,cont in enumerate(contours):
    # look for hierarchy[i][3]!=-1, ie hole boundaries
    if ( hierarchy[0][i][3] != -1 ):
        #cv2.drawContours(canvas, cont, -1, (0, 180, 0), 1) # plot inner contours GREEN
        cv2.fillPoly(canvas, pts =[cont], color=(0, 180, 0)) # fill inner contours GREEN
    else:
        cv2.drawContours(canvas, cont, -1, (255, 0, 0), 1) # plot all others BLUE, for completeness

cv2.imshow("Contours detected", canvas)
cv2.waitKey(0)
cv2.destroyAllWindows()

网页内容由stack overflow 提供, 点击上面的
可以查看英文原文,
原文链接