Swift 4+
func roundCorners(with CACornerMask: CACornerMask, radius: CGFloat) {
    self.layer.cornerRadius = radius
    self.layer.maskedCorners = [CACornerMask]
}
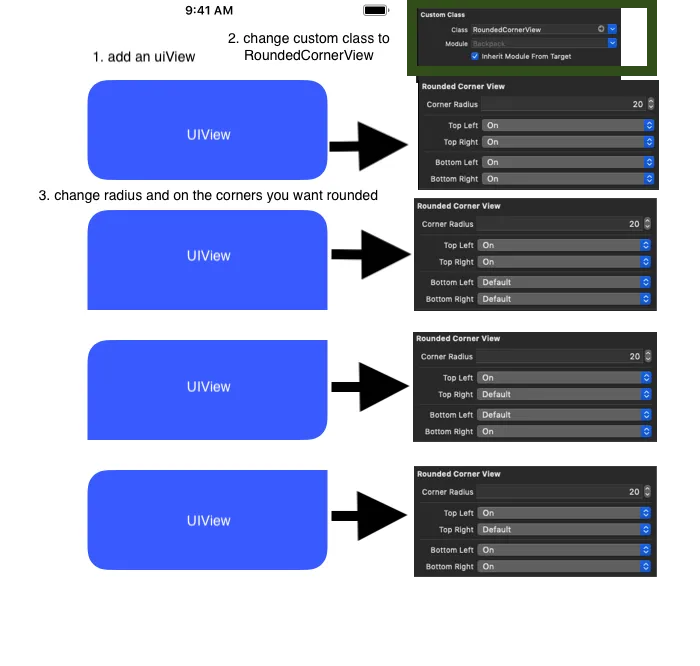
如何使用
roundCorners(with: [.layerMaxXMinYCorner], radius: 20)
roundCorners(with: [.layerMinXMinYCorner], radius: 20)
roundCorners(with: [.layerMaxXMaxYCorner], radius: 20)
roundCorners(with: [.layerMinXMaxYCorner], radius: 20)
或者
另一种方法是使用 CACornerMask
extension UIView{
enum RoundCornersAt{
case topRight
case topLeft
case bottomRight
case bottomLeft
}
func roundCorners(corners:[RoundCornersAt], radius: CGFloat) {
self.layer.cornerRadius = radius
self.layer.maskedCorners = [
corners.contains(.topRight) ? .layerMaxXMinYCorner:.init(),
corners.contains(.topLeft) ? .layerMinXMinYCorner:.init(),
corners.contains(.bottomRight) ? .layerMaxXMaxYCorner:.init(),
corners.contains(.bottomLeft) ? .layerMinXMaxYCorner:.init(),
]
}
}
您可以像下面这样使用。
myView.roundCorners(corners: [.topLeft,.bottomLeft], radius: 20)
或者
使用UIRectCorner实现多个角落
func roundedCorners(corners : UIRectCorner, radius : CGFloat) {
    let path = UIBezierPath(roundedRect: self.bounds, byRoundingCorners: corners, cornerRadii: CGSize(width: radius, height: radius))
    let mask = CAShapeLayer()
    mask.path = path.cgPath
    layer.mask = mask
}
如何使用
roundedCorners(corners: [.topLeft, .topRight], radius: 20)