图像的2D旋转

4

尝试对图像进行90度旋转。左边的是原始图像。
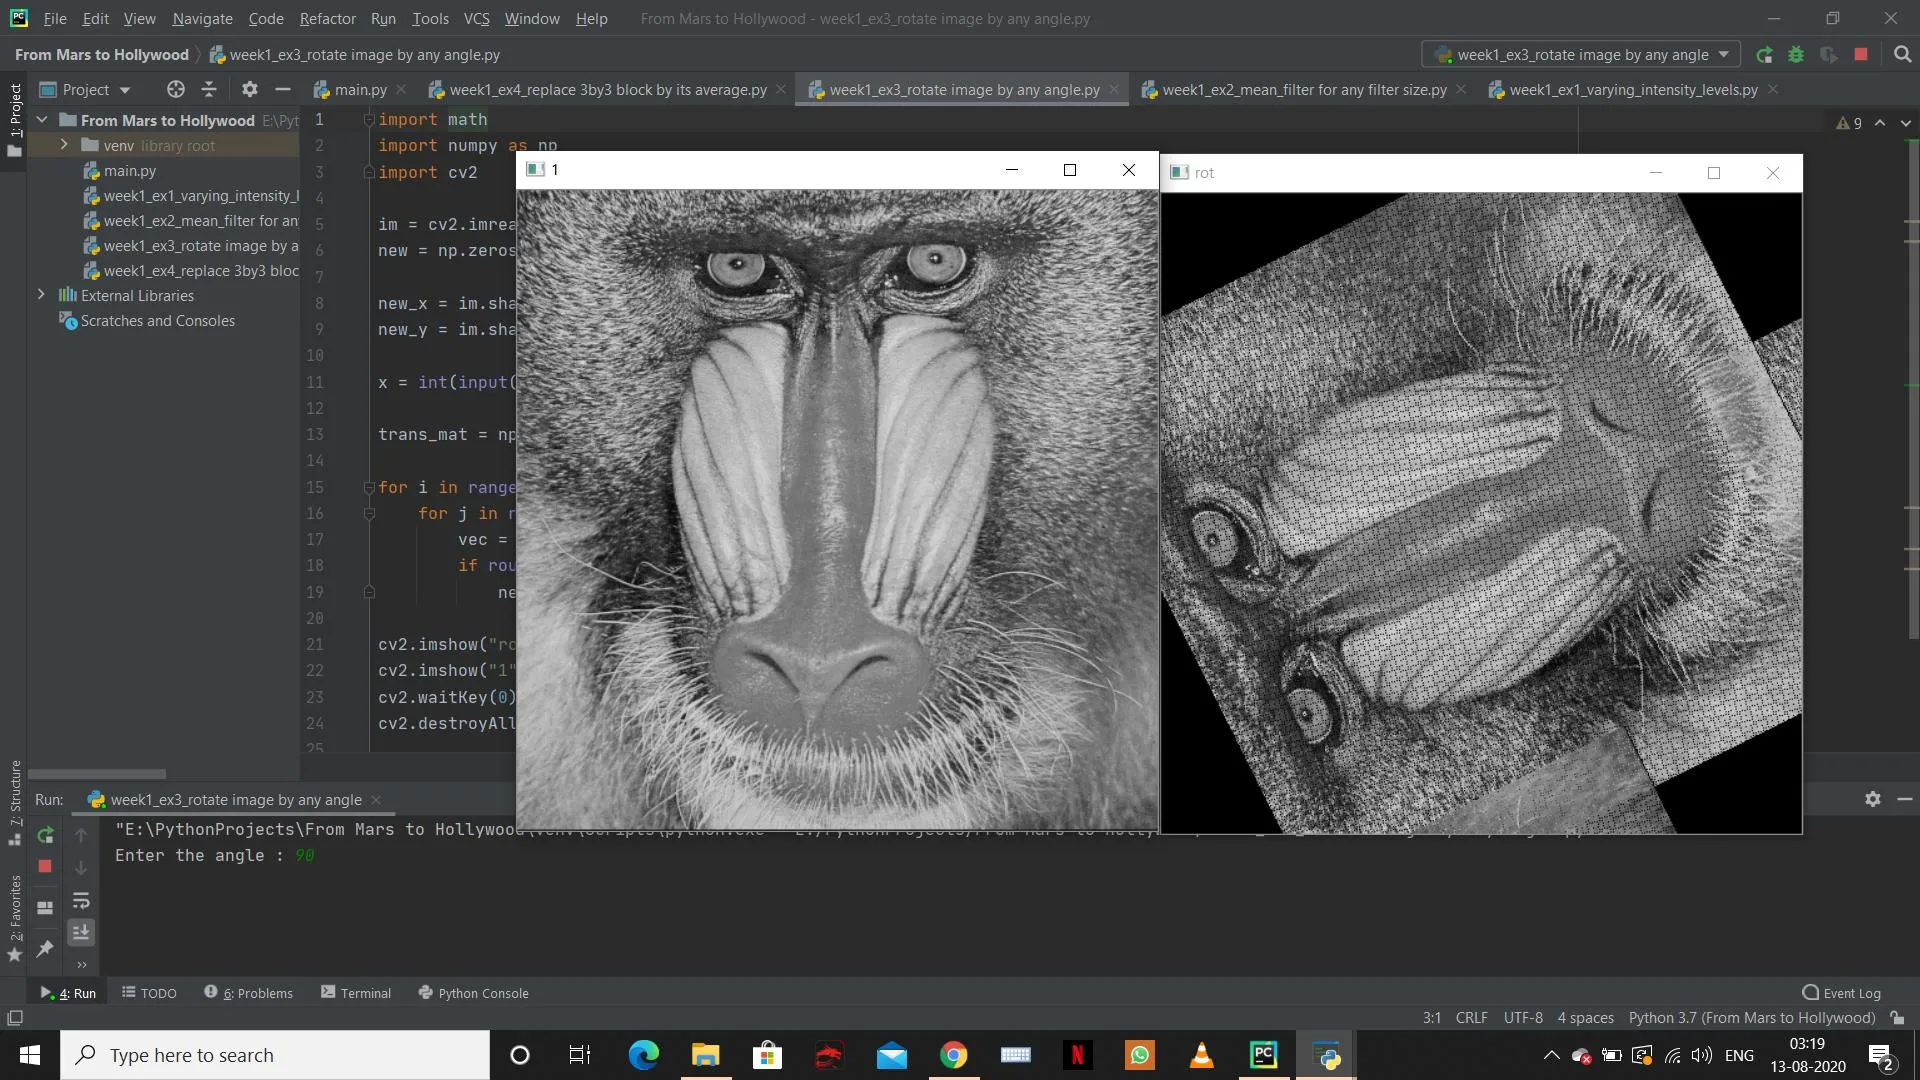
我正在尝试对任意给定角度的图像进行旋转。 我是以图像中心为原点进行旋转的。

但是代码没有按预期进行旋转。 我在下面附上了代码。

import math
import numpy as np
import cv2

im = cv2.imread("Samples\\baboon.jpg", cv2.IMREAD_GRAYSCALE)
new = np.zeros(im.shape,np.uint8)

new_x = im.shape[0] // 2
new_y = im.shape[1] // 2

x = int(input("Enter the angle : "))

trans_mat = np.array([[math.cos(x), math.sin(x), 0],[-math.sin(x), math.cos(x), 0],[0, 0, 1]])

for i in range(-new_x, im.shape[0] - new_x):
    for j in range(-new_y, im.shape[1] - new_y):
        vec = np.matmul([i, j, 1], trans_mat)
        if round(vec[0] + new_x) < 512 and round(vec[1] + new_y) < 512:
            new[round(vec[0]+new_x), round(vec[1]+new_y)] = im[i+new_x,j+new_y]

cv2.imshow("rot",new)
cv2.imshow("1",im)
cv2.waitKey(0)
cv2.destroyAllWindows()

它为什么不工作? - Mad Physicist
我不知道,它会产生扭曲,并且旋转也不正确。 - Ttp waala
您可以在问题中插入图片的地方之一。请发布一张小图片和旋转版本,以便您解释为什么不满意。 - Mad Physicist
我不想使用任何直接的函数,我想理解它背后的逻辑和数学,谢谢 :) - Ttp waala
2
你是将角度放入 cossin 中吗?它们需要弧度。 - Cris Luengo
显示剩余3条评论
3个回答

6

看起来你正在尝试实现最近邻重取样器。你正在遍历图像,并将每个输入像素映射到输出图像中的新位置。这可能会导致出现问题,例如像素不正确地覆盖,输出像素被留空等。

基于经验,我建议你从相反的角度考虑问题。而不是关注输入像素在输出中的位置,你应该考虑每个输出像素在输入中的来源。这样,你就没有关于最近邻的歧义,整个图像数组都将被填充。

你想绕中心旋转。你正在使用的当前旋转矩阵是以(0, 0)为中心旋转的。为了补偿这一点,你需要将图像的中心平移到(0, 0),旋转后再平移回去。我会向你展示如何手动进行这些单独的操作,然后再将它们组合成变换矩阵,而不是开发完整的仿射矩阵。

手动计算

首先获取输入和输出图像:

im = cv2.imread("Samples\\baboon.jpg", cv2.IMREAD_GRAYSCALE)
new = np.zeros_like(im)

确定旋转中心。明确您的尺寸,x 通常是列(维度 1),而不是行(维度 0):

center_row = im.shape[0] // 2
center_col = im.shape[1] // 2

计算图像中每个像素的径向坐标,形状应与相应的维度相同:

row_coord = np.arange(im.shape[0])[:, None] - center_row
col_coord = np.arange(im.shape[1]) - center_col

row_coordcol_coord 是在输出图像中距离中心的距离。现在计算它们在输入中的来源位置。请注意,我们可以使用广播来避免需要循环。我在这里遵循您最初的角度定义约定,并找到反转来确定源位置。这里的大区别在于将以度为单位的输入转换为弧度,因为三角函数所需的单位是弧度:

angle = float(input('Enter Angle in Degrees: ')) * np.pi / 180.0 
source_row = row_coord * np.cos(angle) - col_coord * np.sin(angle) + center_row
source_col = row_coord * np.sin(angle) + col_coord * np.cos(angle) + center_col

如果所有的索引保证在输入图像内,甚至不需要预先分配输出。你只需要简单地执行new = im[source_row, source_col]。然而,你需要掩盖这些索引:
mask = source_row >= 0 & source_row < im.shape[0] & source_col >= 0 & source_col < im.shape[1]
new[mask] = im[source_row[mask].round().astype(int), source_col[mask].round().astype(int)]

仿射变换

现在让我们来看看如何使用仿射变换。首先,您需要从坐标中减去中心点。假设您有一个列向量 [[r], [c], [1]]。将其平移到原点的矩阵为:

[[r']    [[1  0 -rc]  [[r]
 [c']  =  [0  1 -cc] . [c]
 [1 ]]    [0  0  1 ]]  [1]]

接着应用(反向的)旋转:

[[r'']    [[cos(a) -sin(a) 0]  [[r']
 [c'']  =  [sin(a)  cos(a) 0] . [c']
 [ 1 ]]    [  0       0    1]]  [1 ]]

最后,您需要将其翻译回中心。
[[r''']    [[1  0 rc]  [[r'']
 [c''']  =  [0  1 cc] . [c'']
 [ 1  ]]    [0  0  1]]  [ 1 ]]

如果你按照从右到左的顺序将这三个矩阵相乘,你会得到:
   [[cos(a)   -sin(a)    cc * sin(a) - rc * cos(a) + rc]
M = [sin(a)    cos(a)   -cc * cos(a) - rc * sin(a) + cc]
    [  0         0                      1              ]]

如果您构建一个完整的输出坐标矩阵,而不是我们开始使用的子集数组,您可以使用np.matmul(又名@运算符)来为您执行乘法。但对于这样一个简单的情况,没有必要使用这种复杂程度。
matrix = np.array([[np.cos(angle), -np.sin(angle),  col_center * np.sin(angle) - row_center * np.cos(angle) + row_center],
                   [np.sin(angle),  np.cos(angle), -col_center * np.cos(angle) - row_center * np.sin(angle) + col_center],
                   [0, 0, 1]])

coord = np.ones((*im.shape, 3, 1))
coord[..., 0, :] = np.arange(im.shape[0]).reshape(-1, 1, 1, 1)
coord[..., 1, :] = np.arange(im.shape[1]).reshape(-1, 1, 1)

source = (matrix @ coord)[..., :2, 0]

处理的其余部分与手动计算非常相似。
mask = (source >= 0 & source_row < im.shape).all(axis=-1)
new[mask] = im[source[0, mask].round().astype(int), source_col[1, mask].round().astype(int)]

非常感谢您提供如此详细的解释。但是我不理解掩码部分的含义以及它的使用方式。 - Ttp waala
@AmanJain。掩码只选择在边界内的坐标。检查是为了确保行和列都在零和图像相应大小之间。 - Mad Physicist
@MadPhysicist 在这一行中 mask = (source >= 0 & source_row < im.shape).all(axis=-1),如果我没错的话,实际坐标是最后一个轴,所以我对掩码的工作原理感到困惑。我正在使用形状为(574x366x3)的图像。 Source 的形状为(576x366x3x2)。所以我相信x、y 坐标是第3个轴。并且它们被重复了三次(第2个轴)。在这种设置下,source_rowsource_col 应该是什么样子的? - kleerofski
如果我执行 ((source>=0)&(source[...,0]<img.shape[0])&(source[...,1]<img.shape[1])),我会得到一个 ValueError 错误,因为 (574,366,3,2) 与 (574,366,3) 不匹配。 - kleerofski
@MadPhysicist 好的,我意识到布尔数组具有不同的形状,所以我只是在最后一个轴上将它们连接起来,然后它就可以工作了。非常感谢你。 - kleerofski

3

我尝试实现Madphysicist的矩阵乘法方法。以下是实现方法,供有兴趣的人参考:

#!/usr/bin/env python
# -*- coding: utf-8 -*-

import numpy as np
import matplotlib.pyplot as plt
from pathlib import Path

path = Path(".")
img = plt.imread(path.resolve().parent / "img_align" / "faces_imgs" / "4.jpg")
angle = 15


def _transform(rot_mat, x, y):
    """
    conveninece method for matrix multiplication
    """
    return np.matmul(rot_mat, np.array([x, y, 1]))


def rotate(img, angle):
    angle %= 360
    angle = np.radians(angle)
    new = np.zeros_like(img)
    cx, cy = tuple(x / 2 for x in img.shape[:2])

    # Angles are reverse as we are interpolating from destination to source
    rot_mat = np.array(
        [
            [np.cos(-angle), -np.sin(-angle), 0],
            [np.sin(-angle), np.cos(-angle), 0],
            [0, 0, 1],
        ]
    )

    rot_mat[0, 2], rot_mat[1, 2], _ = _transform(rot_mat, -cx, -cy)

    # build combined affine transformation matrrix
    rot_mat[0, 2] += cx
    rot_mat[1, 2] += cy

    coord = np.ones((*img.shape, 3, 1))  # [576x336x3x3x1]
    coord[..., 0, :] = np.arange(img.shape[0]).reshape(-1, 1, 1, 1)
    coord[..., 1, :] = np.arange(img.shape[1]).reshape(-1, 1, 1)

    source = (rot_mat @ coord)[..., :2, 0]
    x_mask = source[..., 0]
    y_mask = source[..., 1]
    mask = (
        (x_mask >= 0)
        & (x_mask < img.shape[0])
        & (y_mask >= 0)
        & (y_mask < img.shape[1])
    ).all(axis=-1)

    # Clipping values to avoid IndexError
    new[mask] = img[
        x_mask[..., 0][mask].round().astype(int).clip(None, img.shape[0] - 1),
        y_mask[..., 1][mask].round().astype(int).clip(None, img.shape[1] - 1),
    ]
    plt.imsave("test.jpg", new)


if __name__ == "__main__":
    rotate(img, angle)

1
我认为这就是你在寻找的内容:如何在OpenCV中正确旋转图像? 以下是代码。
ang = int(input("Enter the angle : "))
im = cv2.imread("Samples\\baboon.jpg", cv2.IMREAD_GRAYSCALE)


def rotimage(image):
    row,col = image.shape[0:2]
    center=tuple(np.array([col,row])/2)
    rot_mat = cv2.getRotationMatrix2D(center,ang,1.0)
    new_image = cv2.warpAffine(image, rot_mat, (col,row))
    return new_image


new_image = rotimage(im)
cv2.imshow("1",new_image)
cv2.waitKey(0)

网页内容由stack overflow 提供, 点击上面的
可以查看英文原文,
原文链接