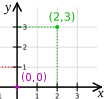
LibGDX使用的坐标系将(0,0)设为左下角。(类似于这张图片: http://i.stack.imgur.com/jVrJ0.png)
这让我感到十分头疼,主要是因为我正在移植一个已经使用了通常坐标系(其中0,0位于左上角)的游戏。
我的问题是: 是否有简单的方法可以更改这个坐标系?
LibGDX使用的坐标系将(0,0)设为左下角。(类似于这张图片: http://i.stack.imgur.com/jVrJ0.png)
这让我感到十分头疼,主要是因为我正在移植一个已经使用了通常坐标系(其中0,0位于左上角)的游戏。
我的问题是: 是否有简单的方法可以更改这个坐标系?
如果你使用相机(你应该这样做),改变坐标系是相当简单的:
camera= new OrthographicCamera(Gdx.graphics.getWidth(), Gdx.graphics.getHeight());
camera.setToOrtho(true, Gdx.graphics.getWidth(), Gdx.graphics.getHeight());
稍微解释一下badlogic上面说的,如果你正在使用TextureAtlas(带有TextureRegions),除了相机工作外,你还需要像badlogic所说的那样翻转它们。如果你正在使用TextureAtlas,你可以在加载atlas后立即使用以下代码:
String textureFile = "data/textures.txt";
atlas = new TextureAtlas(Gdx.files.internal(textureFile), Gdx.files.internal("data"));
// Let's flip all the regions.  Required for y=0 is TOP
Array<AtlasRegion> tr = atlas.getRegions();
for (int i = 0; i < tr.size; i++) {
  TextureRegion t = tr.get(i);
  t.flip(false, true);
}
我刚刚创建了一个继承自SpriteBatch的类,覆盖了某些方法,并添加了y = Gdx.graphics.getHeight() - y - height。简单而有效。
我成功地使用建议的翻转坐标系通过正交相机正确地渲染了纹理和字体。这是我所做的:
private SpriteBatch batch;
private BitmapFont font;
private OrthographicCamera cam;
private Texture tex;

@Override
public void create () {
    batch = new SpriteBatch();

    font = new BitmapFont(true);
    font.setColor(Color.WHITE);

    cam = new OrthographicCamera(Gdx.graphics.getWidth(), Gdx.graphics.getHeight());
    cam.setToOrtho(true, Gdx.graphics.getWidth(), Gdx.graphics.getHeight());
    tex = new Texture("badlogic.jpg");
}

@Override
public void dispose() {
    batch.dispose();
    font.dispose();
    tex.dispose();
}

@Override
public void render () {
    cam.update();
    batch.setProjectionMatrix(cam.combined);

    Gdx.gl.glClearColor(0, 0, 0, 1);
    Gdx.gl.glClear(GL20.GL_COLOR_BUFFER_BIT);
    batch.begin();

    font.draw(batch, "Test", 50, 50);
    batch.draw(tex, 100, 100, tex.getWidth(), tex.getHeight(), 0, 0, tex.getWidth(), tex.getHeight(), false, true);

    batch.end();
}
需要注意的重要事项包括:
现在我们将看看今晚是否会回到这里进行编辑,以修复任何其他问题或发现。