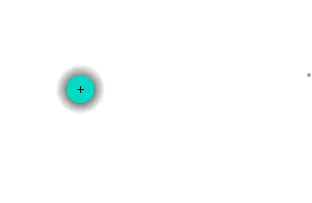
我希望将浮动操作按钮的阴影颜色从黑色/灰色更改为colorprimary/自定义阴影颜色,如下图所示的中央蓝色FAB按钮的浅蓝色阴影,而不是灰色阴影。但我们可以更改FAB按钮的背景颜色。但是,正如您在图像中看到的那样,有FAB按钮的蓝色阴影。我希望实现这件事情。

尝试这样做 :: app:backgroundTint="@color/colorAccentGrey"
其中colorAccentGrey = YourColor
如果忘记了,请在XML开头放置xmlns:app="http://schemas.android.com/apk/res-auto"
要去除阴影,请使用:app:elevation="0dp"
希望这能帮到您.. :)
我认为你有两个选择:
app:borderWidth="0dp"
请参考 Material Design 文档中的正常和迷你 FAB 键属性!
链接 - https://material.io/components/buttons-floating-action-button/android
没有一个答案对我有用。所以我自己写了这个。无论如何它会产生阴影效果,这对我来说已经足够了。
<com.google.android.material.floatingactionbutton.FloatingActionButton
        android:layout_width="wrap_content"
        android:layout_height="wrap_content"
        android:src="@drawable/ic_add_black"
        app:elevation="0dp" // disable outside shawdow
        app:borderWidth="30dp" // make borderwidth to 25dp or height of fab
        app:backgroundTint="#00E5FF" // now you will see only this color with shawdow
        android:backgroundTint="#00E5FF" // since border is 30dp u ll not see this color and if you want to check reduce border width to 25dp then ull see this color in center as a small dot.
        />
虽然晚了一些,但我找到了解决方案。让我们开始吧:
<?xml version="1.0" encoding="utf-8"?>
    <shape android:shape="oval"
     xmlns:android="http://schemas.android.com/apk/res/android">
    <gradient android:type="radial"
        android:startColor="@color/black"
        android:endColor="@android:color/transparent"
        android:gradientRadius="50dp"/>
    </shape>
startColor 是阴影的颜色,我这里使用黑色。
    <?xml version="1.0" encoding="utf-8"?>
        <androidx.coordinatorlayout.widget.CoordinatorLayout
        xmlns:android="http://schemas.android.com/apk/res/android"
        xmlns:app="http://schemas.android.com/apk/res-auto"
        xmlns:tools="http://schemas.android.com/tools"
        android:layout_width="match_parent"
        android:layout_height="match_parent"
        tools:context=".MainActivity">
       <com.google.android.material.floatingactionbutton.FloatingActionButton
           android:layout_width="wrap_content"
           android:layout_height="wrap_content"
           android:layout_gravity="center"
           android:id="@+id/fab"
           android:src="@drawable/ic_add"/>
        <View
            android:layout_width="100dp"
            android:layout_height="100dp"
            android:background="@drawable/shadow_bg"
            app:layout_anchor="@id/fab"
            app:layout_anchorGravity="center"
            android:padding="10dp"/>

        </androidx.coordinatorlayout.widget.CoordinatorLayout>
享受吧,你已经可以开始了。