我需要创建一个水平按钮列表,没有像这个
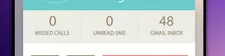 一样的分隔空间。
每个按钮都将包含文本和图标。我了解buttonbarlayout,但它对我无效,请有人帮忙,谢谢。
一样的分隔空间。每个按钮都将包含文本和图标。我了解buttonbarlayout,但它对我无效,请有人帮忙,谢谢。
一样的分隔空间。<LinearLayout
android:layout_width="match_parent"
android:layout_height="match_parent"
android:orientation="horizontal">
<Button
android:layout_width="wrap_content"
android:layout_height="wrap_content"
android:layout_weight="1"
android:drawableTop="@drawable/read"
android:text="Rewards" />
<Button
android:layout_width="wrap_content"
android:layout_height="wrap_content"
android:layout_weight="1"
android:drawableTop="@drawable/read"
android:text="Places" />
<Button
android:layout_width="wrap_content"
android:layout_height="wrap_content"
android:layout_weight="1"
android:drawableTop="@drawable/read"
android:text="Challenges" />
</LinearLayout>
BottomNavigationView元素来实现此功能: <android.support.design.widget.BottomNavigationView
xmlns:android="http://schemas.android.com/apk/res/android"
xmlns:app="http://schemas.android.com/apk/res-auto"
android:id="@+id/navigation"
android:layout_width="match_parent"
android:layout_height="56dp"
android:layout_gravity="start"
app:menu="@menu/my_navigation_items" />
res/menu/my_navigation_items.xml:
<menu xmlns:android="http://schemas.android.com/apk/res/android">
    <item android:id="@+id/action_search"
          android:title="@string/menu_search"
          android:icon="@drawable/ic_search" />
    <item android:id="@+id/action_settings"
          android:title="@string/menu_settings"
          android:icon="@drawable/ic_add" />
    <item android:id="@+id/action_navigation"
          android:title="@string/menu_navigation"
          android:icon="@drawable/ic_action_navigation_menu" />
</menu>
 <LinearLayout
        android:layout_width="match_parent"
        android:layout_height="50dp"
        android:weightSum="4"
        android:id="@+id/func"
        android:layout_above="@+id/btn_next">

        <Button
            android:id="@+id/btn_bgm"
            android:layout_width="wrap_content"
            android:layout_weight="1"
            android:background="#3279CE"
            android:layout_height="wrap_content"
            android:layout_below="@+id/pager_image"
            android:text="BitRate"/>

        <Button
            android:id="@+id/btn_time"
            android:layout_width="wrap_content"
            android:layout_height="wrap_content"
            android:layout_weight="1"
            android:background="#3279CE"
            android:text="time"
            />


        <Button
            android:id="@+id/btn_effect"
            android:layout_width="wrap_content"
            android:layout_height="wrap_content"
            android:layout_weight="1"
            android:background="#3279CE"
            android:text="effect" />
        <Button
            android:id="@+id/frame"
            android:layout_width="wrap_content"
            android:layout_height="wrap_content"
            android:layout_weight="1"
            android:background="#3279CE"
            android:text="FRAME" />


    </LinearLayout>
android:drawableRight="@drawable/..."将可绘制对象放置在文本右侧即可。 - Victor Zamanianprivate LinearLayout tabLayout;
FrameLayout tab1 = (FrameLayout) LayoutInflater.from(this).inflate(R.layout.tab_cell, null);
tab1.findViewById(R.id.click_view).setOnClickListener(this);
tab1.findViewById(R.id.click_view).setTag(First_TAB);
textviewone = (TextView) tab1.findViewById(R.id.tab_header);
textviewone.setWidth(SMALL_TAB_WIDTH);
textviewone.setText("Rewards");
textviewone.setCompoundDrawablesWithIntrinsicBounds(0, R.drawable.picture_s, 0, 0);
tabLayout.addView(tab1);
FrameLayout tab2 = (FrameLayout) LayoutInflater.from(this).inflate(R.layout.tab_cell,, null);
tab2.findViewById(R.id.click_view).setOnClickListener(this);
tab2.findViewById(R.id.click_view).setTag(Second_TAB);
secondtab = (TextView) tab2.findViewById(R.id.tab_header);
secondtab.setWidth(SMALL_TAB_WIDTH);
secondtab.setText(R.string.roster);
secondtab.setCompoundDrawablesWithIntrinsicBounds(0, R.drawable.icon_selector_s, 0, 0);
tabLayout.addView(tab2);
FrameLayout tab3 = (FrameLayout) LayoutInflater.from(this).inflate(R.layout.tab_cell, null);
tab3.findViewById(R.id.click_view).setOnClickListener(this);
tab3.findViewById(R.id.click_view).setTag(Third_TAB);
thirdtab = (TextView) tab3.findViewById(R.id.tab_header);
thirdtab.setWidth(SMALL_TAB_WIDTH);
thridtab.setText(R.string.copy_entry);
thridtab.setCompoundDrawablesWithIntrinsicBounds(0, R.drawable.select_activity_selector_s, 0, 0);
tabLayout.addView(tab3);
tab_cell.xml如下:
<?xml version="1.0" encoding="utf-8"?>
<FrameLayout
    xmlns:android="http://schemas.android.com/apk/res/android"
    android:layout_width="wrap_content" android:layout_height="wrap_content">
    <TextView
        android:id="@+id/tab_header"
        xmlns:android="http://schemas.android.com/apk/res/android"
        android:layout_width="wrap_content"
        android:layout_height="45dp"
        android:layout_weight="1"
        android:gravity="center"
        android:maxLines="1"
        android:textSize="10.5sp"/>
    <RelativeLayout
        android:id="@+id/click_view"
        android:layout_width="40dp"
        android:layout_height="40dp"
        android:layout_gravity="center"></RelativeLayout>
</FrameLayout>
以下是在代码中声明为tabLayout的活动中的线性布局:
 <LinearLayout
                        android:id="@+id/tabs" android:layout_width="wrap_content"
                        android:layout_height="wrap_content"
                        android:orientation="horizontal"
                        android:weightSum="10"></LinearLayout>
你在图片中看到的不是简单的按钮栏,而是称为底部导航栏,Android有专门的代码来实现它。在这个问题中,你可以学习如何创建和使用它。当然,你可以使用简单的XML或Java代码来更改颜色。希望你会觉得有帮助。