Beamer(pdflatex)中的半透明图形

5

我正在尝试使用覆盖图层和图片来避免为每个幻灯片创建不同的图片。覆盖图层可以与任何包含的文本一起使用,但无法与图片一起使用。例如:

\setbeamercovered{dynamic}
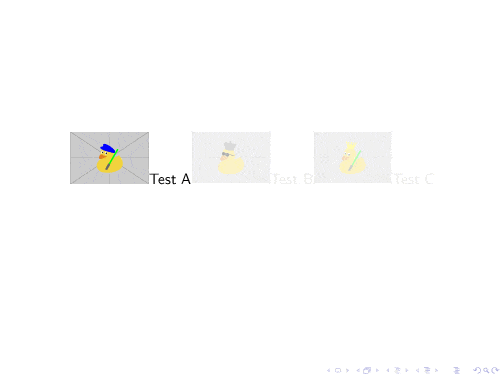
\begin{figure}\resizebox{10.0cm}{!}{
        \includegraphics{problem-a.pdf}
        Test A
        \pause
        \includegraphics{problem-b.pdf}
        Test B
        \pause
        \includegraphics{problem-c.pdf}
        Test C
}\end{figure}

在第一张幻灯片上,“Test B”和“Test C”的文本会被标记,但与“problem-b”和“problem-c”对应的数字不会被标记。


你包含的图形是pdf,你可以在外部编辑它们(使用inkscape、adobe的工具等),或将它们转换为位图(使用ghostscript、incscape等),然后编辑和包含(使用paint、paint.net、gimp等)。 - ocket8888
4个回答

4

如果有人偶然发现这篇文章,目前我发现最好的方法是使用tikz并设置自定义透明模式:

\gdef\transparent@value{100}
\newcommand{\getbeamertrans}{
    \transparent@value/100
}
\newcommand{\set@transparent}[1]{\gdef\transparent@value{#1}}
\def\opaquenessCustom#1{%
\only<1->{%
  \beamer@actions{%
    \set@transparent{#1}%
    \expandafter\xdef\csname beamer@oldcolorhook%
    \the\beamer@coveringdepth\endcsname{\beamer@colorhook}%
    \expandafter\xdef\csname beamer@oldpgfextension%
    \the\beamer@coveringdepth\endcsname{\beamer@pgfextension}%
    {\globalcolorstrue\colorlet{beamer@freeze\the\beamer@coveringdepth}{bg}}%
    \xdef\beamer@colorhook{!#1!beamer@freeze%
      \the\beamer@coveringdepth\beamer@colorhook}%
    \gdef\beamer@pgfextension{!#1opaque}%
    \color{.}%
  }%
  {%
    \set@transparent{100}%
    \xdef\beamer@colorhook{\csname beamer@oldcolorhook%
      \the\beamer@coveringdepth\endcsname}%
    \xdef\beamer@pgfextension{\csname beamer@oldpgfextension%
      \the\beamer@coveringdepth\endcsname}%
    \color{.}%
  }}%
}%
\define@key{beamer@mixin}{transparent}[15]{%
    \def\beamer@uncoverbeforeactions{\ignorespaces\opaquenessCustom{#1}}%
    \def\beamer@uncoverafteractions{\ignorespaces\opaquenessCustom{#1}}%
}
\newcommand{\BeamerGraphic}[1]{%
    \begin{tikzpicture}%
        {\node[opacity=\getbeamertrans] {\includegraphics{#1}};}%
    \end{tikzpicture}%
}

我知道这是一个老问题,但我无法让它工作...你包含了哪些软件包? - greschd
根据我的记录:subfigure、tikz、textcomp。 - Compholio

2
另一种方法是使用半透明形状暂时覆盖图像:

最初的回答。

\documentclass{beamer}
\usepackage{tikz}
\setbeamercovered{dynamic}

\begin{document}

\begin{frame}

\begin{figure}
    \includegraphics[width=2cm,page=1]{example-image-duck}
    Test A
    \pause
    \begin{tikzpicture}
    \node[anchor=south west,inner sep=0] (B) at (4,0) {\includegraphics[width=2cm,page=2]{example-image-duck}};
    \only<1>{%
        \fill [draw=none, fill=white, fill opacity=0.7] (B.north west) -- (B.north east) -- (B.south east) -- (B.south west) -- (B.north west) -- cycle;
    }
    \end{tikzpicture}
    Test B
    \pause  
     \begin{tikzpicture}
        \node[anchor=south west,inner sep=0] (B) at (4,0) {\includegraphics[width=2cm,page=3]{example-image-duck}};
        \only<1-2>{%
            \fill [draw=none, fill=white, fill opacity=0.7] (B.north west) -- (B.north east) -- (B.south east) -- (B.south west) -- (B.north west) -- cycle;
        }
     \end{tikzpicture}  
    Test C
\end{figure}
\end{frame}

\end{document}

enter image description here


这只对有实心背景的情况有效,即使你有渐变(或其他自定义)背景,调整不透明度也可以起作用。 - Compholio

0

我曾经做过类似的事情,方法如下:

\begin{figure}
                \includegraphics<1->{problem-a.pdf}
                \onslide<1->{Test A}                    
                \includegraphics<2->{problem-b.pdf}
                \onslide<1->{Test B}
                \includegraphics<3->{problem-c.pdf}
                \onslide<1->{Test C}
\end{figure}

也许对你有用


0

您可以在此文档中查找有关在pdflatex中使用导入图形的更多信息。请查找第12章:“叠加两个导入的图形”。


网页内容由stack overflow 提供, 点击上面的
可以查看英文原文,
原文链接