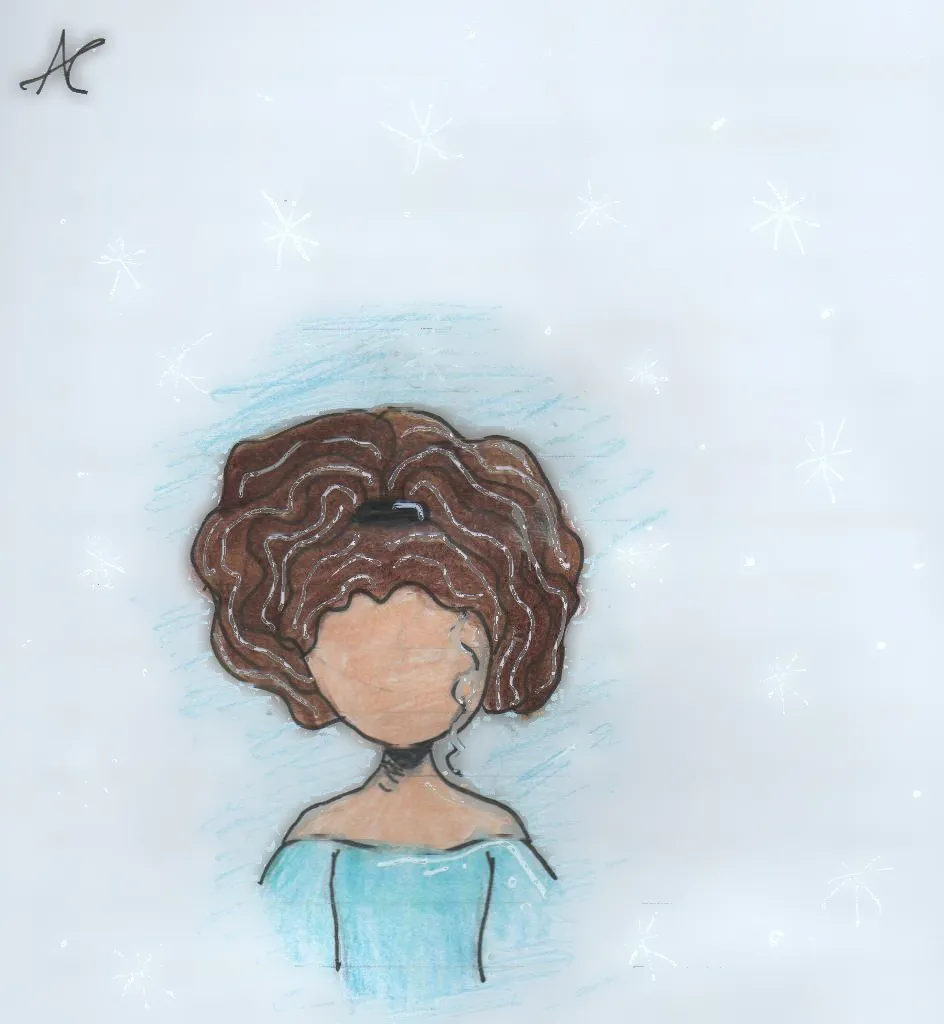
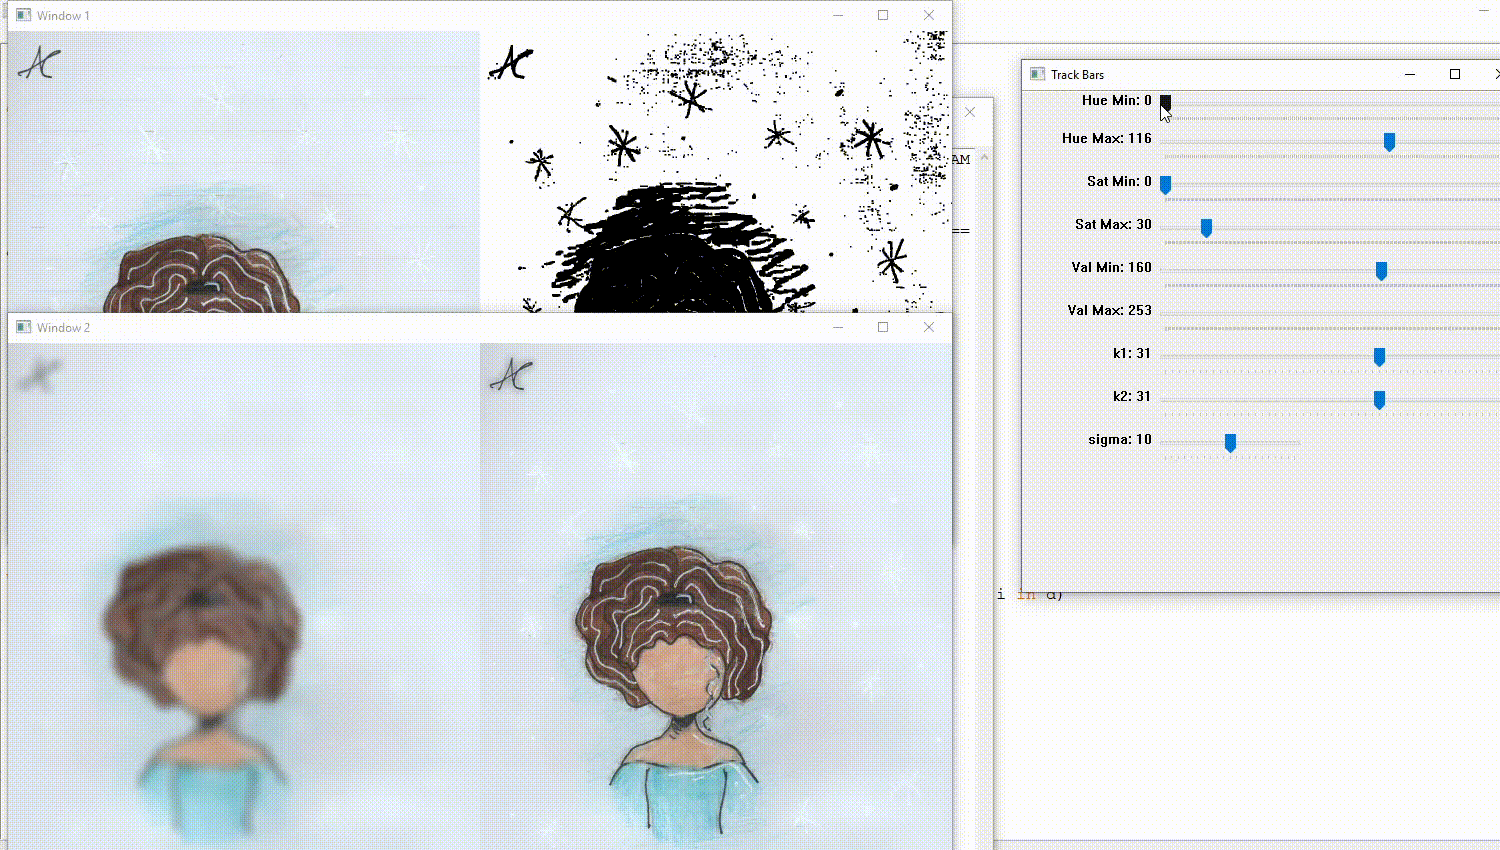
我正在尝试从我女儿的画中删除水平线,但是一直无法做到完美。
我的方法是创建一个具有水平线的掩模(https://dev59.com/w6zla4cB1Zd3GeqPFPQx#57410471),然后从原始图像中删除该掩模(https://docs.opencv.org/3.3.1/df/d3d/tutorial_py_inpainting.html)。
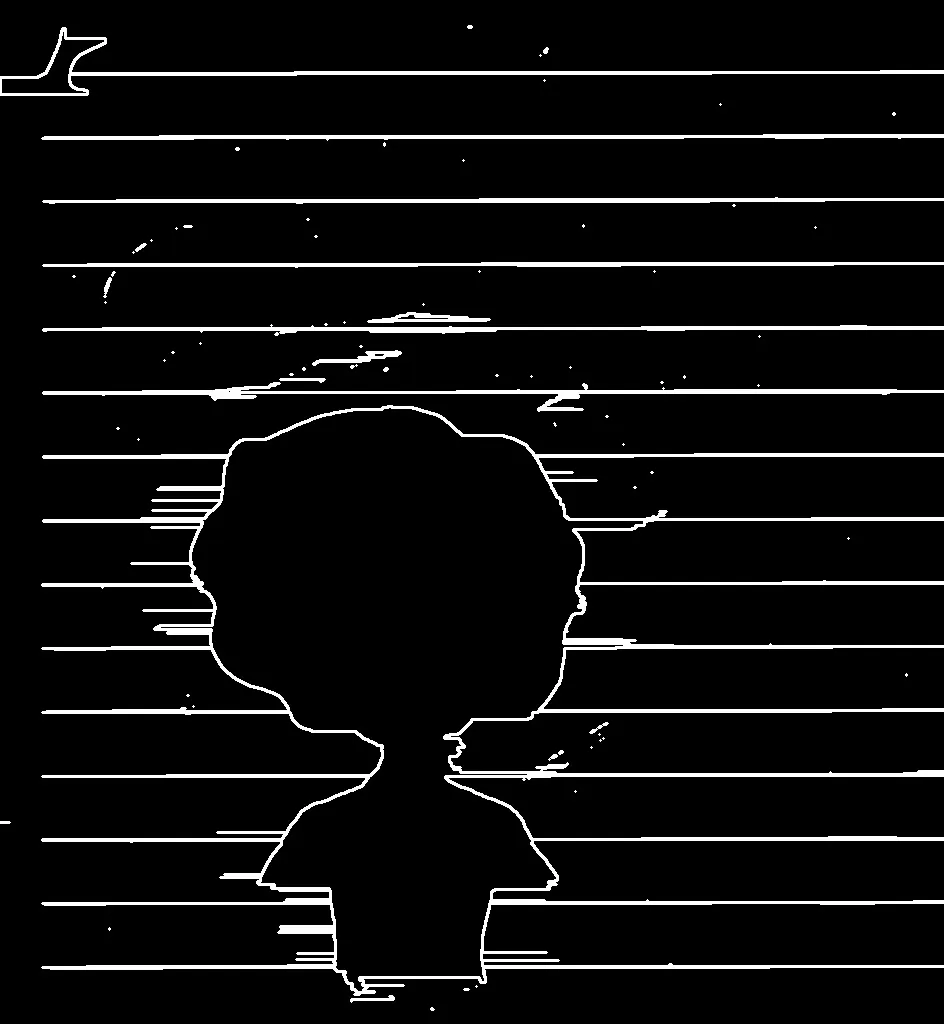
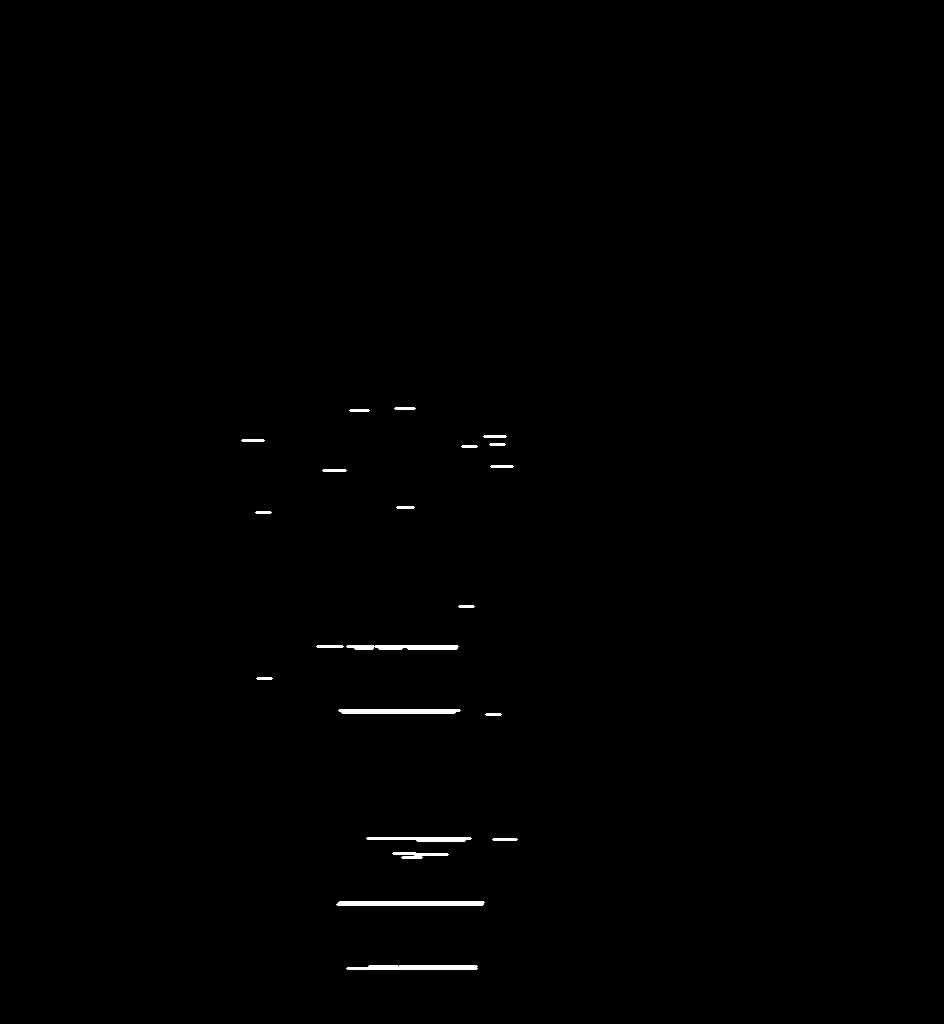
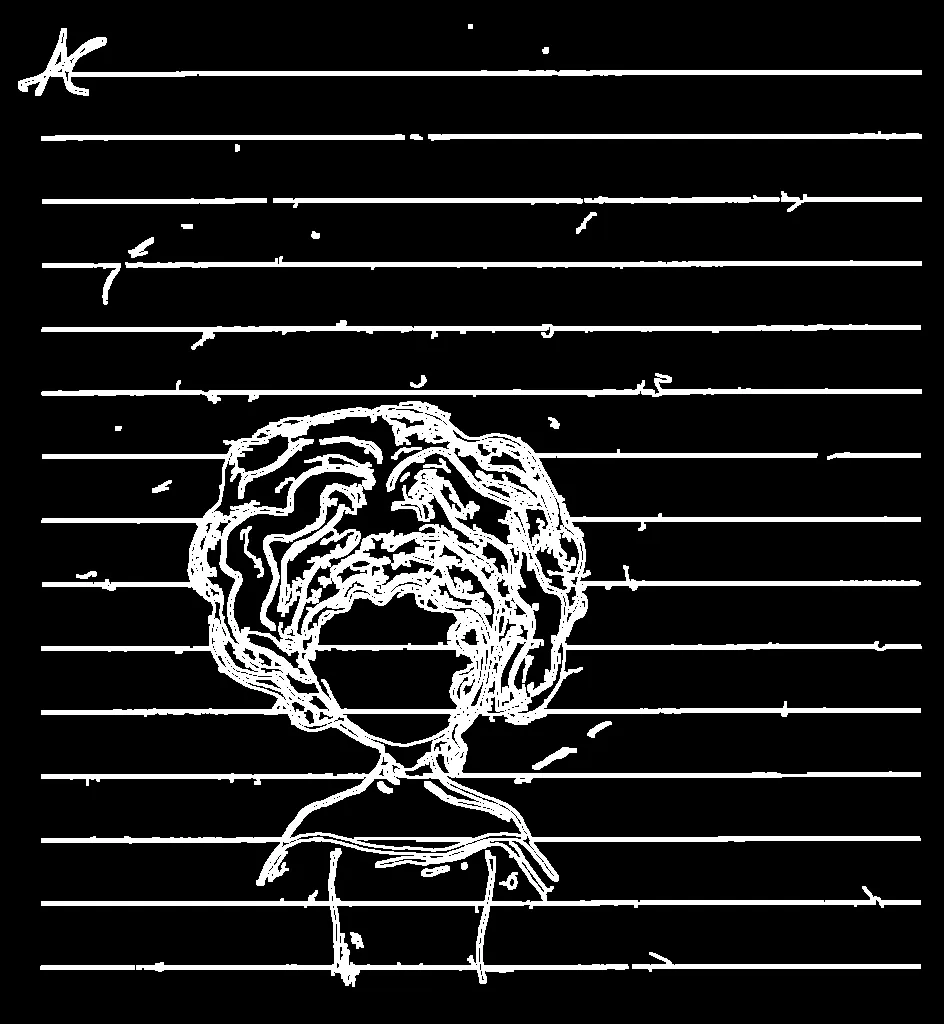
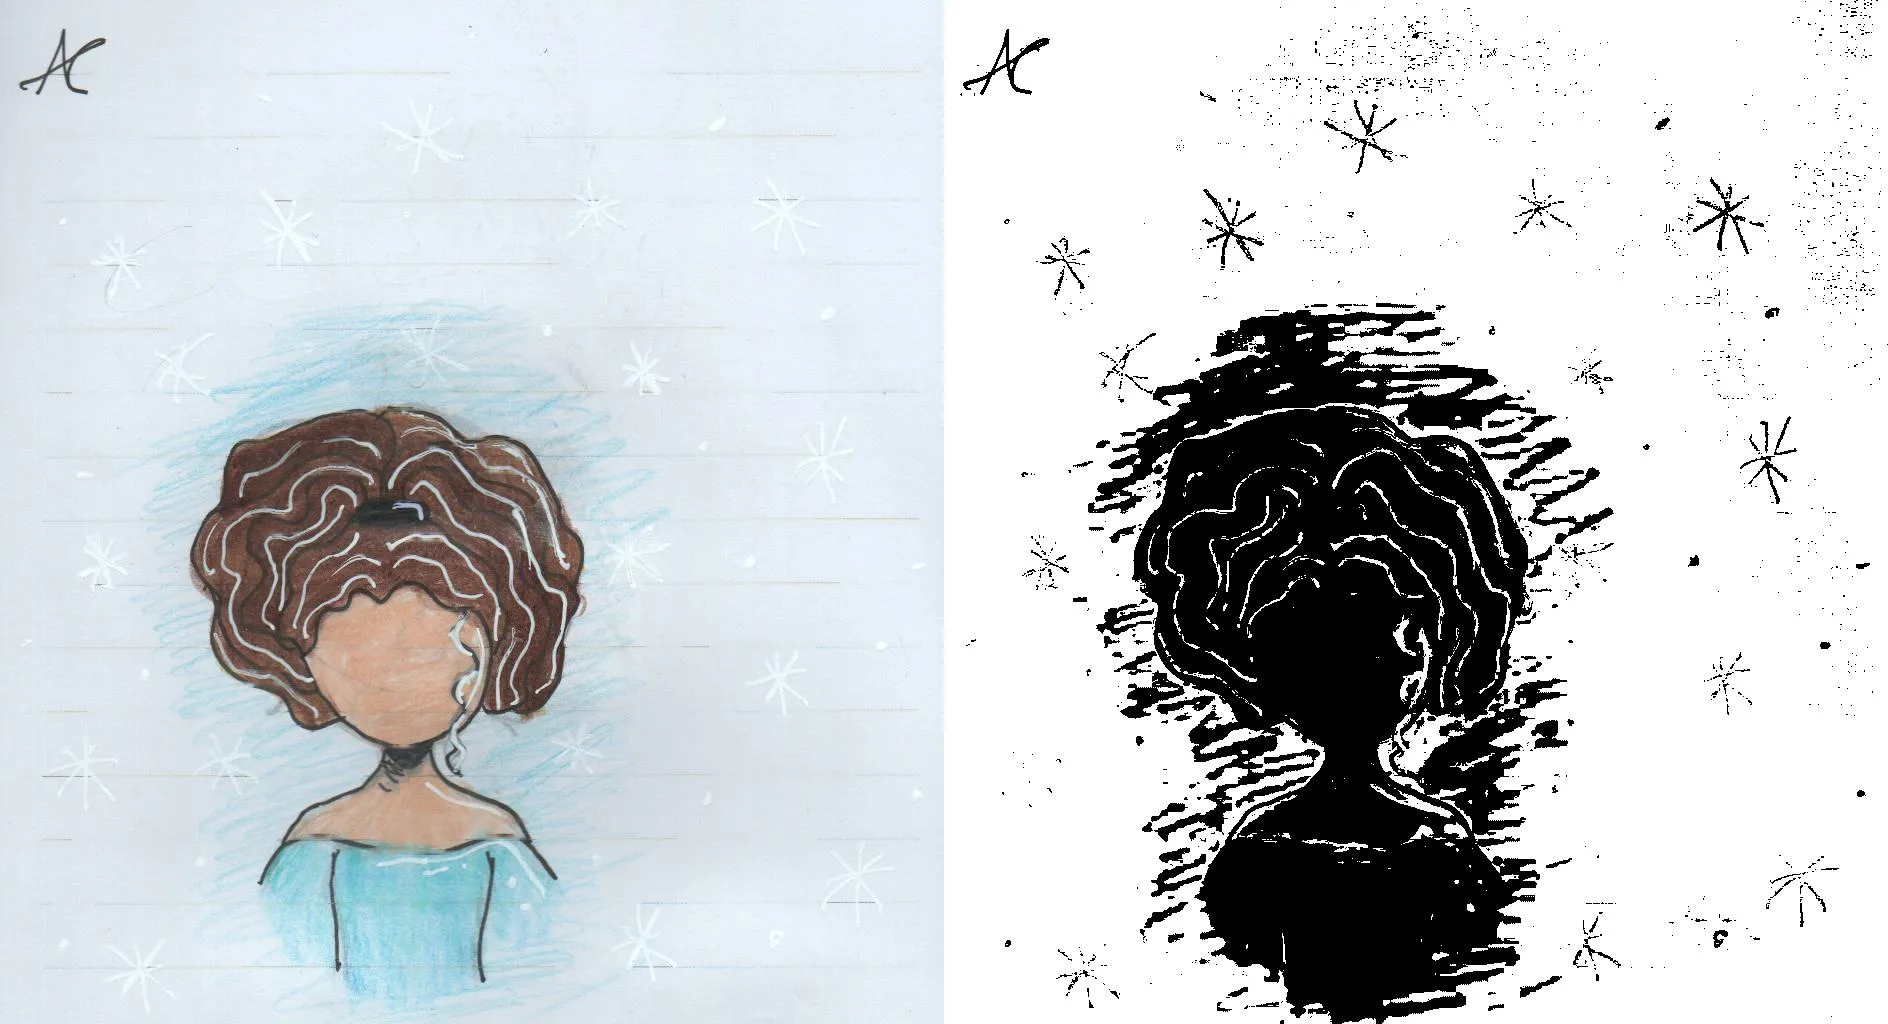
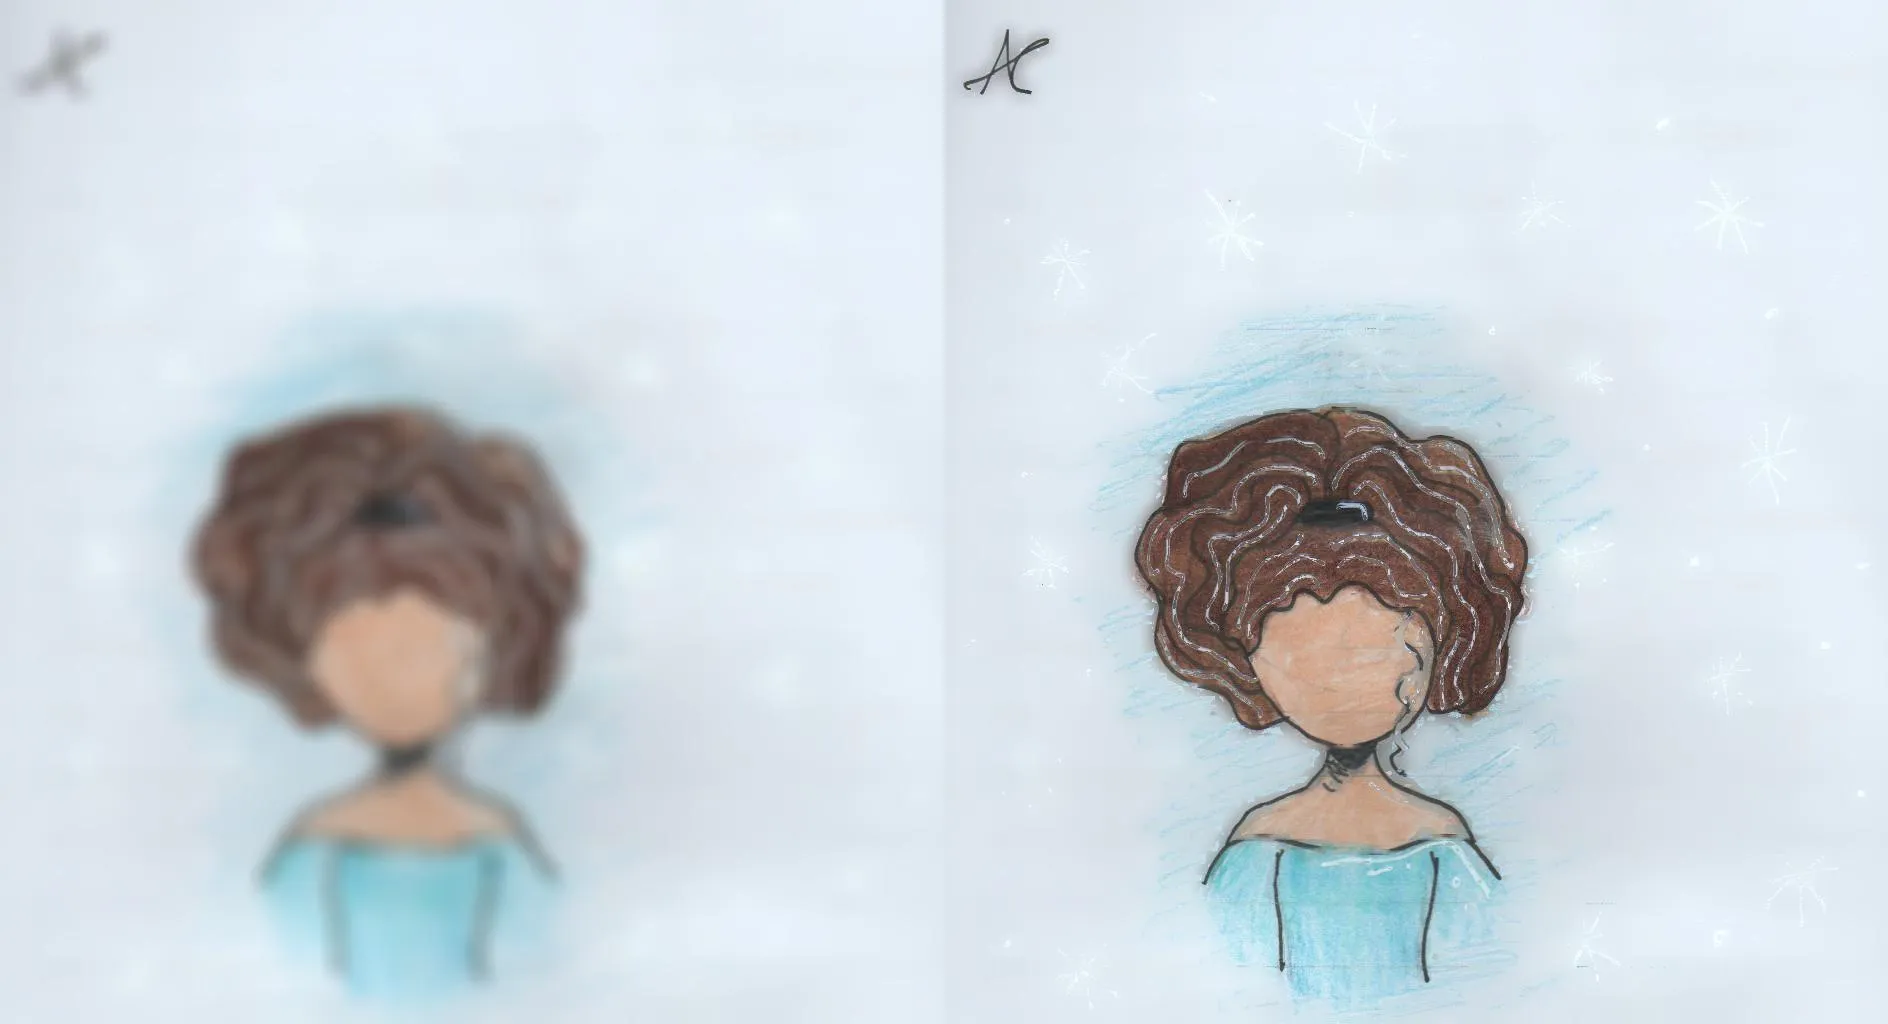
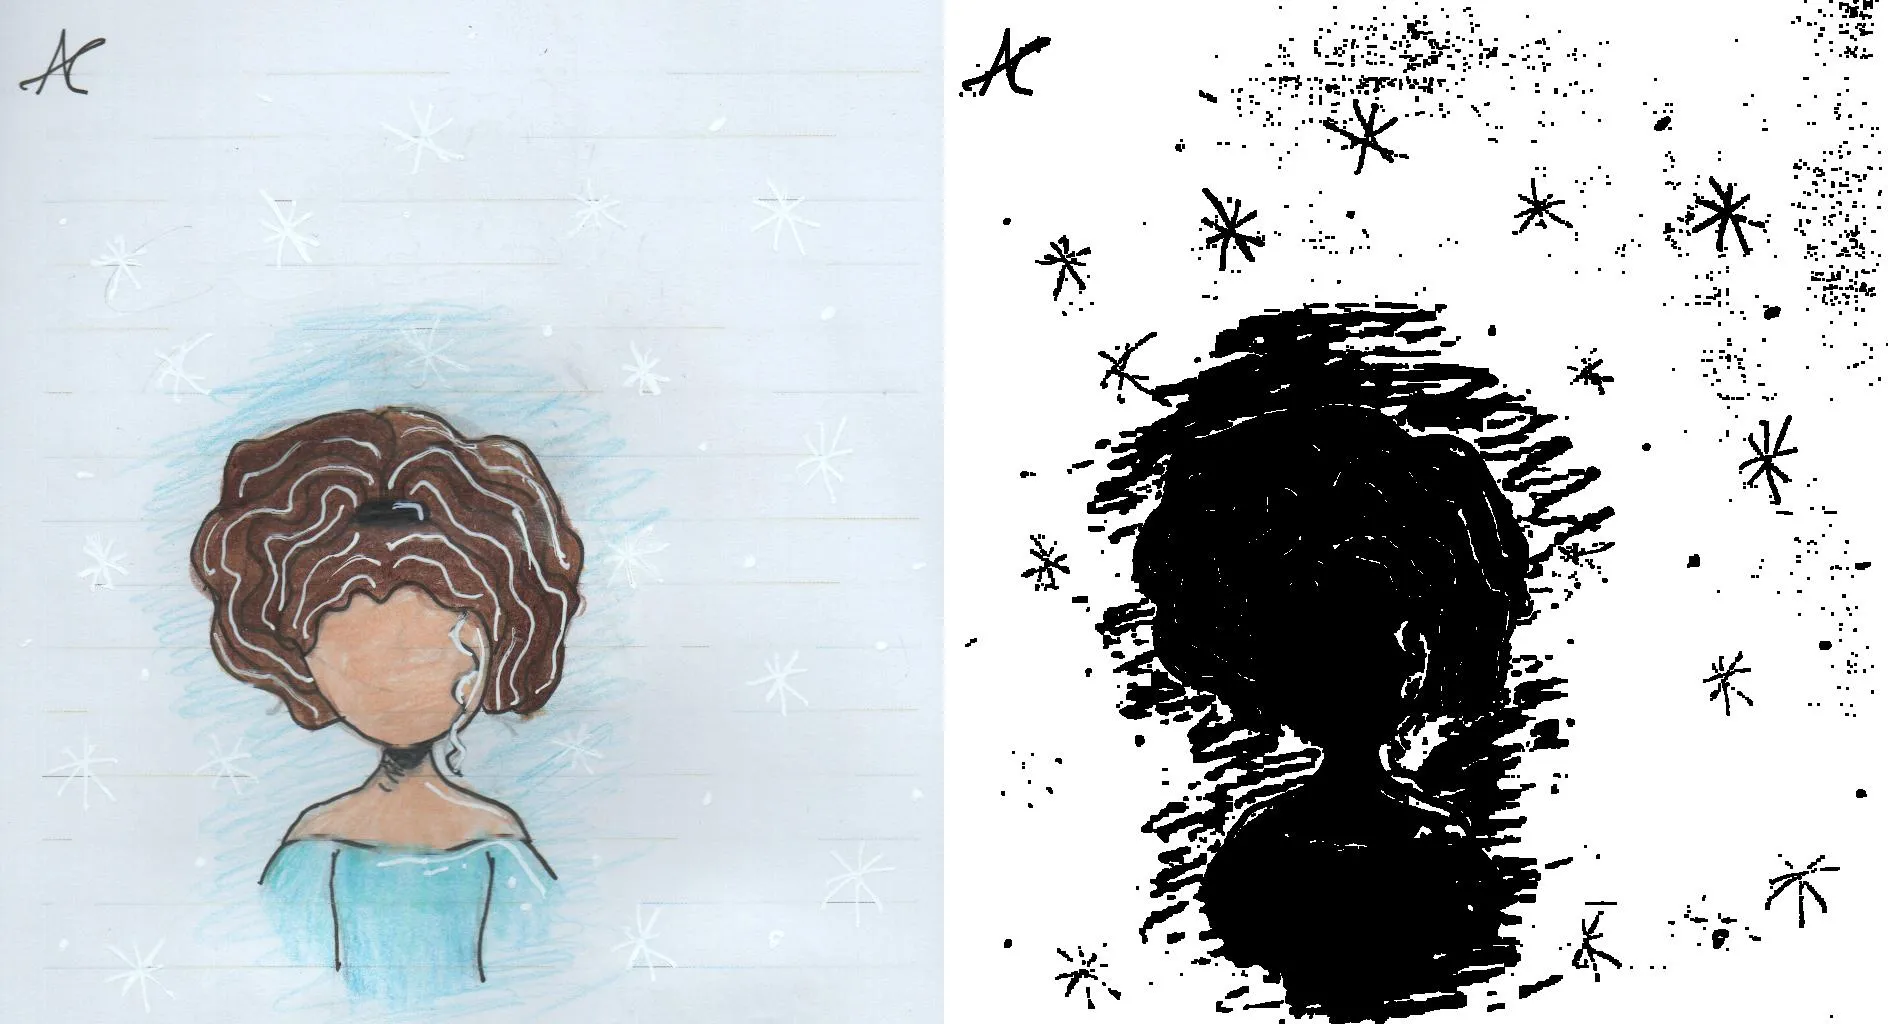
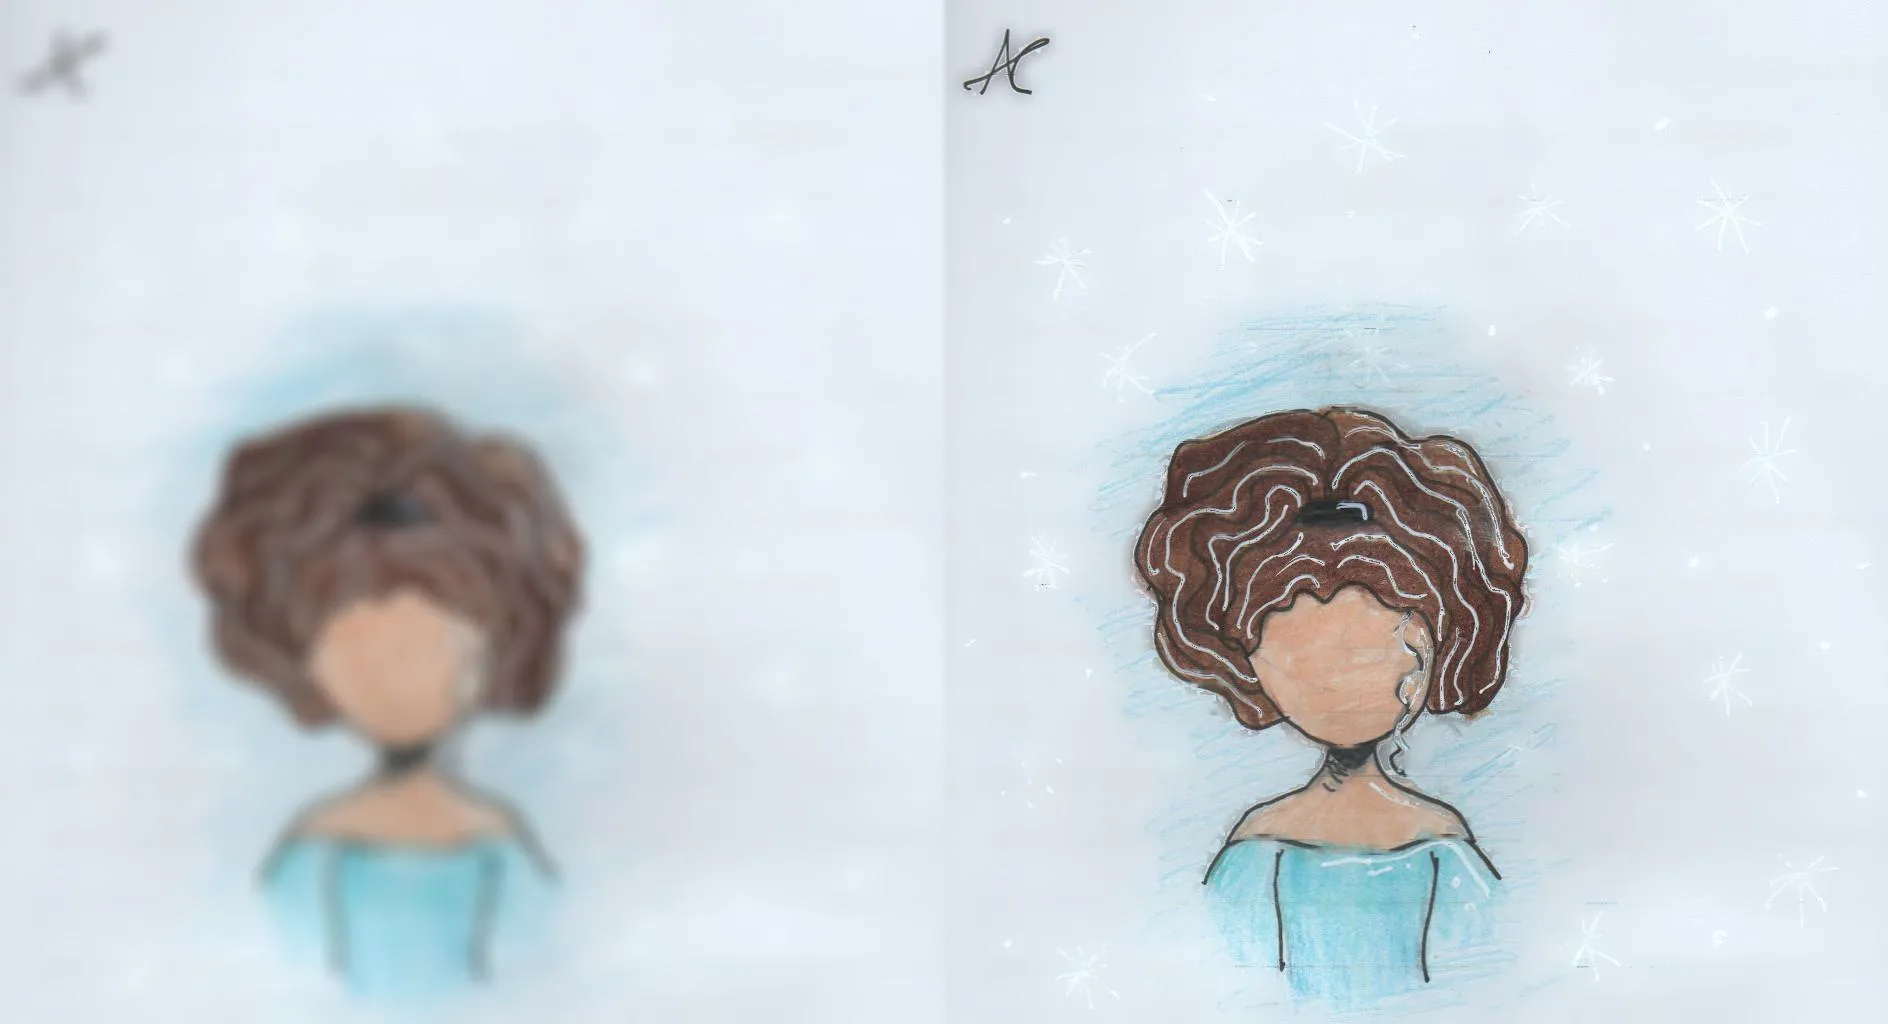
如下图所示,这只能部分地去除水平线,并且还会产生一些扭曲,因为一些原始图像的水平线也出现在了掩模中。
非常感谢任何帮助改进此方法的人!
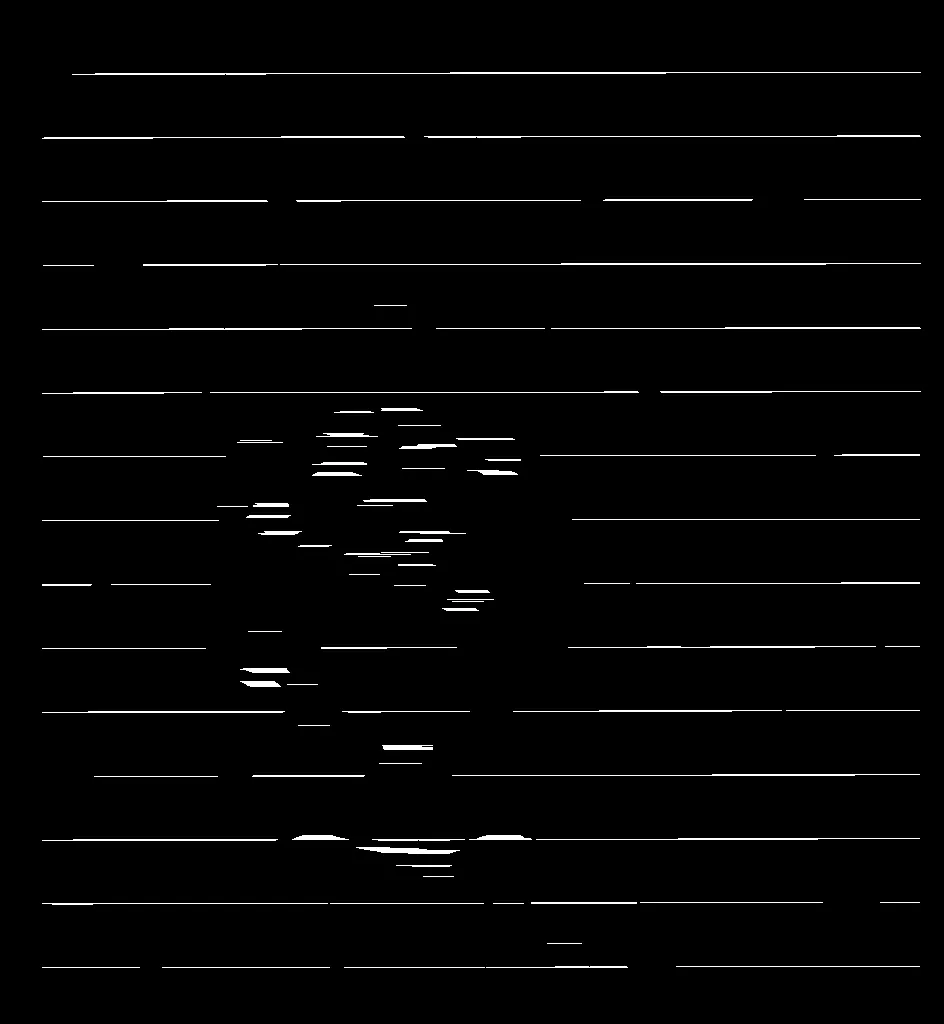
创建具有水平线的掩模
来自https://dev59.com/w6zla4cB1Zd3GeqPFPQx#57410471
import cv2
import numpy as np

img = cv2.imread("input.png", 0)

if len(img.shape) != 2:
    gray = cv2.cvtColor(img, cv2.COLOR_BGR2GRAY)
else:
    gray = img

gray = cv2.bitwise_not(gray)
bw = cv2.adaptiveThreshold(gray, 255, cv2.ADAPTIVE_THRESH_MEAN_C,
cv2.THRESH_BINARY, 15, -2)

horizontal = np.copy(bw)

cols = horizontal.shape[1]
horizontal_size = cols // 30

horizontalStructure = cv2.getStructuringElement(cv2.MORPH_RECT, (horizontal_size, 1))

horizontal = cv2.erode(horizontal, horizontalStructure)
horizontal = cv2.dilate(horizontal, horizontalStructure)

cv2.imwrite("horizontal_lines_extracted.png", horizontal)
使用掩模去除水平线
来自 https://docs.opencv.org/3.3.1/df/d3d/tutorial_py_inpainting.html
import numpy as np
import cv2
mask = cv2.imread('horizontal_lines_extracted.png',0)
dst = cv2.inpaint(img,mask,3,cv2.INPAINT_TELEA)
cv2.imwrite("original_unmasked.png", dst)
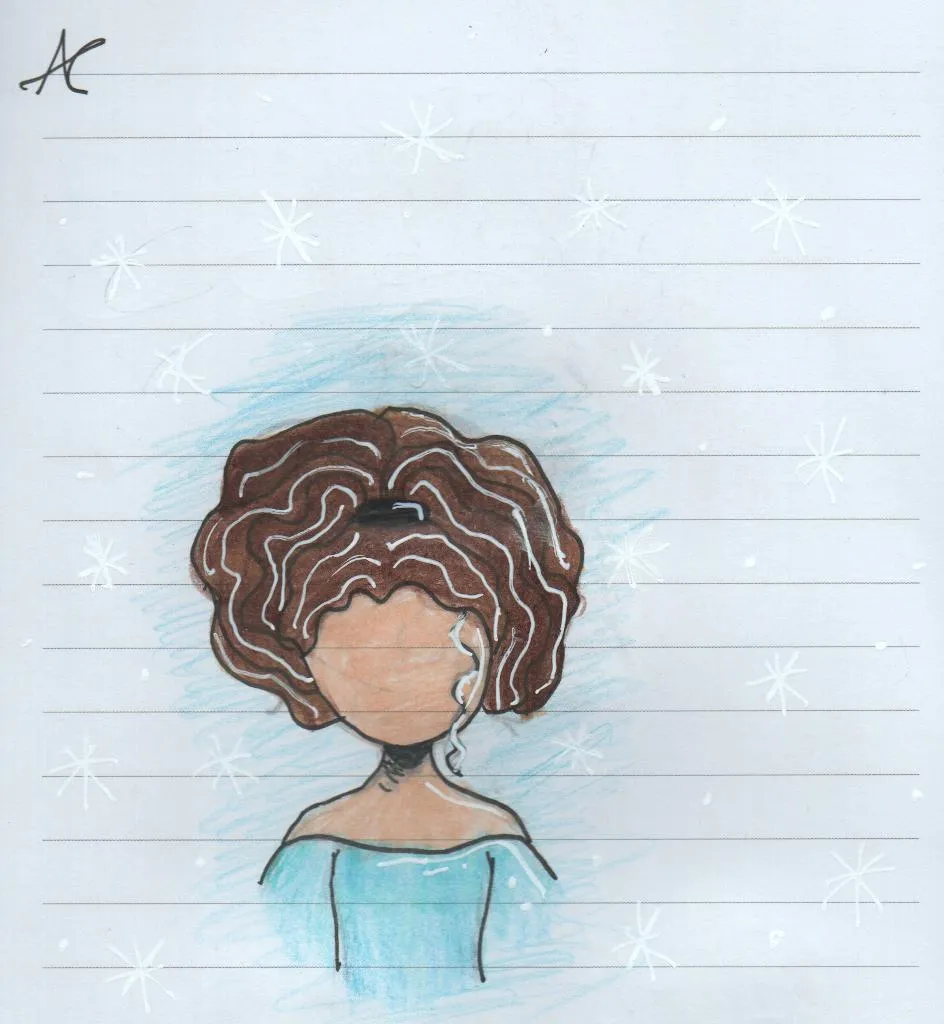
图片
原始图片
口罩
部分清理: