在 Swift 4.2 和 Xcode 10 中
方法1:
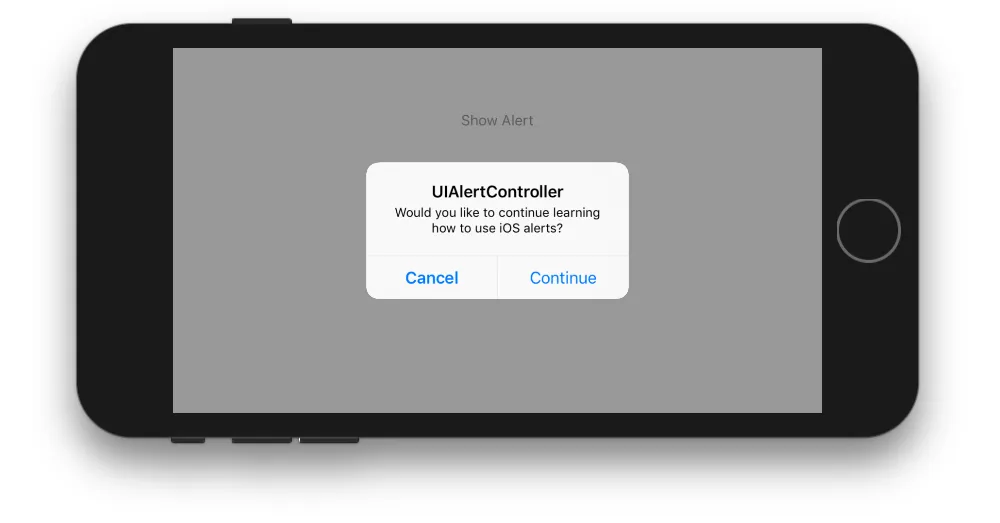
简单提示框
let alert = UIAlertController(title: "Your title", message: "Your message", preferredStyle: .alert)

     let ok = UIAlertAction(title: "OK", style: .default, handler: { action in
     })
     alert.addAction(ok)
     let cancel = UIAlertAction(title: "Cancel", style: .default, handler: { action in
     })
     alert.addAction(cancel)
     DispatchQueue.main.async(execute: {
        self.present(alert, animated: true)
})
方法2:
共享类警报
如果您想使用共享类样式(编写一次,到处使用)
import UIKit
class SharedClass: NSObject {
static let sharedInstance = SharedClass()
func alert(view: UIViewController, title: String, message: String) {
let alert = UIAlertController(title: title, message: message, preferredStyle: .alert)
let defaultAction = UIAlertAction(title: "OK", style: .default, handler: { action in
})
alert.addAction(defaultAction)
DispatchQueue.main.async(execute: {
view.present(alert, animated: true)
})
}
private override init() {
}
}
现在在每个地方调用警报(alert)像这样
SharedClass.sharedInstance.alert(view: self, title: "Your title here", message: "Your message here")
方法三:
在所有窗口上方显示警报
如果您想在所有视图的顶部显示警报,请使用此代码
func alertWindow(title: String, message: String) {
    DispatchQueue.main.async(execute: {
        let alertWindow = UIWindow(frame: UIScreen.main.bounds)
        alertWindow.rootViewController = UIViewController()
        alertWindow.windowLevel = UIWindowLevelAlert + 1

        let alert2 = UIAlertController(title: title, message: message, preferredStyle: .alert)
        let defaultAction2 = UIAlertAction(title: "OK", style: .default, handler: { action in
        })
        alert2.addAction(defaultAction2)

        alertWindow.makeKeyAndVisible()

        alertWindow.rootViewController?.present(alert2, animated: true, completion: nil)
    })
}
函数调用
SharedClass.sharedInstance.alertWindow(title:"This your title", message:"This is your message")
方法四:
使用扩展程序的警告
extension  UIViewController {

    func showAlert(withTitle title: String, withMessage message:String) {
        let alert = UIAlertController(title: title, message: message, preferredStyle: .alert)
        let ok = UIAlertAction(title: "OK", style: .default, handler: { action in
        })
        let cancel = UIAlertAction(title: "Cancel", style: .default, handler: { action in
        })
        alert.addAction(ok)
        alert.addAction(cancel)
        DispatchQueue.main.async(execute: {
            self.present(alert, animated: true)
        })
    }
}
现在这样调用
@IBAction func onClickAlert(_ sender: UIButton) {
showAlert(withTitle:"Your Title Here", withMessage: "YourCustomMessageHere")
}
方法 5:
使用文本框的警告
如果您想要在警告中添加文本框。
var name:String?
var login:String?
func alertWithTF() {
let alert = UIAlertController(title: "Login", message: "Enter username&password", preferredStyle: .alert)
let loginAction = UIAlertAction(title: "Login", style: .default, handler: { (action) -> Void in
let usernameTxt = alert.textFields![0]
let passwordTxt = alert.textFields![1]
self.name = usernameTxt.text
self.login = passwordTxt.text
print("USERNAME: \(self.name!)\nPASSWORD: \(self.login!)")
})
let cancel = UIAlertAction(title: "Cancel", style: .destructive, handler: { (action) -> Void in })
alert.addTextField { (textField: UITextField) in
textField.placeholder = "Enter username"
textField.keyboardType = .default
}
alert.addTextField { (textField: UITextField) in
textField.placeholder = "Enter password"
textField.isSecureTextEntry = true
}
alert.addAction(loginAction)
alert.addAction(cancel)
self.present(alert, animated: true, completion: nil)
}
方法六:
共享类中使用扩展提醒
import UIKit
class SharedClass: NSObject {
static let sharedInstance = SharedClass()
private override init() {
}
}
extension UIViewController {
func showAlert(title: String, msg: String) {
DispatchQueue.main.async {
let alert = UIAlertController(title: title, message: msg, preferredStyle: .alert)
alert.addAction(UIAlertAction(title: "OK", style: .default, handler: nil))
self.present(alert, animated: true, completion: nil)
}
}
}
现在可以直接这样调用
self.showAlert(title: "Your title here...", msg: "Your message here...")
方法七:
在不共享类的情况下使用扩展警报,可以将其放入单独的类中。创建一个新的Swift类,并import UIKit。复制并粘贴以下代码。
import UIKit
import Foundation
extension UIAlertController {
class func alert(title:String, msg:String, target: UIViewController) {
let alert = UIAlertController(title: title, message: msg, preferredStyle: UIAlertControllerStyle.alert)
alert.addAction(UIAlertAction(title: "Ok", style: UIAlertActionStyle.default) {
(result: UIAlertAction) -> Void in
})
target.present(alert, animated: true, completion: nil)
}
}
现在在您所有的类中这样调用alert函数(单行代码)。
UIAlertController.alert(title:"Title", msg:"Message", target: self)
它是如何工作的?

self所属的类采用了协议UIAlertViewDelegate(在Swift中,推荐的方法是使用扩展)。 - Nicolas Miari