这里有三个使用不同工具的图形可视化。
为了生成示例可视化,我将使用一个简单的RNN来执行情感分析,该模型是从一个在线教程中获取的:
class RNN(nn.Module):

    def __init__(self, input_dim, embedding_dim, hidden_dim, output_dim):

        super().__init__()
        self.embedding  = nn.Embedding(input_dim, embedding_dim)
        self.rnn        = nn.RNN(embedding_dim, hidden_dim)
        self.fc         = nn.Linear(hidden_dim, output_dim)

    def forward(self, text):

        embedding       = self.embedding(text)
        output, hidden  = self.rnn(embedding)

        return self.fc(hidden.squeeze(0))
如果你使用print()函数输出模型,这里是结果。
RNN(
  (embedding): Embedding(25002, 100)
  (rnn): RNN(100, 256)
  (fc): Linear(in_features=256, out_features=1, bias=True)
)
以下是三种不同可视化工具的结果。
对于所有这些工具,您需要有可以通过模型的 forward() 方法的虚拟输入。获取此输入的简单方法是从您的数据加载器中检索一个批次,就像这样:
batch = next(iter(dataloader_train))
yhat = model(batch.text)
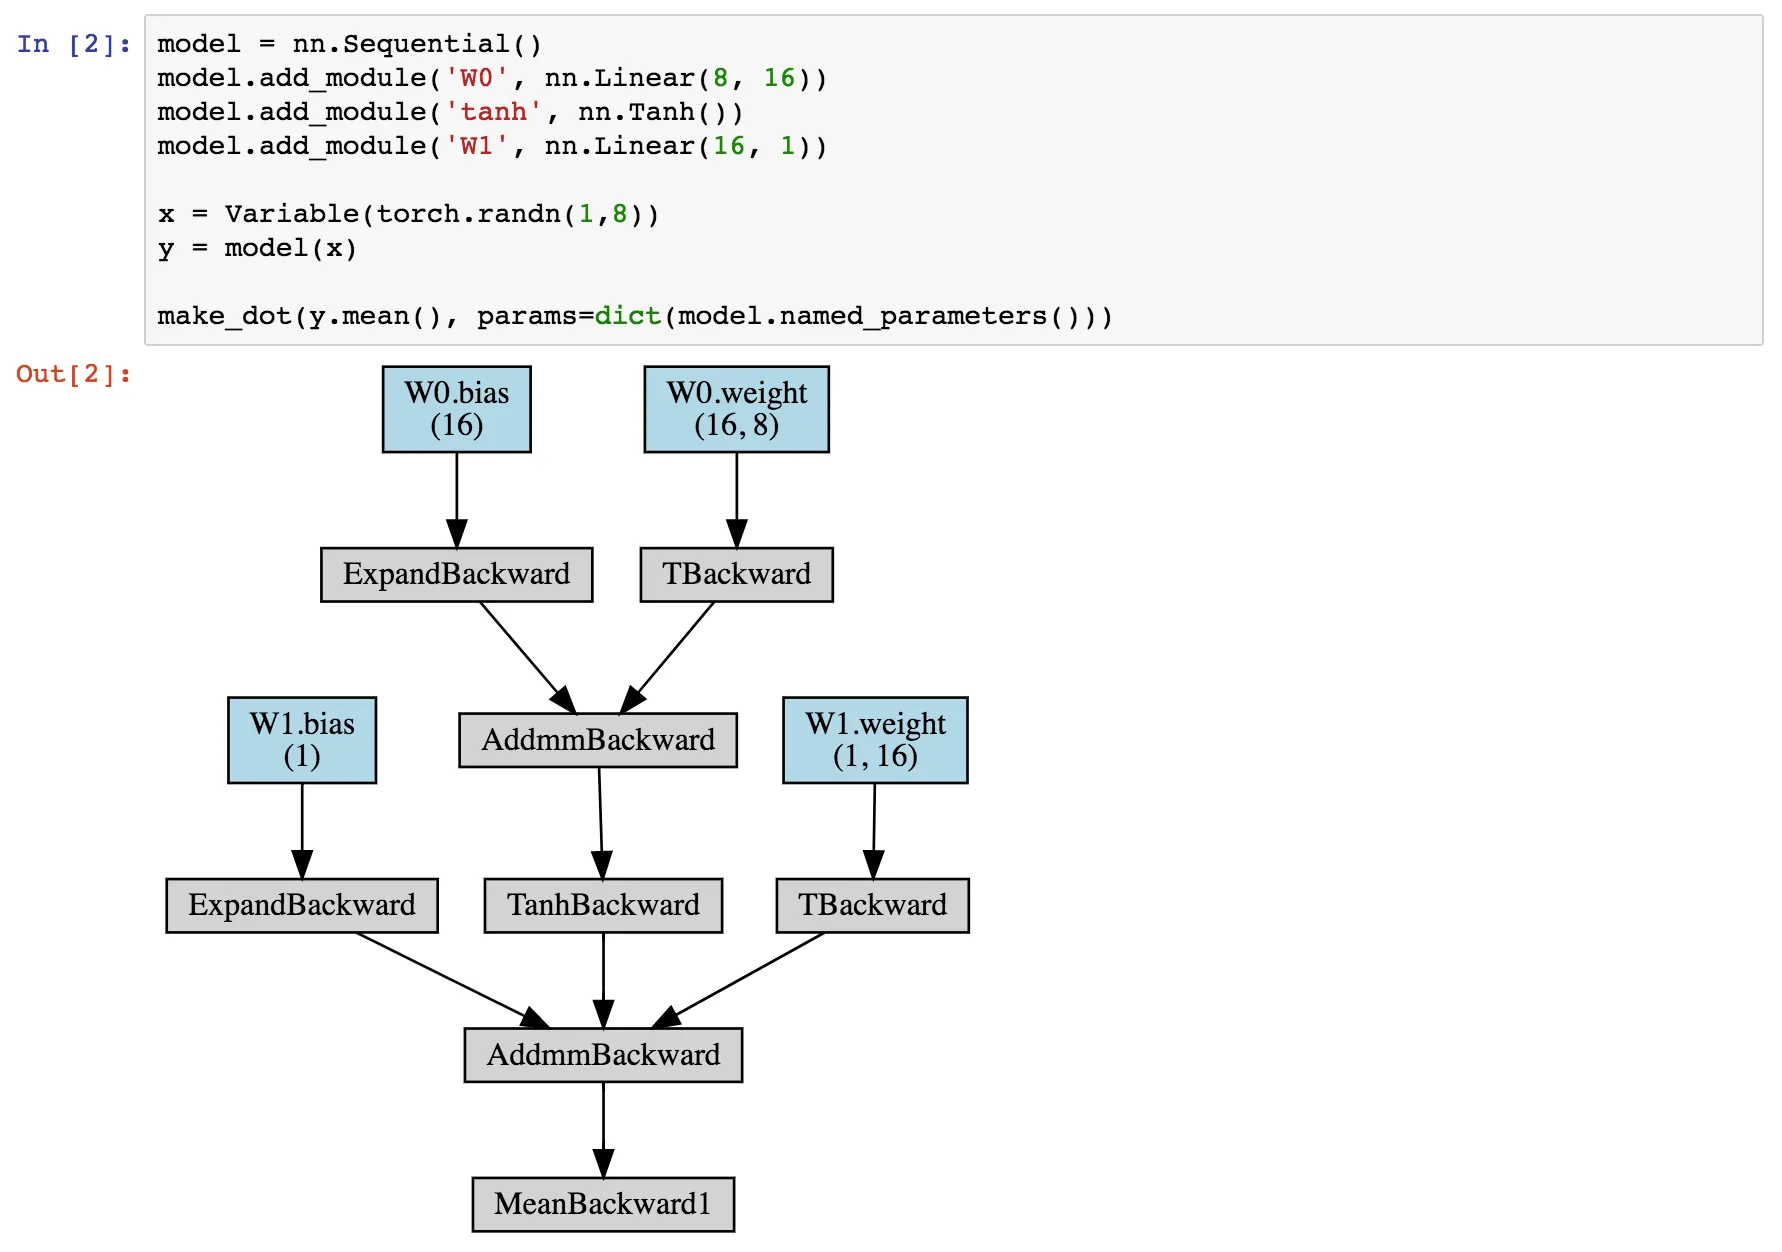
Torchviz
https://github.com/szagoruyko/pytorchviz
我认为这个工具是使用反向传播生成其图形的,因此所有框都使用 PyTorch 组件进行反向传播。
from torchviz import make_dot

make_dot(yhat, params=dict(list(model.named_parameters()))).render("rnn_torchviz", format="png")
这个工具生成以下输出文件:
这是唯一一个清楚地提到我模型中三个层(embedding、rnn和fc)的输出。操作符名称来自于反向传播,因此有些很难理解。
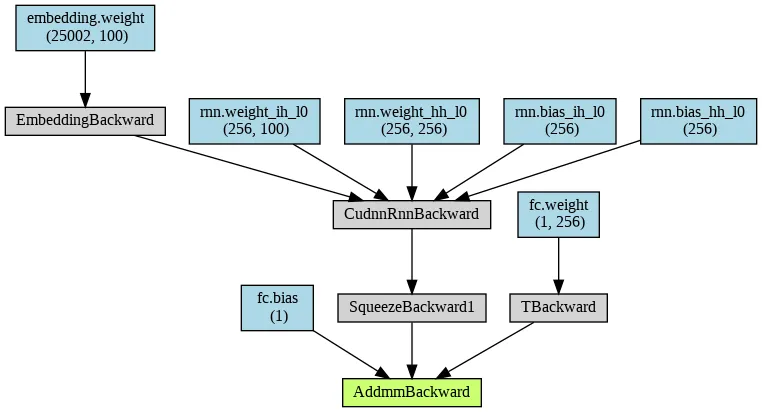
HiddenLayer
https://github.com/waleedka/hiddenlayer
我认为这个工具使用了前向传播。
import hiddenlayer as hl
transforms = [ hl.transforms.Prune('Constant') ]
graph = hl.build_graph(model, batch.text, transforms=transforms)
graph.theme = hl.graph.THEMES['blue'].copy()
graph.save('rnn_hiddenlayer', format='png')
这里是输出结果。我喜欢蓝色的色调。
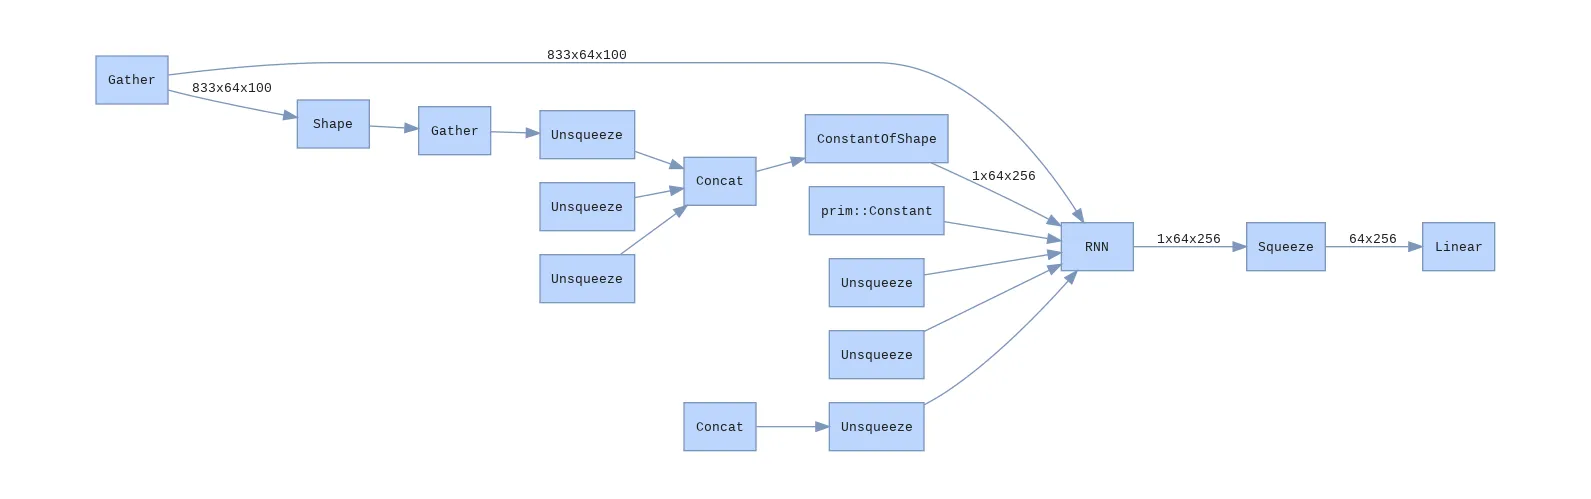
我发现输出结果太过详细,会掩盖我的架构细节。例如,为什么会这么多次提到unsqueeze?
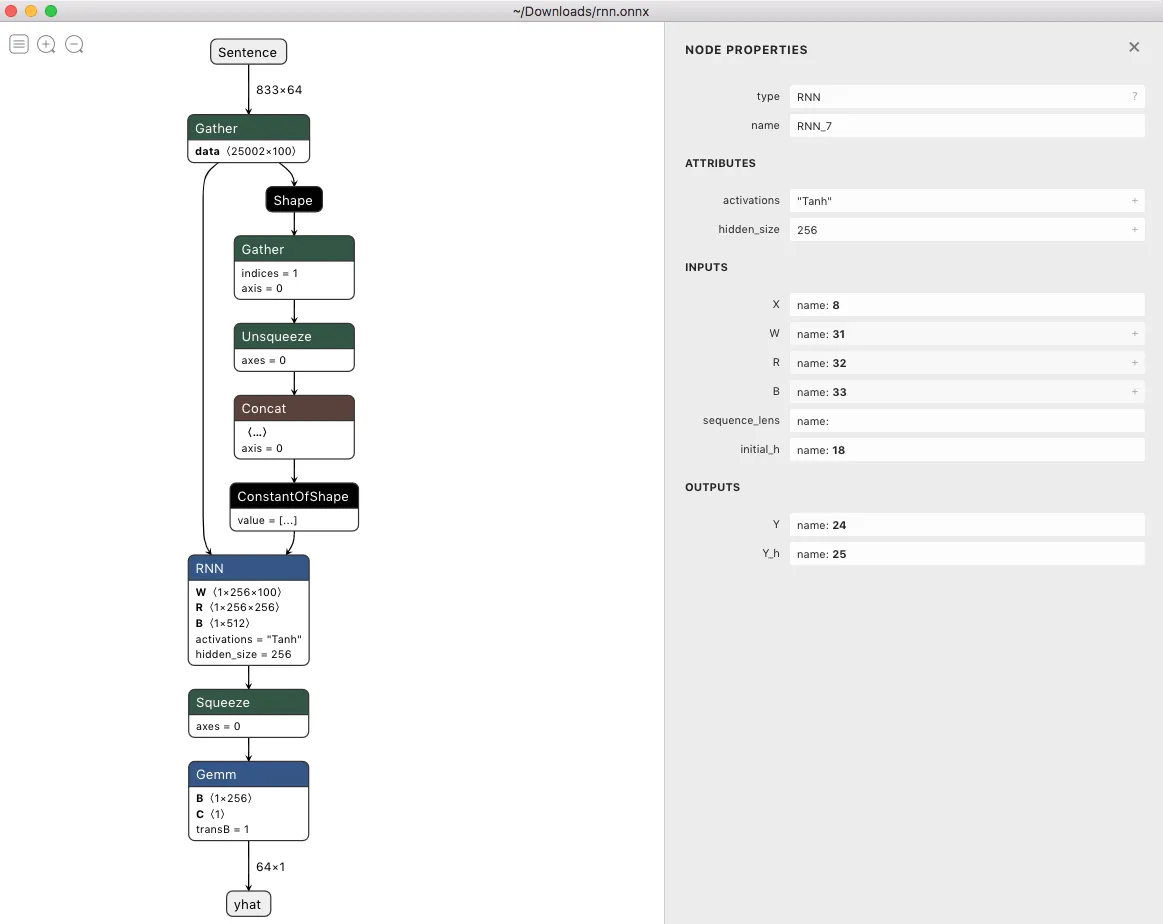
Netron
https://github.com/lutzroeder/netron
Netron是一款适用于Mac、Windows和Linux平台的桌面应用程序。它需要先将模型导出到ONNX格式,然后读取ONNX文件并呈现出来。然后可以选择将模型导出为图像文件。
input_names = ['Sentence']
output_names = ['yhat']
torch.onnx.export(model, batch.text, 'rnn.onnx', input_names=input_names, output_names=output_names)
以下是该应用程序中模型的外观。我认为这个工具相当不错,您可以缩放和平移,还可以深入图层和操作器。我发现唯一的负面是它只支持纵向布局。