你好,
有人能解释一下如何使用这段代码在OpenCV中捕获桌面屏幕吗?我已经尝试了大约30-45分钟,但是当我运行它时我的屏幕没有捕获到任何东西。
在我的应用程序中,从主函数中我有以下三个语句:
HWND hwndDesktop = GetDesktopWindow();
hwnd2mat(hwndDesktop);
imshow("output", src);
我正在调用链接中的函数hwnd2mat。 我是个新手。
谢谢任何回答。
你好,
有人能解释一下如何使用这段代码在OpenCV中捕获桌面屏幕吗?我已经尝试了大约30-45分钟,但是当我运行它时我的屏幕没有捕获到任何东西。
在我的应用程序中,从主函数中我有以下三个语句:
HWND hwndDesktop = GetDesktopWindow();
hwnd2mat(hwndDesktop);
imshow("output", src);
根据OP的评论,我认为仍然需要解释如何像视频流一样捕获桌面
#include "opencv2/imgproc.hpp"
#include "opencv2/highgui.hpp"
#include <Windows.h>
#include <iostream>

using namespace std;
using namespace cv;

Mat hwnd2mat(HWND hwnd)
{
    HDC hwindowDC,hwindowCompatibleDC;

    int height,width,srcheight,srcwidth;
    HBITMAP hbwindow;
    Mat src;
    BITMAPINFOHEADER  bi;

    hwindowDC=GetDC(hwnd);
    hwindowCompatibleDC=CreateCompatibleDC(hwindowDC);
    SetStretchBltMode(hwindowCompatibleDC,COLORONCOLOR);

    RECT windowsize;    // get the height and width of the screen
    GetClientRect(hwnd, &windowsize);

    srcheight = windowsize.bottom;
    srcwidth = windowsize.right;
    height = windowsize.bottom/1;  //change this to whatever size you want to resize to
    width = windowsize.right/1;

    src.create(height,width,CV_8UC4);

    // create a bitmap
    hbwindow = CreateCompatibleBitmap( hwindowDC, width, height);
    bi.biSize = sizeof(BITMAPINFOHEADER);    //http://msdn.microsoft.com/en-us/library/windows/window/dd183402%28v=vs.85%29.aspx
    bi.biWidth = width;
    bi.biHeight = -height;  //this is the line that makes it draw upside down or not
    bi.biPlanes = 1;
    bi.biBitCount = 32;
    bi.biCompression = BI_RGB;
    bi.biSizeImage = 0;
    bi.biXPelsPerMeter = 0;
    bi.biYPelsPerMeter = 0;
    bi.biClrUsed = 0;
    bi.biClrImportant = 0;

    // use the previously created device context with the bitmap
    SelectObject(hwindowCompatibleDC, hbwindow);
    // copy from the window device context to the bitmap device context
    StretchBlt( hwindowCompatibleDC, 0,0, width, height, hwindowDC, 0, 0,srcwidth,srcheight, SRCCOPY); //change SRCCOPY to NOTSRCCOPY for wacky colors !
    GetDIBits(hwindowCompatibleDC,hbwindow,0,height,src.data,(BITMAPINFO *)&bi,DIB_RGB_COLORS);  //copy from hwindowCompatibleDC to hbwindow

    // avoid memory leak
    DeleteObject (hbwindow);
    DeleteDC(hwindowCompatibleDC);
    ReleaseDC(hwnd, hwindowDC);

    return src;
}

int main(int argc, char **argv)
{
    HWND hwndDesktop = GetDesktopWindow();
    namedWindow("output",WINDOW_NORMAL);
    int key = 0;

    while( key != 27 )
    {
        Mat src = hwnd2mat(hwndDesktop);
        // you can do some image processing here
        imshow("output", src);
        key = waitKey(60); // you can change wait time
    }

}
编辑:您可以在此处找到一个用于屏幕捕获并保存为视频的示例代码。
看起来你忘记了捕获hwnd2mat()的返回值:
HWND hwndDesktop = GetDesktopWindow();
Mat src = hwnd2mat(hwndDesktop);
imshow("output", src);
waitKey(0);
Mat hwnd2mat(HWND hwnd)
{
     HDC hwindowDC,hwindowCompatibleDC;

     int height,width,srcheight,srcwidth;
     HBITMAP hbwindow;
     Mat src;
     BITMAPINFOHEADER  bi;

     hwindowDC=GetDC(hwnd);
     hwindowCompatibleDC=CreateCompatibleDC(hwindowDC);
     SetStretchBltMode(hwindowCompatibleDC,COLORONCOLOR);

     RECT windowsize;    // get the height and width of the screen
     GetClientRect(hwnd, &windowsize);

     float valueOfChangeTheSizeOfTextAppsAndOtherItemsInWindowsDisplaySettings = 1.5;
     srcheight = (int)((float)windowsize.bottom * valueOfChangeTheSizeOfTextAppsAndOtherItemsInWindowsDisplaySettings);
     srcwidth = (int)((float)windowsize.right * valueOfChangeTheSizeOfTextAppsAndOtherItemsInWindowsDisplaySettings);
     height = windowsize.bottom/1;  //change this to whatever size you want to resize to
     width = windowsize.right/1;

     src.create(height,width,CV_8UC4);

     // create a bitmap
     hbwindow = CreateCompatibleBitmap( hwindowDC, width, height);
     bi.biSize = sizeof(BITMAPINFOHEADER);    //http://msdn.microsoft.com/en-us/library/windows/window/dd183402%28v=vs.85%29.aspx
     bi.biWidth = width;
     bi.biHeight = -height;  //this is the line that makes it draw upside down or not
     bi.biPlanes = 1;
     bi.biBitCount = 32;
     bi.biCompression = BI_RGB;
     bi.biSizeImage = 0;
     bi.biXPelsPerMeter = 0;
     bi.biYPelsPerMeter = 0;
     bi.biClrUsed = 0;
     bi.biClrImportant = 0;

     // use the previously created device context with the bitmap
     SelectObject(hwindowCompatibleDC, hbwindow);
     // copy from the window device context to the bitmap device context
     StretchBlt( hwindowCompatibleDC, 0,0, width, height, hwindowDC, 0, 0,srcwidth,srcheight, SRCCOPY); //change SRCCOPY to NOTSRCCOPY for wacky colors !
     GetDIBits(hwindowCompatibleDC,hbwindow,0,height,src.data,(BITMAPINFO *)&bi,DIB_RGB_COLORS);  //copy from hwindowCompatibleDC to hbwindow

     // avoid memory leak
     DeleteObject (hbwindow);
     DeleteDC(hwindowCompatibleDC);
     ReleaseDC(hwnd, hwindowDC);

     return src;
 }
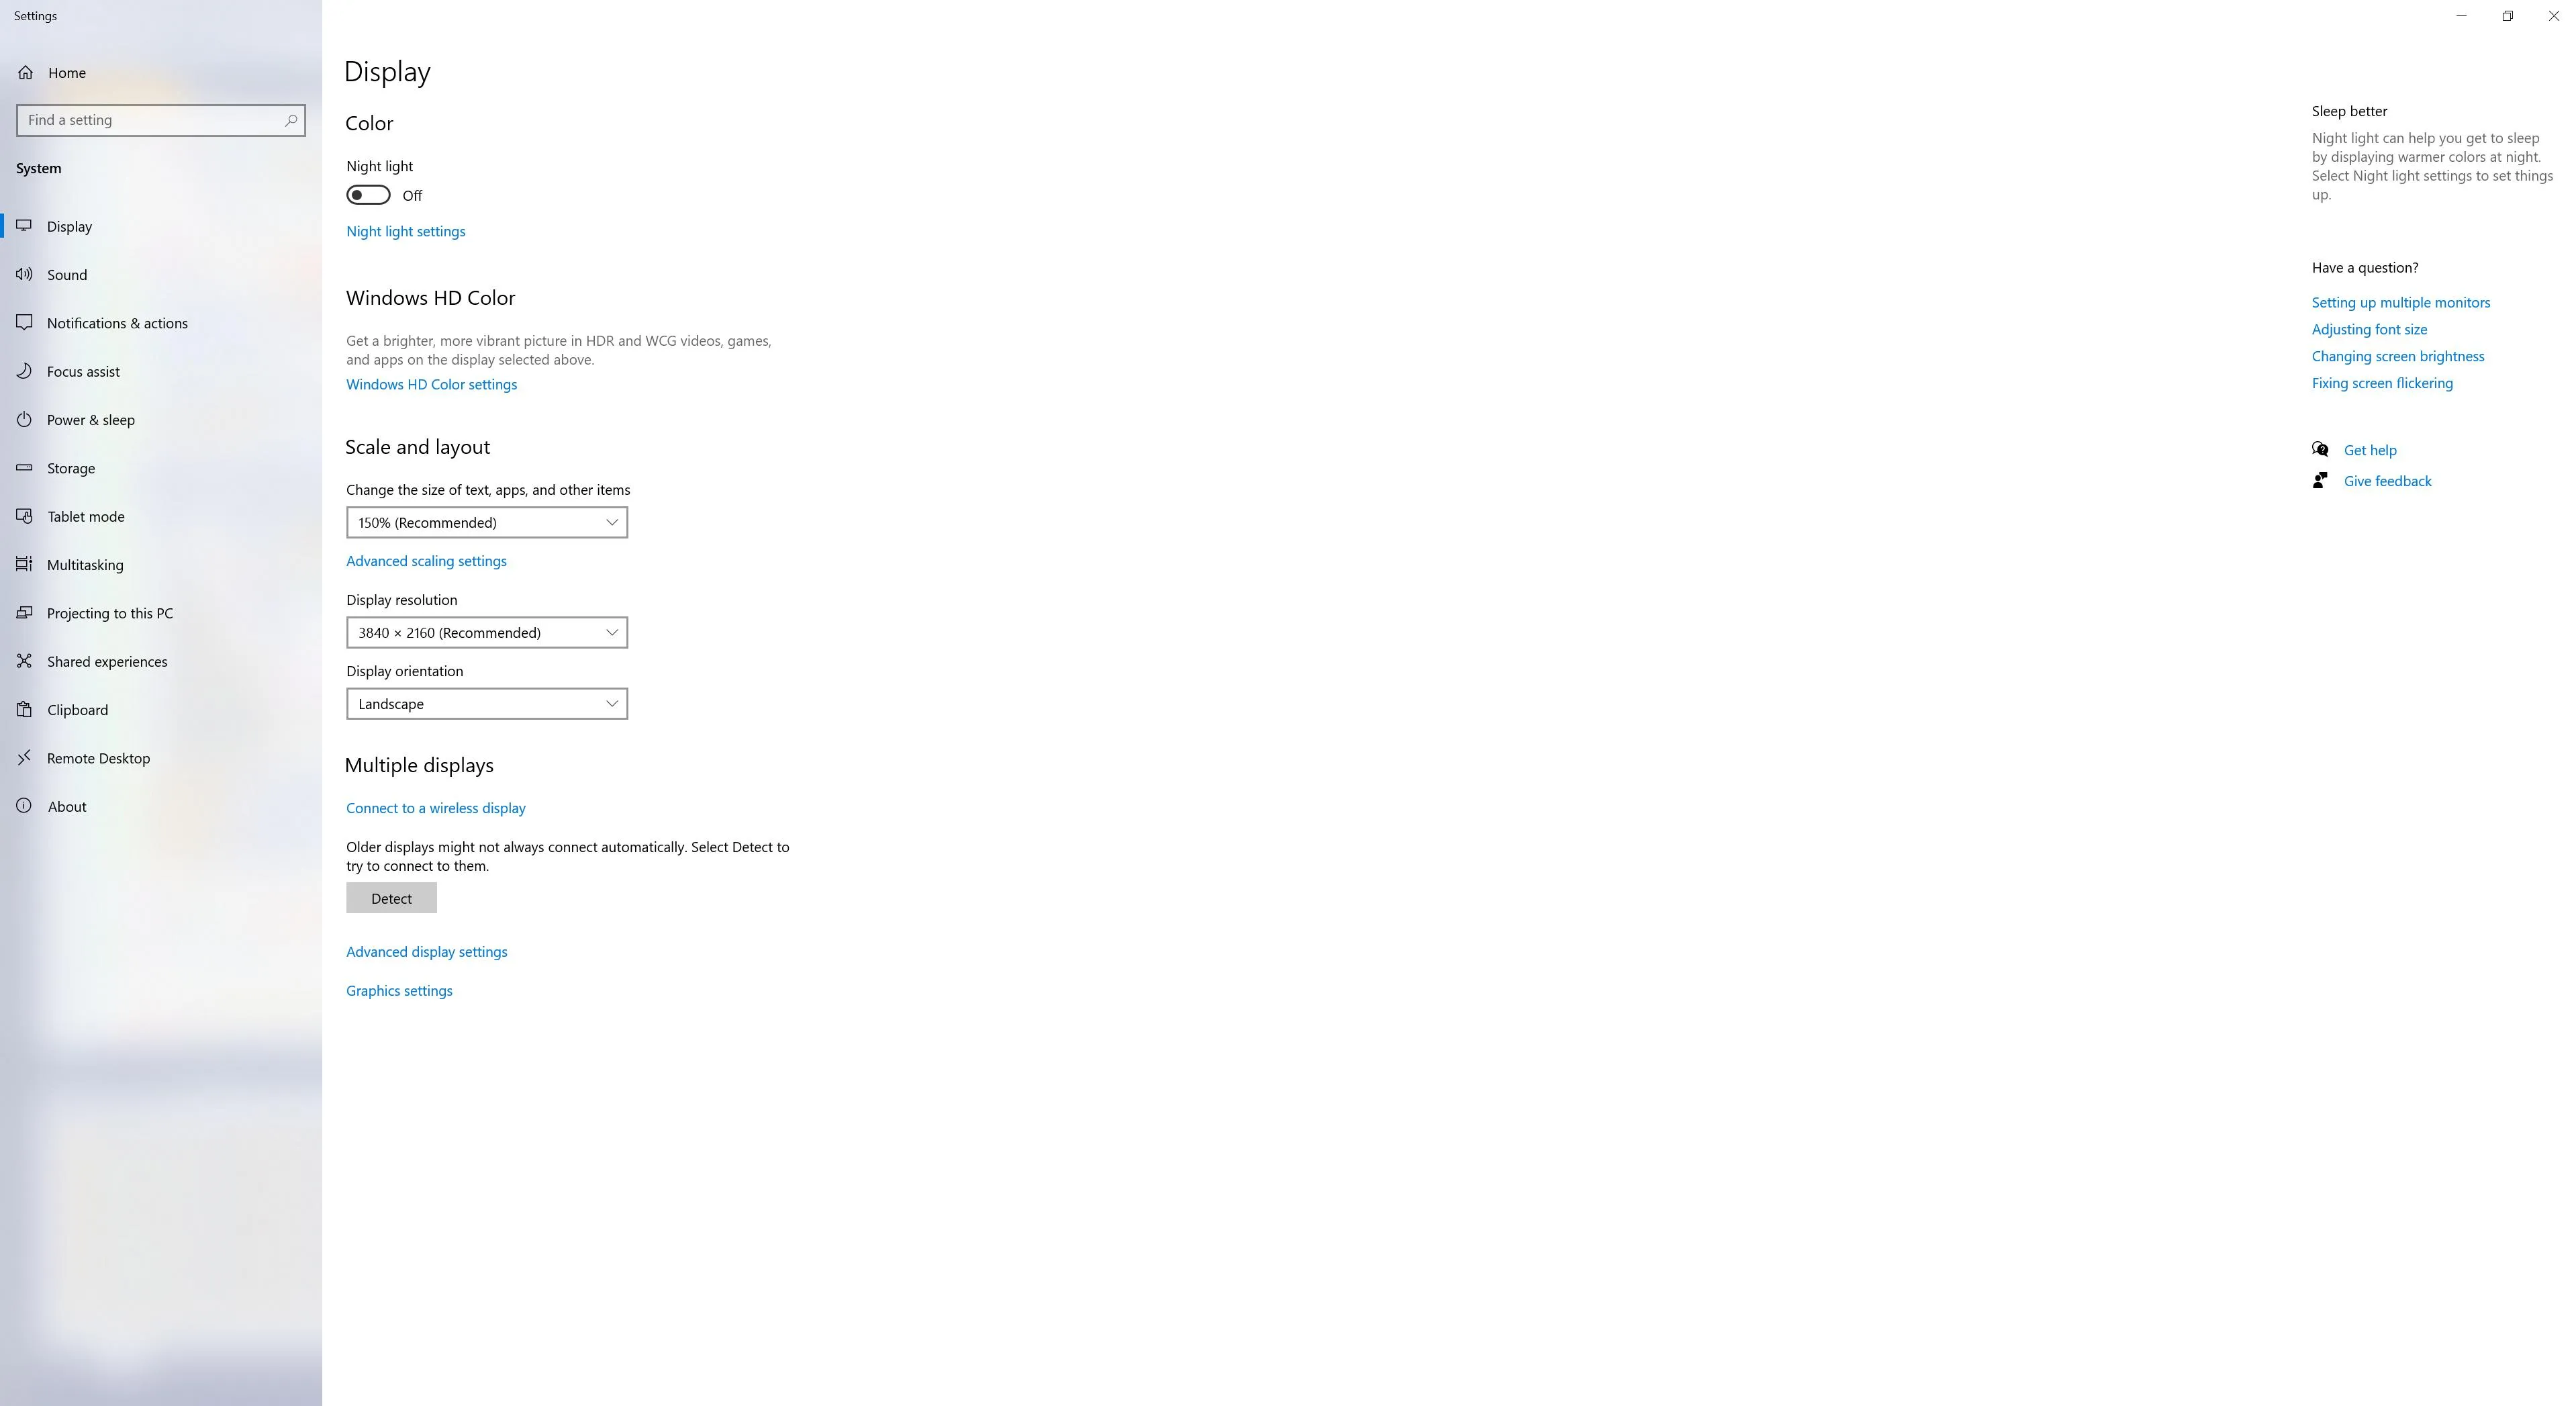
main() 函数中早期调用此方法:SetProcessDpiAwarenessContext(DPI_AWARENESS_CONTEXT_PER_MONITOR_AWARE_V2); 现在所有的值将使用设备像素而不是有时缩放的像素。在清单文件中也可以选择相同的选项。 - Hydranix