如何在xml android中构建梯形形状?

11

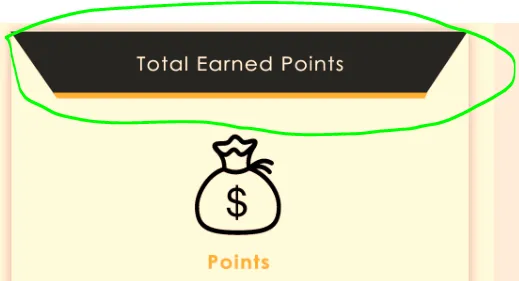
我想用一个带有底部线和文本的 shape 来构建这个内容,但我有点困惑如何实现,我尝试了一些代码但没有得到所需的结果。

期望的结果

到目前为止,我尝试了这段代码

shape.xml

<?xml version="1.0" encoding="UTF-8"?>
<layer-list xmlns:android="http://schemas.android.com/apk/res/android" >

    <!-- Colored rectangle-->
    <item>
        <shape android:shape="rectangle">
            <size
                android:width="100dp"
                android:height="40dp" />
            <solid android:color="#13a89e" />
        </shape>
    </item>


    <!-- This rectangle for the right side -->
    <!-- Their color should be the same as layout's background -->
    <item
        android:right="-100dp"
        android:left="100dp"
        android:top="-100dp"
        android:bottom="-100dp">
        <rotate
            android:fromDegrees="45">
            <shape android:shape="rectangle">
                <solid android:color="#ffffff" />
            </shape>
        </rotate>
    </item>

</layer-list>

它提供了以下结果。my attempt

我还需要在这个形状下面加一条黄线。

谢谢帮助。


看起来你已经快完成了。在第一个矩形下面再画一个矩形(高度较低)。为左侧制作另一个倾斜的矩形。将两个倾斜的矩形都缩小一点。然后对颜色做些调整... - kalabalik
我尝试将相同的白色形状放在左边,但我不知道如何做到这一点。 - Nouman Ch
1
这篇文章对我在创建梯形视图方面帮助很大。https://arkapp.medium.com/trapezium-view-for-android-584799c7e849 - abdul rehman
4个回答

11

这是您的 XML:

<?xml version="1.0" encoding="UTF-8"?>
<layer-list xmlns:android="http://schemas.android.com/apk/res/android" >

<!-- Colored rectangle-->
<item>
    <shape android:shape="rectangle">
        <padding android:top="35dp"/>
        <size android:width="200dp" android:height="40dp" />
        <solid android:color="#13a89e" />
    </shape>
</item>
<!-- Darker colored line-->
<item>
    <shape android:shape="line">
        <size android:width="100dp"/>
        <stroke android:width="4dp" android:color="#123456" />
    </shape>
</item>


<!-- This rectangle for the right side -->
<!-- Their color should be the same as layout's background -->
<item
    android:right="-200dp"
    android:left="200dp"
    android:top="-200dp"
    android:bottom="-200dp">
    <rotate android:fromDegrees="45">
        <shape android:shape="rectangle">
           <padding android:top="-35dp"/>
           <solid android:color="#ffffff" />
        </shape>
    </rotate>
</item>
<!-- This rectangle for the left side -->
<item
    android:right="200dp"
    android:left="-200dp"
    android:top="-200dp"
    android:bottom="-200dp">
    <rotate android:fromDegrees="-45">
        <shape android:shape="rectangle">
            <padding android:top="-35dp"/>
            <solid android:color="#ffffff" />
        </shape>
    </rotate>
</item>

这是它的呈现效果:

Result

这是我的TextView XML:

<?xml version="1.0" encoding="utf-8"?>
<android.support.constraint.ConstraintLayout xmlns:android="http://schemas.android.com/apk/res/android"
xmlns:app="http://schemas.android.com/apk/res-auto"
xmlns:tools="http://schemas.android.com/tools"
android:layout_width="match_parent"
android:layout_height="match_parent"
tools:context="io.kalabalik.tilted.MainActivity">

<TextView
    android:layout_width="wrap_content"
    android:layout_height="wrap_content"
    android:background="@drawable/box"
    android:text="Your Text!"
    android:textColor="#000000"
    android:gravity="center_horizontal|bottom"
    android:paddingBottom="10dp"
    app:layout_constraintBottom_toBottomOf="parent"
    app:layout_constraintLeft_toLeftOf="parent"
    app:layout_constraintRight_toRightOf="parent"
    app:layout_constraintTop_toTopOf="parent" />
</android.support.constraint.ConstraintLayout>

你之前不是已经以某种方式显示它了吗? - kalabalik
抱歉,我不明白你说的是什么。 - Nouman Ch
亲爱的,请告诉我如何在上面放置文本。 - Nouman Ch
它应该像你展示自己的例子一样显示。 - kalabalik
刚刚将 TextView 的 XML 添加到了我的答案中。 - kalabalik
显示剩余2条评论

5
我强烈建议您创建自定义文本视图,以使其更加灵活和可控。您需要创建路径对象,并使用该对象定义视图的角落。如果您想要将视图作为文本显示,您需要重写 onDraw(Canvas canvas) 函数,并调用 canvas.draw(path, paint) 方法。如果您不仅需要应用于文本字段,还应该重写任何视图组类,但对于视图组,您应该重写 onDispatchDraw 函数来实现这一点。
您可以像下面的示例一样创建形状。
    // you can define all points
    Point topLeft = new Point(0,0);
    Point topRight = new Point(getWidth(),0); // your view width
    //... 

    //cover your corner points
    Path path = new Path();
    path.moveTo(topLeft.x, topLeft.y);
    path.lineTo(topRight.x, topRight.y);
    path.lineTo(bottomRight.x, bottomRight.y);
    path.lineTo(shapeBottomRight.x, shapeBottomRight.y);
    path.lineTo(shapeTop.x, shapeTop.y);
    path.lineTo(shapeBottomLeft.x, shapeBottomLeft.y);
    path.lineTo(bottomLeft.x, bottomLeft.y);
    path.lineTo(topLeft.x, topLeft.y);

    canvas.draw(path, paint);

抱歉 Gokhan,我不知道如何使用自定义视图,你能帮忙解释一下这段代码该怎么用吗? - Nouman Ch
@NoumanCh,要实现这个功能,您可以创建自定义视图或视图组。为了简单起见,您可以使用默认构造函数扩展框架布局。您需要重写onDispatch函数以绘制您想要的形状,就像我的示例一样。您可以尝试使用路径对象来绘制矩形。定义四个角并调用canvas.draw(yourPath, paint) ,使用paint对象可以定义您的颜色边框等。最后,转到xml布局并放置您创建的布局,这样您就可以看到您的形状了。 - gokhan
我需要将这段代码放在 onDispatch 方法中吗? - Nouman Ch
如果您的视图类型是视图组(FrameLayout, LinearLayout ...),则应使用 onDispatch;如果您的视图类型是视图(Textview, ImageView ...),则应使用 onDraw。 - gokhan
你根本不需要一个自定义的 View,相反你需要的是一个自定义的 Drawable - pskink
@pskink,您想要添加回答吗? - Shubham AgaRwal

2

这篇文章帮助我很多,讲述了如何创建梯形视图。具体内容请查看https://arkapp.medium.com/trapezium-view-for-android-584799c7e849

<com.arkapp.trapeziumview.TrapeziumCustomView
        android:id="@+id/trapeziumCustomView"
        android:layout_width="match_parent"
        android:layout_height="350dp"
        android:layout_margin="16dp"
        app:layout_constraintEnd_toEndOf="parent"
        app:layout_constraintStart_toStartOf="parent"
        app:layout_constraintTop_toTopOf="parent"
        app:shapeColor="@color/teal_200"
        app:edgeRadius="18"
        app:slopeLength="88"
        app:slopeType="bottomRight" />

在这个过程中,我使用了这个工具来创建一个自定义视图,并将其中一条边缘变成了斜坡。


1
<vector xmlns:android="http://schemas.android.com/apk/res/android"
xmlns:aapt="http://schemas.android.com/aapt"
android:width="28dp"
android:height="5dp"
android:viewportWidth="800"
android:viewportHeight="304">
<path

    android:pathData="M215,41.4c0,0.2 -22.9,58.3 -51,129.1 -28,70.8 -51,129.8 -51,131.1l0,2.4 296.1,-0c281.6,-0 296.1,-0.1 295.6,-1.8 -0.2,-0.9 -11.9,-31 -25.9,-66.7 -14.1,-35.8 -36.9,-94.1 -50.9,-129.8l-25.3,-64.7 -193.8,-0c-106.6,-0 -193.8,0.2 -193.8,0.4z">
    <aapt:attr name="android:fillColor">
        <gradient
            android:endX="50"
            android:endY="99"
            android:startX="50"
            android:startY="1"
            android:type="linear">
            <item
                android:color="#FFFFFF"
                android:offset="0.0" />
            <item
                android:color="#AAA8A8"
                android:offset="0.8" />
            <item
                android:color="#AAA8A8"
                android:offset="1.0" />
        </gradient>
    </aapt:attr>
</path>

网页内容由stack overflow 提供, 点击上面的
可以查看英文原文,
原文链接