如何在Android中使用XML创建“矩形内透明圆形”形状?

20

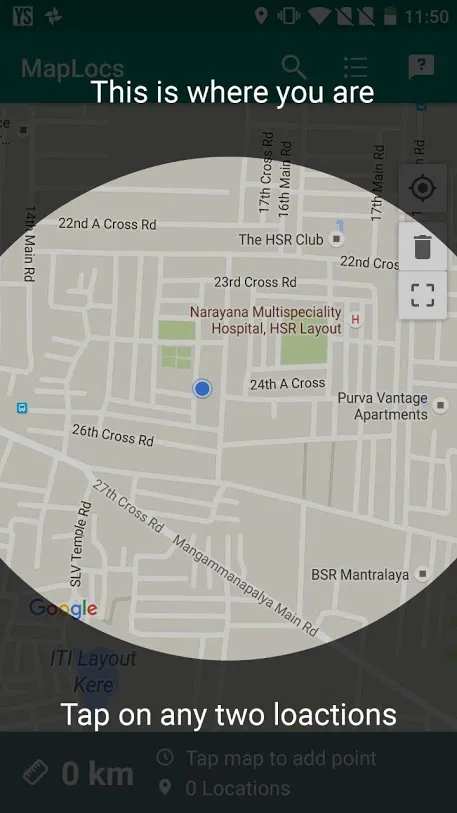
我正在尝试在我的应用程序中创建以下设计。

设计模型
(https://photos.google.com/share/AF1QipPhCGTgf9zi7MetWJYm0NQ14c3wqzjqnEwxsajCFHEjqzt5R29qYvIjZ2C71q7EnQ?key=WUZKSXA1WVVwSlI2LVdTQy1IRjdUdzVuQlpCY0Rn)

这是主UI上的叠加层。我正在尝试使用一个布局来创建它,该布局的背景是在XML中创建的半透明形状。然而,即使阅读了多篇文章,我仍然无法弄清楚它的实现方法。

我尝试了以下方法,但没有成功。创建了一个带有200dp描边的环形形状,并将其设置为图像视图的源,然后将比例类型设置为centerCrop,但形状并未像位图一样缩放。

形状XML:

<?xml version="1.0" encoding="utf-8"?>
<shape xmlns:android="http://schemas.android.com/apk/res/android"
    android:innerRadius="0dp"
    android:shape="ring"
    android:thicknessRatio="2"
    android:useLevel="false" >

    <solid android:color="@android:color/transparent" />

    <stroke
        android:width="200dp"
        android:color="#80000000" />
</shape>

覆盖式布局:

<?xml version="1.0" encoding="utf-8"?>
<RelativeLayout xmlns:android="http://schemas.android.com/apk/res/android"
    android:layout_width="match_parent"
    android:layout_height="match_parent">

    <ImageView
        android:layout_width="match_parent"
        android:layout_height="match_parent"
        android:src="@drawable/onboarding_background"
        android:scaleType="centerCrop"/>

</RelativeLayout>
任何关于如何做到这一点或者提供代码的指针都将非常有帮助。

2
换句话说,您想要在屏幕宽的半透明矩形的中心切出一个圆形孔。 - Phantômaxx
你可以很容易地使用向量来解决这个问题(如果XML不是必需的话,这是另一种解决方案)。 - Mathieu de Brito
请参考此答案:https://dev59.com/E2Yr5IYBdhLWcg3wDGHP#14428226 - Ravi Theja
1
嘿@BobMalooga,感谢您的编辑,我无法直接添加图片,因为显然我需要至少10个积分。我想我应该回答一些问题。 - vepzfe
1
@MathieudeBrito,这只是我作为开发人员(即没有设计师)的工作,我甚至不知道基本的Photoshop,这就是为什么我试图通过使用XML来解决问题。这也可以减小APK文件的大小。 - vepzfe
显示剩余2条评论
4个回答

31

最近我一直在尝试类似的东西,并为您进行了适应。 所有的魔法都发生在 onDraw 中:

public class FocusView extends View {
  private Paint mTransparentPaint;
  private Paint mSemiBlackPaint;
  private Path mPath = new Path();

  public FocusView(Context context) {
    super(context);
    initPaints();
  }

  public FocusView(Context context, AttributeSet attrs) {
    super(context, attrs);
    initPaints();
  }

  public FocusView(Context context, AttributeSet attrs, int defStyleAttr) {
    super(context, attrs, defStyleAttr);
    initPaints();
  }

  private void initPaints() {
    mTransparentPaint = new Paint();
    mTransparentPaint.setColor(Color.TRANSPARENT);
    mTransparentPaint.setStrokeWidth(10);

    mSemiBlackPaint = new Paint();
    mSemiBlackPaint.setColor(Color.TRANSPARENT);
    mSemiBlackPaint.setStrokeWidth(10);
  }

  @Override
  protected void onDraw(Canvas canvas) {
    super.onDraw(canvas);

    mPath.reset();

    mPath.addCircle(canvas.getWidth() / 2, canvas.getHeight() / 2, 550, Path.Direction.CW);
    mPath.setFillType(Path.FillType.INVERSE_EVEN_ODD);

    canvas.drawCircle(canvas.getWidth() / 2, canvas.getHeight() / 2, 550, mTransparentPaint);

    canvas.drawPath(mPath, mSemiBlackPaint);
    canvas.clipPath(mPath);
    canvas.drawColor(Color.parseColor("#A6000000"));
  }
 }

这里的技巧是创建一个路径(透明圆),这样我们就可以将路径的绘制方法设置为“路径外部”而不是“路径内部”。最后,我们可以简单地将画布剪切到该路径,并填充黑色颜色。

对于您来说,您只需要将Color.BLACK更改为您的颜色,并更改所需的半径。

编辑: 另外,可以通过编程方式添加它: FocusView view = new FocusView(context) your_layout.addView(view)

或者通过XML:

<package_path_to_.FocusView
    android:layout_width="match_parent"
    android:layout_height="match_parent" />

编辑2: 我刚刚看到您想要将此用于应用程序的入门。 那么,您可以考虑查看https://github.com/iammert/MaterialIntroView


嗨,我该如何制作一个像这样的椭圆形位于中心位置? - Siddarth G
有人能调整一下代码,让它在中心画一个正方形而不是圆形吗? - VeeyaaR
修复:使用 canvas.getWidth() / 2 替代 550 - Konstantin Konopko

4

我遇到了一个问题,代码在api lvl 16 上无法运行,来自NSimon的问题。 我已经修复了代码,现在它支持api 16+。

public class FocusView extends View {
    private Paint mPaint;
    private Paint mStrokePaint;
    private Path mPath = new Path();

    public FocusView(Context context) {
        super(context);
        initPaints();
    }

    public FocusView(Context context, AttributeSet attrs) {
        super(context, attrs);
        initPaints();
    }

    public FocusView(Context context, AttributeSet attrs, int defStyleAttr) {
        super(context, attrs, defStyleAttr);
        initPaints();
    }

    private void initPaints() {
        mPaint = new Paint();
        mPaint.setColor(Color.parseColor("#A6000000"));

        mStrokePaint = new Paint();
        mStrokePaint.setColor(Color.YELLOW);
        mStrokePaint.setStrokeWidth(2);
        mStrokePaint.setStyle(Paint.Style.STROKE);

    }

    @Override
    protected void onDraw(Canvas canvas) {
        super.onDraw(canvas);
        mPath.reset();

        float radius = 0;
        float strokeWidth = 0;
        if (canvas.getWidth() < canvas.getHeight()) {
            radius = canvas.getWidth() / 2 - 10;
            strokeWidth = (canvas.getHeight() - canvas.getWidth())/2;
        } else {
            radius = canvas.getHeight() / 2 - 10;
            strokeWidth = (canvas.getWidth() - canvas.getHeight())/2;
        }

        mPaint.setStrokeWidth(strokeWidth);

        mPath.addCircle(canvas.getWidth() / 2, canvas.getHeight() / 2, radius, Path.Direction.CW);
        mPath.setFillType(Path.FillType.INVERSE_EVEN_ODD);

        canvas.drawCircle(canvas.getWidth() / 2, canvas.getHeight() / 2, radius, mStrokePaint);

        canvas.drawPath(mPath, mPaint);
    }
}

如何在中心制作椭圆形而不是圆形? - Siddarth G

3
你可以使用PorterDuffXferMode和自定义视图来实现这一点。
在这张图片中提供了不同模式的很好的例子(请参见A Out B):AlphaCompositing 其思想是创建一个自定义视图,其中包含不透明的黑色矩形和圆形。当您应用PorterDuffXferMode.SRC_OUT时,它将从矩形中“擦除”圆形,因此您将获得所需的结果。
在您的自定义视图中,您应该重写dispatchDraw(Canvas canvas)方法,并在您的框架上绘制结果位图。
然后,您可以将MapView和您的自定义视图放在FrameLayout中,享受结果。

0

就像这样使用向量:

<layer-list xmlns:android="http://schemas.android.com/apk/res/android">
    <item>
        <vector
            android:width="200dp"
            android:height="200dp"
            android:viewportWidth="284"
            android:viewportHeight="284">
            <path
                android:fillColor="@android:color/white"
                android:pathData="M0 142L0 0l142 0 142 0 0 142 0 142 -142 0 -142 0zm165 137.34231c26.06742 -4.1212 52.67405 -17.543 72.66855 -36.65787 11.82805 -11.30768 20.55487 -22.85153 27.7633 -36.72531C290.23789 158.21592 285.62874 101.14121 253.48951 58.078079 217.58149 9.9651706 154.68849 -10.125717 98.348685 8.5190299 48.695824 24.95084 12.527764 67.047123 3.437787 118.98655 1.4806194 130.16966 1.511302 152.96723 3.4990422 164.5 12.168375 214.79902 47.646316 256.70775 96 273.76783c21.72002 7.66322 44.26673 9.48476 69 5.57448z" />
        </vector>
    </item>
    <item>
        <shape
            android:innerRadius="0dp"
            android:shape="oval"
            android:useLevel="false">
            <solid android:color="@android:color/transparent" />
            <stroke
                android:width="15dp"
                android:color="@color/your_color" />
        </shape>
    </item>
</layer-list>

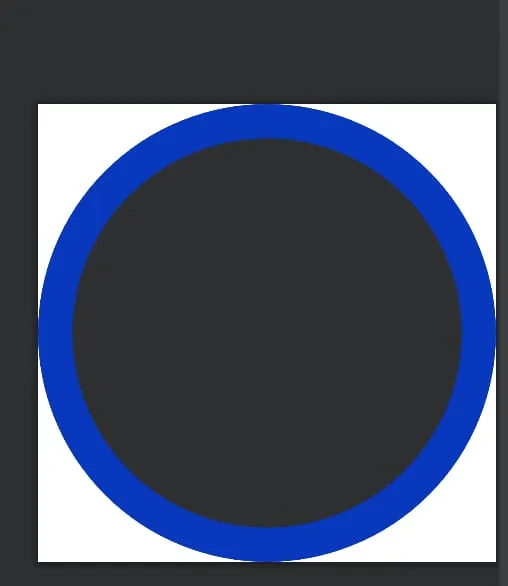
输出:

输出:在这里输入图像描述

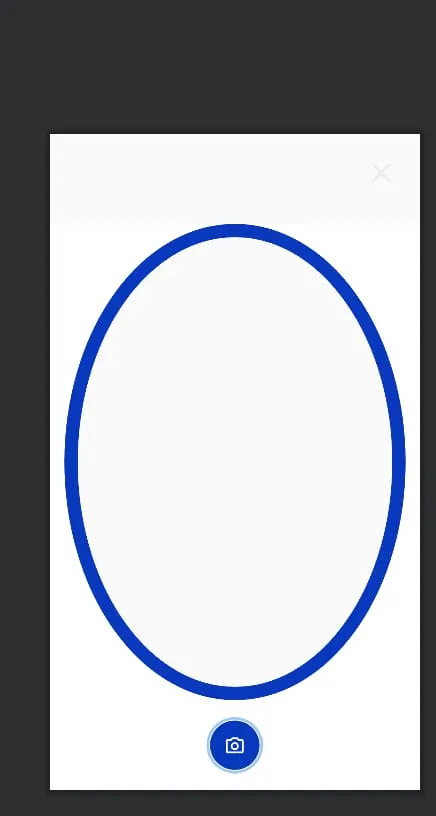
然后您可以拥有像这样的布局,带有透明内容。

enter image description here


网页内容由stack overflow 提供, 点击上面的
可以查看英文原文,
原文链接