有人知道如何使用RecyclerView实现流式布局吗?
6
- Bincy Baby
5
你能详细解释一下吗? - Arth Tilva
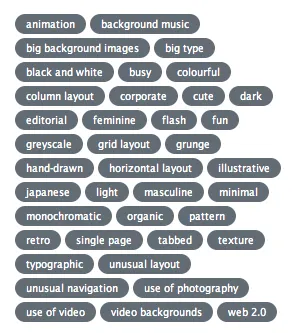
我想要上面图片所示的设计,我认为这可以通过RecyclerView实现,但我不知道该如何做。 - Bincy Baby
2这个链接可能会对你有所帮助:https://github.com/hongyangAndroid/FlowLayout - Dhinakaran Thennarasu
谢谢 @DhinakaranThennarasu - Bincy Baby
2你已经找到解决方案了吗?所有现有的库都只是将视图添加到ViewGroup中,没有涉及到回收。 - Ahmed I. Khalil
3个回答
5
最好的解决方案是使用带有 Google FlexLayoutManager 的 RecyclerView。
// Set layout manager
    val layoutManager = FlexboxLayoutManager(context)
    recyclerview.layoutManager = layoutManager

// Now you can add your normal recyclerview adapter

recyclerview.adapter = MyListAdapter(list)
请在您的 build.gradle 文件中添加以下依赖项。
implementation 'com.google.android:flexbox:3.0.0'
这将起到十分出色的作用。
- Rizwan
2
2挽救了我的一天...最简便的解决方案 - Rick Robin
2这应该是被接受的答案,赞! - Achraf Amil
3
这是使用像列表一样的自定义库GitHubLibrary TagLayout的完整示例:
- 示例代码:
mFlowLayout.setAdapter(new TagAdapter<String>(mVals)
   {
       @Override
       public View getView(FlowLayout parent, int position, String s)
       {
           TextView tv = (TextView) mInflater.inflate(R.layout.tv,
                   mFlowLayout, false);
           tv.setText(s);
           return tv;
       }
   });
使用以下代码,您可以预设所需的选择:-
mAdapter.setSelectedList(1,3,5,7,8,9);
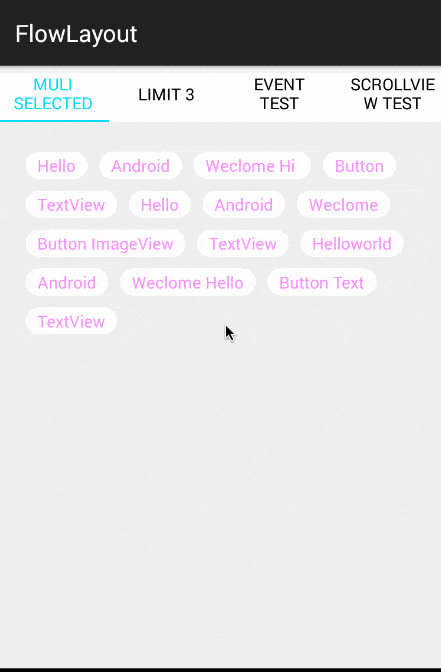
会像下面这样显示结果:
- Hardy
1
我该如何添加多个标签部分?我想要动态地完成它。 - Nav Nav
2
你可以使用FlowLayout并将其作为ScrollView的子级。 在存储库中提供了流布局的示例。
<?xml version="1.0" encoding="utf-8"?>
<ScrollView xmlns:android="http://schemas.android.com/apk/res/android"
            android:layout_width="match_parent"
            android:layout_height="match_parent">

    <LinearLayout
        android:layout_width="match_parent"
        android:layout_height="wrap_content"
        android:orientation="vertical">

        <com.wefika.flowlayout.FlowLayout
            android:layout_width="match_parent"
            android:layout_height="wrap_content"
            android:gravity="start|top"
            android:minHeight="50dp">

            <Button
                android:id="@+id/button"
                android:layout_width="wrap_content"
                android:layout_height="wrap_content"
                android:text="New Button" />

            <Button
                android:id="@+id/button1"
                android:layout_width="wrap_content"
                android:layout_height="wrap_content"
                android:text="New Button" />

            <Button
                android:id="@+id/button2"
                android:layout_width="wrap_content"
                android:layout_height="wrap_content"
                android:text="New Button" />

            <Button
                android:id="@+id/button3"
                android:layout_width="wrap_content"
                android:layout_height="wrap_content"
                android:text="New Button" />
        </com.wefika.flowlayout.FlowLayout>


        <TextView
            android:layout_width="wrap_content"
            android:layout_height="wrap_content"
            android:text="Hello world" />

    </LinearLayout>

</ScrollView>
您可以使用示例中提供的以下方法以编程方式添加或移除视图。
 public void addItem(View view) {

        int color = getResources().getColor(R.color.holo_blue_dark);

        View newView = new View(this);
        newView.setBackgroundColor(color);

        FlowLayout.LayoutParams params = new FlowLayout.LayoutParams(100, 100);
        params.rightMargin = 10;
        newView.setLayoutParams(params);

        mFlowLayout.addView(newView);
    }

    public void removeItem(View view) {

        mFlowLayout.removeView(getLastView());

    }

    public void toggleItem(View view) {

        View last = getLastView();

        if(last.getVisibility() == View.VISIBLE) {
            last.setVisibility(View.GONE);
        } else {
            last.setVisibility(View.VISIBLE);
        }

    }

    private View getLastView() {
        return mFlowLayout.getChildAt(mFlowLayout.getChildCount() - 1);
    }
- Arth Tilva
网页内容由stack overflow 提供, 点击上面的可以查看英文原文,
原文链接
原文链接