Android - ImageView覆盖另一个ImageView

12

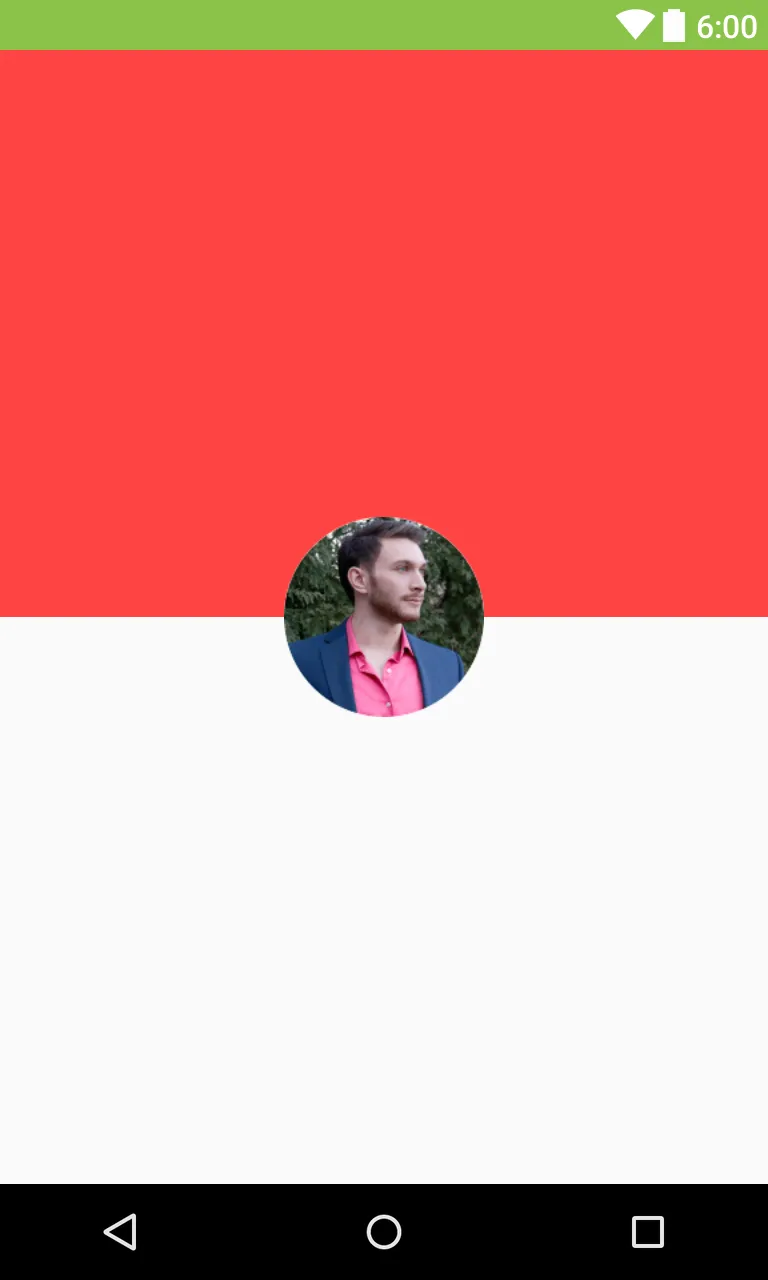
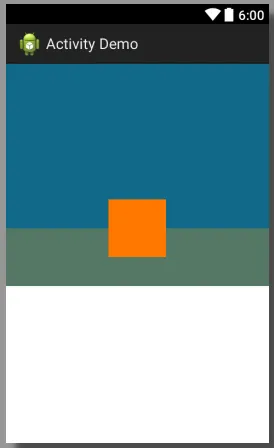
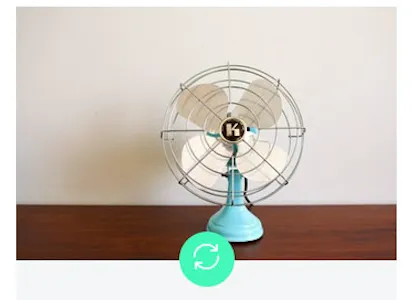
我想让一个ImageView覆盖在另一个ImageView上面,就像这样;只有圆形的一半绿色覆盖在图像上:

enter image description here

我已经尝试使用RelativeLayout并将两个ImageView放入其中。然后我通过使用android:layout_alignBottom将圆形覆盖在图像上。它确实覆盖了,但我不知道如何设置偏移量,以便只有圆形的一半覆盖在基础图像上。

编辑:

对不起,这是我的布局XML代码

<RelativeLayout
    android:layout_width="wrap_content"
    android:layout_height="wrap_content"
    android:layout_gravity="center"
    android:layout_marginBottom="32sp" >
        <ImageView
            android:layout_width="match_parent"
            android:layout_height="wrap_content"
            android:src="@drawable/ic_person_black"
            android:adjustViewBounds="true"
            android:id="@+id/image_view_product" />

        <ImageView
            android:layout_width="wrap_content"
            android:layout_height="wrap_content"
            android:layout_alignBottom="@id/image_view_product"
            android:layout_centerHorizontal="true"
            android:background="@drawable/image_view_circle"
            android:src="@drawable/ic_circle" />

</RelativeLayout>

2
请查看Android:在布局之间重叠放置ImageView帖子。 - ρяσѕρєя K
1
请发布您尝试过的内容 - Iamat8
请发布您的布局代码。 - user4571931
8个回答

11

我得到了许多对这个答案的赞同。所以我试图改进这个答案。也许与其他两种方法相比,这种解决方案更好,因为这个解决方案不需要修复布局或将屏幕分成相等的部分,所以可能更好。

<android.support.design.widget.CoordinatorLayout
 xmlns:android="http://schemas.android.com/apk/res/android"
 xmlns:app="http://schemas.android.com/apk/res-auto"
 android:layout_width="match_parent"
 android:layout_height="match_parent">

<LinearLayout
    android:layout_width="match_parent"
    android:layout_height="match_parent"
    android:orientation="vertical">

    <LinearLayout
        android:id="@+id/viewA"
        android:layout_width="match_parent"
        android:layout_height="wrap_content"
        android:background="@color/colorPrimary"
        android:orientation="horizontal">

        <TextView
            android:id="@+id/subject"
            android:layout_width="match_parent"
            android:layout_height="wrap_content"
            android:padding="20dp"
            android:text="Thi"
            android:textColor="@android:color/white"
            android:textSize="17sp"
            />

    </LinearLayout>

    <LinearLayout
        android:id="@+id/viewB"
        android:layout_width="match_parent"
        android:layout_height="wrap_content"
        android:background="@android:color/white"
        android:orientation="horizontal">

        <TextView
            android:id="@+id/description"
            android:layout_width="wrap_content"
            android:layout_height="wrap_content"
            android:padding="20dp"
            android:text="Thi"
            android:textColor="@android:color/black"
            android:textSize="17sp"
            />
    </LinearLayout>

 </LinearLayout>

 <android.support.design.widget.FloatingActionButton
    android:id="@+id/fab"
    android:layout_width="wrap_content"
    android:layout_height="wrap_content"
    android:layout_margin="16dp"
    android:clickable="true"
    android:src="@drawable/plus"
    app:layout_anchor="@+id/viewA"
    app:layout_anchorGravity="bottom|right|end"/>

</android.support.design.widget.CoordinatorLayout>

可以尝试另一种方式

<FrameLayout xmlns:android="http://schemas.android.com/apk/res/android"
  android:layout_width="match_parent"
  android:layout_height="match_parent"
  android:orientation="vertical">

<LinearLayout
    android:layout_width="match_parent"
    android:layout_height="match_parent"
    android:orientation="vertical">

    // this is your first layout to put the big image
    // use src or backgroud image as per requirement

    <LinearLayout
        android:background="@color/red_error"
        android:layout_width="match_parent"
        android:layout_height="0dp"
        android:layout_weight="1">

    </LinearLayout>

   // this is your bottom layout
    <LinearLayout
        android:layout_width="match_parent"
        android:layout_height="0dp"
        android:layout_weight="1">

    </LinearLayout>
</LinearLayout>

// This is the imageview which overlay the first LinearLayout 
<ImageView
    android:layout_width="wrap_content"
    android:layout_height="wrap_content"
    android:src="@drawable/success"
    android:adjustViewBounds="true"
    android:layout_gravity="center"/>
</FrameLayout>

它看起来像这样

在此输入图片描述

找到了另一种解决方法(编辑) 如果您的大图像尺寸是固定高度,您可以尝试这个

 <RelativeLayout xmlns:android="http://schemas.android.com/apk/res/android"
android:layout_width="match_parent"
android:layout_height="match_parent" >

<RelativeLayout
    android:id="@+id/layoutTop"
    android:background="@color/red_error"
    android:layout_width="match_parent"
    android:layout_height="200dp" >
</RelativeLayout>

<RelativeLayout
    android:id="@+id/layoutBottom"
    android:layout_width="match_parent"
    android:layout_height="0dp"
    android:layout_alignParentBottom="true"
    android:layout_below="@id/layoutTop" >
</RelativeLayout>

<ImageView
    android:id="@+id/overlapImage"
    android:layout_width="wrap_content"
    android:layout_height="40dp"
    android:layout_above="@id/layoutBottom"
    android:layout_centerHorizontal="true"
    android:layout_marginBottom="-20dp" 
    android:adjustViewBounds="true"
   android:src="@drawable/testimage" />

 </RelativeLayout>

参考:- Android: Placing ImageView on overlap between layouts

希望这能有所帮助。祝好运。


1
挽救了我的一天。好的解决方案。谢谢。 - Santhana
非常感谢,现在我可以通过这个创建高级复杂对象了。 - Pulkit
@Pulkit 感谢您的评论。我尝试使用CoordinatorLayout来改进那个答案。我更新了答案,也许会对您有所帮助。 - Shubhank Gupta

2
我建议使用Constraintlayout,因为它对单个视图项的定位控制非常出色。以下是基于您下面的示例的样本。
<android.support.constraint.ConstraintLayout
    android:layout_width="wrap_content"
    android:layout_height="wrap_content"
    android:layout_gravity="center"
    android:id="@+id/parentLayout">
    <ImageView
        android:layout_width="wrap_content"
        android:layout_height="wrap_content"
        android:src="@drawable/ic_person_black"
        android:adjustViewBounds="true"
        android:id="@+id/image_view_product"/>

    <View
        android:layout_width="50dp"
        android:layout_height="50dp"
        app:layout_constraintTop_toBottomOf="@+id/image_view_product"/>

    <ImageView
        android:layout_width="100dp"
        android:layout_height="100dp"
        android:layout_alignBottom="@id/image_view_product"
        android:layout_centerHorizontal="true"
        android:background="@drawable/circle"
        android:src="@drawable/ic_add_circle_green_24dp"

        app:layout_constraintBottom_toBottomOf="parent"
        app:layout_constraintLeft_toLeftOf="parent"
        app:layout_constraintRight_toRightOf="parent"/>

</android.support.constraint.ConstraintLayout>

2

试试这个方法: 只需根据您的需要更改layout_widthlayout_height即可。

<?xml version="1.0" encoding="utf-8"?>
<RelativeLayout xmlns:android="http://schemas.android.com/apk/res/android"
    android:layout_width="match_parent"
    android:layout_height="match_parent"
    android:orientation="vertical" >

    <View
        android:id="@+id/viewOne"
        android:layout_width="match_parent"
        android:layout_height="200dp"
        android:background="#126989" />

    <View
        android:id="@+id/viewTwo"
        android:layout_width="match_parent"
        android:layout_height="70dp"
        android:layout_below="@+id/viewOne"
        android:background="#547866" />

    <View
        android:layout_width="70dp"
        android:layout_height="70dp"
        android:layout_alignBottom="@+id/viewTwo"
        android:layout_centerHorizontal="true"
        android:background="#ff7800"
        android:layout_marginBottom="35dp" />

</RelativeLayout>

它将会长这样:

image


1
回复内容存在敏感词^**$Top = "-20dp"

有边距会使布局在不同的屏幕设备上不太一致。 - cafebabe1991
怎么样?你能解释一下吗? - Zahidul Islam
请阅读此讨论 https://groups.google.com/forum/#!topic/android-developers/2vfHxC33jtI - cafebabe1991
上面的图片(风扇图片)必须有高度。因此,当底部的刷新图片向上移动其大小的一半时,它将对每个不同的屏幕执行相同的操作。我实际上不明白问题出在哪里!! - Zahidul Islam

1

将两张图片放入相对布局中,首先定义你想要放在绿色圆圈后面的图片,然后定义绿色圆圈为:

android:layout_alignBottom="@+id/Image1"

然后通过给绿色圆形图像添加边距来调整位置。

0
我建议您使用一个帧布局来展示这两张图片。
其中,刷新图标位于底部,风扇图标位于顶部。
需要注意的是,由于帧布局的特性类似于堆栈,因此在布局中处于底部的元素会显示在顶部。
同时,将刷新图标的重心设置为bottom|center,以便使其呈现出这种效果。
 <FrameLayout xmlns:android="http://schemas.android.com/apk/res/android"
   android:layout_width="fill_parent"
   android:layout_height="fill_parent">

   <ImageView 
      android:src="@drawable/ic_fan"
      android:scaleType="centerCrop"
      android:layout_height="wrap_content"
      android:layout_width="match_parent"/>

   <ImageView
            android:src="@drawable/ic_refresh"
      android:layout_height="wrap_content"
      android:layout_width="wrap_content"
      android:gravity="center|bottom"/>
</FrameLayout>

0
<RelativeLayout
android:layout_width="wrap_content"
android:layout_height="wrap_content"
android:layout_gravity="center"
android:layout_marginBottom="32sp" >

<ImageView
android:id="@+id/ivBackground"
android:layout_width="match_parent"
android:layout_height="wrap_content"
android:src="@drawable/ic_person_black"
android:adjustViewBounds="true"
android:id="@+id/image_view_product" />

<ImageView
android:layout_width="wrap_content"
android:layout_height="40dp"
android:layout_marginTop="-20dp"
android:layout_below="@+id/ivBackground"
android:layout_centerHorizontal="true"
android:background="@drawable/image_view_circle"
android:src="@drawable/ic_circle" />

我认为这应该会对你有所帮助,我已经编辑了你的代码并进行了以下更改:
- 我将圆形ImageView的高度更改为40dp,然后给它一个-20dp的顶部边距,以便图像可以按照你需要的方式覆盖在背景图像上。

我没有运行过这段代码,如果你遇到任何问题,请告诉我,我希望这对你有所帮助。


0

截图:

enter image description here

activity_main.xml:

   <RelativeLayout
            android:id="@+id/rl_image"
            android:layout_width="match_parent"
            android:layout_height="200dp">

            <ImageView
                android:id="@+id/thumbnail"
                android:layout_width="match_parent"
                android:layout_height="160dp"
                android:background="?attr/selectableItemBackgroundBorderless"
                android:clickable="true"
                android:contentDescription="null"
                android:scaleType="fitXY"
                android:src="@drawable/album9" />


            <ImageView
                android:id="@+id/imageView_round"
                android:layout_width="70dp"
                android:layout_height="70dp"
                android:layout_alignParentBottom="true"
                 android:layout_centerHorizontal="true"
                android:src="@drawable/user_profile" />

        </RelativeLayout>

网页内容由stack overflow 提供, 点击上面的
可以查看英文原文,
原文链接