如何在Kivy中绘制平滑的线条

3

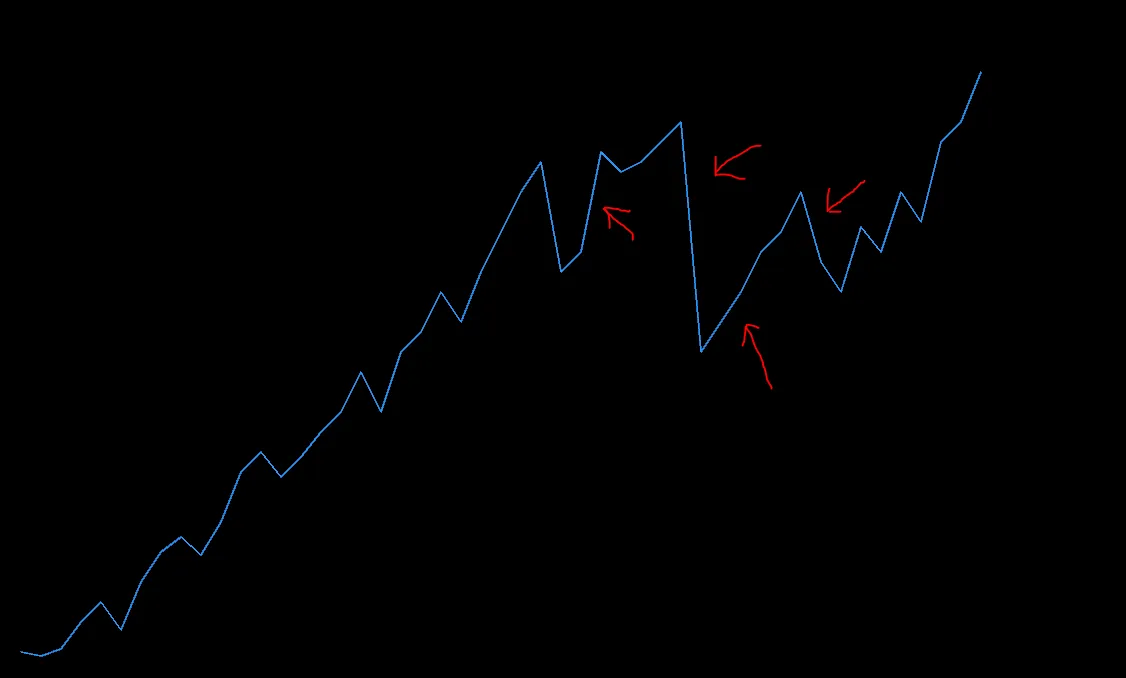
我使用Kivy绘制了一个蓝色的长线,并在其中加入了一些点,但是该线在某些地方看起来很模糊和锯齿状。我尝试使用纹理和调整线宽度,但问题仍然存在。有人知道如何使线条看起来一致和清晰吗?

enter image description here

from kivy.app import App
from kivy.graphics import Line
from kivy.graphics.texture import Texture
from kivy.uix.widget import Widget
from kivy.graphics import Line, InstructionGroup, Canvas, CanvasBase, Color

GRADIENT_DATA = (
    b"\x00\x00\x00\x07\x07\x07\x0f\x0f\x0f\x17\x17\x17\x1f\x1f\x1f"
    b"'''///777???GGGOOOWWW___gggooowww\x7f\x7f\x7f\x87\x87\x87"
    b"\x8f\x8f\x8f\x97\x97\x97\x9f\x9f\x9f\xa7\xa7\xa7\xaf\xaf\xaf"
    b"\xb7\xb7\xb7\xbf\xbf\xbf\xc7\xc7\xc7\xcf\xcf\xcf\xd7\xd7\xd7"
    b"\xdf\xdf\xdf\xe7\xe7\xe7\xef\xef\xef\xf7\xf7\xf7\xff\xff\xff"
    b"\xf6\xf6\xf6\xee\xee\xee\xe6\xe6\xe6\xde\xde\xde\xd5\xd5\xd5"
    b"\xcd\xcd\xcd\xc5\xc5\xc5\xbd\xbd\xbd\xb4\xb4\xb4\xac\xac\xac"
    b"\xa4\xa4\xa4\x9c\x9c\x9c\x94\x94\x94\x8b\x8b\x8b\x83\x83\x83"
    b"{{{sssjjjbbbZZZRRRJJJAAA999111)))   \x18\x18\x18\x10\x10\x10"
    b"\x08\x08\x08\x00\x00\x00")

class MyApp(App):
    def build(self):
        widget = Widget()
        # Create texture
        tex = Texture.create(size=(1, 64), colorfmt='rgb', bufferfmt='ubyte')
        tex.blit_buffer(GRADIENT_DATA, colorfmt='rgb')
        # Draw lines with the texture
        with widget.canvas:
            Color(.157, .588, .988)
            Line(points=(100, 100, 120, 96, 140, 103, 160, 130, 180, 150, 200, 122, 220, 170, 240, 200, 
            260, 215, 280, 197, 300, 230, 320, 280, 340, 300, 360, 275, 380, 295, 400, 320, 420, 340, 
            440, 380, 460, 340,  480, 400, 500, 420, 520, 460, 540, 430, 560, 480, 580, 520, 600, 560, 
            620, 590, 640, 480, 660, 500, 680, 600, 700, 580, 720, 590, 740, 610, 760, 630, 780, 400, 
            800, 430, 820, 460, 840, 500, 860, 520, 880, 560, 900, 490, 920, 460, 940, 525, 960, 500, 
            980, 560, 1000, 530, 1020, 610, 1040, 630, 1060, 680), width=.75, texture=tex)
        return widget

if __name__ == "__main__":    
    MyApp().run()

1
你可以尝试使用SmoothLine类,它的存在基本上是为了解决这个问题,但可能还存在一些问题。你也可以检查是否启用了抗锯齿(在Kivy设置中的MSAA)。 - inclement
1个回答

2

我想到了一个不错的方法来创建平滑的线条,具体步骤如下:

  1. 使用纹理来绘制线条 - 不确定为什么这很重要,但没有纹理会看起来更糟糕。
  2. 确保在效果小部件中的子小部件上使用画布来绘制线条。在效果小部件内部,我们必须利用模糊效果来减少锯齿。

以下是代码:

#We use a combination of the following to create a smooth line:
#1) Utilize a texture for the line - not sure why this matters but it looks worse without it..
#2) Make sure to draw the line with a canvas on top of a child widget within an effect widget. Within the effect widget, we must utilize blur effects to reduce jaggedness.
#it should be structured like this:

    #Effect Widget:
        #Widget: <- note extra widget here
            #canvas for the line

#NOTE: If you don't nest the canvas this way the blur effects won't work on the line.
#Costs and benefits of this approach: You will take a hit on performance and the color of the line will darken a bit, but at least it won't look jagged. 
#You can add more brightness to the line by adding more white (\xff) into the gradient data. 

from kivy.app import App
from kivy.graphics import Line
from kivy.graphics.texture import Texture
from kivy.uix.widget import Widget
from kivy.graphics import Line, InstructionGroup, Canvas, CanvasBase, Color, Rectangle
from kivy.lang import Builder
from kivy.uix.floatlayout import FloatLayout
from kivy.uix.effectwidget import EffectWidget
from kivy.uix.effectwidget import (MonochromeEffect,
                                   InvertEffect,
                                   ScanlinesEffect,
                                   ChannelMixEffect,
                                   ScanlinesEffect,
                                   FXAAEffect,
                                   PixelateEffect,
                                   HorizontalBlurEffect,
                                   VerticalBlurEffect)

Builder.load_string("""
#: import ew kivy.uix.effectwidget
<MyApp>: 
    EffectWidget:
        effects: ew.HorizontalBlurEffect(size=2), ew.VerticalBlurEffect(size=2), ew.FXAAEffect()
        Widget:
            id: ef_widget
""")

GRADIENT_DATA_DARKER = (
    b"\x00\x00\x00\x07\x07\x07\x0f\x0f\x0f\x17\x17\x17\x1f\x1f\x1f"
    b"'''///777???GGGOOOWWW___gggooowww\x7f\x7f\x7f\x87\x87\x87"
    b"\x8f\x8f\x8f\x97\x97\x97\x9f\x9f\x9f\xa7\xa7\xa7\xaf\xaf\xaf"
    b"\xb7\xb7\xb7\xbf\xbf\xbf\xc7\xc7\xc7\xcf\xcf\xcf\xd7\xd7\xd7"
    b"\xdf\xdf\xdf\xe7\xe7\xe7\xef\xef\xef\xf7\xf7\xf7\xff\xff\xff"
    b"\xf6\xf6\xf6\xee\xee\xee\xe6\xe6\xe6\xde\xde\xde\xd5\xd5\xd5"
    b"\xcd\xcd\xcd\xc5\xc5\xc5\xbd\xbd\xbd\xb4\xb4\xb4\xac\xac\xac"
    b"\xa4\xa4\xa4\x9c\x9c\x9c\x94\x94\x94\x8b\x8b\x8b\x83\x83\x83"
    b"{{{sssjjjbbbZZZRRRJJJAAA999111)))   \x18\x18\x18\x10\x10\x10"
    b"\x08\x08\x08\x00\x00\x00")

GRADIENT_DATA_BRIGHTER = (
    b"\x00\x00\x00\x07\x07\x07\x0f\x0f\x0f\x17\x17\x17\x1f\x1f\x1f"
    b"'''///777???GGGOOOWWW___gggooowww\x7f\x7f\x7f\x87\x87\x87"
    b"\xff\xff\xff\xff\xff\xff\xff\xff\xff\xff\xff\xff\xaf\xaf\xaf"
    b"\xff\xff\xff\xbf\xbf\xbf\xc7\xc7\xc7\xcf\xcf\xcf\xff\xff\xff"
    b"\xff\xff\xff\xe7\xe7\xe7\xef\xef\xef\xf7\xf7\xf7\xff\xff\xff"
    b"\xff\xff\xff\xee\xee\xee\xe6\xe6\xe6\xde\xde\xde\xff\xff\xff"
    b"\xff\xff\xff\xc5\xc5\xc5\xbd\xbd\xbd\xb4\xb4\xb4\xff\xff\xff"
    b"\xff\xff\xff\xff\xff\xff\x94\x94\x94\x8b\x8b\x8b\x83\x83\x83"
    b"{{{sssjjjbbbZZZRRRJJJAAA999111)))   \x18\x18\x18\x10\x10\x10"
    b"\x08\x08\x08\x00\x00\x00")

class MyApp(App, FloatLayout):
    def build(self):
        # Create 1st texture
        tex = Texture.create(size=(1, 64), colorfmt='rgb', bufferfmt='ubyte')
        tex.blit_buffer(GRADIENT_DATA_DARKER, colorfmt='rgb')
        mypoints = [100, 100, 120, 96, 140, 103, 160, 130, 180, 150, 200, 122, 220, 170, 240, 200, 
            260, 215, 280, 197, 300, 230, 320, 280, 340, 300, 360, 275, 380, 295, 400, 320, 420, 340, 
            440, 380, 460, 340,  480, 400, 500, 420, 520, 460, 540, 430, 560, 480, 580, 520, 600, 560, 
            620, 590, 640, 480, 660, 500, 680, 600, 700, 580, 720, 590, 740, 610, 760, 630, 780, 400]
        with self.ids.ef_widget.canvas:
            Color(.157, .588, .988) #rgb = 40, 150, 252
            Line(points=(mypoints), width=2.2, texture=tex) #this line is darker because the gradient doesn't have as much white in it..
        # Create 2nd texture
        tex2 = Texture.create(size=(1, 64), colorfmt='rgb', bufferfmt='ubyte')
        tex2.blit_buffer(GRADIENT_DATA_BRIGHTER, colorfmt='rgb')
        mypoints2 = [300, 100, 320, 96, 340, 103, 360, 130, 380, 150, 400, 122, 420, 170, 440, 200, 
            460, 215, 480, 197, 500, 230, 520, 280, 540, 300, 560, 275, 580, 295, 600, 320, 620, 340, 
            640, 380, 660, 340,  680, 400, 700, 420, 720, 460, 740, 430, 760, 480, 780, 520, 800, 560, 
            820, 590, 840, 480, 860, 500, 880, 600, 900, 580, 920, 590, 940, 610, 960, 630, 980, 400]
        with self.ids.ef_widget.canvas:
            Color(.157, .588, .988) #rgb = 40, 150, 252
            Line(points=(mypoints2), width=2.2, texture=tex2) #this line is brighter because the gradient has more white in it (more \xff)
        #here is what the 2 gradients look like as rectangles - the one with more white results in a brighter line
        with self.ids.ef_widget.canvas:
            Rectangle(size=[100, 100], pos=[900, 700], texture=tex2)
        with self.ids.ef_widget.canvas:
            Rectangle(size=[100, 100], pos=[700, 700], texture=tex)
        #here is how you can convert from int to bytes (for use in gradients above) or from bytes to ints
        print (str(bytes([255]))) #convert int to bytes (r/g/b number)
        print (str(int.from_bytes(b'\x00', byteorder='big'))) #convert bytes to int
        return self

if __name__ == "__main__":    
    MyApp().run()

如您所见,现在这条线看起来更加平滑:

enter image description here


网页内容由stack overflow 提供, 点击上面的
可以查看英文原文,
原文链接