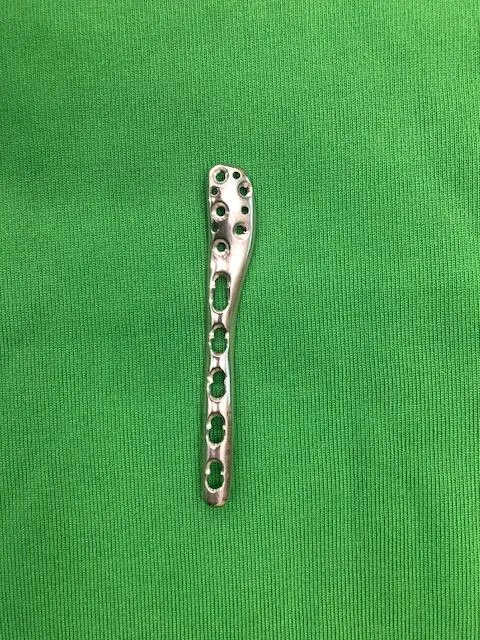
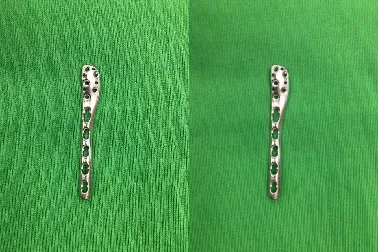
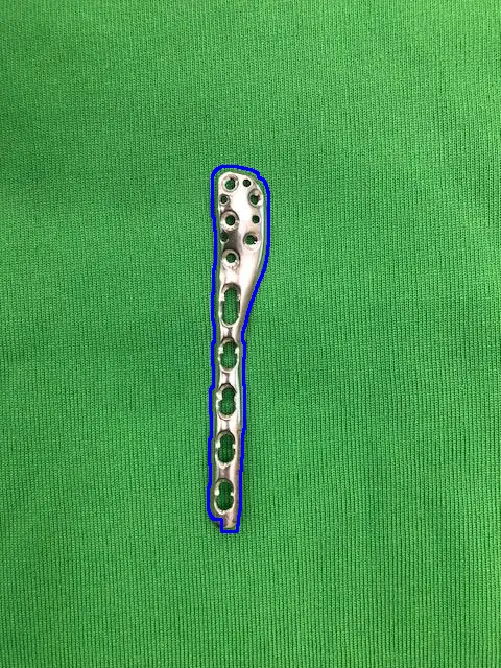
我正在尝试找到类似下图所示的金属光泽物体的轮廓:
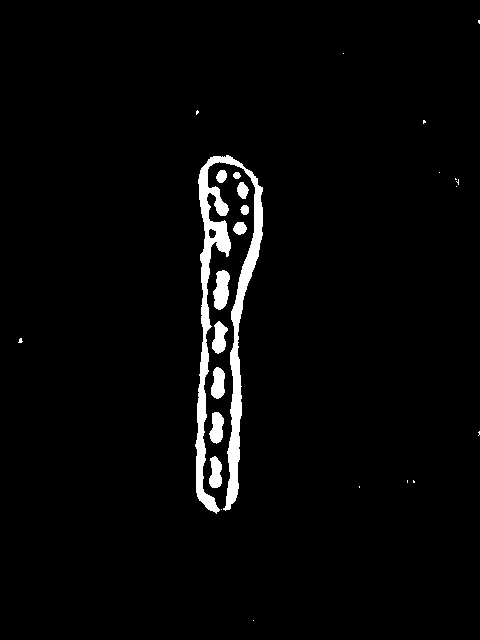
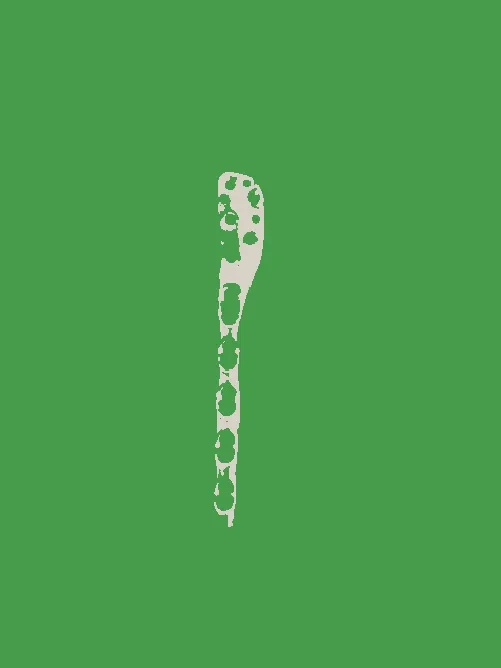
我已经使用了OpenCV中的Canny算法来获取图像的轮廓,但是结果(如下所示)并没有完全绘制出原始图像的轮廓。在右下方有一个大间隙。

我请求任何可以帮助我改进轮廓的资源,使其连续并且(非常接近)原始图像形状的类型。
我已经使用了OpenCV中的Canny算法来获取图像的轮廓,但是结果(如下所示)并没有完全绘制出原始图像的轮廓。在右下方有一个大间隙。
我请求任何可以帮助我改进轮廓的资源,使其连续并且(非常接近)原始图像形状的类型。
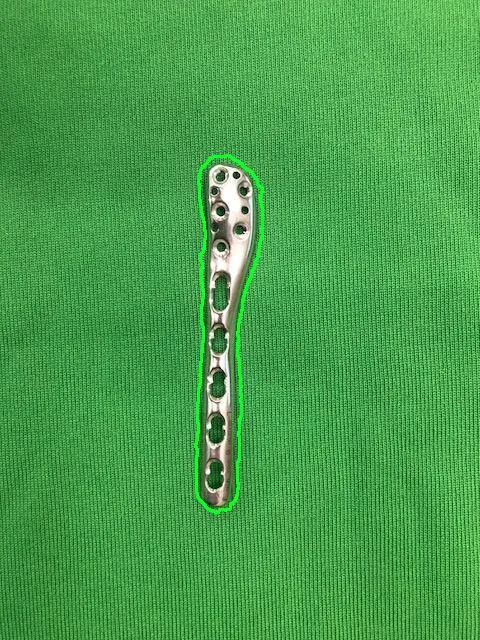
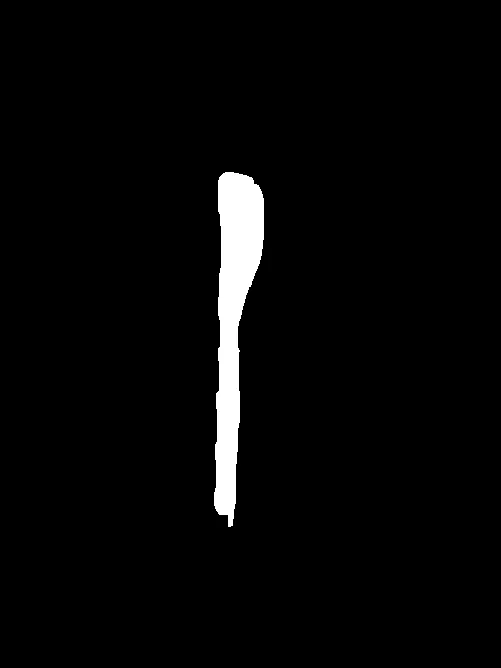
一个简单的方法是先应用大范围的高斯模糊以平滑图像,然后进行自适应阈值处理。在假设物体是图像中最大的东西的前提下,我们可以找到轮廓并使用轮廓面积过滤以获取最大的轮廓。
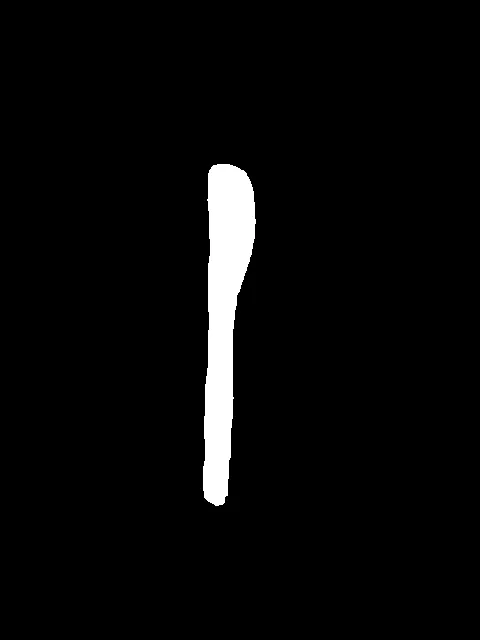
二值化图像
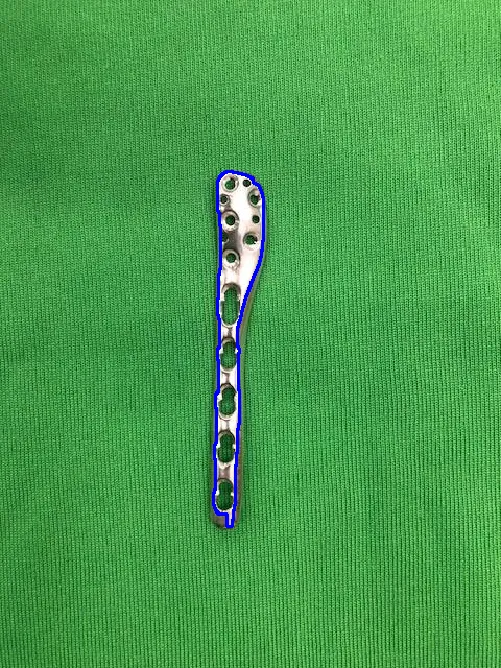
结果
代码
import cv2
import numpy as np

# Load image, convert to grayscale, Gaussian Blur, adaptive threshold
image = cv2.imread('1.jpg')
gray = cv2.cvtColor(image, cv2.COLOR_BGR2GRAY)
blur = cv2.GaussianBlur(gray, (13,13), 0)
thresh = cv2.adaptiveThreshold(blur,255,cv2.ADAPTIVE_THRESH_GAUSSIAN_C, cv2.THRESH_BINARY_INV,51,7)

# Morph close
kernel = cv2.getStructuringElement(cv2.MORPH_RECT, (3,3))
close = cv2.morphologyEx(thresh, cv2.MORPH_CLOSE, kernel, iterations=1)

# Find contours, sort for largest contour, draw contour
cnts = cv2.findContours(close, cv2.RETR_EXTERNAL, cv2.CHAIN_APPROX_SIMPLE)
cnts = cnts[0] if len(cnts) == 2 else cnts[1]
cnts = sorted(cnts, key=cv2.contourArea, reverse=True)
for c in cnts:
    cv2.drawContours(image, [c], -1, (36,255,12), 2)
    break

cv2.imshow('thresh', thresh)
cv2.imshow('image', image)
cv2.waitKey()
输入:

import cv2
import numpy as np

# read input
img = cv2.imread('shiny.jpg')

# convert to hsv and get saturation channel
sat = cv2.cvtColor(img, cv2.COLOR_RGB2HSV)[:,:,1]

# do a little Gaussian filtering
blur = cv2.GaussianBlur(sat, (3,3), 0)


# threshold and invert to create initial mask
mask = 255 - cv2.threshold(blur, 100, 255, cv2.THRESH_BINARY)[1]

# apply morphology close to fill interior regions in mask
kernel = np.ones((15,15), np.uint8)
mask = cv2.morphologyEx(mask, cv2.MORPH_CLOSE, kernel)


# get outer contours from inverted mask and get the largest (presumably only one due to morphology filtering)
cntrs = cv2.findContours(mask, cv2.RETR_EXTERNAL, cv2.CHAIN_APPROX_SIMPLE)
cntrs = cntrs[0] if len(cntrs) == 2 else cntrs[1]
result = img.copy()
area_thresh = 0
for c in cntrs:
    area = cv2.contourArea(c)
    if area > area_thresh:
        area = area_thresh
        big_contour = c

# draw largest contour
cv2.drawContours(result, [big_contour], -1, (0,0,255), 2)


# write result to disk
cv2.imwrite("shiny_mask.png", mask)
cv2.imwrite("shiny_outline.png", result)

# display it
cv2.imshow("IMAGE", img)
cv2.imshow("MASK", mask)
cv2.imshow("RESULT", result)
cv2.waitKey(0)
阈值和过滤器掩码:
结果:

另一种方法是使用cv2.inRange()函数对绿色进行阈值处理。
std::string imageName = "C://opencvImages/LSl42.jpg";
cv::Mat testImage =  cv::imread( imageName );
//apply Gaussian Blur to smooth out the input:
cv::GaussianBlur( testImage, testImage, cv::Size(3,3), 0, 0 );
imageQuantization是从这里获取的函数,它基于K-means实现分割。正如我所提到的,它可以将类似值的颜色分组成簇。那非常方便!让我们将颜色分为2组:前景对象和背景。int segmentationClusters = 2; //total number of clusters in which the input will be segmented...
int iterations = 5; // k-means iterations
cv::Mat segmentedImage = imageQuantization( testImage, segmentationClusters, iterations );
//compute grayscale image of the segmented output:
cv::Mat grayImage;
cv::cvtColor( segmentedImage, grayImage, cv::COLOR_RGB2GRAY );

//get binary image via Otsu:
cv::Mat binImage;
cv::threshold( grayImage, binImage, 0, 255, cv::THRESH_OTSU );

//Perform a morphological closing to lose up holes in the target blob:
cv::Mat SE = cv::getStructuringElement( cv::MORPH_RECT, cv::Size(3, 3) );
cv::morphologyEx( binImage, binImage, cv::MORPH_CLOSE, SE, cv::Point(-1,-1), 10 );
cv::Mat testEdges;
//setup lower and upper thresholds for Canny’s edge detection:
float lowerThreshold = 30;
float upperThreshold = 3 * lowerThreshold;
cv::Canny( binImage, testEdges, lowerThreshold, upperThreshold );
std::vector<std::vector<cv::Point> > contours;
std::vector<cv::Vec4i> hierarchy;

cv::findContours( testEdges, contours, hierarchy, CV_RETR_TREE, CV_CHAIN_APPROX_SIMPLE, cv::Point(0, 0) );

for( int i = 0; i< contours.size(); i++ )
{
 cv::Scalar color = cv::Scalar( 0,255,0 );
 cv::drawContours( resizedImage, contours, i, color, 2, 8, hierarchy, 0, cv::Point() );
}
python 3.7.4,numpy==1.14.5,Windows 10,opencv-python==4.2.0.32。 - nathancy