在MUI DataGrid中,通过点击任何标题列上的选项菜单,您可以访问列可见性面板。
但我还没有找到一种从Grid外部显示此面板的方法。想法是有一个按钮,当点击时,可以显示面板。即使它仍然在Grid内部位置。
这将避免为此目的构建组件。
示例: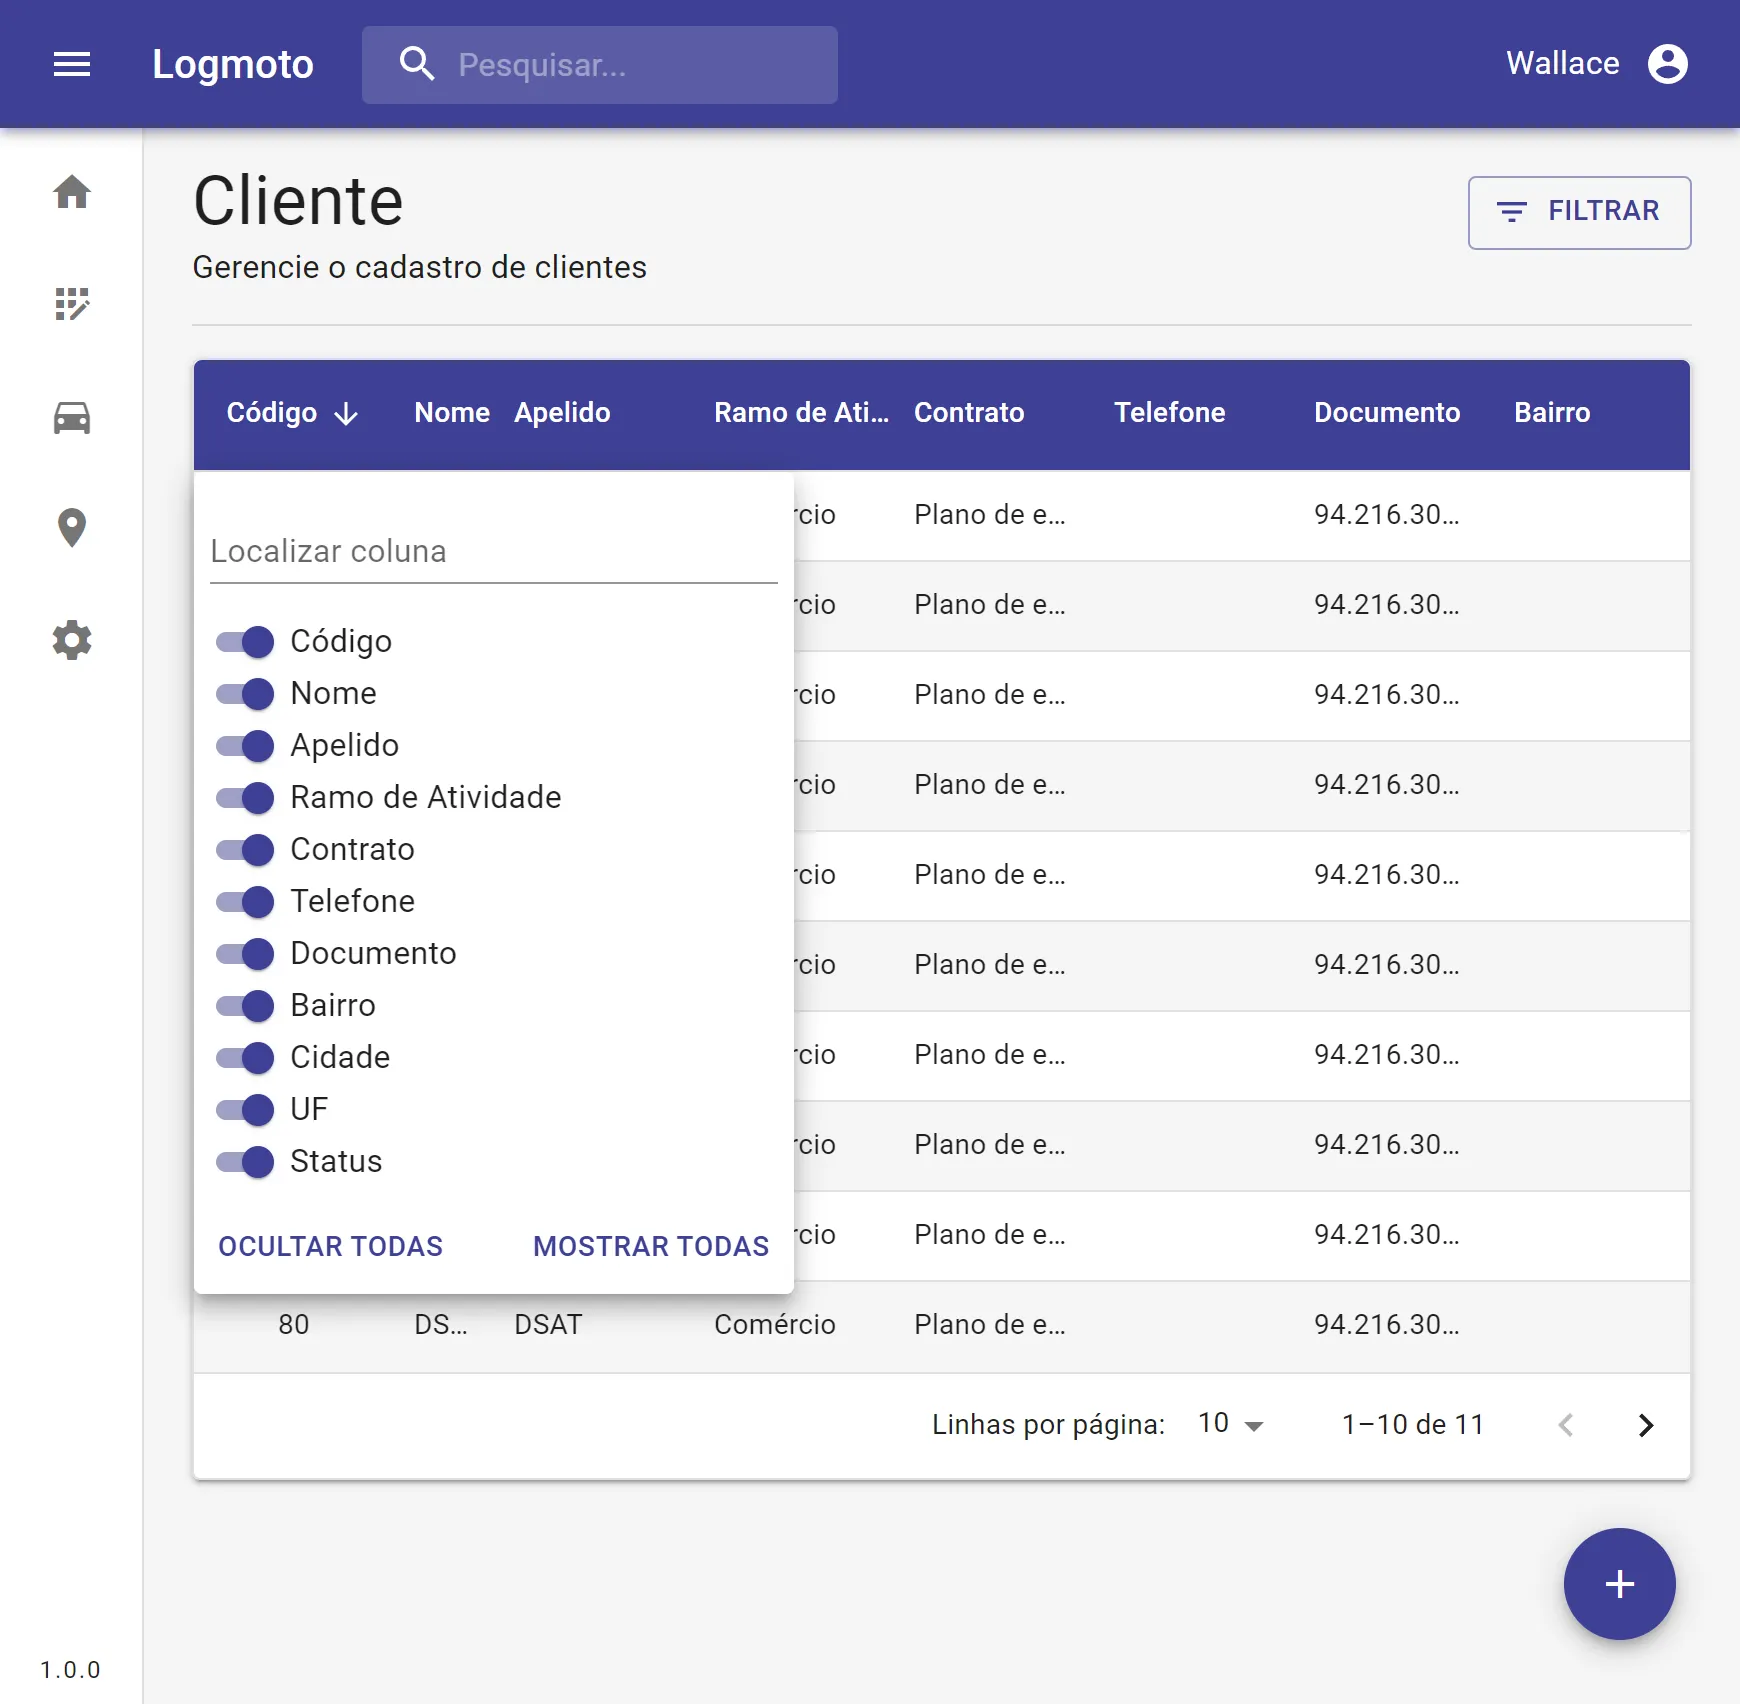
但我还没有找到一种从Grid外部显示此面板的方法。想法是有一个按钮,当点击时,可以显示面板。即使它仍然在Grid内部位置。
这将避免为此目的构建组件。
示例:
GridPreferencesPanel。您可以通过使用网格API上的showPreferences函数来强制打开它。以下是来自MUI源代码的文档:/**
* The preferences panel API interface that is available in the grid [[apiRef]].
*/
export interface GridPreferencesPanelApi {
/**
* Displays the preferences panel. The `newValue` argument controls the content of the panel.
* @param {GridPreferencePanelsValue} newValue The panel to open. Use `"filters"` or `"columns"`.
*/
showPreferences: (newValue: GridPreferencePanelsValue) => void;
/**
* Hides the preferences panel.
*/
hidePreferences: () => void;
}
GridPreferencePanelsValue枚举并调用showPreferences(GridPreferencePanelsValue.columns)。使用普通JavaScript,您可以调用showPreferences("columns")。
Toobar组件中),您将使用useGridApiContext钩子访问该函数。import * as React from "react";
import { Button } from "@mui/material";
import {
GridToolbarContainer,
GridPreferencePanelsValue,
useGridApiContext
} from "@mui/x-data-grid";
export const CustomToolbar = () => {
const apiRef = useGridApiContext();
const handleClick = () => {
apiRef.current?.showPreferences(GridPreferencePanelsValue.columns);
};
return (
<GridToolbarContainer>
<Button onClick={handleClick}>Show Columns</Button>
</GridToolbarContainer>
);
};
<DataGrid
  components={{
    Toolbar: CustomToolbar
  }}
  // your other props
/>
useGridApiRef钩子(仅限专业版)。这将创建一个引用,您将把它传递给DataGrid,但也允许您在父组件中使用该引用。
文档:在网格之外使用
import * as React from "react";
import { Box, Button } from "@mui/material";
import {
  DataGridPro,
  GridPreferencePanelsValue,
  useGridApiRef
} from "@mui/x-data-grid-pro";

export const ParentComponent = () => {
  const apiRef = useGridApiRef();

  const handleClick = () => {
    apiRef.current?.showPreferences(GridPreferencePanelsValue.columns);
  };

  return (
    <Box>
      <Button onClick={handleClick}>Show Columns</Button>
      <Box sx={{ height: 400, width: "100%" }}>
        <DataGridPro
          apiRef={apiRef}
          // your other props
        />
      </Box>
    </Box>
  );
}
虽然有一些变通方法可以避免使用专业版钩子,但这是最清晰的方式。
我不确定文档中是否有提到,但看起来你不能像过滤面板一样使用Grid API来控制默认的MUI“列可见性面板”的可见性。
但是,你可以向DataGrid提供自己的columnVisibilityModel,它将决定网格中哪些列是可见的。这将让你从网格外部控制每个列的可见性,但你需要创建自己的列可见性面板。
以下是一个代码沙箱示例: https://codesandbox.io/s/mui-5-forked-zj4glu?file=/src/ArrowPopper.tsx
代码:
import * as React from "react";
import { Box, Button, FormControlLabel, Popper, Switch } from "@mui/material";
import { DataGrid, GridColDef, GridValueGetterParams } from "@mui/x-data-grid";

const columns: GridColDef[] = [
  { field: "id", headerName: "ID", width: 90 },
  {
    field: "firstName",
    headerName: "First name",
    width: 150,
    editable: true
  },
  {
    field: "lastName",
    headerName: "Last name",
    width: 150,
    editable: true
  },
  {
    field: "age",
    headerName: "Age",
    type: "number",
    width: 110,
    editable: true
  },
  {
    field: "fullName",
    headerName: "Full name",
    description: "This column has a value getter and is not sortable.",
    sortable: false,
    width: 160,
    valueGetter: (params: GridValueGetterParams) =>
      `${params.row.firstName || ""} ${params.row.lastName || ""}`
  }
];

const rows = [
  { id: 1, lastName: "Snow", firstName: "Jon", age: 35 },
  { id: 2, lastName: "Lannister", firstName: "Cersei", age: 42 },
  { id: 3, lastName: "Lannister", firstName: "Jaime", age: 45 },
  { id: 4, lastName: "Stark", firstName: "Arya", age: 16 },
  { id: 5, lastName: "Targaryen", firstName: "Daenerys", age: null },
  { id: 6, lastName: "Melisandre", firstName: null, age: 150 },
  { id: 7, lastName: "Clifford", firstName: "Ferrara", age: 44 },
  { id: 8, lastName: "Frances", firstName: "Rossini", age: 36 },
  { id: 9, lastName: "Roxie", firstName: "Harvey", age: 65 }
];

export default function DataGridDemo() {
  const [columnVisibility, setColumnVisibility] = React.useState({
    id: true,
    firstName: true,
    lastName: true,
    age: true,
    fullName: true
  });

  const [anchorEl, setAnchorEl] = React.useState<null | HTMLElement>(null);

  const toggleColumnVisibility = (e) => {
    setColumnVisibility((prev) => ({
      ...prev,
      [e.target.name]: e.target.checked
    }));
  };

  const handleClick = (event: React.MouseEvent<HTMLElement>) => {
    setAnchorEl(anchorEl ? null : event.currentTarget);
  };

  const open = Boolean(anchorEl);

  return (
    <Box sx={{ height: 400, width: "100%" }}>
      <Button
        onClick={handleClick}
        variant="contained"
        sx={{
          mb: 2
        }}
      >
        Show Column Visibility
      </Button>
      <DataGrid
        rows={rows}
        columns={columns}
        pageSize={5}
        rowsPerPageOptions={[5]}
        checkboxSelection
        disableSelectionOnClick
        columnVisibilityModel={columnVisibility}
      />
      <Popper open={open} anchorEl={anchorEl}>
        <Box
          sx={{
            display: "flex",
            flexDirection: "column",
            backgroundColor: "white"
          }}
        >
          {columns.map((c) => (
            <FormControlLabel
              key={c.field}
              label={c.headerName}
              control={
                <Switch
                  name={c.field}
                  checked={columnVisibility[c.field]}
                  onChange={toggleColumnVisibility}
                />
              }
            />
          ))}
        </Box>
      </Popper>
    </Box>
  );
}