如何在多个未分组的图表中保持恒定的文本大小和X轴比例尺

4

我目前有一个脚本,运行时会生成多个相同类型的图形(绘制数据集中相同类别不同处理方式的影响),这些图形都是带有相同x轴值的躲避式条形图。例如:

d <- data.frame(x = runif(1000), y = runif(1000)^2, very_long_label_name = runif(1000)^3)
d <- round(d, 1)
d <- melt(d)
qplot(data = d[d$variable != "very_long_label_name",], factor(value), position = "dodge", 
      geom = "histogram", fill = variable)
ggsave("test1.png", height = 3.5, width = 4.5)
qplot(data = d[d$variable != "y",], factor(value), position = "dodge",
      geom = "histogram", fill = variable)
ggsave("test2.png", height = 3.5, width = 4.5)

因为我的图形是躲避条形图,所以我在侧边栏上有一个用于条形颜色的图例。但由于每个图形都比较不同,图例上的标签长度也不同,因此图形最终会呈现出不同的纵横比和文字大小。有没有办法控制多个图形中文本的大小和x轴的宽度?
我已经尝试查看了如何在R中控制ggplot的绘图区域比例而不是适应设备?,但是coord_fixed()似乎被ggsave()忽略了。 如何在ggplot中制作一致宽度的图形(包括图例)?是一个非常相似的问题,但是答案似乎都假定我将把这些图形放在一起而不是展开它们到整个纸张上。使用theme_set()可能对字体大小问题有所帮助,但最终的文本大小受ggsave()指定的大小的影响。
似乎我真正需要的功能是能够通过设置绘图区域的宽度来确定图像的输出宽度,而不是像ggsave(“test.png”,width = 3)那样设置整个绘图区域的宽度。 ggplot2中是否存在这样的功能?
2个回答

2

一种(不幸的是不太懒惰的)方法是将图例作为单独的 grobs(图形对象)提取,然后分别布置图形和图例。这样可以更好地控制每个对象分配了多少空间。幸运的是,有几个辅助函数使这个过程相对轻松。以下是一个示例:

library(gridExtra) 

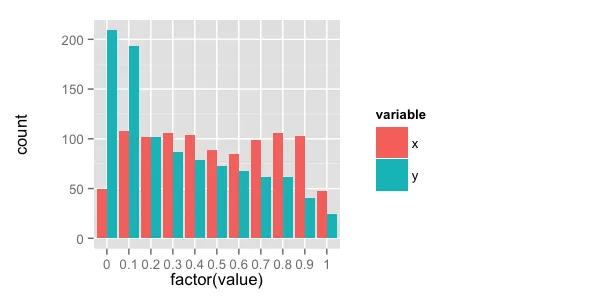
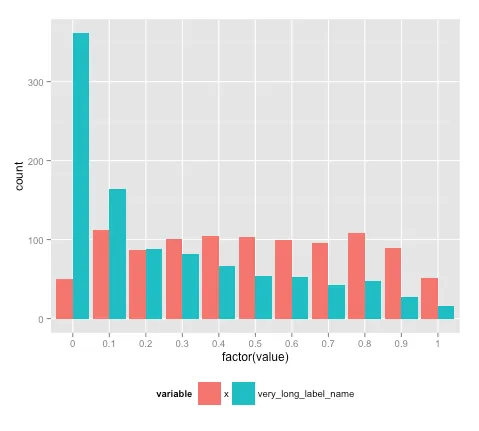
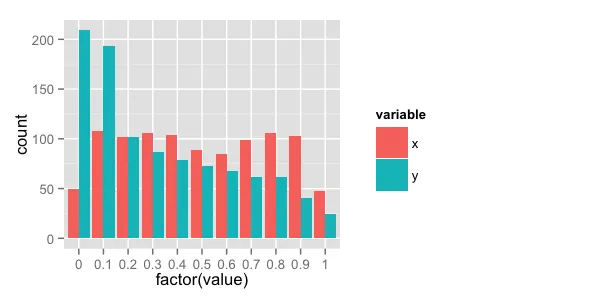
p1 = qplot(data = d[d$variable != "very_long_label_name",], factor(value), 
           position = "dodge", geom = "histogram", fill = variable)

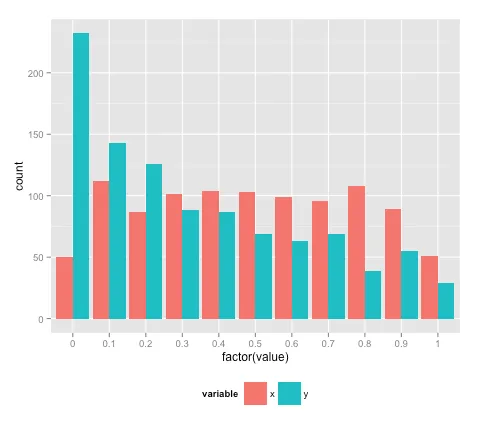
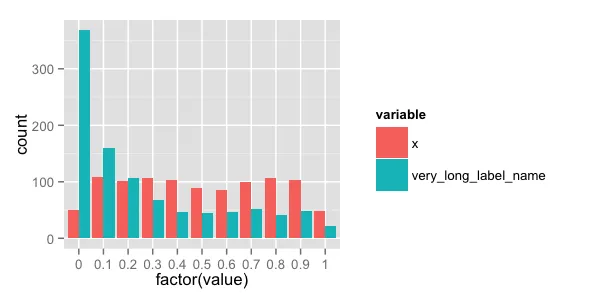
p2 = qplot(data = d[d$variable != "y",], factor(value), position = "dodge",
      geom = "histogram", fill = variable)

我们需要几个辅助函数,一个是用于提取图例的,另一个是用于调整图例图形大小使它们对齐的函数:
# Function to extract legend as a separate grob
# Source: https://dev59.com/fWcs5IYBdhLWcg3w1XbZ#12539820
get_leg = function(a.gplot){
  tmp <- ggplot_gtable(ggplot_build(a.gplot))
  leg <- which(sapply(tmp$grobs, function(x) x$name) == "guide-box")
  legend <- tmp$grobs[[leg]]
  legend
}

# Function to left justify the legends so they line up
# Source: https://dev59.com/coLba4cB1Zd3GeqPirwB#25456672
justify <- function(x, hjust="center", vjust="center", draw=TRUE){
  w <- sum(x$widths)
  h <- sum(x$heights)
  xj <- switch(hjust,
               center = 0.5,
               left = 0.5*w,
               right=unit(1,"npc") - 0.5*w)
  yj <- switch(vjust,
               center = 0.5,
               bottom = 0.5*h,
               top=unit(1,"npc") - 0.5*h)
  x$vp <- viewport(x=xj, y=yj)
  if(draw) grid.draw(x)
  return(x)
}

现在提取图例并布置图表:
# Extract each legend
leg1 = get_leg(p1)
leg2 = get_leg(p2)

# Allocate proportions of layout width to plot and legend
w = c(0.6,0.4)

# Lay out plot and legend separately
png("test1.png", height = 3, width = 6, units="in", res=100)
grid.arrange(p1 + theme(legend.position="none"), 
             justify(leg1,"left","center"),
             widths=w, ncol=2)
dev.off()

png("test2.png", height = 3, width = 6, units="in", res=100)
grid.arrange(p2 + theme(legend.position="none"), 
             justify(leg2,"left","center"),
             widths=w, ncol=2)
dev.off()

在此输入图片描述

在此输入图片描述

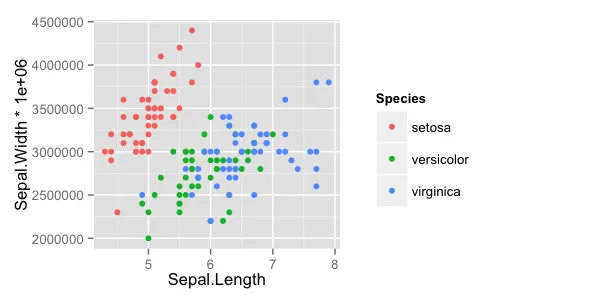
如果您的绘图中y轴的值不同,可能会出现绘图区域不垂直对齐的情况,这是由于当y值具有更多字符时,更多的宽度被分配给y轴标签(而不是绘图区域)。因此,您还需要使绘图区域的宽度相等,以使绘图区域在垂直方向上对齐。以下是一个示例:

# New plot with a different data set
p3 = ggplot(iris, aes(Sepal.Length, Sepal.Width*1e6, colour=Species)) +
        geom_point()

leg3 = get_leg(p3)

# Justify widths
# Source: https://dev59.com/ImYr5IYBdhLWcg3w6eQ3#13295880
gA <- ggplotGrob(p1 + theme(legend.position="none"))
gB <- ggplotGrob(p3 + theme(legend.position="none"))
maxWidth = grid::unit.pmax(gA$widths[2:5], gB$widths[2:5])
gA$widths[2:5] <- as.list(maxWidth)
gB$widths[2:5] <- as.list(maxWidth)

png("test1a.png", height = 3, width = 6, units="in", res=100)
grid.arrange(gA, justify(leg1,"left","center"),
             widths=w, ncol=2)
dev.off()

png("test3.png", height = 3, width = 6, units="in", res=100)
grid.arrange(gB, justify(leg3,"left","center"),
widths=w, ncol=2)
dev.off()

现在这里是原始的p1,接下来是调整宽度后的p1和p3版本:

输入图像描述

输入图像描述

输入图像描述


0

这是一种懒惰的解决方案,但可能适用于您的目的:将图例放在底部

qplot(data = d[d$variable != "very_long_label_name",], factor(value), 
      position = "dodge", geom = "histogram", fill = variable) +
  theme(legend.position = 'bottom')

qplot(data = d[d$variable != "y",], factor(value),
      position = "dodge", geom = "histogram", fill = variable)  +
  theme(legend.position = 'bottom')

enter image description here

enter image description here


网页内容由stack overflow 提供, 点击上面的
可以查看英文原文,
原文链接