OpenCV - 创建颜色掩码

3

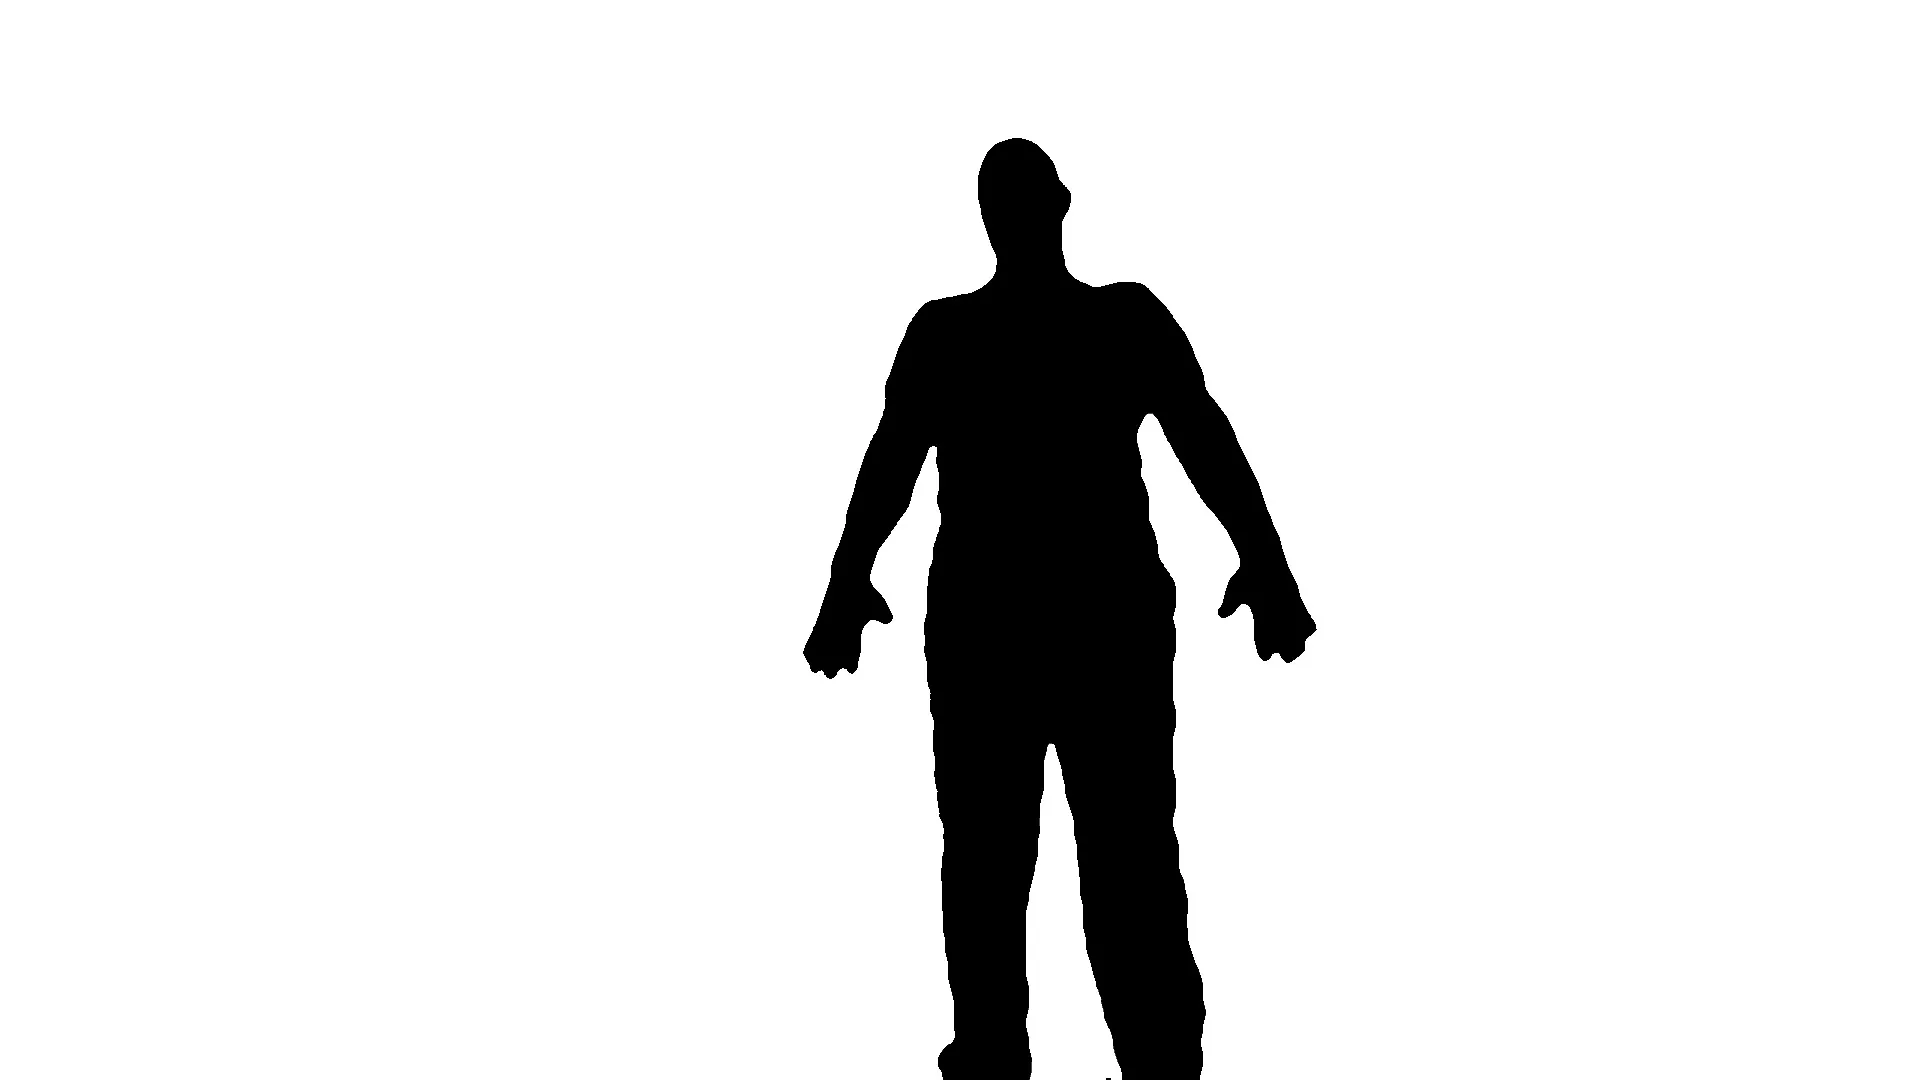
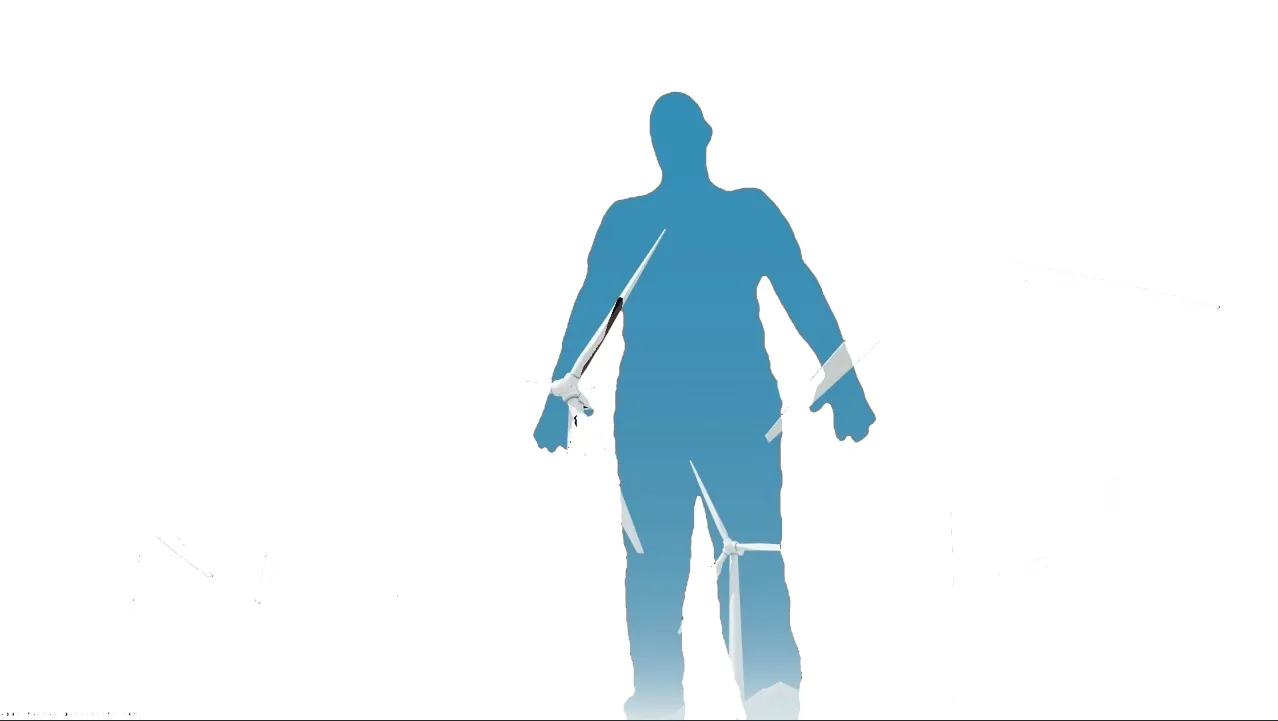
大家好!这里有两张输入图像,一张是背景图像,另一张是掩膜图像。我需要获取掩膜图像的彩色部分。

我需要的结果: 背景图像掩膜图像结果图像

但是我的代码得到了完全不同的结果:背景图像掩膜图像结果图像

我的代码使用C#编写:

 //Read files
Mat img1 = CvInvoke.Imread(Environment.CurrentDirectory + "\\Test\\All1.jpg");
Mat img = CvInvoke.Imread(Environment.CurrentDirectory + "\\Test\\OriginalMask.jpg");

// Threshold and MedianBlur mask
CvInvoke.Threshold(img, img, 0, 255, Emgu.CV.CvEnum.ThresholdType.BinaryInv);
CvInvoke.MedianBlur(img, img, 13);

// without this conversion, an error appears: (mtype == CV_8U || mtype == CV_8S) && _mask.sameSize(*psrc1)
CvInvoke.CvtColor(img, img, Emgu.CV.CvEnum.ColorConversion.Rgb2Gray);

CvInvoke.BitwiseNot(img1, img1, img);

//Save file
img1.Save(Environment.CurrentDirectory + "\\Test\\Result.jpg");

第一个问题:如何达到图片显示的效果?

第二个问题:如果不转换掩码,为什么会出现错误:(mtype == CV_8U || mtype == CV_8S) && _mask.sameSize(*psrc1)

第三个问题:如何实现最终图像中透明背景而不是白色背景?

解决方案不必使用C#语言,任何编程语言都适用,因为OpenCV的语法大致相同。谢谢!


1
关于您的第一个和第三个问题,请看下面我的答案。对于第二个问题:我认为 img 也被加载为三通道(彩色)图像,因为没有设置说明符。thresholdmedianBlur 也可以处理彩色图像,而 bitwise_not 只能用于单通道(灰度)图像。因此,如果没有先进行转换,则会出现错误消息。 - HansHirse
3个回答

3

我将使用C++来回答,因为我最熟悉它。

这是我的建议:

// Load background as color image.
cv::Mat background = cv::imread("background.jpg", cv::IMREAD_COLOR);

// Load mask image as grayscale image.
cv::Mat mask = cv::imread("mask.jpg", cv::IMREAD_GRAYSCALE);

// Start time measurement.
auto start = std::chrono::system_clock::now();

// There are some artifacts in the JPG...
cv::threshold(mask, mask, 128, 255, cv::THRESH_BINARY);

// Initialize result image.
cv::Mat result = background.clone().setTo(cv::Scalar(255, 255, 255));

// Copy pixels from background to result image, where pixel in mask is 0.
for (int x = 0; x < background.size().width; x++)
    for (int y = 0; y < background.size().height; y++)
        if (mask.at<uint8_t>(y, x) == 0)
            result.at<cv::Vec3b>(y, x) = background.at<cv::Vec3b>(y, x);

// End time measurement.
auto end = std::chrono::system_clock::now();

// Output duration duration.
std::chrono::duration<double> elapsed_seconds = end - start;
std::cout << elapsed_seconds.count() << "\n";

// Write result.
cv::imwrite("result.png", result);

// Start time measurement.
start = std::chrono::system_clock::now();

// Generate new image with alpha channel.
cv::Mat resultTransparent = cv::Mat(result.size(), CV_8UC4);

// Copy pixels in BGR channels from result to transparent result image.
// Where pixel in mask is not 0, set alpha to 0.
for (int x = 0; x < background.size().width; x++)
{
    for (int y = 0; y < background.size().height; y++)
    {
        resultTransparent.at<cv::Vec4b>(y, x)[0] = result.at<cv::Vec3b>(y, x)[0];
        resultTransparent.at<cv::Vec4b>(y, x)[1] = result.at<cv::Vec3b>(y, x)[1];
        resultTransparent.at<cv::Vec4b>(y, x)[2] = result.at<cv::Vec3b>(y, x)[2];

        if (mask.at<uint8_t>(y, x) != 0)
            resultTransparent.at<cv::Vec4b>(y, x)[3] = 0;
        else
            resultTransparent.at<cv::Vec4b>(y, x)[3] = 255;
    }
}

// End time measurement.
end = std::chrono::system_clock::now();

// Output duration duration.
elapsed_seconds = end - start;
std::cout << elapsed_seconds.count() << "\n";

// Write transparent result.
cv::imwrite("resultTransparent.png", resultTransparent);

这两个输出结果如下(在 StackOverflow 的白色背景上,您看不到第二张图像的透明度):

White background

Transparent background


谢谢您提供的解决方案。告诉我,整个操作需要多少毫秒完成,不包括读写文件的时间? - Maxim_A
1
我编辑了我的答案,并使用chrono添加了两个时间测量,即您需要添加#include <chrono>。在发布模式下,第一个操作大约需要12毫秒,第二个操作大约需要39毫秒。但我非常怀疑这些数字是否有意义 - 没有使用优化,系统正在运行代码,... - HansHirse
相当有趣。在我的Intel Core i5-8250U处理器上,第一次操作需要0.47秒,第二次操作需要1.4秒。 - Maxim_A
这是我在调试模式下得到的(大概)- 你检查过了吗? - HansHirse
我正在控制台查找信息 std::cout << elapsed_seconds.count() << "\n"; - Maxim_A

1

只是补充一下HanseHirse的答案:

如果你在掩膜上添加高斯模糊(就像你在问题中使用CvInvoke.MedianBlur(img, img, 13);所做的那样),掩膜的边缘将会更加平滑,当放置在另一张图片上时,输出图像看起来更美观。

你可以通过直接将输出图像的第四通道设置为模糊的掩膜来实现这一点。

因此,不要使用

if (mask.at<uint8_t>(y, x) != 0)
            resultTransparent.at<cv::Vec4b>(y, x)[3] = 0;
        else
            resultTransparent.at<cv::Vec4b>(y, x)[3] = 255;

你可以尝试。
resultTransparent.at<cv::Vec4b>(y, x)[3] = mask.at<uint8_t>(y, x);

2
你说得完全正确。我把“美化”部分留给了问题的作者。感谢你的补充。 - HansHirse

1

如果可以给你灵感的话,Python 中的结果相同:

import cv2
import numpy as np
# Read files
img1 = cv2.imread("All1.jpg",cv2.IMREAD_COLOR);
img = cv2.imread("OriginalMask.jpg",cv2.IMREAD_GRAYSCALE)  # loading in grayscale

# Threshold and MedianBlur mask
_, img = cv2.threshold(img, 127, 255, cv2.THRESH_BINARY_INV)  # corrected to 127 instead of 0
img = cv2.medianBlur(img, 13)

# fill with white
dest= np.full(np.shape(img1),255,np.uint8)

# Assuming dst and src are of same sizes
# only copy values where the mask has color > 0
dest[img>0] = img1[img>0]  # after @T.Kau's suggestion


cv2.imshow('dest',dest)
cv2.waitKey(0)
cv2.destroyAllWindows()

2
在Python中,您可以通过执行dest[img>0] = img1[img>0]来节省一些代码行。 - T. Kau

网页内容由stack overflow 提供, 点击上面的
可以查看英文原文,
原文链接