我正在尝试实现Python(3.7)OpenCV(3.4.3)ORB图像对齐。我通常使用ImageMagick进行大部分处理。但是我需要进行一些图像对齐,并尝试使用Python OpenCV ORB。我的脚本基于Satya Mallick的Learn OpenCV教程中的一个脚本,链接如下:https://www.learnopencv.com/image-alignment-feature-based-using-opencv-c-python/。
然而,我正在尝试修改它以使用刚性对齐而不是透视同源,并使用掩码过滤点来限制y值之间的差异,因为图像已经几乎对齐。
掩码方法来自最后一个示例中的FLANN对齐代码,链接如下:https://opencv-python-tutroals.readthedocs.io/en/latest/py_tutorials/py_feature2d/py_matcher/py_matcher.html。
我的脚本很好用,如果我去掉matchesMask,那么它就可以提供点过滤。(我有另外两个工作脚本,一个类似,但只过滤点并忽略掩码,另一个基于ECC算法。) 然而,我想知道为什么我的下面的代码不起作用。 也许我的掩码结构在当前版本的Python Opencv中是不正确的?
我得到的错误是:
这是我的代码。第一个箭头显示了遮罩创建的位置。第二个箭头显示了我必须删除的行,以使脚本正常工作。但这样它会忽略我对点的过滤。
这是我的两张图片:lena和旋转1度的lena。请注意,这些不是我的实际图片。这些图片没有diffy值大于10,但我的实际图片有。
我的脚本很好用,如果我去掉matchesMask,那么它就可以提供点过滤。(我有另外两个工作脚本,一个类似,但只过滤点并忽略掩码,另一个基于ECC算法。) 然而,我想知道为什么我的下面的代码不起作用。 也许我的掩码结构在当前版本的Python Opencv中是不正确的?
我得到的错误是:
Traceback (most recent call last):
  File "warp_orb_rigid2_filter.py", line 92, in <module>
    imReg, m = alignImages(im, imReference)
  File "warp_orb_rigid2_filter.py", line 62, in alignImages
    imMatches = cv2.drawMatches(im1, keypoints1, im2, keypoints2, matches, None, **draw_params)
SystemError: <built-in function drawMatches> returned NULL without setting an error
这是我的代码。第一个箭头显示了遮罩创建的位置。第二个箭头显示了我必须删除的行,以使脚本正常工作。但这样它会忽略我对点的过滤。
#!/bin/python3.7

import cv2
import numpy as np


MAX_FEATURES = 500
GOOD_MATCH_PERCENT = 0.15


def alignImages(im1, im2):

  # Convert images to grayscale
  im1Gray = cv2.cvtColor(im1, cv2.COLOR_BGR2GRAY)
  im2Gray = cv2.cvtColor(im2, cv2.COLOR_BGR2GRAY)

  # Detect ORB features and compute descriptors.
  orb = cv2.ORB_create(MAX_FEATURES)
  keypoints1, descriptors1 = orb.detectAndCompute(im1Gray, None)
  keypoints2, descriptors2 = orb.detectAndCompute(im2Gray, None)

  # Match features.
  matcher = cv2.DescriptorMatcher_create(cv2.DESCRIPTOR_MATCHER_BRUTEFORCE_HAMMING)
  matches = matcher.match(descriptors1, descriptors2, None)

  # Sort matches by score
  matches.sort(key=lambda x: x.distance, reverse=False)

  # Remove not so good matches
  numGoodMatches = int(len(matches) * GOOD_MATCH_PERCENT)
  matches = matches[:numGoodMatches]

  # Extract location of good matches and filter by diffy
  points1 = np.zeros((len(matches), 2), dtype=np.float32)
  points2 = np.zeros((len(matches), 2), dtype=np.float32)

  for i, match in enumerate(matches):
    points1[i, :] = keypoints1[match.queryIdx].pt
    points2[i, :] = keypoints2[match.trainIdx].pt

  # initialize empty arrays for newpoints1 and newpoints2 and mask
  newpoints1 = np.empty(shape=[0, 2])
  newpoints2 = np.empty(shape=[0, 2])
  matches_Mask = [0] * len(matches)

  # filter points by using mask
  for i in range(len(matches)):
      pt1 = points1[i]
      pt2 = points2[i]
      pt1x, pt1y = zip(*[pt1])
      pt2x, pt2y = zip(*[pt2])
      diffy = np.float32( np.float32(pt2y) - np.float32(pt1y) )
      print(diffy)
      if abs(diffy) < 10.0:
        newpoints1 = np.append(newpoints1, [pt1], axis=0)
        newpoints2 = np.append(newpoints2, [pt2], axis=0)
        matches_Mask[i]=[1,0]  #<--- mask created
  print(matches_Mask)

  draw_params = dict(matchColor = (255,0,),
    singlePointColor = (255,255,0),
    matchesMask = matches_Mask, #<---- remove mask here
    flags = 0)

  # Draw top matches
  imMatches = cv2.drawMatches(im1, keypoints1, im2, keypoints2, matches, None, **draw_params)
  cv2.imwrite("/Users/fred/desktop/lena_matches.png", imMatches)


  # Find Affine Transformation
  # true means full affine, false means rigid (SRT)
  m = cv2.estimateRigidTransform(newpoints1,newpoints2,False)

  # Use affine transform to warp im1 to match im2
  height, width, channels = im2.shape
  im1Reg = cv2.warpAffine(im1, m, (width, height))

  return im1Reg, m


if __name__ == '__main__':

  # Read reference image
  refFilename = "/Users/fred/desktop/lena.png"
  print("Reading reference image : ", refFilename)
  imReference = cv2.imread(refFilename, cv2.IMREAD_COLOR)

  # Read image to be aligned
  imFilename = "/Users/fred/desktop/lena_r1.png"
  print("Reading image to align : ", imFilename);
  im = cv2.imread(imFilename, cv2.IMREAD_COLOR)

  print("Aligning images ...")
  # Registered image will be stored in imReg.
  # The estimated transform will be stored in m.
  imReg, m = alignImages(im, imReference)

  # Write aligned image to disk.
  outFilename = "/Users/fred/desktop/lena_r1_aligned.jpg"
  print("Saving aligned image : ", outFilename);
  cv2.imwrite(outFilename, imReg)

  # Print estimated homography
  print("Estimated Affine Transform : \n",  m)
这是我的两张图片:lena和旋转1度的lena。请注意,这些不是我的实际图片。这些图片没有diffy值大于10,但我的实际图片有。
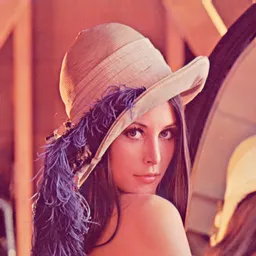
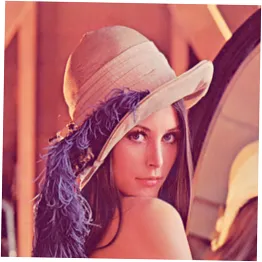
我正在尝试对旋转图像进行对齐和扭曲,以匹配原始的lena图像。