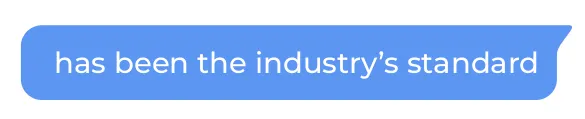
大家好,我也在寻找一个聊天气泡形状的小部件,最终我自己制作了一个。
我是通过自定义Painter实现的,但我并不是很擅长。

import 'package:flutter/material.dart';

class ChatBubble extends CustomPainter {
  final Color color;
  final Alignment alignment;

  ChatBubble({
    @required this.color,
    this.alignment,
  });

  var _radius = 10.0;
  var _x = 10.0;


  @override
  void paint(Canvas canvas, Size size) {
    if (alignment == Alignment.topRight) {
      canvas.drawRRect(
          RRect.fromLTRBAndCorners(
            0,
            0,
            size.width - 8,
            size.height,
            bottomLeft: Radius.circular(_radius),
            topRight: Radius.circular(_radius),
            topLeft: Radius.circular(_radius),
          ),
          Paint()
            ..color = this.color
            ..style = PaintingStyle.fill);
      var path = new Path();
      path.moveTo(size.width - _x, size.height - 20);
      path.lineTo(size.width - _x, size.height);
      path.lineTo(size.width, size.height);
      canvas.clipPath(path);
      canvas.drawRRect(
          RRect.fromLTRBAndCorners(
            size.width - _x,
            0.0,
            size.width,
            size.height,
            topRight: Radius.circular(_radius),
          ),
          Paint()
            ..color = this.color
            ..style = PaintingStyle.fill);
    } else {
      canvas.drawRRect(
          RRect.fromLTRBAndCorners(
            _x,
            0,
            size.width,
            size.height,
            bottomRight: Radius.circular(_radius),
            topRight: Radius.circular(_radius),
            topLeft: Radius.circular(_radius),
          ),
          Paint()
            ..color = this.color
            ..style = PaintingStyle.fill);
      var path = new Path();
      path.moveTo(0, size.height);
      path.lineTo(_x, size.height);
      path.lineTo(_x, size.height-20);
      canvas.clipPath(path);
      canvas.drawRRect(
          RRect.fromLTRBAndCorners(
            0,
            0.0,
            _x,
            size.height,
            topRight: Radius.circular(_radius),
          ),
          Paint()
            ..color = this.color
            ..style = PaintingStyle.fill);
    }
  }

  @override
  bool shouldRepaint(CustomPainter oldDelegate) {
    return true;
  }
}
复制并粘贴上面的代码到你的项目中。
Align(
alignment: alignment,
child: CustomPaint(
painter: ChatBubble(color: Colors.blue, alignment: alignment),
child: Container(
margin: EdgeInsets.all(10),
child: Stack(
children: <Widget>[
TextView("Hello World"),
],
),
),
),
)
将此代码粘贴到需要显示ChatBubble Widget的位置。
我还在Bitbucket上传了这段代码 ChatBubble Widget。如果您有任何贡献,请随意。
 更新
我知道可以使用stack来完成这个任务,但我正在寻找更好的解决方案,因为我需要在单个视图中多次使用它,并且使用许多stack可能会影响性能。(如果我错了,请纠正我)
更新
我知道可以使用stack来完成这个任务,但我正在寻找更好的解决方案,因为我需要在单个视图中多次使用它,并且使用许多stack可能会影响性能。(如果我错了,请纠正我)