这是我的布局代码:
<?xml version="1.0" encoding="utf-8"?>
<LinearLayout xmlns:android="http://schemas.android.com/apk/res/android"
    android:orientation="vertical"
    android:layout_width="fill_parent"
    android:layout_height="fill_parent">

    <TextView android:text="@string/welcome"
        android:id="@+id/TextView"
        android:layout_width="fill_parent"
        android:layout_height="wrap_content">
    </TextView>

    <LinearLayout android:id="@+id/LinearLayout"
        android:orientation="horizontal"
        android:layout_width="wrap_content"
        android:layout_height="wrap_content"
        android:gravity="bottom">

            <EditText android:id="@+id/EditText"
                android:layout_width="fill_parent"
                android:layout_height="wrap_content">
            </EditText>

            <Button android:text="@string/label_submit_button"
                android:id="@+id/Button"
                android:layout_width="wrap_content"
                android:layout_height="wrap_content">
            </Button>

    </LinearLayout>

</LinearLayout>
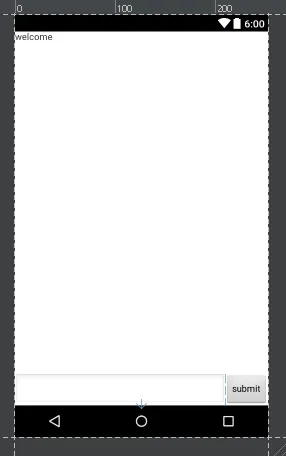
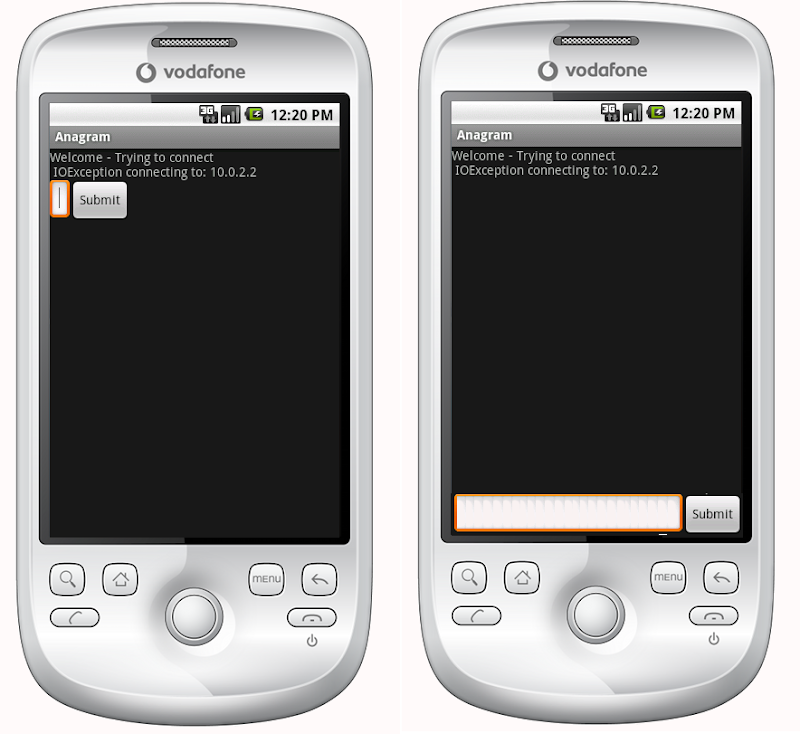
左边是实际效果,右边是我想要的效果。
显然,将TextView的高度设置为fill_parent即可解决问题,但这会导致没有留出空间给按钮或输入框。
问题在于,我希望提交按钮和文本输入框在底部具有固定的高度,并且文本视图填充其余空间。同样,在水平线性布局中,我希望提交按钮包裹其内容,文本输入框填充其余空间。
如果线性布局中的第一项被设置为fill_parent,则它将完全填满该项,不再留出其他项的最小要求空间。如何使线性布局中的第一项填充除了布局中其他项的最小要求空间之外的所有空间?
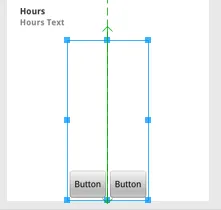
相对布局确实是答案:
    <?xml version="1.0" encoding="utf-8"?>
    <RelativeLayout
    xmlns:android="http://schemas.android.com/apk/res/android"
    android:layout_width="fill_parent"
    android:layout_height="fill_parent">

    <TextView
        android:text="@string/welcome"
        android:id="@+id/TextView"
        android:layout_width="fill_parent"
        android:layout_height="wrap_content"
        android:layout_alignParentTop="true">
    </TextView>

    <RelativeLayout
        android:id="@+id/InnerRelativeLayout"
        android:layout_width="wrap_content"
        android:layout_height="wrap_content"
        android:layout_alignParentBottom="true" >

        <Button
            android:text="@string/label_submit_button"
            android:id="@+id/Button"
            android:layout_alignParentRight="true"
            android:layout_width="wrap_content"
            android:layout_height="wrap_content">
        </Button>

        <EditText
            android:id="@+id/EditText"
            android:layout_width="fill_parent"
            android:layout_toLeftOf="@id/Button"
            android:layout_height="wrap_content">
        </EditText>

    </RelativeLayout>

</RelativeLayout>