支持库版本18中增加了Action Bar的兼容性。现在有一个名为ActionBarActivity 的类,用于在旧版Android上创建带有Action Bar的活动。
是否有办法将支持库中的Action Bar添加到PreferenceActivity中?
以前我使用过ActionBarSherlock,它有SherlockPreferenceActivity。
支持库版本18中增加了Action Bar的兼容性。现在有一个名为ActionBarActivity 的类,用于在旧版Android上创建带有Action Bar的活动。
是否有办法将支持库中的Action Bar添加到PreferenceActivity中?
以前我使用过ActionBarSherlock,它有SherlockPreferenceActivity。
编辑:在 appcompat-v7 22.1.0 中,Google 添加了 AppCompatDelegate 抽象类作为代理,您可以使用它来扩展 AppCompat 对任何活动的支持。
使用方法如下:
...
import android.support.v7.app.ActionBar;
import android.support.v7.app.AppCompatDelegate;
import android.support.v7.widget.Toolbar;
...

public class SettingsActivity extends PreferenceActivity {

    private AppCompatDelegate mDelegate;

    @Override
    protected void onCreate(Bundle savedInstanceState) {
        getDelegate().installViewFactory();
        getDelegate().onCreate(savedInstanceState);
        super.onCreate(savedInstanceState);
    }

    @Override
    protected void onPostCreate(Bundle savedInstanceState) {
        super.onPostCreate(savedInstanceState);
        getDelegate().onPostCreate(savedInstanceState);
    }

    public ActionBar getSupportActionBar() {
        return getDelegate().getSupportActionBar();
    }

    public void setSupportActionBar(@Nullable Toolbar toolbar) {
        getDelegate().setSupportActionBar(toolbar);
    }

    @Override
    public MenuInflater getMenuInflater() {
        return getDelegate().getMenuInflater();
    }

    @Override
    public void setContentView(@LayoutRes int layoutResID) {
        getDelegate().setContentView(layoutResID);
    }

    @Override
    public void setContentView(View view) {
        getDelegate().setContentView(view);
    }

    @Override
    public void setContentView(View view, ViewGroup.LayoutParams params) {
        getDelegate().setContentView(view, params);
    }

    @Override
    public void addContentView(View view, ViewGroup.LayoutParams params) {
        getDelegate().addContentView(view, params);
    }

    @Override
    protected void onPostResume() {
        super.onPostResume();
        getDelegate().onPostResume();
    }

    @Override
    protected void onTitleChanged(CharSequence title, int color) {
        super.onTitleChanged(title, color);
        getDelegate().setTitle(title);
    }

    @Override
    public void onConfigurationChanged(Configuration newConfig) {
        super.onConfigurationChanged(newConfig);
        getDelegate().onConfigurationChanged(newConfig);
    }

    @Override
    protected void onStop() {
        super.onStop();
        getDelegate().onStop();
    }

    @Override
    protected void onDestroy() {
        super.onDestroy();
        getDelegate().onDestroy();
    }

    public void invalidateOptionsMenu() {
        getDelegate().invalidateOptionsMenu();
    }

    private AppCompatDelegate getDelegate() {
        if (mDelegate == null) {
            mDelegate = AppCompatDelegate.create(this, null);
        }
        return mDelegate;
    }
}
不再进行黑客攻击。代码取自AppCompatPreferenceActivity.java。
目前无法通过AppCompat实现。我已经在内部提交了一个错误报告。
PreferenceActivity何时添加到ActionBarCompat中吗? - imbryk我已经成功创建了一个类似于Google Play商店使用的解决方案。原始回答链接
与您自己的代码非常相似,但添加了XML以允许设置标题:
继续使用PreferenceActivity:
settings_toolbar.xml:
<?xml version="1.0" encoding="utf-8"?>
<android.support.v7.widget.Toolbar
    xmlns:android="http://schemas.android.com/apk/res/android"
    xmlns:app="http://schemas.android.com/apk/res-auto"
    android:id="@+id/toolbar"
    app:theme="@style/ThemeOverlay.AppCompat.Dark.ActionBar"
    android:layout_width="match_parent"
    android:layout_height="wrap_content"
    android:minHeight="?attr/actionBarSize"
    app:navigationContentDescription="@string/abc_action_bar_up_description"
    android:background="?attr/colorPrimary"
    app:navigationIcon="?attr/homeAsUpIndicator"
    app:title="@string/action_settings"
    />
SettingsActivity.java :
public class SettingsActivity extends PreferenceActivity {

    @Override
    protected void onPostCreate(Bundle savedInstanceState) {
        super.onPostCreate(savedInstanceState);

        LinearLayout root = (LinearLayout)findViewById(android.R.id.list).getParent().getParent().getParent();
        Toolbar bar = (Toolbar) LayoutInflater.from(this).inflate(R.layout.settings_toolbar, root, false);
        root.addView(bar, 0); // insert at top
        bar.setNavigationOnClickListener(new View.OnClickListener() {
            @Override
            public void onClick(View v) {
                finish();
            }
        });
    }

}
结果 :
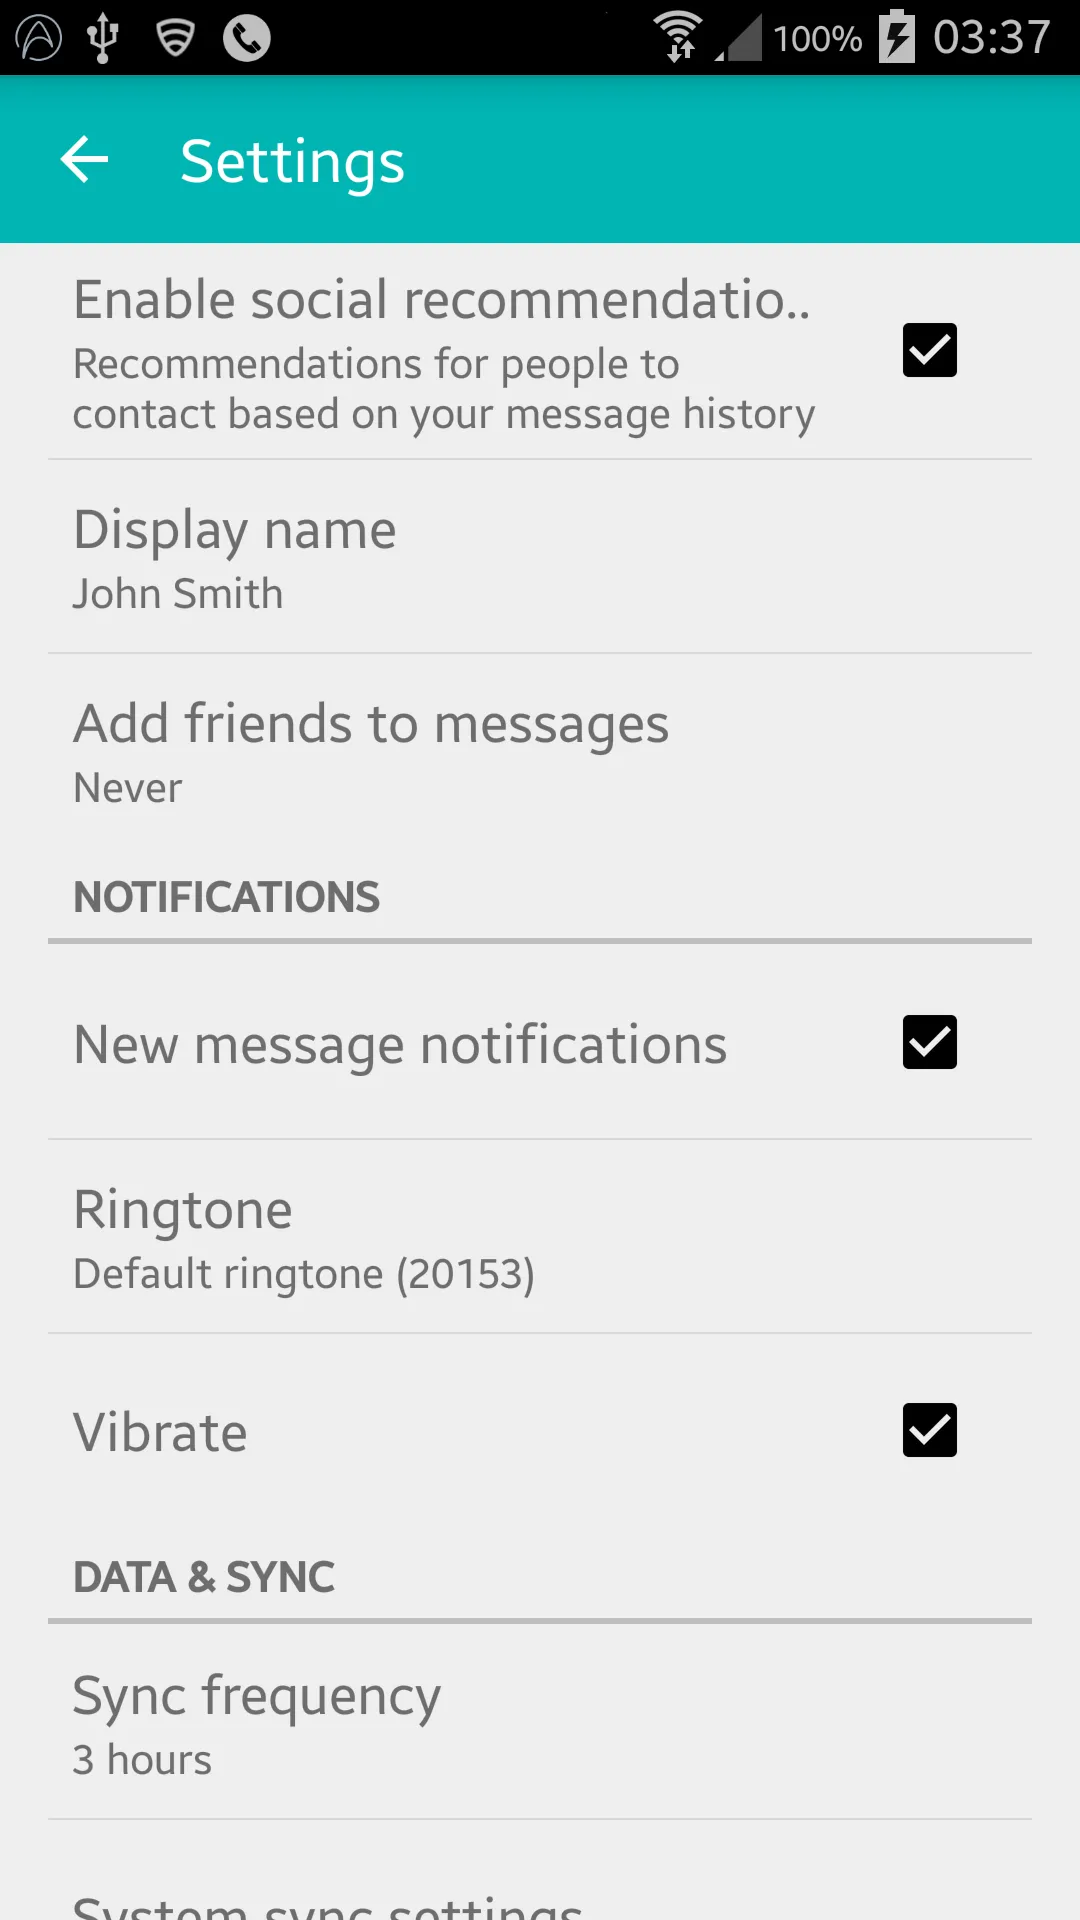
正如此处所指出的,Gingerbread 设备在这一行上返回了空指针异常:
LinearLayout root = (LinearLayout)findViewById(android.R.id.list).getParent().getParent().getParent();
SettingsActivity.java :
public class SettingsActivity extends PreferenceActivity {

    @Override
    protected void onPostCreate(Bundle savedInstanceState) {
        super.onPostCreate(savedInstanceState);
        Toolbar bar;

        if (Build.VERSION.SDK_INT >= Build.VERSION_CODES.ICE_CREAM_SANDWICH) {
            LinearLayout root = (LinearLayout) findViewById(android.R.id.list).getParent().getParent().getParent();
            bar = (Toolbar) LayoutInflater.from(this).inflate(R.layout.settings_toolbar, root, false);
            root.addView(bar, 0); // insert at top
        } else {
            ViewGroup root = (ViewGroup) findViewById(android.R.id.content);
            ListView content = (ListView) root.getChildAt(0);

            root.removeAllViews();

            bar = (Toolbar) LayoutInflater.from(this).inflate(R.layout.settings_toolbar, root, false);


            int height;
            TypedValue tv = new TypedValue();
            if (getTheme().resolveAttribute(R.attr.actionBarSize, tv, true)) {
                height = TypedValue.complexToDimensionPixelSize(tv.data, getResources().getDisplayMetrics());
            }else{
                height = bar.getHeight();
            }

            content.setPadding(0, height, 0, 0);

            root.addView(content);
            root.addView(bar);
        }

        bar.setNavigationOnClickListener(new View.OnClickListener() {
            @Override
            public void onClick(View v) {
                finish();
            }
        });
    }
}
如果上述内容有任何问题,请让我知道!
更新2:着色工作区
正如许多开发笔记中指出的那样,PreferenceActivity不支持元素的着色,但是通过利用一些内部类,您可以实现这一点。不过,在这些类被删除之前(适用于appCompat support-v7 v21.0.3)。
添加以下导入:
import android.support.v7.internal.widget.TintCheckBox;
import android.support.v7.internal.widget.TintCheckedTextView;
import android.support.v7.internal.widget.TintEditText;
import android.support.v7.internal.widget.TintRadioButton;
import android.support.v7.internal.widget.TintSpinner;
然后覆盖 onCreateView 方法:
@Override
public View onCreateView(String name, Context context, AttributeSet attrs) {
    // Allow super to try and create a view first
    final View result = super.onCreateView(name, context, attrs);
    if (result != null) {
        return result;
    }

    if (Build.VERSION.SDK_INT < Build.VERSION_CODES.LOLLIPOP) {
        // If we're running pre-L, we need to 'inject' our tint aware Views in place of the
        // standard framework versions
        switch (name) {
            case "EditText":
                return new TintEditText(this, attrs);
            case "Spinner":
                return new TintSpinner(this, attrs);
            case "CheckBox":
                return new TintCheckBox(this, attrs);
            case "RadioButton":
                return new TintRadioButton(this, attrs);
            case "CheckedTextView":
                return new TintCheckedTextView(this, attrs);
        }
    }

    return null;
}
结果:
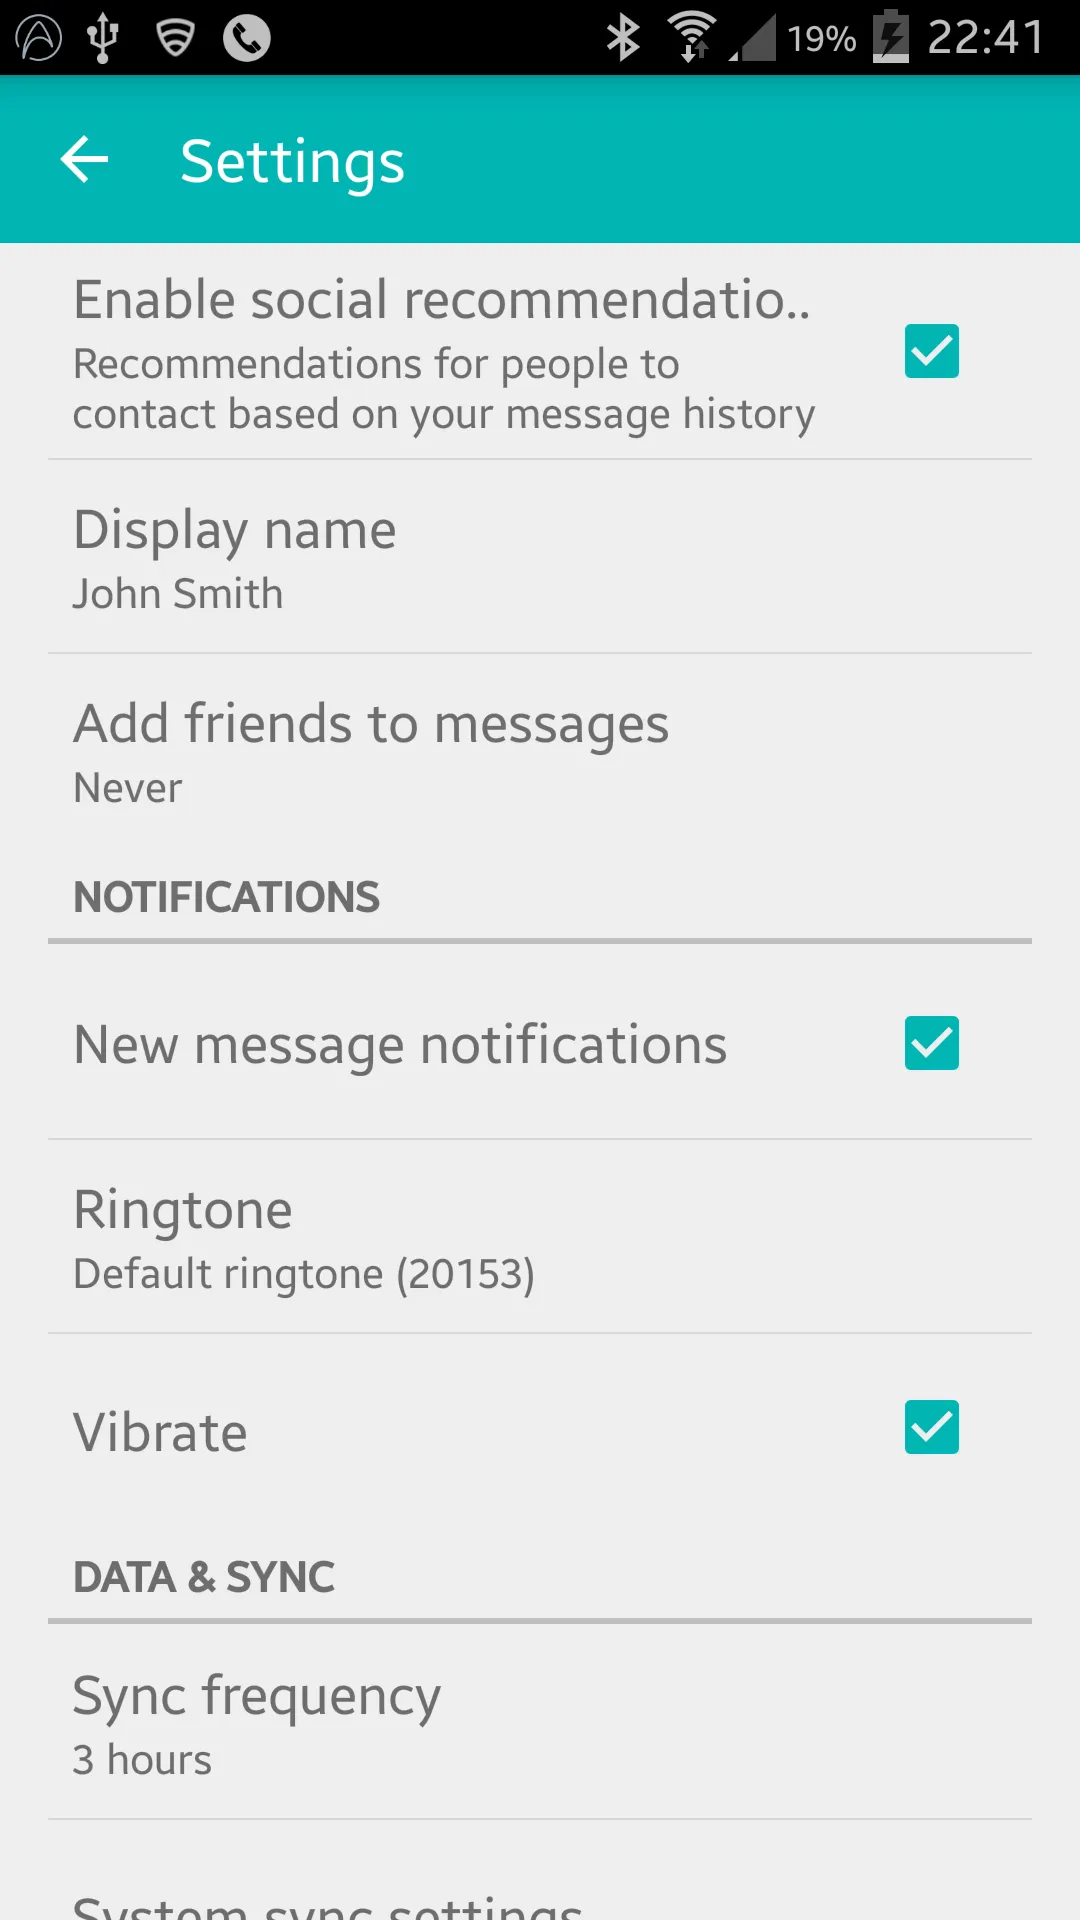
AppCompat 22.1引入了新的着色元素,这意味着不再需要使用内部类来实现与上次更新相同的效果。相反,请遵循以下步骤(仍然重写onCreateView):
@Override
public View onCreateView(String name, Context context, AttributeSet attrs) {
    // Allow super to try and create a view first
    final View result = super.onCreateView(name, context, attrs);
    if (result != null) {
        return result;
    }

    if (Build.VERSION.SDK_INT < Build.VERSION_CODES.LOLLIPOP) {
        // If we're running pre-L, we need to 'inject' our tint aware Views in place of the
        // standard framework versions
        switch (name) {
            case "EditText":
                return new AppCompatEditText(this, attrs);
            case "Spinner":
                return new AppCompatSpinner(this, attrs);
            case "CheckBox":
                return new AppCompatCheckBox(this, attrs);
            case "RadioButton":
                return new AppCompatRadioButton(this, attrs);
            case "CheckedTextView":
                return new AppCompatCheckedTextView(this, attrs);
        }
    }

    return null;
}
嵌套偏好设置屏幕
许多人在包含工具栏的嵌套<PreferenceScreen />中遇到问题,然而我已经找到了解决方案! - 在进行了大量尝试和错误之后!
将以下内容添加到您的SettingsActivity中:
@SuppressWarnings("deprecation")
@Override
public boolean onPreferenceTreeClick(PreferenceScreen preferenceScreen, Preference preference) {
    super.onPreferenceTreeClick(preferenceScreen, preference);

    // If the user has clicked on a preference screen, set up the screen
    if (preference instanceof PreferenceScreen) {
        setUpNestedScreen((PreferenceScreen) preference);
    }

    return false;
}

public void setUpNestedScreen(PreferenceScreen preferenceScreen) {
    final Dialog dialog = preferenceScreen.getDialog();

    Toolbar bar;

    if (Build.VERSION.SDK_INT >= Build.VERSION_CODES.ICE_CREAM_SANDWICH) {
        LinearLayout root = (LinearLayout) dialog.findViewById(android.R.id.list).getParent();
        bar = (Toolbar) LayoutInflater.from(this).inflate(R.layout.settings_toolbar, root, false);
        root.addView(bar, 0); // insert at top
    } else {
        ViewGroup root = (ViewGroup) dialog.findViewById(android.R.id.content);
        ListView content = (ListView) root.getChildAt(0);

        root.removeAllViews();

        bar = (Toolbar) LayoutInflater.from(this).inflate(R.layout.settings_toolbar, root, false);

        int height;
        TypedValue tv = new TypedValue();
        if (getTheme().resolveAttribute(R.attr.actionBarSize, tv, true)) {
            height = TypedValue.complexToDimensionPixelSize(tv.data, getResources().getDisplayMetrics());
        }else{
            height = bar.getHeight();
        }

        content.setPadding(0, height, 0, 0);

        root.addView(content);
        root.addView(bar);
    }

    bar.setTitle(preferenceScreen.getTitle());

    bar.setNavigationOnClickListener(new View.OnClickListener() {
        @Override
        public void onClick(View v) {
            dialog.dismiss();
        }
    });
}
PreferenceScreen是一个痛点,因为它们基于包装对话框,所以我们需要捕获对话框布局以添加工具栏。
Toolbar不能实现高程和阴影效果。如果你想要在你的Toolbar上实现高程效果,你需要将它包装在AppBarLayout中:
`settings_toolbar.xml :
<android.support.design.widget.AppBarLayout
    android:layout_width="match_parent"
    android:layout_height="wrap_content">

   <android.support.v7.widget.Toolbar
       .../>

</android.support.design.widget.AppBarLayout>
不要忘记在build.gradle文件中将Design Support库添加为依赖项:
compile 'com.android.support:support-v4:22.2.0'
compile 'com.android.support:appcompat-v7:22.2.0'
compile 'com.android.support:design:22.2.0'
我调查了反馈的重叠问题,但无法复现该问题。
使用上述完整代码会生成以下内容:
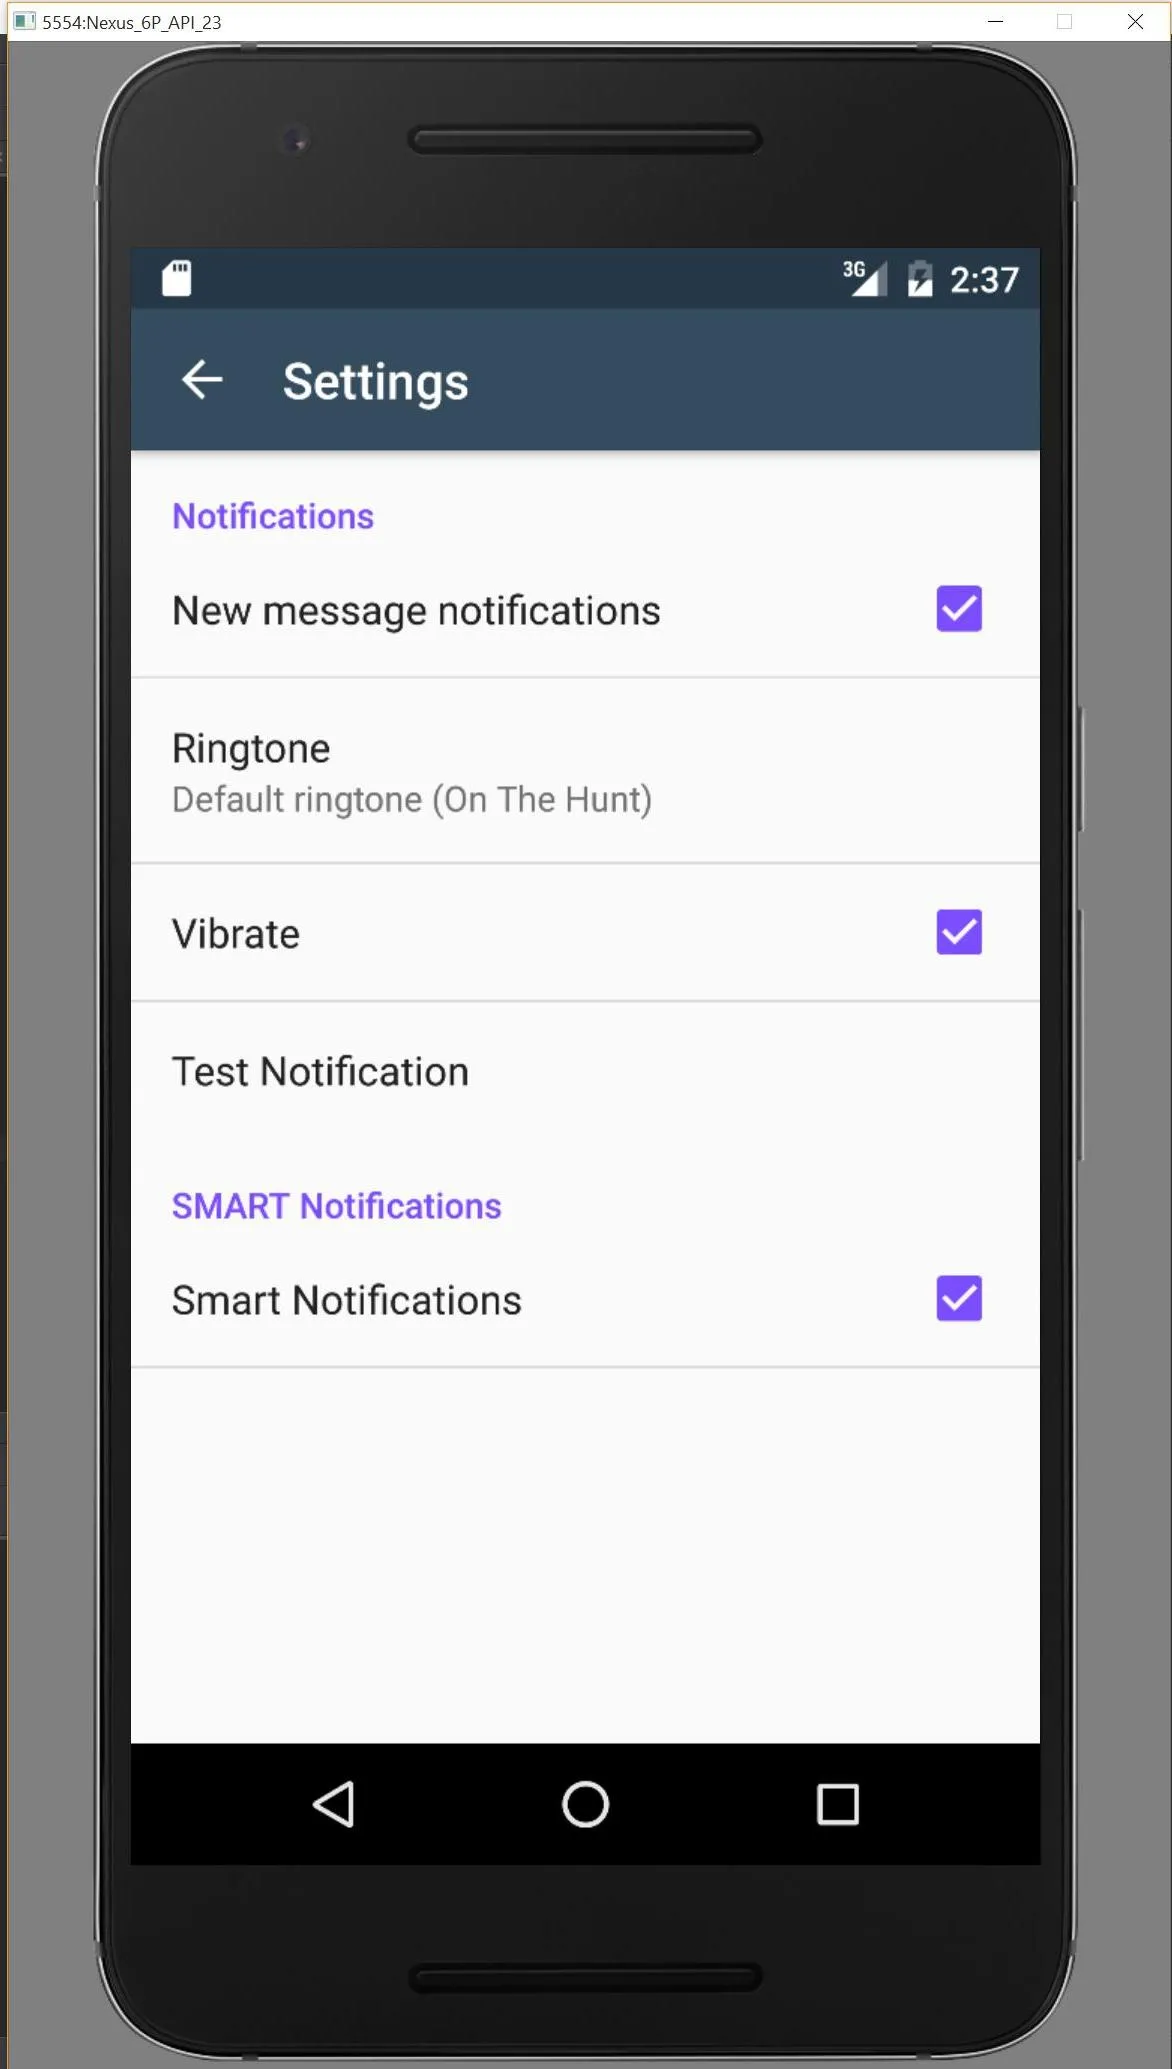
如果我漏掉了什么,请通过此存储库让我知道,我会进行调查。
PreferenceActivity这么难用???它应该能够节省时间。我还不如自己制作一个常规活动,并手动在线性布局中排列所有设置。他妈的! - Someone Somewhere发现了一种基于support-v4 Fragment的PreferenceFragment实现:
https://github.com/kolavar/android-support-v4-preferencefragment
编辑:我刚测试了一下,它运行得非常好!
提问者想知道如何在Android的支持库中,将MenuItem放置在PreferenceActivity的ActionBar中,因为Android的支持库存在一个bug,不允许这样做。
我已经找到了一个比已经提出的方法更加简洁的方式来实现这个目标(并且在Android文档中找到了它):
android:parentActivityNameThe class name of the logical parent of the activity. The name here must match the class name given to the corresponding element's android:name attribute.
The system reads this attribute to determine which activity should be started when the use presses the Up button in the action bar. The system can also use this information to synthesize a back stack of activities with TaskStackBuilder.
To support API levels 4 - 16, you can also declare the parent activity with a element that specifies a value for "android.support.PARENT_ACTIVITY". For example:
<activity
    android:name="com.example.app.ChildActivity"
    android:label="@string/title_child_activity"
    android:parentActivityName="com.example.myfirstapp.MainActivity" >
    <!-- Parent activity meta-data to support API level 4+ -->
    <meta-data
        android:name="android.support.PARENT_ACTIVITY"
        android:value="com.example.app.MainActivity" />
</activity>
现在按照你通常在onOptionsItemSelected()中做的事情就可以了。由于它是Android文档的一部分,所以没有任何副作用。
祝编码愉快。 :)
如果您的目标是Lollipop,则这种解决方案将不再适用。如果您正在使用AppCompat,则应查看此答案。
PreferencesActivity没有任何方法将项目放入ActionBar,特别是返回按钮。我的答案是一个很好的解决办法。 - Sufian:) - David Passmore将 PreferenceActivity 与 ABC 集成是不可能的,至少对我来说是这样。我尝试了我能找到的两种可能性,但都没有成功:
ActionBarPreferenceActivity 扩展了 PreferenceActivity。当你这样做时,你受到 ActionBarActivityDelegate.createDelegate(ActionBarActivity activity) 的限制。此外,您需要实现不可访问的 ActionBar.Callbacks。
ActionBarPreferenceActivity 扩展了 ActionBarActivity。这种方法需要重写一个全新的 PreferenceActivity、PreferenceManager 以及可能还要重写 PreferenceFragment,也就是需要访问隐藏类,例如 com.android.internal.util.XmlUtils。解决方案只能来自 Google 开发人员实现一个可以添加到任何活动中的 ActionBarWrapper。
如果你确实需要一个 preference activity,我现在的建议是使用 ActionBarSherlock。
然而,我在这里实现了它。
我通过使用getActionBar()得到了android.app.Actionbar。一开始它返回了一个空值...然后我去了清单并将主题更改为:
android:theme="@style/Theme.AppCompat"然后我又能够使用操作栏了。我猜这只适用于某些版本的构建。因此,您可能需要检查构建编号或检查返回的值是否为空。
对我来说没问题,因为我正在开发的应用程序是针对 ICS/4.0+ 的。
现在这个问题的官方答案已经发布了。它是v7/v14 Preference Support库。
请参阅如何使用v7/v14 Preference Support库?以了解如何使用它。