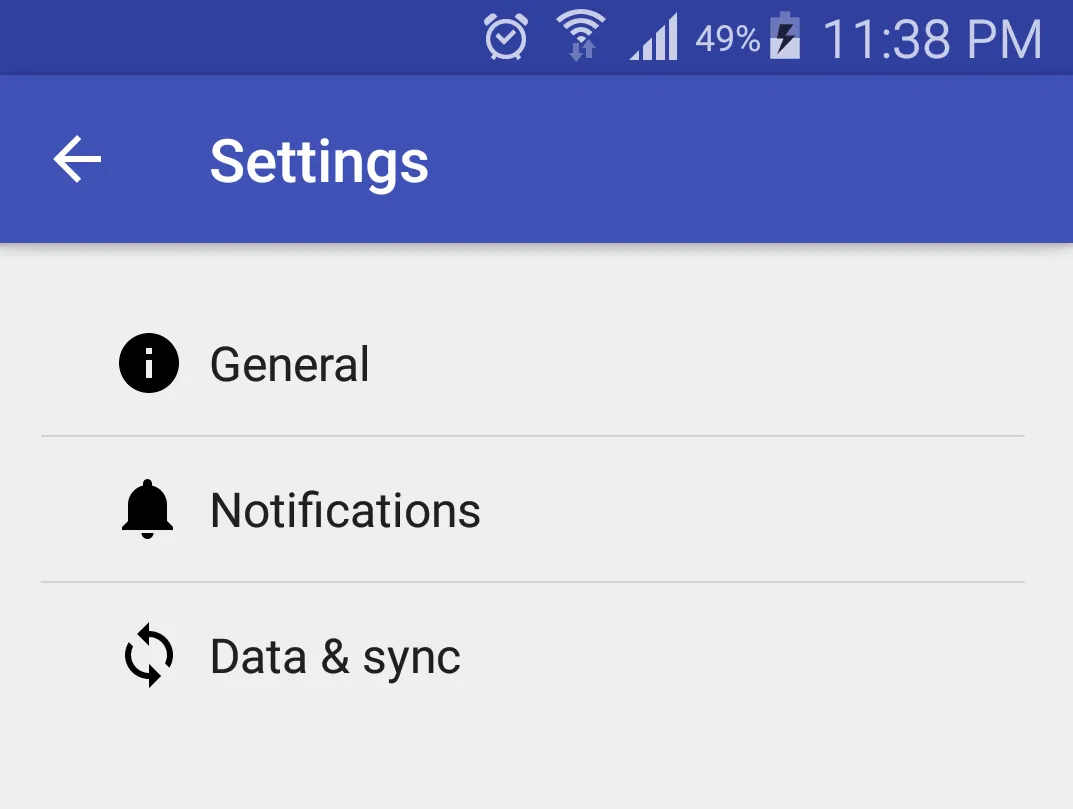
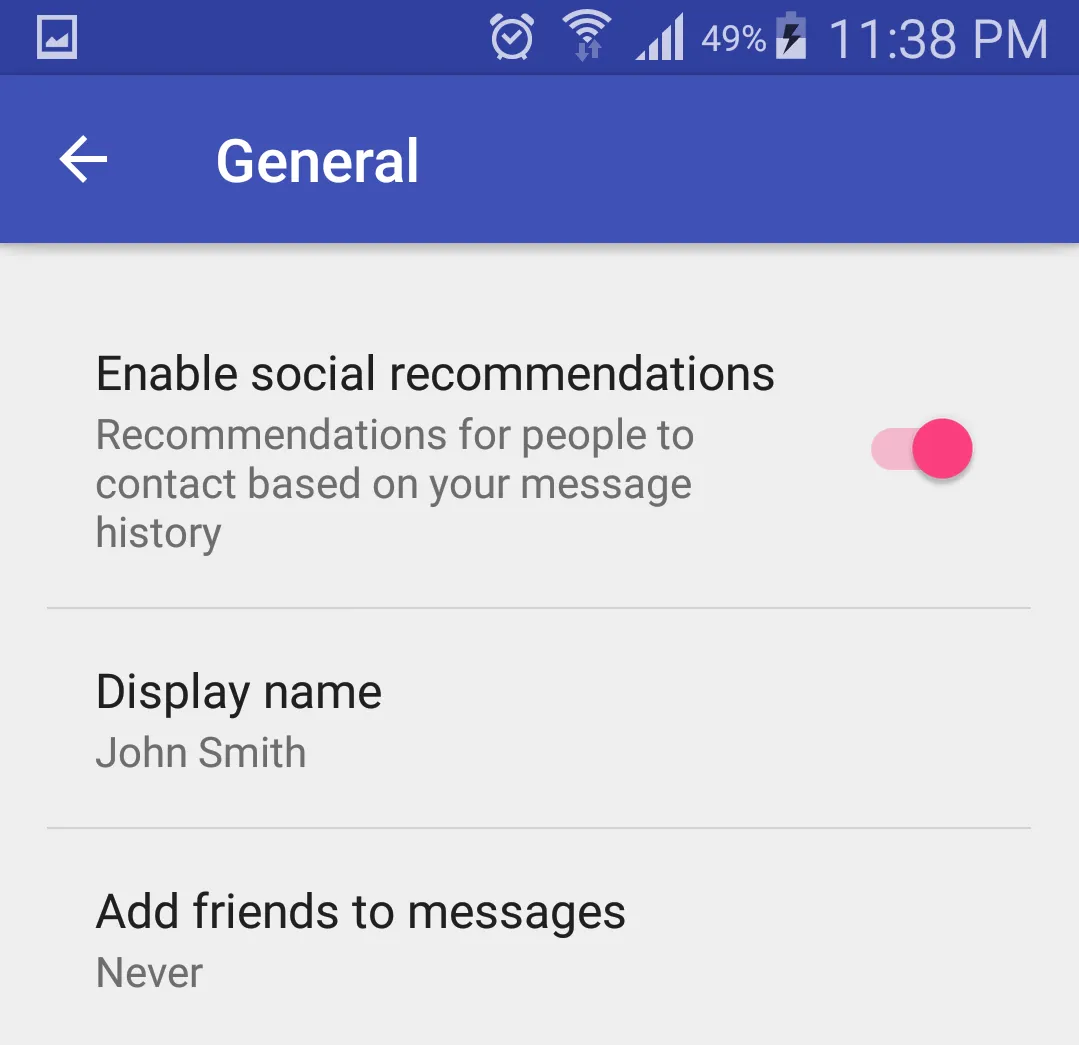
使用支持(v21)工具栏创建偏好设置屏幕

116

我在使用支持库中的新Material Design工具栏时遇到了问题,并且出现在Preference屏幕上。

我的settings.xml文件内容如下:

<PreferenceScreen xmlns:android="http://schemas.android.com/apk/res/android">
    <PreferenceCategory
        android:title="@string/AddingItems"
        android:key="pref_key_storage_settings">

        <ListPreference
            android:key="pref_key_new_items"
            android:title="@string/LocationOfNewItems"
            android:summary="@string/LocationOfNewItemsSummary"
            android:entries="@array/new_items_entry"
            android:entryValues="@array/new_item_entry_value"
            android:defaultValue="1"/>

    </PreferenceCategory>
</PreferenceScreen>

这些字符串在其他地方被定义。


这个答案提供了一个完美的Support Library解决方案。 - harishannam
13个回答

112
请查看GitHub代码库:这里
我晚了一点,但以下是我使用作为继续使用PreferenceActivity的解决方案:

settings_toolbar.xml :

<?xml version="1.0" encoding="utf-8"?>
<android.support.v7.widget.Toolbar
    xmlns:android="http://schemas.android.com/apk/res/android"
    xmlns:app="http://schemas.android.com/apk/res-auto"
    android:id="@+id/toolbar"
    app:theme="@style/ThemeOverlay.AppCompat.Dark.ActionBar"
    android:layout_width="match_parent"
    android:layout_height="wrap_content"
    android:minHeight="?attr/actionBarSize"
    app:navigationContentDescription="@string/abc_action_bar_up_description"
    android:background="?attr/colorPrimary"
    app:navigationIcon="?attr/homeAsUpIndicator"
    app:title="@string/action_settings"
    />

设置活动.java :

public class SettingsActivity extends PreferenceActivity {

    @Override
    protected void onPostCreate(Bundle savedInstanceState) {
        super.onPostCreate(savedInstanceState);

        LinearLayout root = (LinearLayout)findViewById(android.R.id.list).getParent().getParent().getParent();
        Toolbar bar = (Toolbar) LayoutInflater.from(this).inflate(R.layout.settings_toolbar, root, false);
        root.addView(bar, 0); // insert at top
        bar.setNavigationOnClickListener(new View.OnClickListener() {
            @Override
            public void onClick(View v) {
                finish();
            }
        });
    }

}

结果:
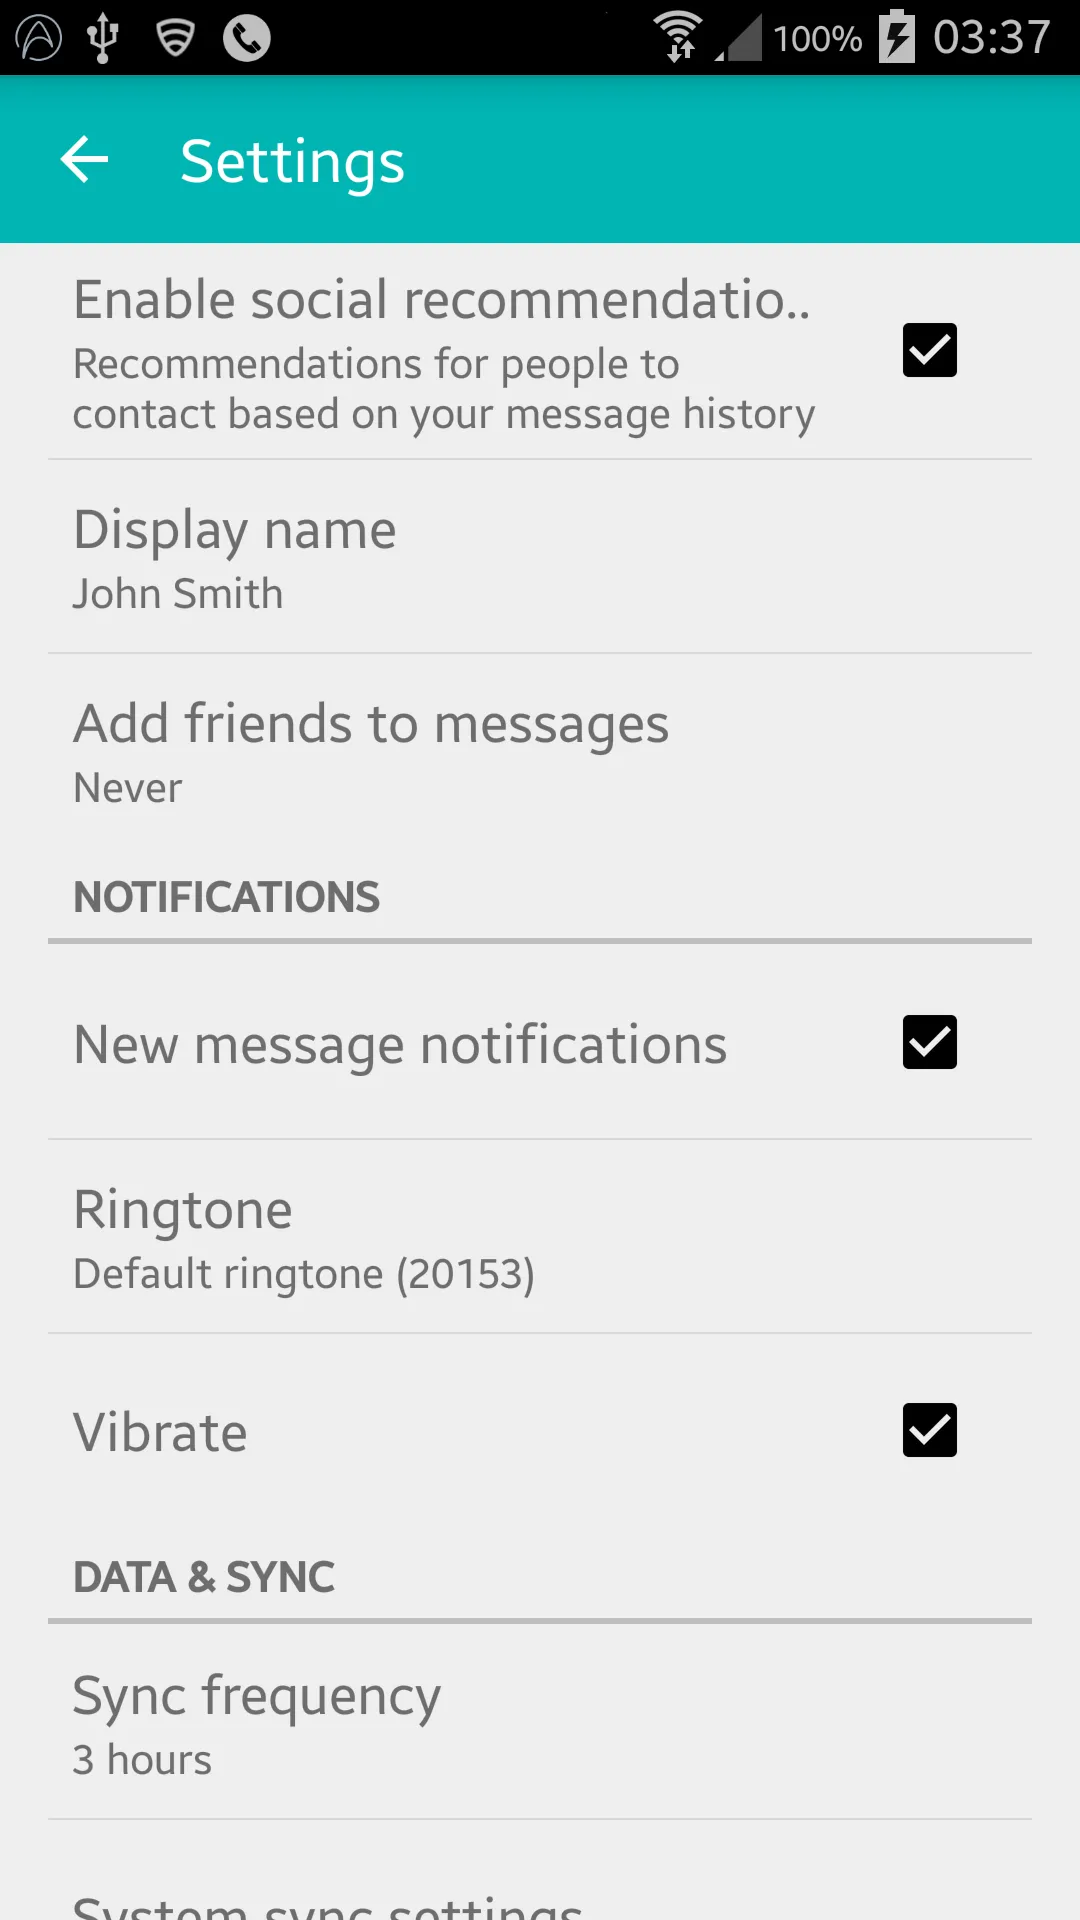
示例


更新(适用于Gingerbread):

根据评论,Gingerbread设备在此行返回NullPointerException:

LinearLayout root = (LinearLayout)findViewById(android.R.id.list).getParent().getParent().getParent();

修复:

SettingsActivity.java :

public class SettingsActivity extends PreferenceActivity {

    @Override
    protected void onPostCreate(Bundle savedInstanceState) {
        super.onPostCreate(savedInstanceState);
        Toolbar bar;

        if (Build.VERSION.SDK_INT >= Build.VERSION_CODES.ICE_CREAM_SANDWICH) {
            LinearLayout root = (LinearLayout) findViewById(android.R.id.list).getParent().getParent().getParent();
            bar = (Toolbar) LayoutInflater.from(this).inflate(R.layout.settings_toolbar, root, false);
            root.addView(bar, 0); // insert at top
        } else {
            ViewGroup root = (ViewGroup) findViewById(android.R.id.content);
            ListView content = (ListView) root.getChildAt(0);

            root.removeAllViews();

            bar = (Toolbar) LayoutInflater.from(this).inflate(R.layout.settings_toolbar, root, false);
            

            int height;
            TypedValue tv = new TypedValue();
            if (getTheme().resolveAttribute(R.attr.actionBarSize, tv, true)) {
                height = TypedValue.complexToDimensionPixelSize(tv.data, getResources().getDisplayMetrics());
            }else{
                height = bar.getHeight();
            }

            content.setPadding(0, height, 0, 0);

            root.addView(content);
            root.addView(bar);
        }

        bar.setNavigationOnClickListener(new View.OnClickListener() {
            @Override
            public void onClick(View v) {
                finish();
            }
        });
    }
}

如果上述有任何问题,请告诉我!


更新2:着色解决方法

如许多开发注释所指出的那样,PreferenceActivity不支持元素的着色,但是通过利用一些内部类,您可以实现这一点。在这些类被删除之前,这是可行的。(使用appCompat support-v7 v21.0.3可行)。

添加以下导入:

import android.support.v7.internal.widget.TintCheckBox;
import android.support.v7.internal.widget.TintCheckedTextView;
import android.support.v7.internal.widget.TintEditText;
import android.support.v7.internal.widget.TintRadioButton;
import android.support.v7.internal.widget.TintSpinner;

然后覆盖 onCreateView 方法:

@Override
public View onCreateView(String name, Context context, AttributeSet attrs) {
    // Allow super to try and create a view first
    final View result = super.onCreateView(name, context, attrs);
    if (result != null) {
        return result;
    }

    if (Build.VERSION.SDK_INT < Build.VERSION_CODES.LOLLIPOP) {
        // If we're running pre-L, we need to 'inject' our tint aware Views in place of the
        // standard framework versions
        switch (name) {
            case "EditText":
                return new TintEditText(this, attrs);
            case "Spinner":
                return new TintSpinner(this, attrs);
            case "CheckBox":
                return new TintCheckBox(this, attrs);
            case "RadioButton":
                return new TintRadioButton(this, attrs);
            case "CheckedTextView":
                return new TintCheckedTextView(this, attrs);
        }
    }

    return null;
}

结果:
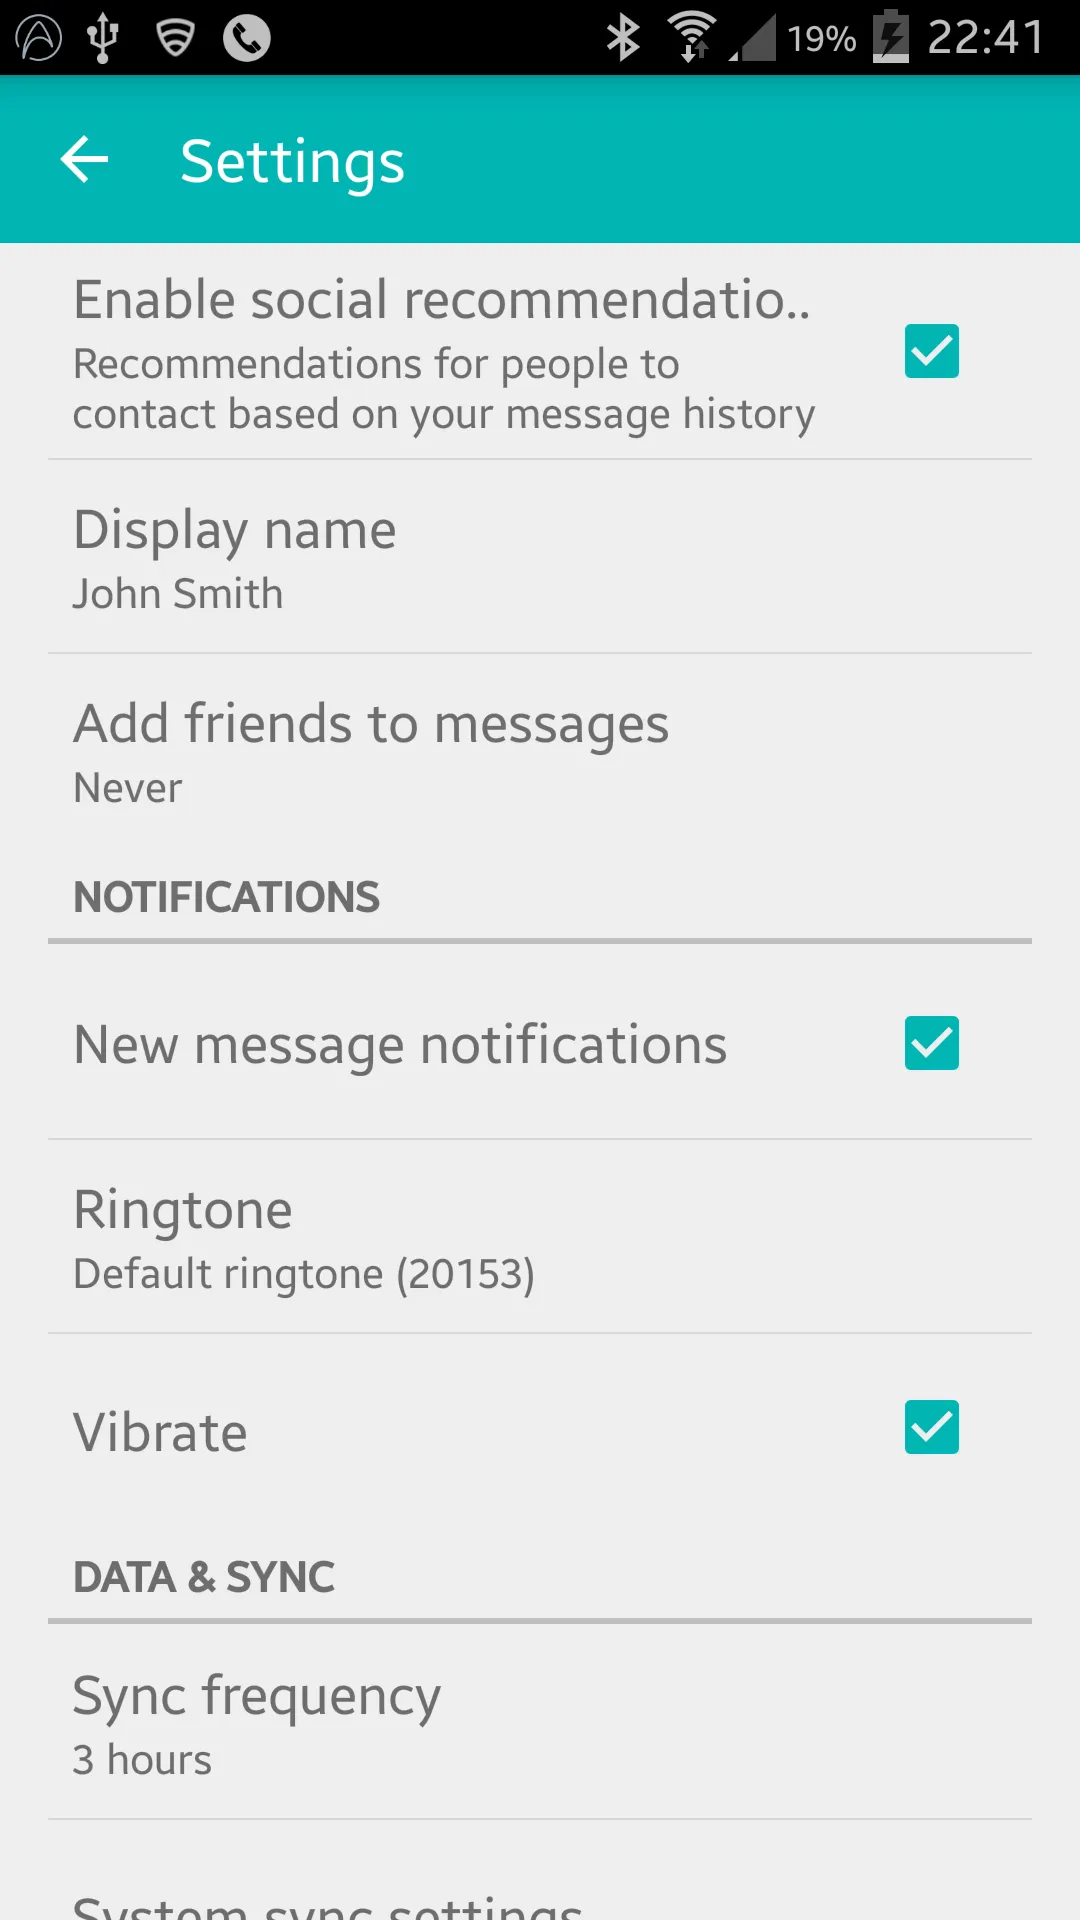
示例2


AppCompat 22.1

AppCompat 22.1引入了新的着色元素,这意味着不再需要使用内部类来实现与上次更新相同的效果。取而代之的是遵循以下步骤(仍然要覆盖onCreateView):

@Override
public View onCreateView(String name, Context context, AttributeSet attrs) {
    // Allow super to try and create a view first
    final View result = super.onCreateView(name, context, attrs);
    if (result != null) {
        return result;
    }

    if (Build.VERSION.SDK_INT < Build.VERSION_CODES.LOLLIPOP) {
        // If we're running pre-L, we need to 'inject' our tint aware Views in place of the
        // standard framework versions
        switch (name) {
            case "EditText":
                return new AppCompatEditText(this, attrs);
            case "Spinner":
                return new AppCompatSpinner(this, attrs);
            case "CheckBox":
                return new AppCompatCheckBox(this, attrs);
            case "RadioButton":
                return new AppCompatRadioButton(this, attrs);
            case "CheckedTextView":
                return new AppCompatCheckedTextView(this, attrs);
        }
    }

    return null;
}

嵌套的偏好设置屏幕

许多人在将工具栏包含在嵌套的 <PreferenceScreen /> 中遇到了问题,但是我找到了解决方法!- 经过反复尝试!

将以下内容添加到您的SettingsActivity

@SuppressWarnings("deprecation")
@Override
public boolean onPreferenceTreeClick(PreferenceScreen preferenceScreen, Preference preference) {
    super.onPreferenceTreeClick(preferenceScreen, preference);

    // If the user has clicked on a preference screen, set up the screen
    if (preference instanceof PreferenceScreen) {
        setUpNestedScreen((PreferenceScreen) preference);
    }

    return false;
}

public void setUpNestedScreen(PreferenceScreen preferenceScreen) {
    final Dialog dialog = preferenceScreen.getDialog();

    Toolbar bar;

    if (Build.VERSION.SDK_INT >= Build.VERSION_CODES.ICE_CREAM_SANDWICH) {
        LinearLayout root = (LinearLayout) dialog.findViewById(android.R.id.list).getParent();
        bar = (Toolbar) LayoutInflater.from(this).inflate(R.layout.settings_toolbar, root, false);
        root.addView(bar, 0); // insert at top
    } else {
        ViewGroup root = (ViewGroup) dialog.findViewById(android.R.id.content);
        ListView content = (ListView) root.getChildAt(0);

        root.removeAllViews();

        bar = (Toolbar) LayoutInflater.from(this).inflate(R.layout.settings_toolbar, root, false);

        int height;
        TypedValue tv = new TypedValue();
        if (getTheme().resolveAttribute(R.attr.actionBarSize, tv, true)) {
            height = TypedValue.complexToDimensionPixelSize(tv.data, getResources().getDisplayMetrics());
        }else{
            height = bar.getHeight();
        }

        content.setPadding(0, height, 0, 0);

        root.addView(content);
        root.addView(bar);
    }

    bar.setTitle(preferenceScreen.getTitle());

    bar.setNavigationOnClickListener(new View.OnClickListener() {
        @Override
        public void onClick(View v) {
            dialog.dismiss();
        }
    });
}

PreferenceScreen 之所以这么麻烦,是因为它们是基于对话框的包装器,所以我们需要捕获对话框布局来添加工具栏。


工具栏阴影

按设计,导入 Toolbar 在 v21 之前的设备上不允许使用高度和阴影,如果你想在你的 Toolbar 上使用高度,你需要将其包装在一个 AppBarLayout 中:

settings_toolbar.xml:

<android.support.design.widget.AppBarLayout
    android:layout_width="match_parent"
    android:layout_height="wrap_content">

   <android.support.v7.widget.Toolbar
       .../>

</android.support.design.widget.AppBarLayout>

不要忘记在build.gradle文件中将Design Support库作为依赖项添加:

compile 'com.android.support:support-v4:22.2.0'
compile 'com.android.support:appcompat-v7:22.2.0'
compile 'com.android.support:design:22.2.0'

Android 6.0

我调查了报告的重叠问题,但无法复现该问题。

使用上述完整代码会生成以下结果:
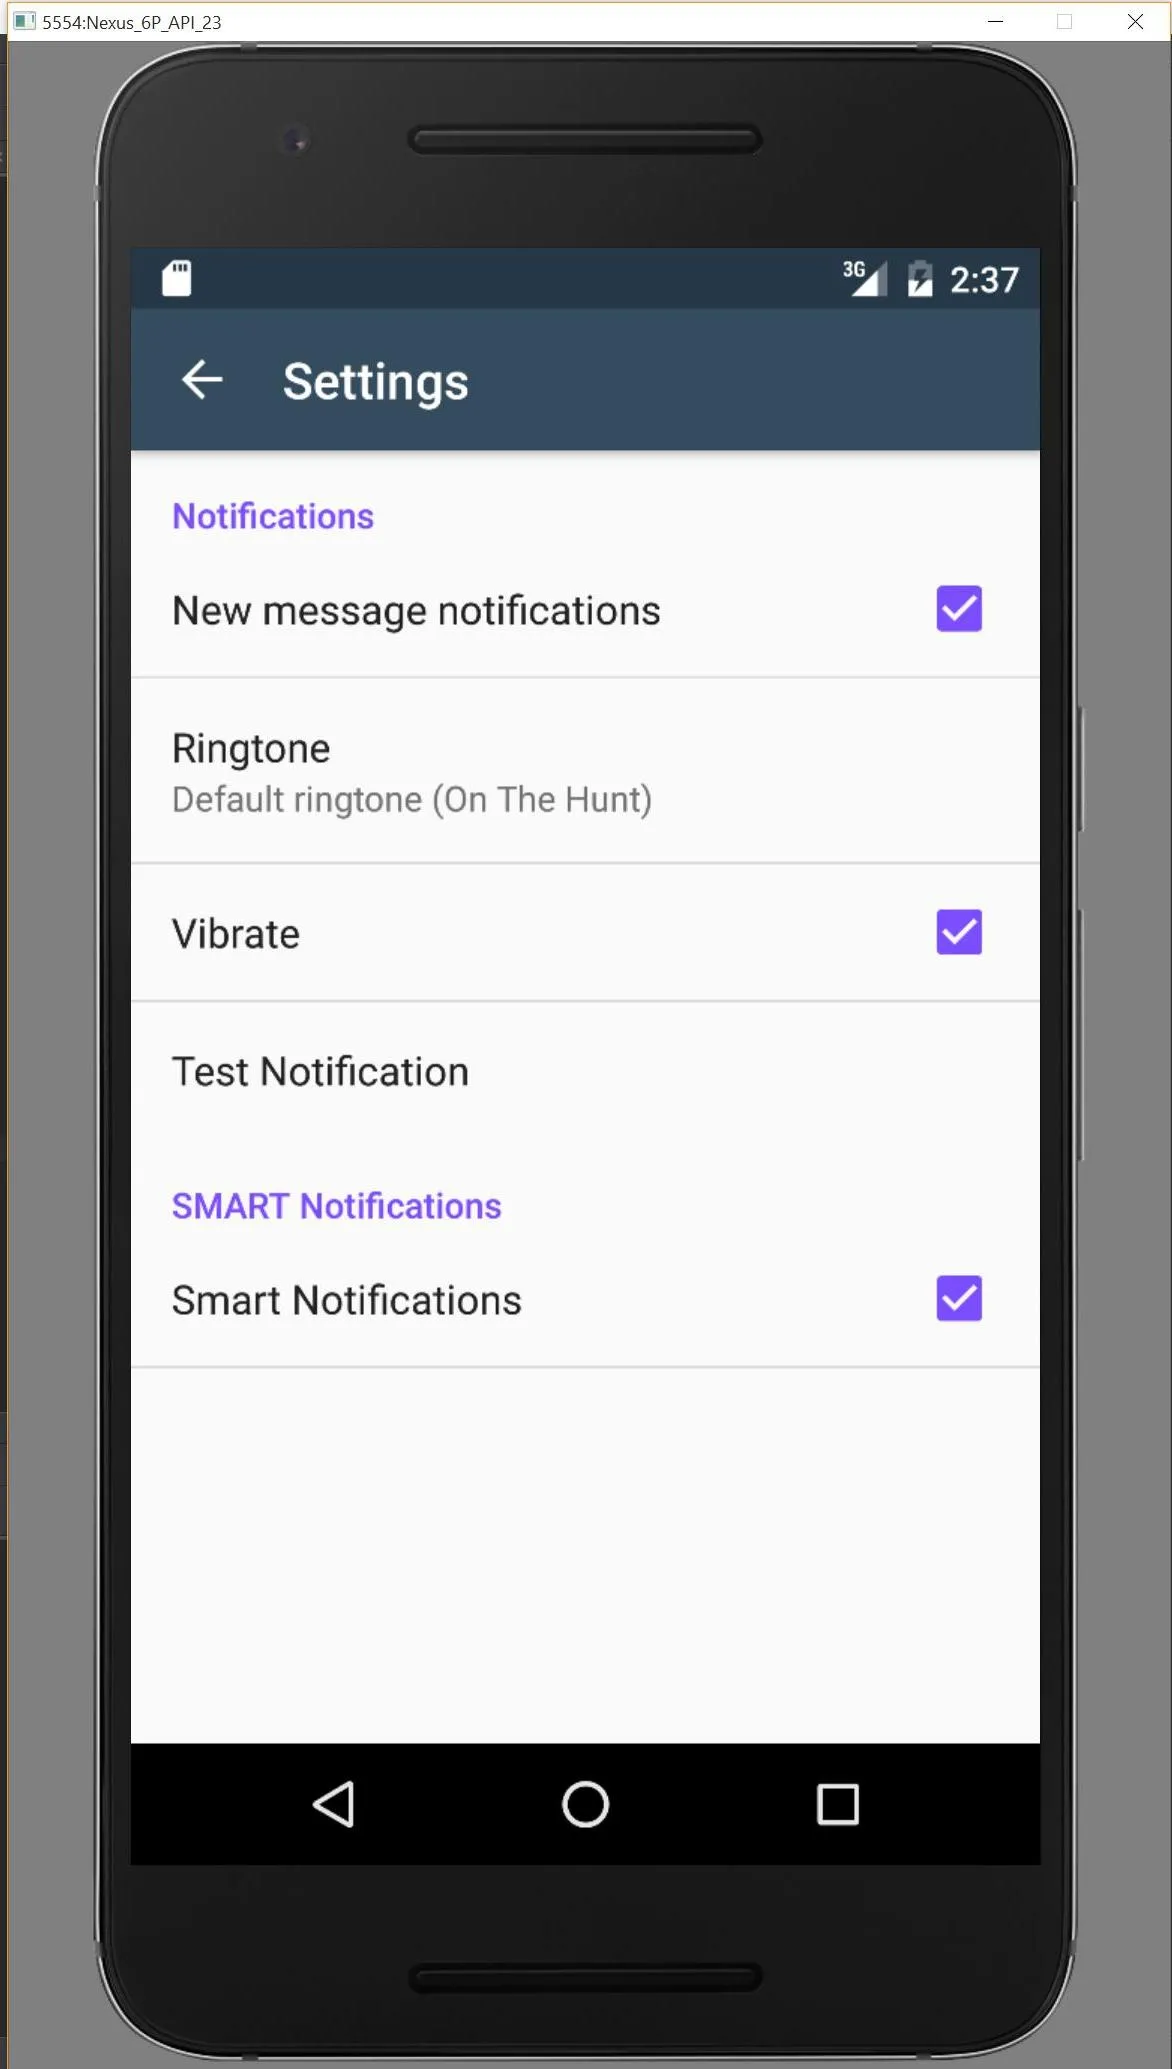
输入图像描述

如果我漏掉了什么,请通过此存储库让我知道,我会进行调查。


1
@andQlimax 我已经更新了我的答案,并提供了解决着色问题的方案。 - David Passmore
@FerranNegre 我不明白为什么会有任何问题,因为在这里 https://android.googlesource.com/platform/frameworks/base/+/refs/heads/master/core/res/res/layout/preference_list_content.xml 中的布局没有进行任何更改。我将进一步调查并回复任何更新。 - David Passmore
@DavidPassmore 我想到了类似的东西(就像答案顶部所示),但是在 getFragmentManager().beginTransaction().replace(R.id.content_frame, new MyPreferenceFragment()).commit(); 中的 content_frame 有一个红色下划线,告诉我出了问题。我确实在 xml 文件中创建了一个具有相同 id 的 frame。不确定问题出在哪里。 - Srujan Barai
3
@DavidPassmore 对我来说,偏好列表重叠在工具栏上。 - Shashank Srivastava
1
@ShashankSrivastava 如果您正在使用Android 6,则会反映出这一点,我正在为此寻找解决方案。感谢您的更新。 - David Passmore
显示剩余17条评论

107

你可以使用PreferenceFragment作为PreferenceActivity的替代选择。以下是包装Activity的示例:

public class MyPreferenceActivity extends ActionBarActivity {
    @Override
    public void onCreate(Bundle savedInstanceState) {
        super.onCreate(savedInstanceState);
        setContentView(R.layout.pref_with_actionbar);

        android.support.v7.widget.Toolbar toolbar = (android.support.v7.widget.Toolbar) findViewById(uk.japplications.jcommon.R.id.toolbar);
        setSupportActionBar(toolbar);

        getFragmentManager().beginTransaction().replace(R.id.content_frame, new MyPreferenceFragment()).commit();
    }
}

这是布局文件(pref_with_actionbar):

<RelativeLayout
    xmlns:android="http://schemas.android.com/apk/res/android"
    xmlns:app="http://schemas.android.com/apk/res-auto"
    android:orientation="vertical"
    android:layout_width="match_parent"
    android:layout_height="match_parent">

    <android.support.v7.widget.Toolbar
        android:id="@+id/toolbar"
        android:layout_height="@dimen/action_bar_height"
        android:layout_width="match_parent"
        android:minHeight="?attr/actionBarSize"
        android:background="?attr/colorPrimary"
        app:theme="@style/ToolbarTheme.Base"
        app:popupTheme="@style/ThemeOverlay.AppCompat.Light"/>

    <FrameLayout
        android:id="@+id/content_frame"
        android:layout_below="@+id/toolbar"
        android:layout_width="match_parent"
        android:layout_height="wrap_content" />

</RelativeLayout>

最后是PreferenceFragment

public static class MyPreferenceFragment extends PreferenceFragment{
    @Override
    public void onCreate(final Bundle savedInstanceState){
        super.onCreate(savedInstanceState);
        addPreferencesFromResource(R.xml.settings);
    }
}

39
我尝试过这种方法,但问题是它无法在子偏好设置屏幕中显示工具栏。 - Madhur Ahuja
2
我认为他在谈论嵌入根首选项XML中的PreferenceScreen。 - Lucas S.
5
我喜欢这种方法,但遗憾的是,如果目标 API 低于 API 11,它将无法使用。 - midhunhk
12
它将与两者都无法兼容。实际上,似乎没有任何方法可以创建材料设计的工具栏、嵌套的偏好设置屏幕。如果您使用 ActionBarActivity 来获取工具栏和相关功能,将没有 onBuildHeaders() 可以覆盖,并且活动中实际上没有偏好设置支持。如果您使用旧的 PreferenceActivity,您将没有工具栏和相关功能(是的,您可以有 Toolbar 和布局,但您不能调用 setSupportActionBar())。因此,无论是使用偏好设置标题还是嵌套的偏好设置屏幕,我们似乎都无法解决这个问题。 - Gábor
1
我同意Gabor的评论。这个解决方案并不通用。下面有更好的解决方案,可以模拟工具栏(没有ActionBar,但谁在乎),还有新的支持库发布,带有AppCompatDelegate。 - Eugene Wechsler
显示剩余8条评论

47

全新更新。

经过一些实验,我似乎找到了适用于嵌套偏好屏幕的 AppCompat 22.1+ 解决方案。

首先,正如许多答案中(包括这里一个答案)所提到的那样,您需要使用新的 AppCompatDelegate。要么使用支持演示文件夹中的 AppCompatPreferenceActivity.java 文件 (https://android.googlesource.com/platform/development/+/58bf5b99e6132332afb8b44b4c8cedf5756ad464/samples/Support7Demos/src/com/example/android/supportv7/app/AppCompatPreferenceActivity.java) 并简单地从中延伸出来,或将相关功能复制到您自己的 PreferenceActivity 中。这里将展示第一种方法:

public class SettingsActivity extends AppCompatPreferenceActivity {

  @Override
  public void onBuildHeaders(List<Header> target) {
    loadHeadersFromResource(R.xml.settings, target);

    setContentView(R.layout.settings_page);
    Toolbar toolbar = (Toolbar) findViewById(R.id.toolbar);
    setSupportActionBar(toolbar);

    ActionBar bar = getSupportActionBar();
    bar.setHomeButtonEnabled(true);
    bar.setDisplayHomeAsUpEnabled(true);
    bar.setDisplayShowTitleEnabled(true);
    bar.setHomeAsUpIndicator(R.drawable.abc_ic_ab_back_mtrl_am_alpha);
    bar.setTitle(...);
  }

  @Override
  protected boolean isValidFragment(String fragmentName) {
    return SettingsFragment.class.getName().equals(fragmentName);
  }

  @Override
  public boolean onOptionsItemSelected(MenuItem item) {
    switch (item.getItemId()) {
      case android.R.id.home:
        onBackPressed();
        break;
    }
    return super.onOptionsItemSelected(item);
  }
}

随附的布局相当简单且常见(layout/settings_page.xml):

<LinearLayout xmlns:android="http://schemas.android.com/apk/res/android"
    android:layout_width="match_parent"
    android:layout_height="match_parent"
    android:layout_margin="0dp"
    android:orientation="vertical"
    android:padding="0dp">
  <android.support.v7.widget.Toolbar
      android:id="@+id/toolbar"
      android:layout_width="match_parent"
      android:layout_height="?attr/actionBarSize"
      android:background="?attr/colorPrimary"
      android:elevation="4dp"
      android:theme="@style/..."/>
  <ListView
      android:id="@id/android:list"
      android:layout_width="match_parent"
      android:layout_height="match_parent"/>
</LinearLayout>

首选项本身按照通常的方式定义(xml/settings.xml):

<preference-headers xmlns:android="http://schemas.android.com/apk/res/android">
  <header
      android:fragment="com.example.SettingsFragment"
      android:summary="@string/..."
      android:title="@string/...">
    <extra
        android:name="page"
        android:value="page1"/>
  </header>
  <header
      android:fragment="com.example.SettingsFragment"
      android:summary="@string/..."
      android:title="@string/...">
    <extra
        android:name="page"
        android:value="page2"/>
  </header>
  ...
</preference-headers>

到现在为止,这些解决方案在网上并没有真正的不同。实际上,即使您没有嵌套屏幕、没有标题,只有一个屏幕,您也可以使用这种方法。

我们为所有深层页面使用公共的PreferenceFragment,通过头部中的extra参数来区分它们。每个页面都有一个单独的XML文件,里面包含一个公共的PreferenceScreen(如xml/settings_page1.xml等)。该片段使用与活动相同的布局,包括工具栏。

public class SettingsFragment extends PreferenceFragment {

  @Override
  public void onCreate(Bundle savedInstanceState) {
    super.onCreate(savedInstanceState);
    getActivity().setTheme(R.style...);

    if (getArguments() != null) {
      String page = getArguments().getString("page");
      if (page != null)
        switch (page) {
          case "page1":
            addPreferencesFromResource(R.xml.settings_page1);
            break;
          case "page2":
            addPreferencesFromResource(R.xml.settings_page2);
            break;
          ...
        }
    }
  }

  @Override
  public View onCreateView(@NonNull LayoutInflater inflater, ViewGroup container, Bundle savedInstanceState) {
    View layout = inflater.inflate(R.layout.settings_page, container, false);
    if (layout != null) {
      AppCompatPreferenceActivity activity = (AppCompatPreferenceActivity) getActivity();
      Toolbar toolbar = (Toolbar) layout.findViewById(R.id.toolbar);
      activity.setSupportActionBar(toolbar);

      ActionBar bar = activity.getSupportActionBar();
      bar.setHomeButtonEnabled(true);
      bar.setDisplayHomeAsUpEnabled(true);
      bar.setDisplayShowTitleEnabled(true);
      bar.setHomeAsUpIndicator(R.drawable.abc_ic_ab_back_mtrl_am_alpha);
      bar.setTitle(getPreferenceScreen().getTitle());
    }
    return layout;
  }

  @Override
  public void onResume() {
    super.onResume();

    if (getView() != null) {
      View frame = (View) getView().getParent();
      if (frame != null)
        frame.setPadding(0, 0, 0, 0);
    }
  }
}
最后,简要概述一下实际的工作原理。新的AppCompatDelegate允许我们使用任何具有AppCompat功能的活动,而不仅仅是那些扩展自实际在AppCompat中的活动。这意味着我们可以将传统的PreferenceActivity转换为一个新的PreferenceActivity并像往常一样添加工具栏。从那时起,我们可以坚持关于首选项屏幕和标题的旧解决方案,而不会偏离现有文档。只有一个重要的问题:不要在活动中使用onCreate(),因为它会导致错误。对于所有操作(如添加工具栏),请使用onBuildHeaders()
唯一的真正区别是,这也是使嵌套屏幕工作的原因,您可以使用相同的方法处理片段。您可以像在活动中一样使用它们的onCreateView(),自己填充布局而不是系统布局,并以与活动中相同的方式添加工具栏。

2
多么巧妙的小技巧!这是我找到的唯一一个可以在后代PreferenceScreen上显示材料工具栏的解决方案。干得好先生。 - Sterling
通过这个解决方案,我认为工具栏会跟随内容滚动而变化,因为它只是一个内部ListView中的项目。 - tasomaniac
不是用这个更新的、新的解决方案。那个可以像预期的那样工作。 - Gábor
奇怪的是,这个解决方案似乎无法识别PreferenceFragmentCompat而不是PreferenceFragment。使用xmlns:app="http://schemas.android.com/apk/res-auto"设置preference-header,然后使用app:fragment而不是android:fragment并没有加载任何新的偏好设置屏幕。所以在向后兼容方面存在问题...有什么建议吗? - fattire
只是瞎猜,但也许如果您同时指定两个呢? - Gábor
显示剩余3条评论

17

如果您想使用PreferenceHeaders,可以使用以下方法:

import android.support.v7.widget.Toolbar;

public class MyPreferenceActivity extends PreferenceActivity

   Toolbar mToolbar;

    @Override
    protected void onCreate(Bundle savedInstanceState) {
        super.onCreate(savedInstanceState);

        ViewGroup root = (ViewGroup) findViewById(android.R.id.content);
        LinearLayout content = (LinearLayout) root.getChildAt(0);
        LinearLayout toolbarContainer = (LinearLayout) View.inflate(this, R.layout.activity_settings, null);

        root.removeAllViews();
        toolbarContainer.addView(content);
        root.addView(toolbarContainer);

        mToolbar = (Toolbar) toolbarContainer.findViewById(R.id.toolbar);
    }

    @Override
    public void onBuildHeaders(List<Header> target) {
        loadHeadersFromResource(R.xml.pref_headers, target);
    }

    // Other methods

}

布局/activity_settings.xml

<LinearLayout
    xmlns:android="http://schemas.android.com/apk/res/android"
    xmlns:app="http://schemas.android.com/apk/res-auto"
    android:orientation="vertical"
    android:layout_width="match_parent"
    android:layout_height="match_parent">

    <android.support.v7.widget.Toolbar
        android:id="@+id/toolbar"
        android:layout_height="?attr/actionBarSize"
        android:layout_width="match_parent"
        android:minHeight="?attr/actionBarSize"
        android:background="?attr/colorPrimary"
        app:theme="@style/AppTheme"
        app:popupTheme="@style/ThemeOverlay.AppCompat.Light"/>

</LinearLayout>

在这里您可以使用任何布局,但请确保在Java代码中进行相应的调整。

最后,您的文件包含标题(xml/pref_headers.xml)

<preference-headers xmlns:android="http://schemas.android.com/apk/res/android">

    <header
        android:fragment="com.example.FirstFragment"
        android:title="@string/pref_header_first" />
    <header
        android:fragment="com.example.SecondFragment"
        android:title="@string/pref_header_second" />

</preference-headers>

root.addView(toolbar); 为什么? root.addView(toolbarContainer); - Crossle Song
糟糕,重命名时错过了一个变量,已修复。 - Sven Dubbeld
1
非常好的答案。关键在于 android.R.id.content,因为我们过去通常会使用带有 android.R.id.listListView 来处理首选项列表本身(如果仍在使用无片段、无标题的方式,则仍然需要这样做)。 - davidcesarino
2
我认为最好检查Android的代码,看看它需要什么,而不是乱搞它的视图层次结构(删除/添加视图)。我认为这样更安全。我建议查看文件“preference_list_content”。 - android developer
2
这是本帖中最好的答案。文章的作者将其扩展为完整的参考实现,我也使用了它。事实上,这是唯一支持应用程序中复杂偏好设置的可行解决方案。 - Eugene Wechsler

17

1
哦,那太好了!因此,在这个新的角度上,基于“扩展PreferenceActivity”的解决方案比基于“扩展ActionBarActivity”的解决方案更好。 - Eugene Wechsler
1
@EugeneWechsler 是的,确实,ActionBarActivity现在已经被弃用了。 - MrBrightside
这个解决方案也适用于嵌套屏幕吗?有更好的例子吗? - Tomas
@Tomas 我还没有尝试过,但是它应该也适用于嵌套屏幕。如果对你有用,请告诉我们。 - MrBrightside
我无法使其与真正嵌套的首选项一起工作...不过,一个解决方案是将您的首选项拆分成多个文件,例如这样 - Tim Rae
显示剩余5条评论

6

虽然上面的回答看起来很详细,但如果你想要一个快速解决方案,以支持API 7及以上版本,并扩展PreferenceActivity,我从下面的项目中获得了帮助。

https://github.com/AndroidDeveloperLB/ActionBarPreferenceActivity

activity_settings.xml

<LinearLayout xmlns:android="http://schemas.android.com/apk/res/android"
xmlns:tools="http://schemas.android.com/tools"
xmlns:app="http://schemas.android.com/apk/res-auto"
android:layout_width="match_parent"
android:layout_height="match_parent"
android:orientation="vertical" >

<android.support.v7.widget.Toolbar
    android:id="@+id/toolbar"
    android:layout_width="match_parent"
    android:layout_height="wrap_content"
    android:background="@color/app_theme_light"
    app:popupTheme="@style/Theme.AppCompat.Light"
    app:theme="@style/Theme.AppCompat" />

<FrameLayout
    android:layout_width="match_parent"
    android:layout_height="match_parent"
    android:padding="@dimen/padding_medium" >

    <ListView
        android:id="@android:id/list"
        android:layout_width="match_parent"
        android:layout_height="match_parent" />
</FrameLayout>

SettingsActivity.java

public class SettingsActivity extends PreferenceActivity {

@Override
protected void onCreate(Bundle savedInstanceState) {
    super.onCreate(savedInstanceState);

    setContentView(R.layout.activity_settings);

    Toolbar toolbar = (Toolbar) findViewById(R.id.toolbar);

    addPreferencesFromResource(R.xml.preferences);

    toolbar.setClickable(true);
    toolbar.setNavigationIcon(getResIdFromAttribute(this, R.attr.homeAsUpIndicator));
    toolbar.setTitle(R.string.menu_settings);
    toolbar.setNavigationOnClickListener(new View.OnClickListener() {

        @Override
        public void onClick(View v) {
            finish();
        }
    });

}

private static int getResIdFromAttribute(final Activity activity, final int attr) {
    if (attr == 0) {
        return 0;
    }
    final TypedValue typedvalueattr = new TypedValue();
    activity.getTheme().resolveAttribute(attr, typedvalueattr, true);
    return typedvalueattr.resourceId;
}
}

6
我也一直在寻找一个解决方案来将 v7 支持的工具栏 (API 25) 添加到 AppCompatPreferenceActivity 中(当添加 SettingsActivity 时,Android Studio 会自动创建该文件)。经过阅读多个解决方案并尝试每一个解决方案后,我发现生成的 PreferenceFragment 示例也很难显示工具栏。
一个修改后有点用的解决方案来自于 "Gabor"。
我面临的一个限制是 'onBuildHeaders' 只会触发一次。如果你旋转设备 (如手机),视图就会重新创建,PreferenceActivity 就会再次没有工具栏,但是 PreferenceFragments 则会保留它们自己的。
我尝试使用 'onPostCreate' 来调用 'setContentView',虽然这能在方向改变时重新创建工具栏,但是 PreferenceFragments 就会呈现为空白。
我想出的解决方案利用了我能找到的关于该主题的每一个提示和答案。我希望其他人也会发现它有用。
我们先从 Java 开始。
首先,在 (生成的) AppCompatPreferenceActivity.java 中,我修改了 'setSupportActionBar' 如下:
public void setSupportActionBar(@Nullable Toolbar toolbar) {
    getDelegate().setSupportActionBar(toolbar);
    ActionBar bar = getDelegate().getSupportActionBar();
    bar.setHomeButtonEnabled(true);
    bar.setDisplayHomeAsUpEnabled(true);
}

其次,我创建了一个名为 AppCompatPreferenceFragment.java 的新类(目前它是一个未使用的名称,尽管可能不会保持这样!):
abstract class AppCompatPreferenceFragment extends PreferenceFragment {

    @Override
    public View onCreateView(LayoutInflater inflater, ViewGroup container, Bundle savedInstanceState) {
        View view = inflater.inflate(R.layout.activity_settings, container, false);
        if (view != null) {
            Toolbar toolbar = (Toolbar) view.findViewById(R.id.toolbar_settings);
            ((AppCompatPreferenceActivity) getActivity()).setSupportActionBar(toolbar);
        }
        return view;
    }

    @Override
    public void onResume() {
        super.onResume();
        View frame = (View) getView().getParent();
        if (frame != null) frame.setPadding(0, 0, 0, 0);
    }
}

这是 Gabor 回答中有效的部分。
最后,为了保持一致性,我们需要对 SettingsActivity.java 进行一些更改:
public class SettingsActivity extends AppCompatPreferenceActivity {

    boolean mAttachedFragment;

    @Override
    protected void onCreate(Bundle savedInstanceState) {
        mAttachedFragment = false;
        super.onCreate(savedInstanceState);
    }

    @Override
    @TargetApi(Build.VERSION_CODES.HONEYCOMB)
    public void onBuildHeaders(List<Header> target) {
        loadHeadersFromResource(R.xml.pref_headers, target);
    }

    @Override
    public void onAttachFragment(Fragment fragment) {
        mAttachedFragment = true;
        super.onAttachFragment(fragment);
    }

    @Override
    protected void onPostCreate(Bundle savedInstanceState) {
        super.onPostCreate(savedInstanceState);

        //if we didn't attach a fragment, go ahead and apply the layout
        if (!mAttachedFragment) {
            setContentView(R.layout.activity_settings);
            setSupportActionBar((Toolbar)findViewById(R.id.toolbar_settings));
        }
    }

    /**
     * This fragment shows general preferences only. It is used when the
     * activity is showing a two-pane settings UI.
     */
    @TargetApi(Build.VERSION_CODES.HONEYCOMB)
    public static class GeneralPreferenceFragment extends AppCompatPreferenceFragment {
        @Override
        public void onCreate(Bundle savedInstanceState) {
            super.onCreate(savedInstanceState);

            addPreferencesFromResource(R.xml.pref_general);
            setHasOptionsMenu(true);

            bindPreferenceSummaryToValue(findPreference("example_text"));
            bindPreferenceSummaryToValue(findPreference("example_list"));
        }

        @Override
        public boolean onOptionsItemSelected(MenuItem item) {
            int id = item.getItemId();
            if (id == android.R.id.home) {
                startActivity(new Intent(getActivity(), SettingsActivity.class));
                return true;
            }
            return super.onOptionsItemSelected(item);
        }
    }
}

为了简洁起见,某些代码已从活动中省略。关键组件包括“onAttachedFragment”、“onPostCreate”,以及“GeneralPreferenceFragment”现在扩展了自定义的“AppCompatPreferenceFragment”,而不是PreferenceFragment。
代码摘要:如果存在片段,则该片段会注入新布局并调用修改后的“setSupportActionBar”函数。如果片段不存在,则SettingsActivity在“onPostCreate”上注入新布局。
现在进入XML(非常简单):
activity_settings.xml:
<?xml version="1.0" encoding="utf-8"?>
<LinearLayout xmlns:android="http://schemas.android.com/apk/res/android"
    android:orientation="vertical"
    android:layout_width="match_parent"
    android:layout_height="match_parent">

    <include
        layout="@layout/app_bar_settings"
        android:layout_width="match_parent"
        android:layout_height="match_parent" />

</LinearLayout>

app_bar_settings.xml:

<?xml version="1.0" encoding="utf-8"?>
<android.support.design.widget.CoordinatorLayout
    xmlns:android="http://schemas.android.com/apk/res/android"
    xmlns:app="http://schemas.android.com/apk/res-auto"
    xmlns:tools="http://schemas.android.com/tools"
    android:id="@+id/content_frame"
    android:layout_width="match_parent"
    android:layout_height="match_parent"
    android:fitsSystemWindows="true"
    tools:context=".SettingsActivity">

    <android.support.design.widget.AppBarLayout
        android:layout_width="match_parent"
        android:layout_height="wrap_content"
        android:theme="@style/AppTheme.NoActionBar.AppBarOverlay">

        <android.support.v7.widget.Toolbar
            android:id="@+id/toolbar_settings"
            android:layout_width="match_parent"
            android:layout_height="?attr/actionBarSize"
            android:background="?attr/colorPrimary"
            app:popupTheme="@style/AppTheme.NoActionBar.PopupOverlay" />

    </android.support.design.widget.AppBarLayout>

    <include layout="@layout/content_settings" />

</android.support.design.widget.CoordinatorLayout>

content_settings.xml:

<?xml version="1.0" encoding="utf-8"?>
<RelativeLayout xmlns:android="http://schemas.android.com/apk/res/android"
    xmlns:app="http://schemas.android.com/apk/res-auto"
    xmlns:tools="http://schemas.android.com/tools"
    android:id="@+id/content"
    android:layout_width="match_parent"
    android:layout_height="match_parent"
    android:paddingBottom="@dimen/activity_vertical_margin"
    android:paddingLeft="@dimen/activity_horizontal_margin"
    android:paddingRight="@dimen/activity_horizontal_margin"
    android:paddingTop="@dimen/activity_vertical_margin"
    app:layout_behavior="@string/appbar_scrolling_view_behavior"
    tools:context=".SettingsActivity"
    tools:showIn="@layout/app_bar_settings">

    <ListView
        android:id="@android:id/list"
        android:layout_width="match_parent"
        android:layout_height="wrap_content" />

</RelativeLayout>

最终结果:

SettingsActivity

GeneralPreferenceFragment


看起来很有前途,但对我不起作用。http://imgur.com/lSSVCIo(Pixel C模拟器)。 - Thomas Vos
懒人专用:Github链接 - Martin Sing

5

我有一个新的(可能更整洁)解决方案,它使用来自Support v7示例的AppCompatPreferenceActivity。有了这段代码,我创建了自己的布局,其中包括一个工具栏:

<?xml version="1.0" encoding="utf-8"?>
<android.support.design.widget.CoordinatorLayout xmlns:android="http://schemas.android.com/apk/res/android"
    xmlns:app="http://schemas.android.com/apk/res-auto" xmlns:tools="http://schemas.android.com/tools"
    android:layout_width="match_parent" android:layout_height="match_parent"
    android:fitsSystemWindows="true" tools:context="edu.adelphi.Adelphi.ui.activity.MainActivity">

    <android.support.design.widget.AppBarLayout android:id="@+id/appbar"
        android:layout_width="match_parent" android:layout_height="wrap_content"
        android:theme="@style/AppTheme.AppBarOverlay">

        <android.support.v7.widget.Toolbar android:id="@+id/toolbar"
            android:layout_width="match_parent" android:layout_height="?attr/actionBarSize"
            android:background="?attr/colorPrimary" app:popupTheme="@style/AppTheme.PopupOverlay"/>

    </android.support.design.widget.AppBarLayout>

    <FrameLayout android:id="@+id/content"
        android:layout_width="match_parent" android:layout_height="match_parent"/>

</android.support.design.widget.CoordinatorLayout>

接着,在我的 AppCompatPreferenceActivity 中,我修改了 setContentView 方法来创建我的新布局,并将提供的布局放置在我的 FrameLayout 中:

@Override
public void setContentView(@LayoutRes int layoutResID) {
    View view = getLayoutInflater().inflate(R.layout.toolbar, null);
    FrameLayout content = (FrameLayout) view.findViewById(R.id.content);
    getLayoutInflater().inflate(layoutResID, content, true);
    setContentView(view);
}

我只需要扩展 AppCompatPreferenceActivity,这样我就可以调用 setSupportActionBar((Toolbar) findViewById(R.id.toolbar)),并在工具栏中填充菜单项。同时保留了 PreferenceActivity 的所有好处。


5

让我们保持简单和清洁,不破坏任何内置的布局。

import android.support.design.widget.AppBarLayout;
import android.support.v4.app.NavUtils;
import android.support.v7.widget.Toolbar;

private void setupActionBar() {
    Toolbar toolbar = new Toolbar(this);

    AppBarLayout appBarLayout = new AppBarLayout(this);
    appBarLayout.addView(toolbar);

    final ViewGroup root = (ViewGroup) findViewById(android.R.id.content);
    final ViewGroup window = (ViewGroup) root.getChildAt(0);
    window.addView(appBarLayout, 0);

    setSupportActionBar(toolbar);

    // Show the Up button in the action bar.
    getSupportActionBar().setDisplayHomeAsUpEnabled(true);
    toolbar.setNavigationOnClickListener(new View.OnClickListener() {
        @Override
        public void onClick(View v) {
            onBackPressed();
        }
    });
}

对我没用,root.getChildAt(0); 返回 null - Eido95

4
我在工作中找到了这个简单的解决方案。首先,我们需要为设置活动创建一个布局。 activity_settings.xml
<RelativeLayout xmlns:android="http://schemas.android.com/apk/res/android"
    xmlns:app="http://schemas.android.com/apk/res-auto"
    xmlns:tools="http://schemas.android.com/tools"
    android:layout_width="match_parent"
    android:layout_height="match_parent"
    tools:context="com.my.package">

    <android.support.v7.widget.Toolbar
        android:id="@+id/tool_bar"
        android:layout_width="match_parent"
        android:layout_height="?attr/actionBarSize"
        android:background="?attr/colorPrimary"
        android:theme="@style/ThemeOverlay.AppCompat.Dark.ActionBar"
        app:elevation="@dimen/appbar_elevation"
        app:navigationIcon="?attr/homeAsUpIndicator"
        app:navigationContentDescription="@string/abc_action_bar_up_description"
        app:popupTheme="@style/ThemeOverlay.AppCompat.Light" />

    <ListView
        android:id="@android:id/list"
        android:layout_width="wrap_content"
        android:layout_height="wrap_content"
        android:layout_below="@+id/tool_bar" />

</RelativeLayout>

请确保添加了一个带有android:id="@android:id/list"的列表视图,否则会抛出NullPointerException

下一步是在您的设置活动中添加(覆盖)onCreate方法

Settings.java

@Override
protected void onCreate(Bundle savedInstanceState) {
    super.onCreate(savedInstanceState);
    setContentView(R.layout.activity_settings);
    Toolbar toolbar = (Toolbar) findViewById(R.id.tool_bar);
    toolbar.setTitle(R.string.action_settings);
    toolbar.setNavigationOnClickListener(new View.OnClickListener() {
        @Override
        public void onClick(View v) {
            finish();
        }
    });
}

请确保导入android.suppoer.v7.widget.Toolbar。这在所有API 16及以上(Jelly Bean及更高版本)的设备上都可以使用。


网页内容由stack overflow 提供, 点击上面的
可以查看英文原文,
原文链接