
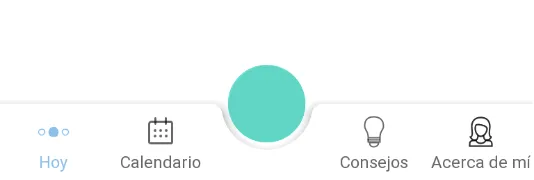
我想创建一个像上面那样的布局。有没有人能帮我如何做到这一点?我已经尝试了新的材料底部应用栏,但我无法实现这种视图。
我想创建一个像上面那样的布局。有没有人能帮我如何做到这一点?我已经尝试了新的材料底部应用栏,但我无法实现这种视图。
终于找到解决方案了。 只需将bottomAppBar置于带有透明背景的bottomNavigationView下方。还要在menu.xml中添加空菜单项以为FAB腾出空间。
XML:
最后得到解决方案。只需在底部导航视图下方放置具有透明背景的bottomAppBar,并在menu.xml中添加空菜单项以为FAB腾出空间。
<?xml version="1.0" encoding="utf-8"?>
<androidx.coordinatorlayout.widget.CoordinatorLayout
xmlns:android="http://schemas.android.com/apk/res/android"
xmlns:app="http://schemas.android.com/apk/res-auto"
android:id="@+id/coordinator_view"
android:layout_width="match_parent"
android:layout_height="match_parent"
android:background="@color/white"
android:fitsSystemWindows="false">


<com.google.android.material.bottomappbar.BottomAppBar
    android:layout_width="match_parent"
    android:layout_height="wrap_content"
    android:id="@+id/bottom_bar"
    android:clickable="false"
    app:fabAlignmentMode="center"
    android:layout_gravity="bottom"/>

<FrameLayout
    android:layout_width="match_parent"
    android:layout_height="wrap_content"
    android:layout_gravity="bottom">

    <com.google.android.material.bottomnavigation.BottomNavigationView
        android:id="@+id/bottom_navigation"
        android:layout_width="match_parent"
        android:clickable="false"
        android:layout_height="wrap_content"
        app:menu="@menu/bottom_menu" />
</FrameLayout>

<FloatingActionButton
    android:id="@+id/fab"
    android:layout_width="wrap_content"
    android:layout_height="wrap_content"
    app:layout_anchor="@id/bottom_bar"/>
</androidx.coordinatorlayout.widget.CoordinatorLayout>
同时,您需要在您的menu.xml中添加一个空白项,如下所示:
<item
android:id="@+id/action_empty"
android:title=""
android:checkable="false"
android:checked="false"
app:showAsAction="always"
android:enabled="false"
>
@Artur的解决方案是朝着正确方向的一大步,尽管需要进行更多微调以适应Google材料组件的发展。
implementation 'com.google.android.material:material:1.1.0-alpha10'
implementation 'androidx.appcompat:appcompat:1.1.0'
implementation 'androidx.constraintlayout:constraintlayout:2.0.0-beta2'
<?xml version="1.0" encoding="utf-8"?>
<androidx.constraintlayout.widget.ConstraintLayout
        xmlns:android="http://schemas.android.com/apk/res/android"
        xmlns:tools="http://schemas.android.com/tools"
        xmlns:app="http://schemas.android.com/apk/res-auto"
        android:layout_width="match_parent"
        android:layout_height="match_parent"
        tools:context=".ui.main.MainActivity"
        android:background="@color/orange_500"
        >

        <!-- blah blah blah other content...   -->
        <!--         android:visibility="gone" -->

        <androidx.coordinatorlayout.widget.CoordinatorLayout
                android:id="@+id/coordinator_view"
                android:layout_width="match_parent"
                android:layout_height="match_parent"
                android:fitsSystemWindows="false"
                android:clickable="false"
                android:focusable="false"
                >


                <com.google.android.material.bottomappbar.BottomAppBar
                        android:id="@+id/bottom_bar"
                        android:layout_width="match_parent"
                        android:layout_height="wrap_content"
                        android:layout_gravity="bottom"
                        android:background="@android:color/transparent"
                        android:clickable="false"
                        app:fabAlignmentMode="center"
                        app:contentInsetStart="0dp"
                        app:contentInsetStartWithNavigation="0dp"
                        >

                        <com.google.android.material.bottomnavigation.BottomNavigationView
                                android:background="@color/clear"
                                android:id="@+id/bottom_navigation"
                                android:layout_width="match_parent"
                                android:layout_height="wrap_content"
                                app:menu="@menu/menu_bottom_navigation_main"
                                android:outlineAmbientShadowColor="@android:color/transparent"
                                android:outlineSpotShadowColor="@android:color/transparent"
                                />

                </com.google.android.material.bottomappbar.BottomAppBar>

                <com.google.android.material.floatingactionbutton.FloatingActionButton
                        android:id="@+id/fab"
                        style="@style/Widget.Design.FloatingActionButton"
                        android:layout_width="wrap_content"
                        android:layout_height="wrap_content"
                        app:layout_anchor="@id/bottom_bar"
                        android:src="@drawable/ic_add_white_24dp"
                        android:tint="@color/white"
                        />
        </androidx.coordinatorlayout.widget.CoordinatorLayout>
</androidx.constraintlayout.widget.ConstraintLayout>
<?xml version="1.0" encoding="utf-8"?>
<menu xmlns:android="http://schemas.android.com/apk/res/android"
      xmlns:app="http://schemas.android.com/apk/res-auto">

    <item
            android:id="@+id/action_view_all_expenses"
            android:enabled="true"
            android:icon="@drawable/ic_list_black_24dp"
            android:title="View All"
            app:showAsAction="always" />


    <item
    android:enabled="false"
    android:title="Add Expense"
    app:showAsAction="always"
            android:checkable="false"
            android:checked="false"
            />


    <item

            android:id="@+id/action_view_dashboard"
            android:enabled="true"
            android:icon="@drawable/ic_dashboard_black_24dp"
            android:title="Dashboard"
            app:showAsAction="withText" />
</menu>
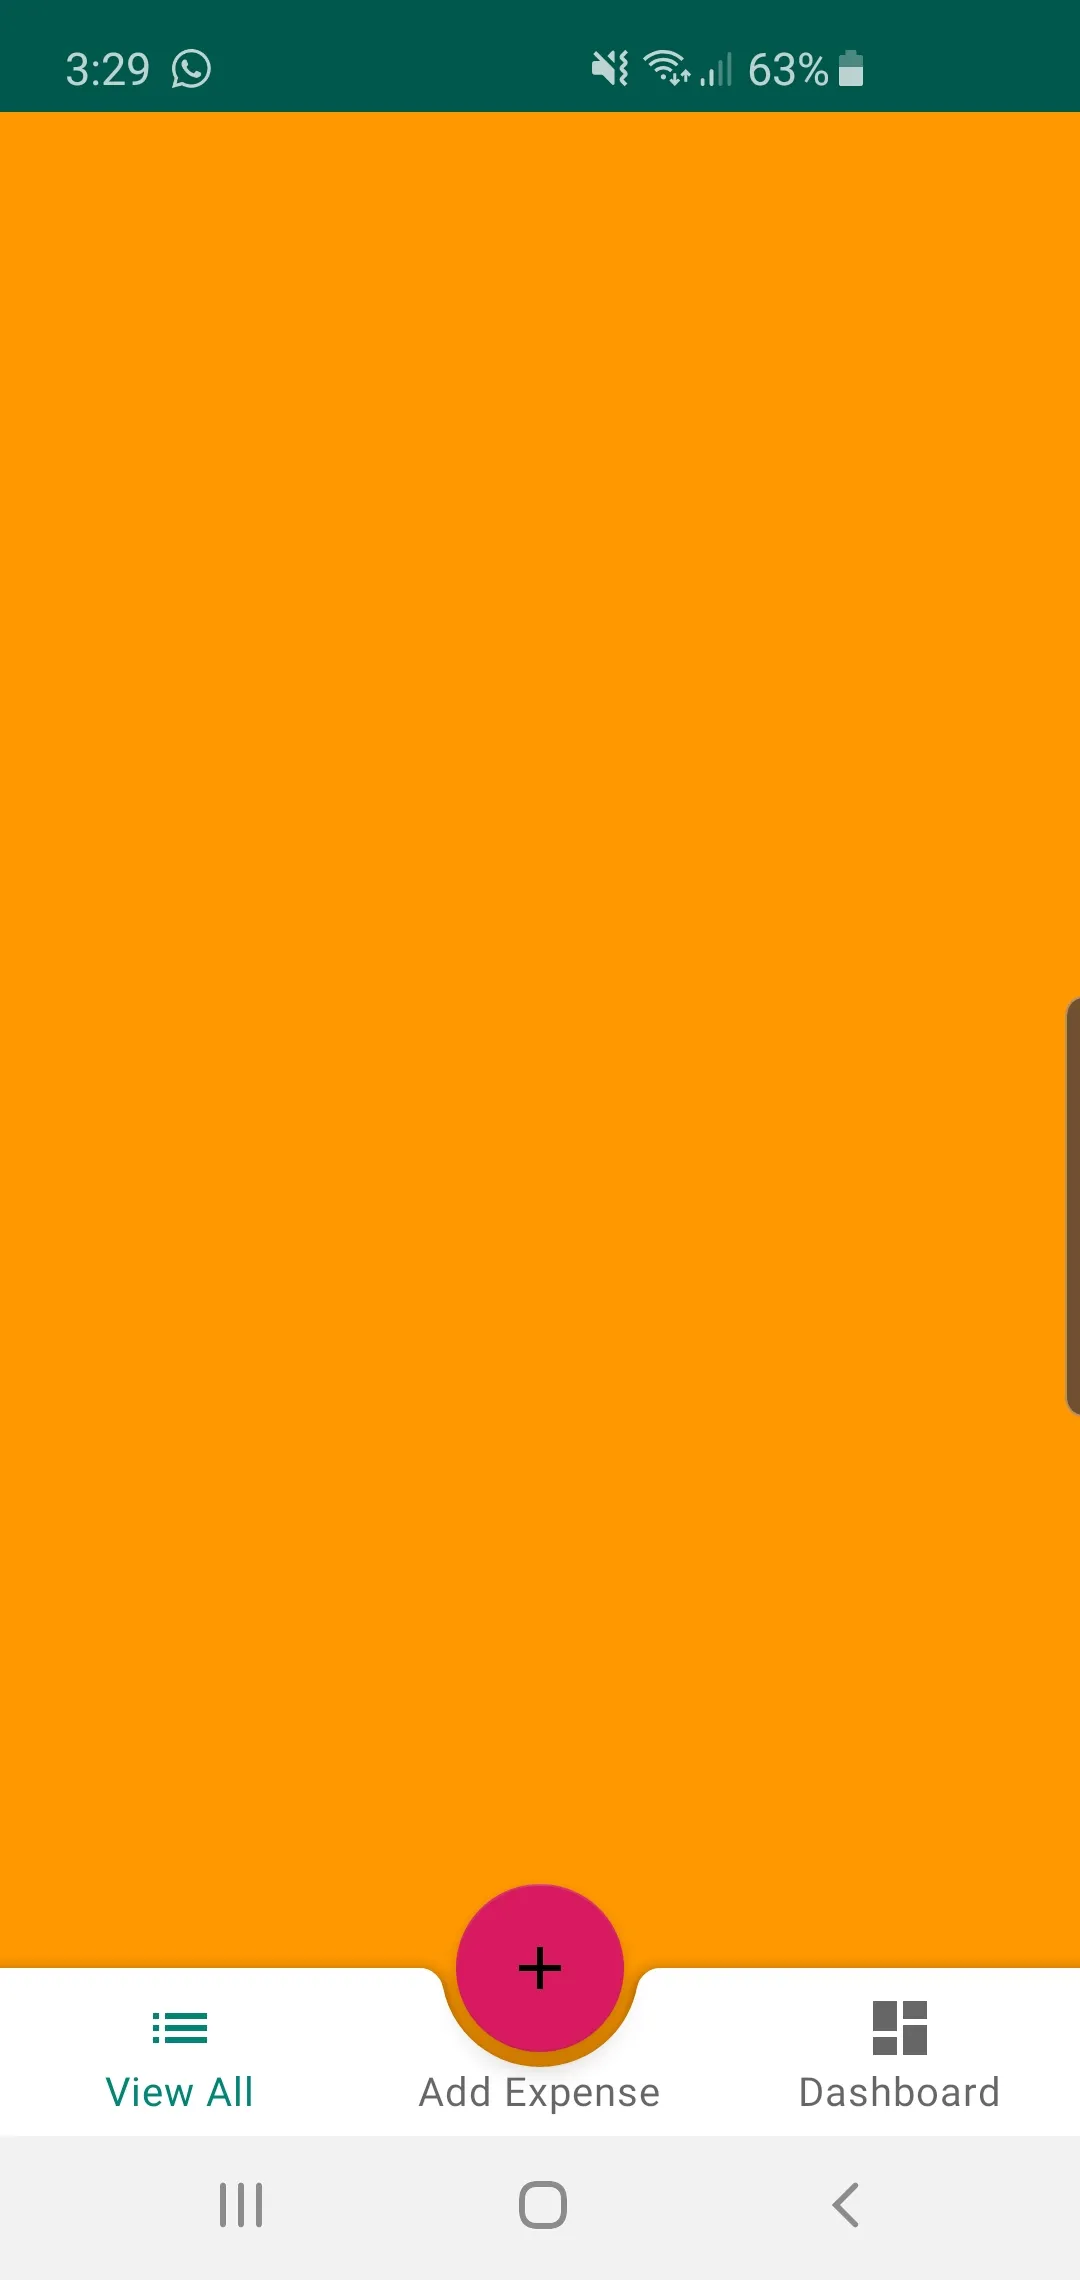
我不得不删除 FrameLayout 作为中间人,它没能很好地运行。
我的主根视图是 ConstraintLayout。我只需要添加一个协调布局以使底部表现良好。请注意,协调器的高度为 match_parent,尽管它只需要用于底部应用栏。
底部导航视图必须添加android:outlineAmbientShadowColor和android:outlineSpotShadowColor为transparent,并且背景也要透明,否则运行 Android Q 的设备会在底部应用栏上面产生奇怪的阴影。
底部应用栏必须添加app:contentInsetStart和app:contentInsetStartWithNavigation为0dp,以便导航栏不会被移开屏幕的开始位置并显得奇怪。
如果您将 ConstraintLayout 作为根视图,则无法将其约束到底部导航视图。相反,您需要将其约束到父级的底部,并添加底部边距,如下所示:android:layout_marginBottom="@dimen/design_bottom_navigation_height"
您还可以使用 android.support.design.widget.TabLayout,将其与四个带有图标的普通选项卡一起放置在屏幕底部,并在其他选项卡中间放置一个带有自定义视图的特殊选项卡。
您可以在这里找到另一种解决方案。 @barenluth建议在底部应用栏中放置一个线性布局,并像导航视图一样使用它:
<com.google.android.material.bottomappbar.BottomAppBar
    android:id="@+id/bar"
    android:layout_width="match_parent"
    android:layout_height="wrap_content"
    android:layout_gravity="bottom"
    android:gravity="center"
    app:layout_anchorGravity="start"
    app:hideOnScroll="true"
    app:fabAnimationMode="scale"
    app:fabAlignmentMode="center"
    app:backgroundTint="@color/colorPrimary">

    <LinearLayout
        android:layout_width="match_parent"
        android:layout_height="wrap_content"
        android:weightSum="5"
        android:paddingEnd="16dp">
        <ImageButton
            android:layout_width="0dp"
            android:layout_height="wrap_content"
            android:layout_weight="1"
            app:srcCompat="@drawable/ic_home_white_24dp"
            android:background="?attr/selectableItemBackgroundBorderless"
            android:tint="@color/secondary_text"/>
        <ImageButton
            android:layout_width="0dp"
            android:layout_height="wrap_content"
            android:layout_weight="1"
            app:srcCompat="@drawable/ic_map_black_24dp"
            android:background="?attr/selectableItemBackgroundBorderless"/>
        <ImageButton
            android:layout_width="0dp"
            android:layout_height="wrap_content"
            android:layout_weight="1"
            android:background="@android:color/transparent"/>
        <ImageButton
            android:layout_width="0dp"
            android:layout_height="wrap_content"
            android:layout_weight="1"
            app:srcCompat="@drawable/ic_people_white_24dp"
            android:background="?attr/selectableItemBackgroundBorderless"/>
        <ImageButton
            android:layout_width="0dp"
            android:layout_height="wrap_content"
            android:layout_weight="1"
            app:srcCompat="@drawable/ic_account_circle_24dp"
            android:background="?attr/selectableItemBackgroundBorderless"/>
    </LinearLayout>
</com.google.android.material.bottomappbar.BottomAppBar>
Re'em的评论很重要。 我有一个补充:
通过单个outlineProvider=none将android:outlineAmbientShadowColor和android:outlineSpotShadowColor替换为透明。
如果你正在使用最新的Material组件和相关主题,并且想要将一些布局放入BottomAppBar中,你需要在themes.xml中覆盖BottomAppBar样式,以去除开始(左侧)的导航抽屉图标空间。
<style name="AppTheme.BottomAppBar" parent="@style/Widget.MaterialComponents.BottomAppBar">
    <item name="contentInsetStart">0dp</item>
    <item name="contentInsetStartWithNavigation">0dp</item>
</style>
并应用于您的布局
        <com.google.android.material.bottomappbar.BottomAppBar
        android:id="@+id/bar"
        style="@style/AppTheme.BottomAppBar"
        android:layout_width="match_parent"
        android:layout_height="wrap_content"
        android:layout_gravity="bottom"
        app:fabAlignmentMode="center">

        <com.google.android.material.bottomnavigation.BottomNavigationView
            android:id="@+id/nav_view"
            style="@style/Widget.MaterialComponents.BottomNavigationView"
            android:layout_width="match_parent"
            android:layout_height="wrap_content"
            android:background="@color/bgDefault"
            app:labelVisibilityMode="unlabeled"
            app:menu="@menu/bottom_nav_menu" />

    </com.google.android.material.bottomappbar.BottomAppBar>