在按钮内更改可绘制对象的大小

17

我想创建一个像这样的 Button:

按钮示例

这是我的代码:

<Button
android:layout_width="80dp"
android:layout_height="80dp"
android:layout_gravity="center"
android:drawablePadding="10dp"
android:id="@+id/button"
android:text="Play Game"
android:background="@drawable/ronaldo"
android:drawableRight="@drawable/messi" />

但是 messi.jpeg 太大了,在这种情况下无法显示文本。如何减小图片大小以适合按钮?

有人能帮我解决这个问题吗?


是的,已经做了,但图片不符合我的要求。 - Twitter khuong291
1
看这个:https://dev59.com/e2sz5IYBdhLWcg3w9s2r - SuperFrog
9个回答

35
如果您使用的API版本大于等于23,您可以将可绘制资源放置在XML文件中,如下所示: messi_smaller.xml
<layer-list xmlns:android="http://schemas.android.com/apk/res/android">
    <item
        android:drawable="@drawable/messi"
        android:width="smaller_width_in_dp"
        android:height="smaller_height_in_dp">
    </item>
</layer-list>

在设置宽度和高度时,必须确保保持可绘制比例。并且只需在您的按钮中使用此可绘制资源:

<Button
    android:layout_width="80dp"
    android:layout_height="80dp"
    android:layout_gravity="center"
    android:drawablePadding="10dp"
    android:id="@+id/button"
    android:text="Play Game"
    android:background="@drawable/ronaldo"
    android:drawableRight="@drawable/messi_smaller" />

通过这种方式,您可以在xml代码中轻松更改可绘制对象的大小。


最好的和最聪明的,这就是正确的解决方案!谢谢 - Luca Biasotto
优秀的解决方案。谢谢。 - Smitty-Werben-Jager-Manjenson

24

解决方法 1:

为按钮添加可绘制对象的功能非常有限。您无法更改可绘制对象的大小,所以修复它的最佳方法是在线性布局中添加一个带有图像视图的按钮,如下所示:

<LinearLayout
    android:layout_width="wrap_content"
    android:layout_height="wrap_content"
    android:layout_gravity="center"
    android:background="@drawable/ronaldo"
    android:orientation="horizontal">

    <Button
        android:id="@+id/button"
        android:layout_width="wrap_content"
        android:layout_height="80dp"
        android:layout_marginEnd="10dp"
        android:layout_marginRight="10dp"
        android:background="@null"
        android:text="Play Game"
        android:textColor="#ff0000"
        android:textStyle="italic" />

    <ImageView
        android:id="@+id/imageView"
        android:layout_width="wrap_content"
        android:layout_height="80dp"
        android:src="@drawable/messi" />

</LinearLayout>

解决方法2:

如果您更喜欢这种方式,您也可以这样做,但是您需要为每个元素添加onClickListner():

<LinearLayout
    android:layout_width="wrap_content"
    android:layout_height="wrap_content"
    android:layout_gravity="center"
    android:background="@drawable/ronaldo"
    android:orientation="horizontal">

    <Button
        android:id="@+id/button"
        android:layout_width="wrap_content"
        android:layout_height="80dp"
        android:background="@null"
        android:text="Play Game"
        android:textColor="#ff0000"
        android:textStyle="italic" />

    <ImageButton
        android:id="@+id/imageButton"
        android:layout_width="wrap_content"
        android:layout_height="80dp"
        android:src="@drawable/messi" />

</LinearLayout>

解决方案三:

正如您在评论中提到的那样,您可以像这样执行:

<RelativeLayout
    xmlns:android="http://schemas.android.com/apk/res/android"
    android:layout_width="wrap_content"
    android:layout_height="80dp"
    android:layout_gravity="center"
    android:background="@drawable/ronaldo">

    <Button
        android:id="@+id/button"
        android:layout_width="wrap_content"
        android:layout_height="80dp"
        android:layout_alignLeft="@+id/buttonLayout"
        android:layout_alignRight="@+id/buttonLayout"
        android:background="@null" />

    <LinearLayout
        android:id="@+id/buttonLayout"
        android:layout_width="wrap_content"
        android:layout_height="wrap_content"
        android:orientation="horizontal">

        <TextView
            android:id="@+id/textView"
            android:layout_width="wrap_content"
            android:layout_height="80dp"
            android:gravity="center"
            android:text="Play Game"
            android:textAppearance="?android:attr/textAppearanceMedium"
            android:textColor="#ff0000"
            android:textStyle="italic" />

        <ImageView
            android:id="@+id/imageView"
            android:layout_width="wrap_content"
            android:layout_height="80dp"
            android:src="@drawable/messi" />

    </LinearLayout>

</RelativeLayout>

1
这是唯一的方法。如果你想要更好但更难的方法,你可以使用9-patch图像。搜索谷歌以获取更多帮助。希望能有所帮助。 - Hussein El Feky
1
这样怎么样:https://dev59.com/e2sz5IYBdhLWcg3w9s2r - Twitter khuong291
很高兴解决了你的问题!如果我的回答有帮助到你,能否请你接受我的答案呢?不幸的是,我没有 Skype,但你可以通过我的 StackOverflow 资料给我发电子邮件,如果需要任何帮助的话。 :) - Hussein El Feky
你删掉了这个问题? - Hussein El Feky
顺便问一下,如何在一个活动中播放很多首歌?如果第一首歌结束了,第二首歌就开始播放,以此类推。怎么做呢? - Twitter khuong291
显示剩余10条评论

1

我删除了 button 并且制作了一个类似于 button 的图层。

<LinearLayout
    android:layout_width="match_parent"
    android:layout_height="50dp"
    android:background="@android:color/background_light"
    android:gravity="center"
    android:orientation="horizontal">


    <LinearLayout
        android:layout_width="match_parent"
        android:layout_height="match_parent"
        android:layout_weight="1"
        android:gravity="center"
        android:onClick="go_map"
        android:clickable="true"
        android:orientation="vertical">

        <ImageView
            android:id="@+id/img_m0"
            style="@style/menu2img"
            app:srcCompat="@drawable/ico_m0" />
       <TextView
            android:id="@+id/textView2"
            style="@style/menu2text"
            android:text="@string/men_map" />
    </LinearLayout>

[]


0

如果你需要处理多种屏幕尺寸,创建适合特定屏幕的备用版本(例如drawable-mdpi文件夹等)可能是解决方案。


0

试试这个:

final Button button = (Button) findViewById(R.id.button1);
ViewTreeObserver vto = button.getViewTreeObserver();
vto.addOnPreDrawListener(new ViewTreeObserver.OnPreDrawListener() {
            public boolean onPreDraw() {
                button.getViewTreeObserver().removeOnPreDrawListener(this);
                //scale to 90% of button height
                DroidUtils.scaleButtonDrawables(button, 0.9);
                return true;
            }
        });

0
如果您直接导入向量,可以使用以下代码:
<vector android:height="30dp"  android:tint="#00FF41"
    android:viewportHeight="24" android:viewportWidth="24"
    android:width="30dp" xmlns:android="http://schemas.android.com/apk/res/android">
    <path android:fillColor="@android:color/white" android:pathData="M20,6h-8l-2,-2L4,4c-1.1,0 -1.99,0.9 -1.99,2L2,18c0,1.1 0.9,2 2,2h16c1.1,0 2,-0.9 2,-2L22,8c0,-1.1 -0.9,-2 -2,-2zM20,18L4,18L4,8h16v10zM8,13.01l1.41,1.41L11,12.84L11,17h2v-4.16l1.59,1.59L16,13.01 12.01,9 8,13.01z"/>
</vector>

enter image description here


0

尝试使用矢量文件而不是JPEG。此外,您甚至可以将jpeg转换为svg格式。 一旦您将svg文件导入Android Studio项目,您将看到<vector>资源,然后只需通过widthheight属性更改所需的大小。 viewportWidthviewportHeight用于设置在虚拟画布上绘制的大小。

 <vector xmlns:android="http://schemas.android.com/apk/res/android"
    android:width="20dp" <!-- fix the size here -->
    android:height="20dp"
    android:viewportWidth="40"
    android:viewportHeight="40">
  <path .../> <!-- your shapes are here -->
  <path .../> 
</vector>


0

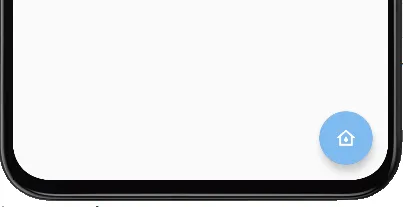
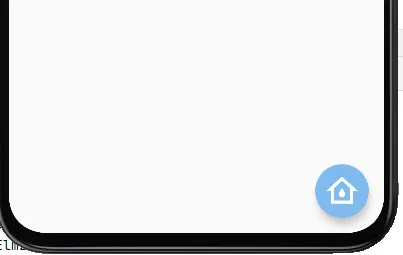
对于API >= 23和android.support.design.widget.FloatingActionButton(FAB),您可以将可绘制资源(SVG)放在XML文件中,路径为:File/New/Vector Asset,并将文件保存为例如:ic_water_white_24dp.xml

然后将app:maxImageSize属性添加到FAB中:

<android.support.design.widget.FloatingActionButton
    android:id="@+id/btnAddProduct"
    android:layout_width="wrap_content"
    android:layout_height="wrap_content"
    android:layout_marginBottom="16dp"
    android:layout_marginEnd="16dp"
    android:clickable="true"
    android:focusable="true"
    app:layout_constraintBottom_toBottomOf="parent"
    app:layout_constraintEnd_toEndOf="parent"
    app:maxImageSize="40dp" // add this line to increase the icon inside the fab
    app:srcCompat="@drawable/ic_water_damage_white_24dp" />

Before After


0
你可以像这样使用 RelativeLayout
<RelativeLayout
    android:layout_width="80dp"
    android:layout_height="80dp"
    android:background="@drawable/ronaldo">

    <Button
        android:layout_width="fill_parent"
        android:layout_height="fill_parent"
        android:text="play game"
        />
    <ImageView
        android:layout_width="40dp"
        android:layout_height="40dp"
        android:layout_alignParentRight="true"
        android:layout_centerVertical="true"
        android:background="@drawable/messi"
        android:scaleType="fitXY"
        />
</RelativeLayout>

不,我只想要一个按钮,它里面有文本和图像。 - Twitter khuong291
使用这种方式有什么问题吗? - saleh sereshki
这里没有问题,但每当要处理某些东西时,我们必须处理这个“小按钮”。这不是一个很好的方式。 - Twitter khuong291

网页内容由stack overflow 提供, 点击上面的
可以查看英文原文,
原文链接