CIGaussianBlur图像大小

14

我想要模糊我的视图,我使用了这段代码:

//Get a UIImage from the UIView
NSLog(@"blur capture");
UIGraphicsBeginImageContext(BlurContrainerView.frame.size);
[self.view.layer renderInContext:UIGraphicsGetCurrentContext()];
UIImage *viewImage = UIGraphicsGetImageFromCurrentImageContext();
UIGraphicsEndImageContext();

//Blur the UIImage
CIImage *imageToBlur = [CIImage imageWithCGImage:viewImage.CGImage];
CIFilter *gaussianBlurFilter = [CIFilter filterWithName: @"CIGaussianBlur"];
[gaussianBlurFilter setValue:imageToBlur forKey: @"inputImage"];
[gaussianBlurFilter setValue:[NSNumber numberWithFloat: 5] forKey: @"inputRadius"]; //change number to increase/decrease blur
CIImage *resultImage = [gaussianBlurFilter valueForKey: @"outputImage"];

//create UIImage from filtered image
blurredImage = [[UIImage alloc] initWithCIImage:resultImage];

//Place the UIImage in a UIImageView
UIImageView *newView = [[UIImageView alloc] initWithFrame:self.view.bounds];
newView.image = blurredImage;

NSLog(@"%f,%f",newView.frame.size.width,newView.frame.size.height);
//insert blur UIImageView below transparent view inside the blur image container
[BlurContrainerView insertSubview:newView belowSubview:transparentView];

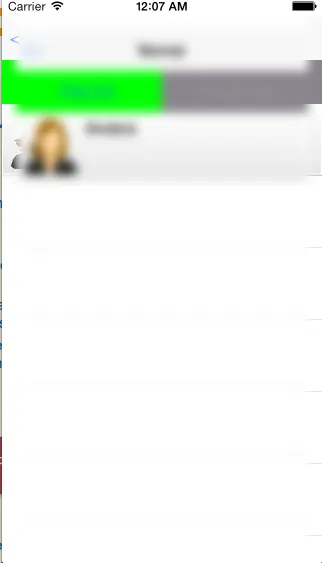
它使视图模糊,但并非全部。我如何使整个视图都变模糊?

billed: postimg.org/image/9bee2e4zx/

3个回答

22

问题不在于它没有模糊整个图像,而是模糊扩展了图像的边界,使得图像变大,并且由于这个原因没有对齐。

为了保持图像大小,在此行之后:

CIImage *resultImage    = [gaussianBlurFilter valueForKey: @"outputImage"];

你可以抓取在这个resultImage中心的原始图片大小的矩形的CGRect

// note, adjust rect because blur changed size of image

CGRect rect             = [resultImage extent];
rect.origin.x          += (rect.size.width  - viewImage.size.width ) / 2;
rect.origin.y          += (rect.size.height - viewImage.size.height) / 2;
rect.size               = viewImage.size;

然后使用CIContext来获取图像的那一部分:

CIContext *context      = [CIContext contextWithOptions:nil];
CGImageRef cgimg        = [context createCGImage:resultImage fromRect:rect];
UIImage   *blurredImage = [UIImage imageWithCGImage:cgimg];
CGImageRelease(cgimg);

如果你想在 iOS 7 上实现这个效果,可以前往iOS UIImageEffects示例代码并下载iOS_UIImageEffects.zip,然后获取UIImage+ImageEffects类别。无论如何,这将提供一些新方法:

- (UIImage *)applyLightEffect;
- (UIImage *)applyExtraLightEffect;
- (UIImage *)applyDarkEffect;
- (UIImage *)applyTintEffectWithColor:(UIColor *)tintColor;
- (UIImage *)applyBlurWithRadius:(CGFloat)blurRadius tintColor:(UIColor *)tintColor saturationDeltaFactor:(CGFloat)saturationDeltaFactor maskImage:(UIImage *)maskImage;
所以,要将图像模糊并使其变亮(产生“毛玻璃”效果),您可以执行以下操作:
UIImage *newImage = [image applyLightEffect];

有趣的是,苹果的代码没有使用CIFilter,而是调用了vImageBoxConvolve_ARGB8888这个vImage高性能图像处理框架。这种技术在WWDC 2013视频在iOS上实现引人入胜的UI中有说明。


嗨,罗布!最近怎么样?我知道这不是你的主要领域,但我们有一个有趣的场景,我们想在显示之前对缓冲区进行下采样(图像数据方面)。我知道你肯定收到了很多请求,但以防万一,这里是一个链接:https://stackoverflow.com/questions/57153640/metal-resize-video-buffer-before-passing-to-custom-kernel-filter/57163285?noredirect=1#comment100842018_57163285 ,像往常一样 - 谢谢! - Roi Mulia

16

更快的解决方案是完全避免使用CGImageRef,而在CIImage懒加载级别执行所有变换。

因此,不要使用以下不适当的方式:

// create UIImage from filtered image (but size is wrong)
blurredImage = [[UIImage alloc] initWithCIImage:resultImage];

一个不错的解决方案是编写:

Objective-C

// cropping rect because blur changed size of image
CIImage *croppedImage = [resultImage imageByCroppingToRect:imageToBlur.extent];
// create UIImage from filtered cropped image
blurredImage = [[UIImage alloc] initWithCIImage:croppedImage];

Swift 3

// cropping rect because blur changed size of image
let croppedImage = resultImage.cropping(to: imageToBlur.extent)
// create UIImage from filtered cropped image
let blurredImage = UIImage(ciImage: croppedImage)

Swift 4

// cropping rect because blur changed size of image
let croppedImage = resultImage.cropped(to: imageToBlur.extent)
// create UIImage from filtered cropped image
let blurredImage = UIImage(ciImage: croppedImage)

谢谢!这个救了我 -> Swift 4 - devjme
CIFilter的模糊程度可以被控制吗?我需要让它更加模糊。 - Anuran Barman
@AnuranBarman 这是一个不同的问题。请将其作为单独的问题发布,谢谢。 :) - Cœur
1
@AnuranBarman 作为提示,您可以尝试调整 inputRadius 或者切换到其他模糊效果。如果这还不够,那么您可能需要使用 Accelerate 中的 vImageBoxConvolve_ARGB8888 自己编写模糊效果代码(https://github.com/Coeur/ImageEffects/blob/master/SwiftImageEffects/ImageEffects%2BAccelerate.swift)。 - Cœur

0

看起来模糊滤镜将返回比您开始时更大的图像,这是有道理的,因为边缘的像素被模糊到它们之外。最简单的解决方案可能是使newView使用UIViewContentModeCentercontentMode,这样它不会试图压缩模糊的图像;您也可以通过在适当尺寸的新上下文中绘制中心的blurredImage来裁剪它,但您实际上并不需要。


网页内容由stack overflow 提供, 点击上面的
可以查看英文原文,
原文链接