安卓图片正确的长宽比和边框

5

我希望有一个固定大小的盒子,大小为120x180 dp,里面包含一张比例正确的图片并在周围画上边框。

XML:

<android.support.constraint.ConstraintLayout
android:layout_width="120dp"
android:layout_height="180dp"
app:layout_gravity="center">

<ImageView
    android:id="@+id/picture"
    android:layout_width="0dp"
    android:layout_height="0dp"
    android:background="@drawable/game_border"
    app:srcCompat="@drawable/pic_lion"
    android:scaleType="centerInside" />

游戏边框布局:

<layer-list xmlns:android="http://schemas.android.com/apk/res/android" >
<item>
    <shape android:shape="rectangle" >
        <solid android:color="#55111111" />
        <padding
            android:bottom="4dp"
            android:left="4dp"
            android:right="4dp"
            android:top="4dp" />

        <corners android:radius="6dp" />
    </shape>
</item>
</layer-list>

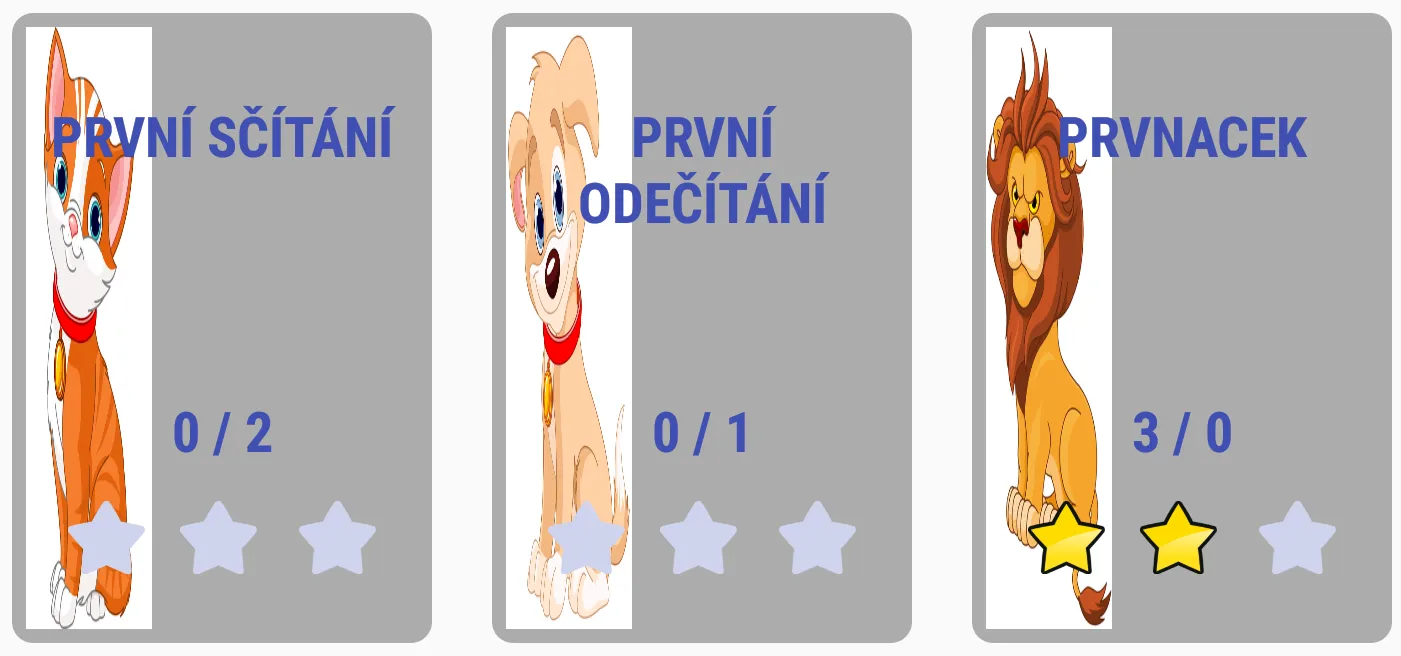
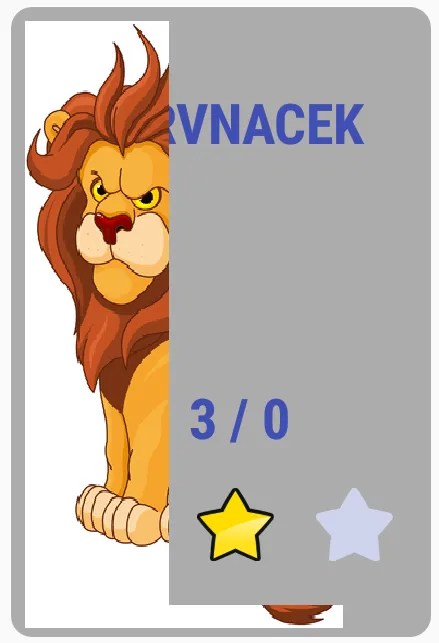
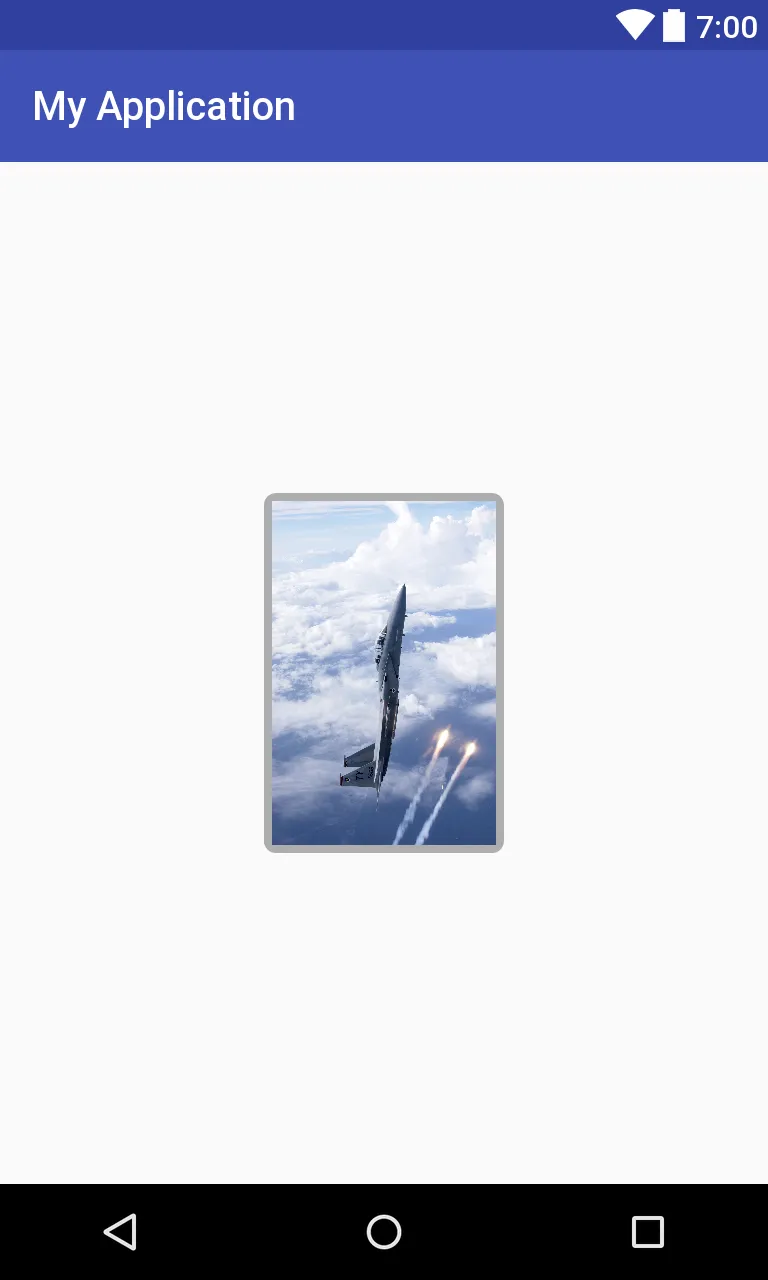
这个scaleType设置很好用,因为它填满了完整的瓷砖内部,而且背景没有被覆盖。但是为了展示不正确的宽高比,我增加了顶部边距。请看下面的图片。我尝试了其他值,但它们要么涂在边框上,要么不能填满完整的内部部分。

如何让具有正确宽高比的带有图片局部边框的瓷砖?图片可以被裁剪。我认为这种技术称为居中裁剪。我在Picasso库中找到了它。

输入图片说明

FitXY会扭曲图片:

不良宽高比

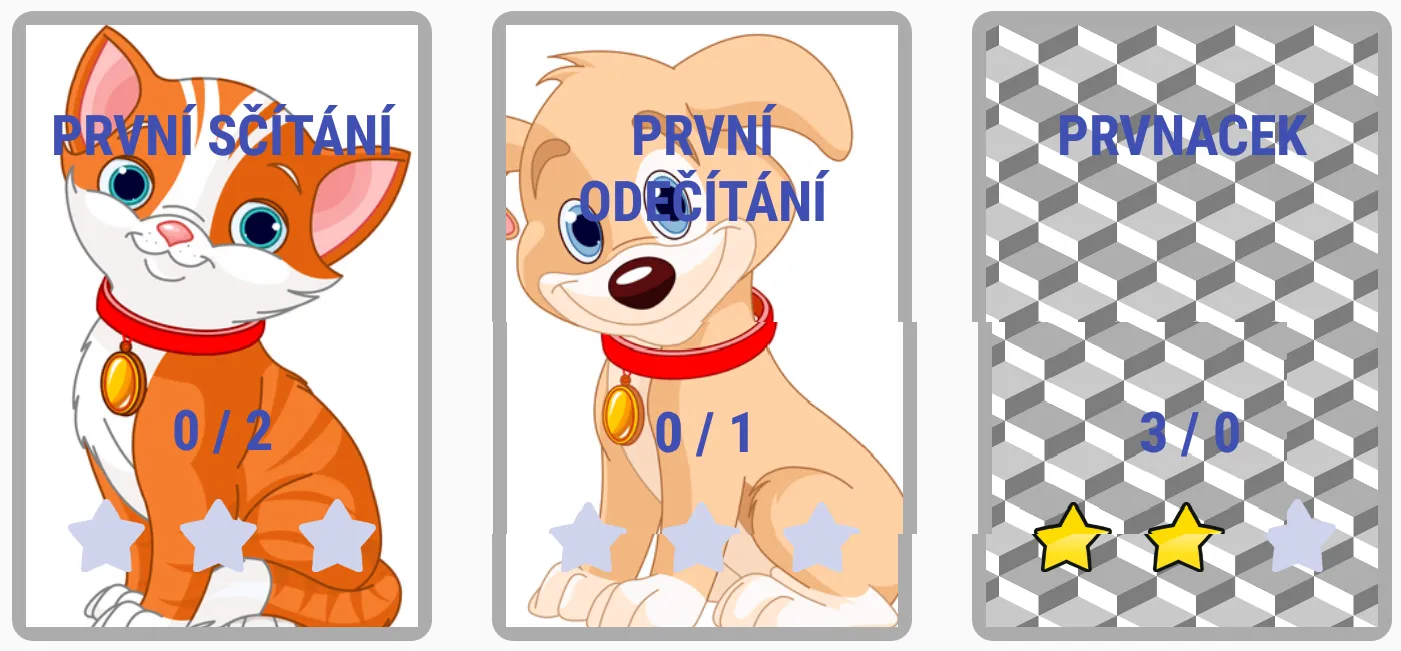
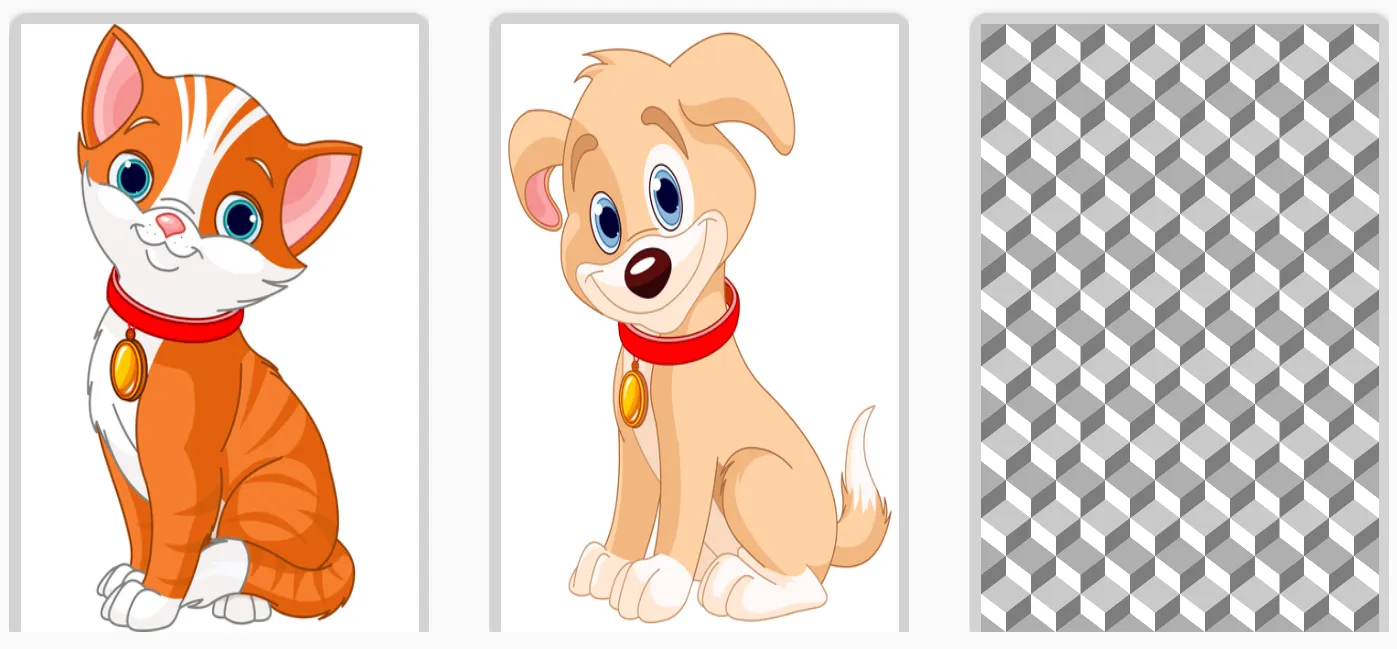
当我保持宽高比裁剪图片时,手动绘制的图片。抱歉,它看起来很丑,但悬赏很快就结束了。

输入图片说明

Bjorn的答案:

输入图片说明

Rahul的答案没有底部边框

输入图片说明


1
你测试过android:adjustViewBounds属性的真值吗? - Shayan Pourvatan
我将它设置为true,但没有帮助。 - Leos Literak
请参阅以下链接:https://dev59.com/QHE85IYBdhLWcg3w9orw。 - Shayan Pourvatan
我认为我正在寻找中心裁剪。这个Picasso的描述似乎符合我的需求:CenterCrop()是一种裁剪技术,它缩放图像以填充ImageView的请求边界,然后裁剪多余部分。ImageView将被完全填充,但可能不会显示整个图像。 - Leos Literak
@Leos Literak,您想将一个图像设置为具有精确纵横比的视图。例如,如果有一个带有50dp顶部填充的图像视图..您需要在剩余的空间中显示您的图像,并保持其纵横比不被拉伸..这是您想要的吗? - Charuක
显示剩余2条评论
6个回答

5
<ImageView
android:id="@id/img"
android:layout_width="match_parent"
android:layout_height="match_parent"
android:adjustViewBounds="true"
android:scaleType="fitCenter" />

scaleType="fitCenter"(默认情况下省略)

  • 将使图像尽可能宽,按比例上下缩放以适应父容器。

    scaleType="centerInside"

  • 如果src的固有宽度小于父宽度,则水平居中对齐。

  • 如果src的固有宽度大于父宽度,则尽可能宽,按比例缩小以适应父容器。

无论您是使用android:src还是ImageView.setImage*,都不重要。关键是android:adjustViewBounds。

或者,您也可以使用CardView为imageView创建圆角。

 <android.support.v7.widget.CardView 
    android:layout_width="120dp"
    android:layout_height="180dp"
    android:layout_gravity="center"
    android:layout_marginLeft="6dp"
    android:layout_marginRight="6dp"
    android:layout_marginTop="6dp"
    app:cardCornerRadius="@dimen/_5dp"
    app:cardBackgroundColor="#D3D3D3"
    app:cardPreventCornerOverlap="false"
    card_view:cardPreventCornerOverlap="false">

    <ImageView
        android:layout_width="match_parent"
        android:layout_height="match_parent"
        android:layout_margin="3dp"
        android:background="@drawable/image"
        android:scaleType="fitXY" />

</android.support.v7.widget.CardView>

不错的答案。没有fitXY有帮助。CardView是一个很好的技巧,可以得到边框,我喜欢它。但图片不尊重比例。我需要一种裁剪技术。 - Leos Literak
@LeosLiterak 你是否尝试过使用scaleType=fitCenteradjustViewBounds=true进行检查? - Rahul Devanavar
你说得没错,这个方面是被保留下来了。但我需要整个画面都被绘制出来。你的解决方案使用fitCenter会在小图片周围绘制灰色区域,或者使用titXY会导致图片缩放不正确。 - Leos Literak
由于您在图像周围得到了灰色区域,请移除imageView的android:layout_margin=3dp。 - Rahul Devanavar
如果你仍然遇到问题,请发布你的图片。 - Rahul Devanavar
显示剩余2条评论

2
拥有圆角 ImageView 可能会是一项有点痛苦的任务。你可以使用支持圆角和边框的库。例如:

https://github.com/vinc3m1/RoundedImageView

如果你理解它的功能,那么你就可以轻松地创建自己的ImageView。诀窍是重写ImageView的onDraw方法并使用路径进行裁剪。你可以找到一些与此主题相关的文章。

很好。我担心我无法在XML中修复它,只能自己实现。所以这会为我节省很多工作。但我仍在等待是否有人知道此问题的根源。 - Leos Literak

2

您可以使用两个单独的ImageView:一个用于框架,另一个用于图片。这样,您可以在图片ImageView上使用ScaleType“centerCrop”,并且结果图片始终具有所需的宽高比,并带有周围的边框。

只需确保两个ImageView的约束设置为两个都跨越父级。

代码:

<android.support.constraint.ConstraintLayout
xmlns:android="http://schemas.android.com/apk/res/android"
xmlns:app="http://schemas.android.com/apk/res-auto"
xmlns:tools="http://schemas.android.com/tools"
android:layout_width="120dp"
android:layout_height="180dp">

<ImageView
    android:layout_width="0dp"
    android:layout_height="0dp"
    app:srcCompat="@drawable/game_border"
    android:id="@+id/frame"
    app:layout_constraintTop_toTopOf="parent"
    app:layout_constraintRight_toRightOf="parent"
    app:layout_constraintLeft_toLeftOf="parent"
    app:layout_constraintBottom_toBottomOf="parent"/>

<ImageView
    android:layout_width="0dp"
    android:layout_height="0dp"
    app:srcCompat="@drawable/lion"
    android:id="@+id/picture"
    android:scaleType="centerCrop"
    app:layout_constraintTop_toTopOf="parent"
    app:layout_constraintRight_toRightOf="parent"
    app:layout_constraintLeft_toLeftOf="parent"
    app:layout_constraintBottom_toBottomOf="parent"
    android:layout_marginTop="4dp"
    android:layout_marginStart="4dp"
    android:layout_marginLeft="4dp"
    android:layout_marginEnd="4dp"
    android:layout_marginRight="4dp"
    android:layout_marginBottom="4dp" />

结果: 带边框的图片

这个答案看起来非常有希望。我会在晚上测试一下。谢谢。 - Leos Literak

1

既然您已经在使用ConstraintLayout,那么有一个方便的属性app:layout_constraintDimensionRatio可让您指定纵横比尺寸。以下是下图的布局代码。

<?xml version="1.0" encoding="utf-8"?>
<android.support.constraint.ConstraintLayout
    xmlns:android="http://schemas.android.com/apk/res/android"
    xmlns:app="http://schemas.android.com/apk/res-auto"
    android:layout_width="match_parent"
    android:layout_height="match_parent"
    >

  <ImageView
      android:id="@+id/picture"
      android:layout_width="120dp"
      android:layout_height="0dp"
      android:background="@drawable/game_border"
      android:scaleType="centerInside"
      app:layout_constraintBottom_toBottomOf="parent"
      app:layout_constraintDimensionRatio="h, 2:3"
      app:layout_constraintLeft_toLeftOf="parent"
      app:layout_constraintRight_toRightOf="parent"
      app:layout_constraintTop_toTopOf="parent"
      app:srcCompat="@drawable/vertical_deploy"
      />

</android.support.constraint.ConstraintLayout>

example


它不起作用。而且我怀疑它能否起作用。这个参数定义了组件的宽和高之间的比例。它不影响加载图像的显示方式。 - Leos Literak
是的,我误解了你的问题。可以给我一张你的图片吗? - Alexander Perfilyev
取任何图像,尺寸并不重要。将上边距设置为高值以扭曲图像。 - Leos Literak

1

试试这个:

<LinearLayout
        android:layout_width="120dp"
        android:layout_height="180dp"
        android:background="@drawable/game_border">

        <ImageView
            android:id="@+id/picture"
            android:layout_width="match_parent"
            android:layout_height="match_parent"
            app:srcCompat="@drawable/pic_lion"
            android:scaleType="centerCrop" />

    </LinearLayout>

希望能帮到你!

1
使用简单的Framelayout作为背景,并使用centerCrop对ImageView进行裁剪:
<FrameLayout
    android:layout_width="120dp"
    android:layout_height="180dp"
    android:background="@drawable/background_with_rounded_corners"
    android:padding="4dp">

    <ImageView
        android:layout_width="match_parent"
        android:layout_height="match_parent"
        android:scaleType="centerCrop"/>
</FrameLayout>

把填充移动到FrameLayout中,这样你的背景资源文件只需要颜色和角落即可:
<layer-list xmlns:android="http://schemas.android.com/apk/res/android">
    <item>
        <shape android:shape="rectangle">
            <solid android:color="#55111111" />
            <corners android:radius="6dp" />
        </shape>
    </item>
</layer-list>

我已经添加了你的答案的截图。 - Leos Literak

网页内容由stack overflow 提供, 点击上面的
可以查看英文原文,
原文链接