cv::RotatedRect中非零像素的数量

4
正如标题所说,我正在尝试找到一个cv::Mat特定区域内非零像素的数量,即在RotatedRect内部。
对于常规矩形,可以在ROI上使用countNonZeroPixels。但是ROIs只能是常规(未旋转)矩形。
另一个想法是绘制旋转矩形并将其用作掩码。然而,openCV既不支持绘制旋转矩形,也不接受掩码。
有没有人有解决这个问题的优雅方法?
谢谢!

嗯,我想出了一个解决方案,但我还不能回答自己的问题。明天我会回来的 - 如果有人在那之前有什么想法,我很好奇你们会想到什么 :) - joekr
我添加了一个新的想法,我认为可能更容易实现。 - Entreco
3个回答

4

好的,这是我的第一次尝试。

这个想法是将图像旋转到矩形的反向旋转,然后在直角矩形上应用roi。

  • This will break if the rotated rectangle is not completely within the image
  • You can probably speed this up by applying another roi before rotation to avoid having to rotate the whole image...

    #include <highgui.h>
    #include <cv.h>
    
    
    // From https://dev59.com/8HE95IYBdhLWcg3wf94F
    cv::Mat rotateImage(const cv::Mat& source, cv::Point2f center, double angle)
    {
      cv::Mat rot_mat = cv::getRotationMatrix2D(center, angle, 1.0);
      cv::Mat dst;
      cv::warpAffine(source, dst, rot_mat, source.size());
      return dst;
    }
    
    int main()
    {
      cv::namedWindow("test1");
    
      // Our rotated rect
      int x = 300;
      int y = 350;
      int w = 200;
      int h = 50;
      float angle = 47;
      cv::RotatedRect rect = cv::RotatedRect(cv::Point2f(x,y), cv::Size2f(w,h), angle);
    
      // An empty image
      cv::Mat img = cv::Mat(cv::Size(640, 480), CV_8UC3);
    
      // Draw rotated rect as an ellipse to get some visual feedback
      cv::ellipse(img, rect, cv::Scalar(255,0,0), -1);
    
      // Rotate the image by rect.angle * -1
      cv::Mat rotimg = rotateImage(img, rect.center, -1 * rect.angle);
    
      // Set roi to the now unrotated rectangle
      cv::Rect roi;
      roi.x = rect.center.x - (rect.size.width / 2);
      roi.y = rect.center.y - (rect.size.height / 2);
      roi.width = rect.size.width;
      roi.height = rect.size.height;
    
      cv::imshow("test1", rotimg(roi));
      cv::waitKey(0);
    }
    

1
完全不同的方法可能是将您的图像旋转(向相反方向),并仍然使用矩形ROI与countNonZeroPixels相结合。唯一的问题是您必须围绕ROI中心的支点旋转您的图像...
为了使其更清晰,可以参考附加示例:

enter image description here


你说得对。我只看了代码,就太快地假设它是类似这样的东西。对不起。 - Entreco
顺便说一句,你可以在你的答案中使用这张图片作为额外的解决方案见解。 - Entreco

0
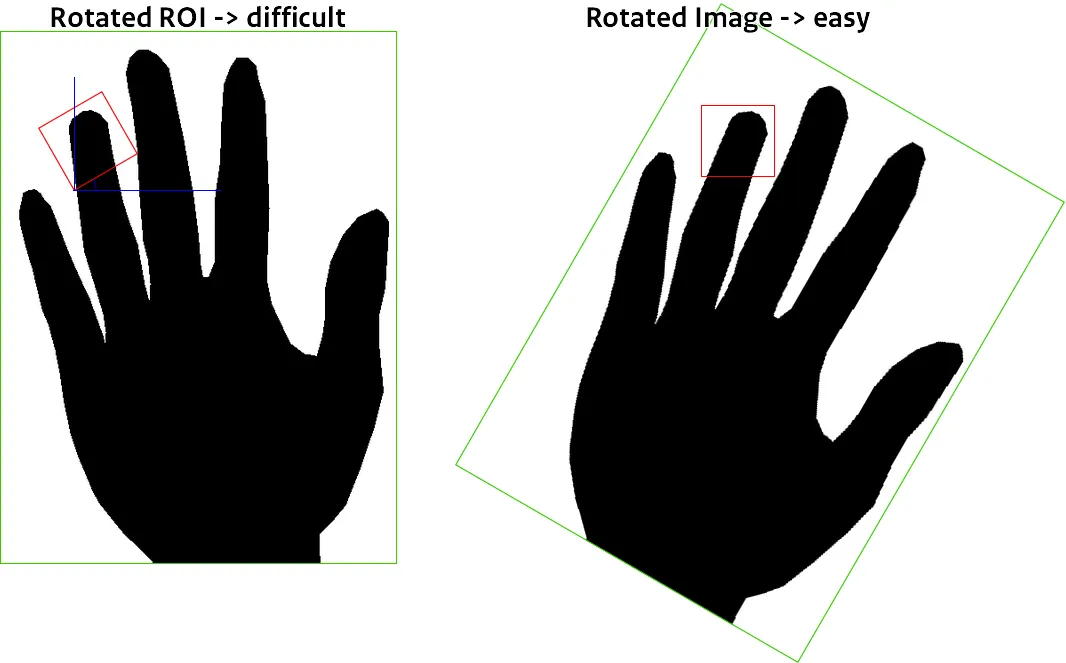
为了避免在类似的任务中出现旋转,我使用以下函数迭代RotatedRect中的每个像素:
double filling(Mat& img, RotatedRect& rect){

    double non_zero = 0;
    double total = 0;
    Point2f rect_points[4];
    rect.points( rect_points );

    for(Point2f i=rect_points[0];norm(i-rect_points[1])>1;i+=(rect_points[1]-i)/norm((rect_points[1]-i))){
        Point2f destination = i+rect_points[2]-rect_points[1];
        for(Point2f j=i;norm(j-destination)>1;j+=(destination-j)/norm((destination-j))){
            if(img.at<uchar>(j) != 0){
                non_zero+=1;
            }
            total+=1;
        }
    }

    return non_zero/total;
}

看起来像是对矩形的常规迭代,但在每一步中,我们会向当前点添加一个单位1px向目标方向的向量。

这个循环并不遍历所有点并跳过一些像素,但对于我的任务来说还可以接受。

更新:最好使用LineIterator进行迭代:

Point2f rect_points[4];
rect.points(rect_points);

Point2f x_start = rect_points[0];
Point2f x_end = rect_points[1];
Point2f y_direction = rect_points[3] - rect_points[0];

LineIterator x = LineIterator(frame, x_start, x_end, 4);
for(int i = 0; i < x.count; ++i, ++x){
    LineIterator y = LineIterator(frame, x.pos(), x.pos() + y_direction, 4);
    for(int j=0; j < y_count; j++, ++y){
        Vec4b pixel = frame.at<Vec4b>(y.pos);
        /* YOUR CODE HERE */
    }
}

网页内容由stack overflow 提供, 点击上面的
可以查看英文原文,
原文链接