在安卓中如何为视图添加阴影

18

我有一个要作为页脚标题的视图。它只是一个视图,你可以把它想象成按钮、文本视图或布局(我对任何东西都很开放)。这里是xml代码。

<RelativeLayout>
   <ScrollView >… </ScrollView> //match parent width and height
   <MyBottomView/> // align parent bottom
 </RelativeLayout>

所以,您可以看到ScrollView在MyBottomView下面滚动。我想为MyBottomView添加顶部阴影,使其更像Material Design。我该如何做呢?


1
可能是一个重复问题,与如何在Android中为View设置阴影?相似。 - Yury Fedorov
5个回答

84

如果您需要在视图的一个侧面(例如顶部)只有阴影,则可以在其前面添加另一个视图,并为其背景使用渐变阴影。

这是渐变文件top_shadow_gradient.xml,您需要将其存储在drawable文件夹中:

<?xml version="1.0" encoding="utf-8"?>
<shape xmlns:android="http://schemas.android.com/apk/res/android">
    <gradient
        android:angle="90"
        android:endColor="#30ffffff"
        android:startColor="#40000000" />
</shape>

这里是一个使用它的示例布局:

<?xml version="1.0" encoding="utf-8"?>
<LinearLayout xmlns:android="http://schemas.android.com/apk/res/android"
    android:layout_width="match_parent"
    android:layout_height="match_parent"
    android:background="@android:color/transparent"
    android:orientation="vertical">

    <View
        android:layout_width="match_parent"
        android:layout_height="8dp"
        android:background="@drawable/top_shadow_gradient" />

    <LinearLayout
        android:layout_width="match_parent"
        android:layout_height="wrap_content"
        android:background="#ffffff"
        android:orientation="vertical"
        android:paddingTop="8dp">
        
        <!-- Put your content here-->
   
    </LinearLayout>

</LinearLayout>

重要提示:根布局必须是透明的(android:background="@android:color/transparent"),而你的“内容”布局需要具有白色背景(android:background="#ffffff")。

这是结果: enter image description here


1
我遇到的唯一解决方案,但我总是在阴影开头得到一个奇怪的白线。 - Ângelo Polotto
将endcolor设置为完全透明的黑色#0000可以去除白色。然而,这种策略虽然容易,但不像光线创造的阴影那样完全正确。 - arberg
请点击此处了解如何使用Paint.setXfermode()进行剪切和阴影处理。 - arberg
圆角半径怎么处理? - sma6871
帮了大忙。谢谢! - Ali Zahid

10

以下是解决此问题的几种方法-选择最适合您的方法:

Android中没有显示阴影的属性。但可能的解决方法有:

  1. 添加一个纯色LinearLayout,然后在其上添加您的实际布局,并使底部和右侧的边距等于1或2 dp。
  1. 使用带有阴影的9-patch图像,并将其设置为线性布局的背景。

还有另一种解决问题的方法,即实现LayerList,用作LinearLayoout的背景。

将background_with_shadow.xml文件添加到res/drawable中,内容如下:

<?xml version="1.0" encoding="utf-8"?>
<layer-list xmlns:android="http://schemas.android.com/apk/res/android">
    <item >
        <shape 
            android:shape="rectangle">
        <solid android:color="@android:color/darker_gray" />
        <corners android:radius="5dp"/>
        </shape>
    </item>
    <item android:right="1dp" android:left="1dp" android:bottom="2dp">
        <shape 
            android:shape="rectangle">
        <solid android:color="@android:color/white"/>
        <corners android:radius="5dp"/>
        </shape>
    </item>
</layer-list>

然后在你的LinearLayout中将layer-list作为背景添加。

<LinearLayout
  android:layout_width="wrap_content"
  android:layout_height="wrap_content"
  android:background="@drawable/background_with_shadow"/>
您还可以阅读: http://odedhb.blogspot.com/2013/05/android-layout-shadow-without-9-patch.html 另外,StackOverflow上的另一篇帖子 how to set shadow to a View in android? 给出了另一个解决方案(使用两个形成阴影的视图)。
<?xml version="1.0" encoding="utf-8"?>
<FrameLayout xmlns:android="http://schemas.android.com/apk/res/android"
    android:layout_width="fill_parent"
    android:layout_height="fill_parent" 
    android:padding="10dp"
    android:background="#CC55CC">
    <LinearLayout
        android:layout_width="fill_parent"
        android:layout_height="wrap_content"
        android:orientation="vertical">
        <TableLayout
            android:layout_width="fill_parent"
            android:layout_height="wrap_content"
            android:stretchColumns="0">
            <TableRow>
                <LinearLayout
                    android:id="@+id/content"
                    android:layout_width="wrap_content"
                    android:layout_height="wrap_content">
                    <TextView  
                        android:layout_width="fill_parent" 
                        android:layout_height="wrap_content"
                        android:background="#FFFFFF" 
                        android:text="@string/hello" />
                </LinearLayout>
                <View
                    android:layout_width="5dp"
                    android:layout_height="fill_parent"
                    android:layout_marginTop="5dp"
                    android:background="#55000000"/>
            </TableRow>
        </TableLayout>
        <View
            android:layout_width="fill_parent"
            android:layout_height="5dp"
            android:layout_marginLeft="5dp"
            android:background="#55000000"/>
    </LinearLayout>
</FrameLayout>
您还可以使用特定的Android资源可绘制形式来模拟阴影效果。请参见:Android View shadow 或只需阅读下面的帖子:
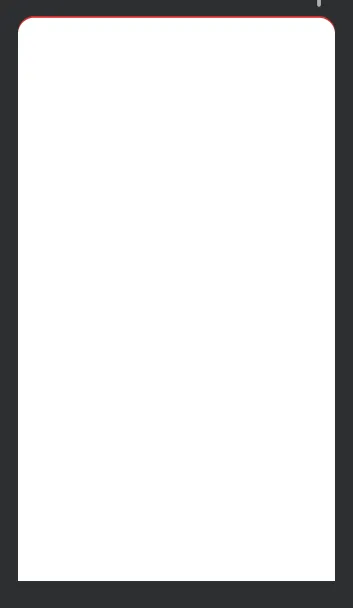
  • 我正在使用Android Studio 0.8.6,但我找不到:
android:background="@drawable/abc_menu_dropdown_panel_holo_light"

所以我找到了这个:

android:background="@android:drawable/dialog_holo_light_frame"

它看起来像这样:

智能手机运行Android,具有运行代码示例的图片


如果您对清新的材料设计效果感兴趣,请阅读以下一些文档:


5

我通过使用ConstraintLayout的方法,更新了Ivo 的卓越答案。

Drawable: shadow_top.xml

<?xml version="1.0" encoding="utf-8"?>
<shape xmlns:android="http://schemas.android.com/apk/res/android">
    <gradient android:startColor="#40000000" android:endColor="#10ffffff" android:angle="90"/>
</shape>

布局:

<?xml version="1.0" encoding="utf-8"?>
<androidx.constraintlayout.widget.ConstraintLayout xmlns:android="http://schemas.android.com/apk/res/android"
  xmlns:app="http://schemas.android.com/apk/res-auto"
  android:layout_width="match_parent"
  android:layout_height="match_parent">

    <androidx.constraintlayout.widget.ConstraintLayout
      android:id="@+id/cl_topView"
      android:layout_width="match_parent"
      android:layout_height="0dp"
      app:layout_constraintBottom_toTopOf="@id/cl_bottomView"
      app:layout_constraintStart_toStartOf="parent"
      app:layout_constraintTop_toTopOf="parent">
      
         ... nested views

    </androidx.constraintlayout.widget.ConstraintLayout>

    <View
      android:id="@+id/v_shadowTop"
      android:layout_width="match_parent"
      android:layout_height="3dp"
      android:background="@drawable/shadow_top"
      app:layout_constraintStart_toStartOf="parent"
      app:layout_constraintBottom_toTopOf="@id/cl_bottomView"/>

   <androidx.constraintlayout.widget.ConstraintLayout
      android:id="@+id/cl_bottomView"
      android:layout_width="match_parent"
      android:layout_height="wrap_content"
      app:layout_constraintBottom_toBottomOf="parent"
      app:layout_constraintStart_toStartOf="parent"
      app:layout_constraintTop_toBottomOf="@id/cl_topView">

         ... nested views

    </androidx.constraintlayout.widget.ConstraintLayout>

</androidx.constraintlayout.widget.ConstraintLayout>

结果: 按照上述步骤,我成功地得到了如下图片中箭头所示的顶部阴影。

enter image description here

对于那些新手Android开发者:

高度调整: 阴影的高度由视图"v_shadowTop"的高度控制(目前为3dp)。

渐变调整: 渐变色的颜色由"shadow_top.xml"可绘制对象中startColor(目前为000000)和endColor(目前为ffffff)的最后六个字符(十六进制代码)控制。

透明度由shadow_top.xml可绘制对象中startColor(目前为40)和endColor(目前为10)的前两个字符控制。


5
我发现一个针对此问题的解决方案是将您的视图包装在一个父级中并使用旋转。例如,如果您有一个卡片视图并且正在向其添加高度,则可以像这样放置两个旋转以实现阴影位于上方而不是下方:
<RelativeLayout
    android:layout_width="match_parent"
    android:layout_height="wrap_content"
    android:clipToPadding="false"
    android:paddingBottom="10dp"
    android:rotation="180">

    <android.support.v7.widget.CardView
        android:layout_width="match_parent"
        android:layout_height="wrap_content"
        android:rotation="180"
        app:cardElevation="8dp">
    <!--Card view content-->
    </android.support.v7.widget.CardView>
</RelativeLayout>

这会得到类似于附加的屏幕截图的东西。

enter image description here

仍然存在一个问题 - 这需要在父布局上设置paddingBottom,这意味着任何可滚动的同级组件都无法覆盖它下方。因此,即使在如今使用高程和轮廓提供程序的时代,最好还是添加一个半透明视图。:(

4
另一个问题是,它会将CardView内部的任何内容都翻转过来! - AndroidGuy
是的,那需要将子元素也旋转180度。我知道,这很糟糕。 - AA_PV
这是一种取巧的方式,而不是真正的解决方案。 - Akshay Kumar Both
1
完全正确,这就是我在回答中一开始要表达的 :) - AA_PV
尽管这种方法很粗糙,但不幸的是这是目前可用的最佳解决方案。添加形状会产生可怕的白色带,并且比这个解决方案不够优雅。 - reactor

3

顶部投影:

<layer-list xmlns:android="http://schemas.android.com/apk/res/android" >

<item>
    <shape>
        <padding
            android:top="@dimen/_2sdp" />
        <solid android:color="@color/red" />
        <corners android:radius="@dimen/_8sdp" />
    </shape>
</item>

<!-- Background -->
<item>
    <shape>
        <solid android:color="@color/white" />
        <corners android:radius="@dimen/_8sdp" />
    </shape>
</item>

如果您想让阴影出现在其他区域,请添加 bottomrightleft 的填充。结果如下图所示:1

这应该是正确的答案。帮助我解决了我的问题,链接在这里:https://dev59.com/o3sQtIcB2Jgan1znAWVB - Ambran

网页内容由stack overflow 提供, 点击上面的
可以查看英文原文,
原文链接