上传到iTunesConnect时,是否遇到了这个错误。上传进程到“正在验证与iTunes Store的资产”,然后我收到以下错误:
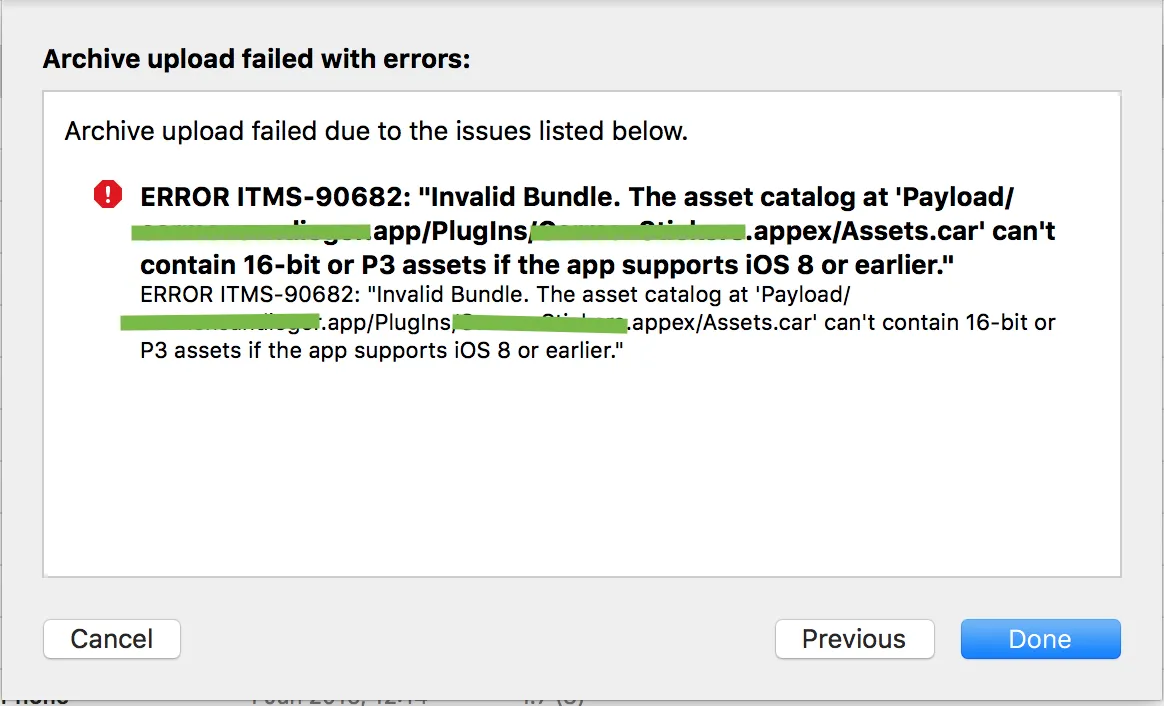
我正在使用xCode8,在现有iOS应用程序中嵌入自定义贴纸应用程序。 我已暂时删除贴纸资产并包含苹果示例消息图标以测试是否是我的贴纸资产导致问题,但是在验证时仍然收到相同的错误。 有任何想法吗?
上传到iTunesConnect时,是否遇到了这个错误。上传进程到“正在验证与iTunes Store的资产”,然后我收到以下错误:
我正在使用xCode8,在现有iOS应用程序中嵌入自定义贴纸应用程序。 我已暂时删除贴纸资产并包含苹果示例消息图标以测试是否是我的贴纸资产导致问题,但是在验证时仍然收到相同的错误。 有任何想法吗?
此外,作为我之前发布的补充,请执行以下操作:
这个步骤适用于所有照片
在预览应用程序中打开每张或所有照片
单击“工具”>“调整大小”>然后将dpi设置为72
和“工具”>“分配配置文件”>然后选择通用RGB配置文件
sips -m ...不是幂等的,这意味着当在同一图像文件上再次执行时,转换后的图像将再次被修改。# before run the commands, cd to the folder which includes all suspicious images.
while IFS= read -d '' -r file; do if [ $(file "$file" | grep -c '16-bit') -eq 1 ]; then sips -m '/System/Library/Colorsync/Profiles/sRGB Profile.icc' "$file"; fi done < <(find . -print0)
请更加清晰明了,将其保存为以下的Bash shell文件:
#/bin/bash

# Before run the shell script,
# cd to the folder which includes all suspicious images

while IFS= read -d '' -r file; do
  if [ $(file "$file" | grep -c '16-bit') -eq 1 ]; then
    sips -m '/System/Library/Colorsync/Profiles/sRGB Profile.icc' "$file";
  fi
done < <(find . -print0)
通过终端一条命令修复:
find . -type f -name '*.png' -print0 | while IFS= read -r -d '' file; do sips --matchTo '/System/Library/ColorSync/Profiles/sRGB Profile.icc' "$file" --out "$file"; done