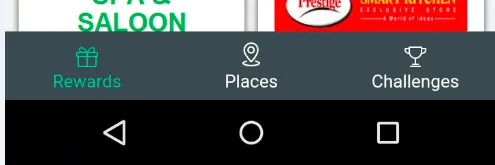
寻找一个好的方法来实现类似的工具栏。我应该使用图像按钮吗?
寻找一个好的方法来实现类似的工具栏。我应该使用图像按钮吗?
<android.support.v7.widget.Toolbar  xmlns:android="http://schemas.android.com/apk/res/android"
xmlns:app="http://schemas.android.com/apk/res-auto"
android:id="@+id/actionbarT"
android:layout_width="match_parent"
android:layout_height="wrap_content"
android:background="@drawable/thebackgroundimageyouwant"
android:minHeight="?attr/actionBarSize"
app:theme="@style/Base.Theme.AppCompat.CompactMenu" >

    <LinearLayout
        android:id="@+id/toolbarmenucontainer"
        android:layout_width="match_parent"
        android:weightSum="3"
        android:layout_height="match_parent"
        android:orientation="horizontal" >

        <ImageButton
            android:layout_width="0dp"
            android:layout_height="match_parent"
            android:background="@drawable/preferedbackground"
            android:clickable="true"
            android:scaleType="fitXY"
            android:layout_weight = "1"
            android:src="@drawable/preferredimage" />

         <ImageButton
            android:layout_width="0dp"
            android:layout_height="match_parent"
            android:background="@drawable/preferedbackground"
            android:clickable="true"
            android:scaleType="fitXY"
            android:layout_weight = "1"
            android:src="@drawable/preferredimage" />

        <ImageButton
            android:layout_width="0dp"
            android:layout_height="match_parent"
            android:background="@drawable/preferedbackground"
            android:clickable="true"
            android:scaleType="fitXY"
            android:layout_weight = "1"
            android:src="@drawable/preferredimage" />

    </LinearLayout>

</android.support.v7.widget.Toolbar>
这个想法是它们将像你想要的那样水平排列,然后不要在ToolBar上执行ToolBar.setTitle()或设置导航,也不需要添加optionsMenu。所以它将像你想要的那样简洁。
试试看是否符合你的要求,记得将背景和图像来源添加到ImageButton中。
ImageButton 吗?您可以为 ImageButton 添加 ID,并通过 Toolbar.findViewById() 获取对它的引用,然后可以通过编程方式更改 ImageButton 的图像(我的意思是编程方式,希望能够帮到您)。 - Elltzandroid:layout_weight="1" 而不是 android:weight="1"。 - florian-do在2020年,适用于我使用的Android Studio 3.5.3版本中,设置Toolbar(接受答案的后半部分)的方法如下: 我该如何将视图对齐到屏幕底部? 您可以在androidx.appcompat.widget.Toolbar中使用Toolbar布局/小部件。
将alignParentBottom属性设置为“true”(将元素放置在RelativeLayout内部)。
上次我尝试做这个的时候,我使用了布局底部包裹着一个LinearLayout的Button,就像这样:
<LinearLayout>
// The other stuff on the view
(...)
</LinearLayout>
// (This is the part you can try to use as a toolbar)
<LinearLayout
    android:orientation="horizontal"
    android:layout_width="fill_parent"
    android:layout_height="wrap_content">

    <Button
        android:layout_width="wrap_content"
        android:layout_height="wrap_content"
        android:layout_gravity="bottom"
        style="?android:attr/borderlessButtonStyle"
        android:textStyle="bold"
        android:background="@drawable/button_tab"
        android:textColor="#ffffffff"
        android:text="@string/bt_orders"
        android:id="@+id/bt_orders"
        android:layout_weight="1" />

    <Button
        android:layout_width="wrap_content"
        android:layout_height="wrap_content"
        android:layout_gravity="bottom"
        style="?android:attr/borderlessButtonStyle"
        android:textStyle="bold"
        android:background="@drawable/button_tab"
        android:textColor="#ffffffff"
        android:text="@string/bt_credit"
        android:id="@+id/bt_credit"
        android:layout_weight="1" />
</LinearLayout>
如果你对我使用的风格和背景感到好奇,这里是它们:
// button_tab.xml
<?xml version="1.0" encoding="utf-8"?>

<selector xmlns:android="http://schemas.android.com/apk/res/android">
    <item android:state_pressed="true">
        <shape android:shape="rectangle">
            <stroke
                android:width="1dp"
                android:color="@color/button_pressed" />
            <solid android:color="@color/button_pressed" />
        </shape>
    </item>
    <item android:state_focused="true" >
        <shape android:shape="rectangle">
            <stroke
                android:width="1dp"
                android:color="@color/button_focus" />
            <solid android:color="@color/button_focus" />
        </shape>
    </item>
    <item>
        <shape android:shape="rectangle">
            <stroke
                android:width="1dp"
                android:color="@color/button_normal" />
            <solid android:color="@color/button_normal" />
        </shape>
    </item>
</selector>