将cornerRadius和backgroundImage设置为UIButton

52

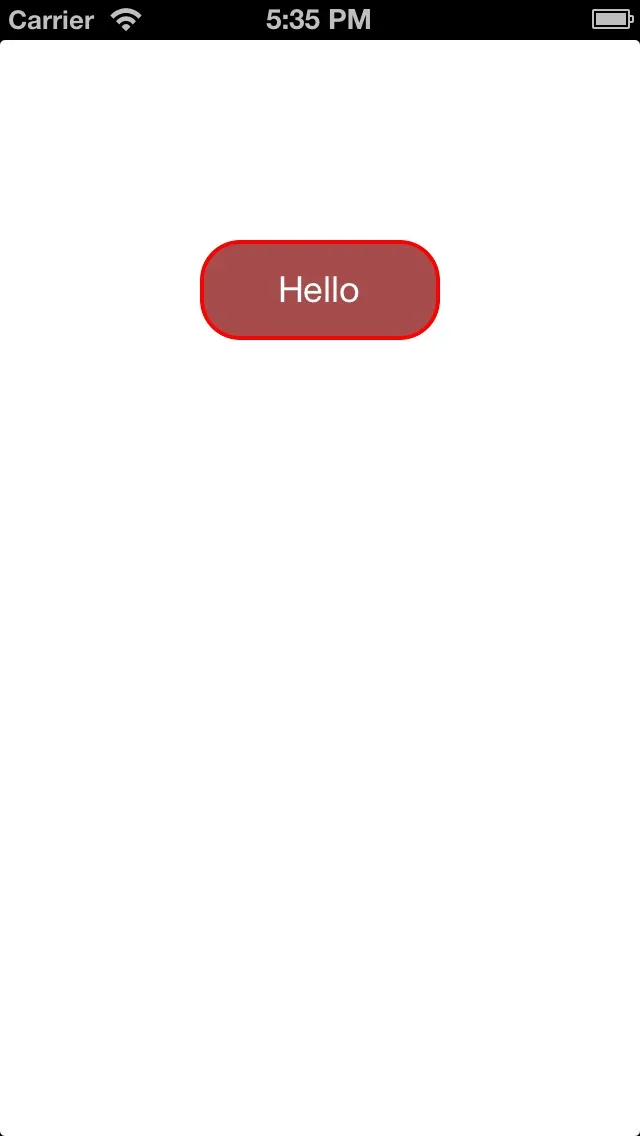
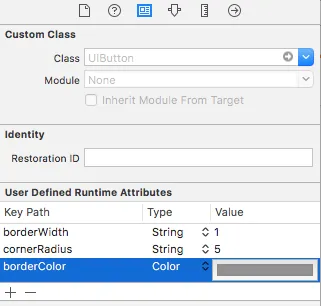
我想将UIButton的cornerRadius属性设置为圆角,但是不知道该如何实现。

如果我像这样操作:

button.layer.cornerRadius = 5;

如果我这样做,它会很好:

button.layer.cornerRadius = 5;
[button setBackgroundColor:[UIColor colorWithPatternImage:radialGradient]];

角落没有圆角。

我知道我可以用以下方法解决问题

 [button.layer setMasksToBounds:YES];

但我特别寻找不同的解决方案,因为我在按钮上添加了一些箭头,如果我设置掩码到边界,箭头就会受到掩盖。

编辑:

径向渐变是由函数创建的

+ (UIImage *)getRadialGradientImage:(CGSize)size centre:(CGPoint)centre radius:(float)radius startColor:(UIColor *)startColor endColor:(UIColor *)endColor{

// Initialise
UIGraphicsBeginImageContextWithOptions(size, YES, 1);

// Create the gradient's colours
size_t num_locations = 2;
CGFloat locations[2] = { 0.0, 1.0 };

const CGFloat *component_first = CGColorGetComponents([startColor CGColor]);

CGFloat red1 = component_first[0];
CGFloat green1 = component_first[1];
CGFloat blue1 = component_first[2];

const CGFloat *component_second = CGColorGetComponents([endColor CGColor]);
CGFloat red2 = component_second[0];
CGFloat green2 = component_second[1];
CGFloat blue2 = component_second[2];

const CGFloat components[8] = { red1,green1,blue1,1,red2,green2,blue2,1}; // End color

CGColorSpaceRef myColorspace = CGColorSpaceCreateDeviceRGB();
CGGradientRef myGradient = CGGradientCreateWithColorComponents (myColorspace, components, locations, num_locations);

// Normalise the 0-1 ranged inputs to the width of the image
CGPoint myCentrePoint = CGPointMake(centre.x * size.width, centre.y * size.height);
float myRadius = MIN(size.width, size.height) * radius;

// Draw it!
CGContextDrawRadialGradient (UIGraphicsGetCurrentContext(), myGradient, myCentrePoint,
                             0, myCentrePoint, myRadius,
                             kCGGradientDrawsAfterEndLocation);

// Grab it as an autoreleased image
UIImage *image = UIGraphicsGetImageFromCurrentImageContext();

// Clean up
CGColorSpaceRelease(myColorspace); // Necessary?
CGGradientRelease(myGradient); // Necessary?
UIGraphicsEndImageContext(); // Clean up
return image;
}

你能展示一下radialGradient声明吗? - Kumar KL
7个回答

49

以下是我如何通过代码创建一个按钮并设置其背景颜色。

UIButton *btn = [UIButton buttonWithType:UIButtonTypeCustom];
btn.frame = CGRectMake(100, 100, 100,50);
[btn setTitle:@"Hello" forState:UIControlStateNormal];
[btn setBackgroundColor:[UIColor colorWithRed:128.0/255.0f green:0.0/255.0f  blue:0.0/255.0f alpha:0.7]];
btn.frame = CGRectMake(100.0, 100.0, 120.0, 50.0);//width and height should be same  value
btn.clipsToBounds = YES;

btn.layer.cornerRadius = 20;//half of the width
btn.layer.borderColor=[UIColor redColor].CGColor;
btn.layer.borderWidth=2.0f;

[self.view addSubview:btn];

以下是与上面代码相关的按钮图像 在此输入图片描述

您可以随时玩弄代码并创建所需的背景和边框颜色。希望这可以帮助您。


23
btn.clipsToBounds = YES; 

我刚添加了这段代码,它对我很有效。实际上我可以通过为特定的UIButton设置一个图片来设置其圆角半径。


太棒了!现在我知道边界包括边框半径。 - gwest7

9

如果您在按钮背景中使用图片,则需要将clipsTobounds设置为true。

button.layer.cornerRadius = 10 
button.clipsToBounds = true

7

你也可以拥有以下内容:

btn.clipsToBounds = true;

请注意,在 Objective-C 中应使用 YES/NO,而在 Swift 中可以使用 true/false - JAL
1
@JAL 在Objective-C中,你也可以使用true/TRUEfalse/FALSE,同时还有YESNO - Luke
最好使用YES/NO与Objective-C的BOOL类型一起使用,因为true/false映射到C的bool类型。 - JAL

2

//创建类似于此的按钮

     UIButton *cancel=[[UIButton alloc]initWithFrame:CGRectMake(9, 9,35,35)];
    cancel.backgroundColor=[UIColor  colorWithPatternImage:[UIImage imageNamed:@"BackX.png"]];
[cancel setTitleColor:[UIColor blackColor] forState:UIControlStateNormal];

    [cancel.layer setBorderColor: [[UIColor blackColor] CGColor]];
    [cancel.layer setBorderWidth: 1.0];
    cancel.contentMode=UIViewContentModeScaleAspectFill;
    cancel.clipsToBounds=YES;
    cancel.layer.cornerRadius=8.0;
    [cancel addTarget:self action:@selector(cancelbtnclk1:) forControlEvents:UIControlEventTouchUpInside];
    [self.view addSubview:cancel];

在此之前,请添加 QuartzCore Framework 并在您的 .h 文件中导入 QuartzCore/CoreAnimation.h。
希望这对您有所帮助。

嗨,谢谢你的回复,但我特别不想使用clipToBounds。 - user1570600
是的,但这样它就没有被逼入绝境了 :D - user1570600

1
使用UIGraphicsImageRenderer,您可以使用UIGraphicsImageRendererContextcgContext属性来访问CGContext并添加圆形路径:
UIGraphicsImageRenderer(size: size).image { context in
    let rect = CGRect(origin: .zero, size: size)
    let clipPath = UIBezierPath(roundedRect: rect, cornerRadius: cornerRadius).cgPath
    context.cgContext.addPath(clipPath)
    context.cgContext.setFillColor(self.cgColor)
    context.cgContext.fillPath()
}

作为 UIColor 的扩展添加:
extension UIColor {
    public func image(_ size: CGSize = CGSize(width: 10, height: 10), cornerRadius: CGFloat = 4) -> UIImage {
        return UIGraphicsImageRenderer(size: size).image { context in
            let rect = CGRect(origin: .zero, size: size)
            let clipPath = UIBezierPath(roundedRect: rect, cornerRadius: cornerRadius).cgPath
            context.cgContext.addPath(clipPath)
            context.cgContext.setFillColor(self.cgColor)
            context.cgContext.fillPath()
        }
    }
}

这种方法还可以让您为按钮添加阴影,而不像使用clipsToBounds

-1
在Identity Inspector中为按钮设置圆角半径。请参见图片。

enter image description here

在属性检查器中为按钮设置背景图像。请参见图片。

enter image description here


网页内容由stack overflow 提供, 点击上面的
可以查看英文原文,
原文链接