如果不显示所有NavigationLink,则 SwiftUI 中 NavigationView 中的 NavigationLink 的“tag”和“selection”将停止工作。

8

我有一个列表,它在NavigationView中的Form中,每个列表项都有一个可以通过NavigationLink到达的详细视图。当我向列表中添加新元素时,我希望显示其详细视图。为此,我使用一个@State变量currentSelection,将其作为selection传递给NavigationLink,并将每个元素的函数作为tag

NavigationLink(
  destination: DetailView(entry: entry),
  tag: entry,
  selection: $currentSelection,
  label: { Text("The number \(entry)") })

这个方法可以正常工作,并且遵循了Apple文档最佳实践

惊奇的是,当列表的元素数量超过屏幕容纳的元素数量时(加上约2个元素),它就停止工作了。问题是:为什么?如何解决?


我制作了一个最小示例来复制这种行为:

import SwiftUI

struct ContentView: View {
    @State var entries = [10, 11, 12, 13, 14, 15, 16, 17, 18, 19, 20, 21, 22, 23, 24, 25]
    @State var currentSelection: Int? = nil

    var body: some View {
        NavigationView {
            Form {
                ForEach(entries.sorted(), id: \.self) { entry in
                    NavigationLink(
                        destination: DetailView(entry: entry),
                        tag: entry,
                        selection: $currentSelection,
                        label: { Text("The number \(entry)") })
                }
            }
            .toolbar {
                ToolbarItem(placement: ToolbarItemPlacement.navigationBarLeading) { Button("Add low") {
                    let newEntry = (entries.min() ?? 1) - 1
                    entries.insert(newEntry, at: 1)
                    currentSelection = newEntry
                } }
                ToolbarItem(placement: ToolbarItemPlacement.navigationBarTrailing) { Button("Add high") {
                    let newEntry = (entries.max() ?? 50) + 1
                    entries.append(newEntry)
                    currentSelection = newEntry
                } }
                ToolbarItem(placement: ToolbarItemPlacement.bottomBar) {
                    Text("The current selection is \(String(describing: currentSelection))")
                }
            }
        }
    }
}

struct DetailView: View {
    let entry: Int
    var body: some View {
        Text("It's a \(entry)!")
    }
}

(通过将列表减少到5个项目并在标签上设置填充:label:{ Text("The number \(entry).padding(30)") },我排除了元素数量是核心问题的可能性)

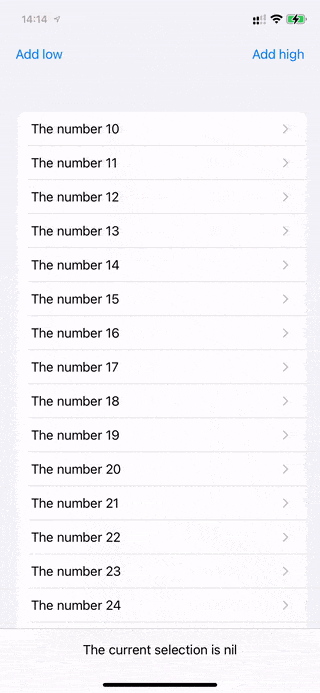
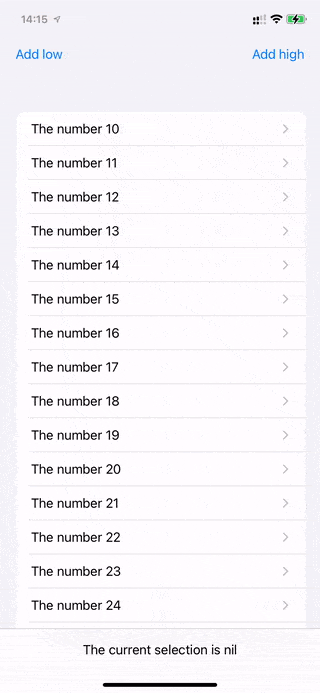
正如您在屏幕录像中所看到的,在达到关键的元素数量之后(无论是在列表前面还是后面添加),底部表仍然显示currentSelection正在更新,但没有导航。

我使用的是iOS 14.7.1、Xcode 12.5.1和Swift 5。

向列表开头添加 向列表末尾添加


2
从用户体验的角度来看,您可能希望滚动到新创建的导航链接(使用ScrollViewReader),以便它变得可见。我猜测,编程触发的导航链接将会起作用。 - CouchDeveloper
我喜欢这个想法,但是我无法用我的方法使其工作,不过我会将其包含在ZStack-Solution中。 - Jannik Arndt
刚刚添加了一个解决方案,但是要小心使用哦。 ;) - CouchDeveloper
请查看我的更新答案,我通过将导航链接创建登录移至扩展程序使其看起来更漂亮。 - Phil Dukhov
3个回答

9
这是因为低级项未被呈现,因此在层次结构中没有带有这样标记的NavigationLink
我建议您使用ZStack + EmptyView NavigationLink“hack”。
此外,在此处使用LazyView,由于@autoclosure,它让我传递未打包的currentSelection:只有在NavigationLink处于活动状态时才会调用该值,而这仅在currentSelection != nil时发生。
struct ContentView: View {
    @State var entries = [10, 11, 12, 13, 14, 15, 16, 17, 18, 19, 20, 21, 22, 23, 24, 25]
    @State var currentSelection: Int? = nil

    var body: some View {
        NavigationView {
            ZStack {
                EmptyNavigationLink(
                    destination: { DetailView(entry: $0) },
                    selection: $currentSelection
                )
                Form {
                    ForEach(entries.sorted(), id: \.self) { entry in
                        NavigationLink(
                            destination: DetailView(entry: entry),
                            label: { Text("The number \(entry)") })
                    }
                }
                .toolbar {
                    ToolbarItem(placement: ToolbarItemPlacement.navigationBarLeading) { Button("Add low") {
                        let newEntry = (entries.min() ?? 1) - 1
                        entries.insert(newEntry, at: 1)
                        currentSelection = newEntry
                    } }
                    ToolbarItem(placement: ToolbarItemPlacement.navigationBarTrailing) { Button("Add high") {
                        let newEntry = (entries.max() ?? 50) + 1
                        entries.append(newEntry)
                        currentSelection = newEntry
                    } }
                    ToolbarItem(placement: ToolbarItemPlacement.bottomBar) {
                        Text("The current selection is \(String(describing: currentSelection))")
                    }
                }
            }
        }
    }
}

struct DetailView: View {
    let entry: Int
    var body: some View {
        Text("It's a \(entry)!")
    }
}

public struct LazyView<Content: View>: View {
    private let build: () -> Content
    public init(_ build: @autoclosure @escaping () -> Content) {
        self.build = build
    }
    public var body: Content {
        build()
    }
}

struct EmptyNavigationLink<Destination: View>: View {
    let lazyDestination: LazyView<Destination>
    let isActive: Binding<Bool>
    
    init<T>(
        @ViewBuilder destination: @escaping (T) -> Destination,
        selection: Binding<T?>
    )  {
        lazyDestination = LazyView(destination(selection.wrappedValue!))
        isActive = .init(
            get: { selection.wrappedValue != nil },
            set: { isActive in
                if !isActive {
                    selection.wrappedValue = nil
                }
            }
        )
    }
    
    var body: some View {
        NavigationLink(
            destination: lazyDestination,
            isActive: isActive,
            label: { EmptyView() }
        )
    }
}

查看有关LazyView的更多信息,它通常有助于NavigationLink:在真实应用中,目标可能是一个巨大的屏幕,当您在每个单元格中都有一个NavigationLink时,SwiftUI将处理所有这些,这可能会导致延迟。


4
问题源于程序化导航(由工具栏中的按钮启动)。为了触发NavigationLink,您需要先创建它。
但是,如果使用List(或Form或LazyVStack),不应显示在屏幕上的子视图(这里是NavigationLink)将不会被“创建”。因此,当您尝试触发NavigationLink(修改currentSelection)时,该NavigationLink可能不存在。
如果我们将List / Form替换为ScrollView,则问题应该消失。
但最好的方法肯定是分离两种导航方式:
1- 由按钮触发的程序化导航。为此,我们将使用NavigationLink(_:destination:isActive:)初始化器。
2- 通过List进行导航(可点击的单元格,即NavigationLink(destination:label:)
struct ContentView: View {
    @State var entries = [10, 11, 12, 13, 14, 15, 16, 17, 18, 19, 20, 21, 22, 23, 24, 25]
    @State var currentSelection: Int? = nil
    @State var linkIsActive = false
    var body: some View {
        NavigationView {
            Form {
                ForEach(entries.sorted(), id: \.self) { entry in
                    // 2- Clickable label
                    NavigationLink(
                        destination: DetailView(entry: entry),
                        label: { Text("The number \(entry)") })
                }
            }
            .background(
                // 1- Programmatic navigation
                NavigationLink("", destination: DetailView(entry: currentSelection ?? -99), isActive: $linkIsActive)
            )
            .onChange(of: currentSelection, perform: { value in
                if value != nil {
                    linkIsActive = true
                }
            })
            .onChange(of: linkIsActive, perform: { value in
                if !value {
                    currentSelection = nil
                }
            })
   //...
}

不错!与@Philip的解决方案不同之处在于(1)使用.background()而不是ZStack,(2)将isActive作为显式的@State var并使用onChange()而不是Binding,以及(3)使用??回退而不是! - 虽然在真实应用程序中创建回退有点困难。 - Jannik Arndt
说实话,我认为我更喜欢 @Philip 的解决方案。:)1- 背景和 ZStack,它们是一样的 3- 他可以强制解包,因为他使用了 LazyView。 2- 真正的区别。这个解决方案对于一些人来说可能更易读(onChange vs custom Binding),所以我还是会保留它。 - Adrien

0

由于可能需要查看已添加到表单中的行,我想展示一个解决方案,首先滚动到新插入的项,然后显示详细视图。

虽然这不是我的最爱动画或流程。

该解决方案添加了一个额外的ScrollViewReader,似乎也可以与表单无缝协作。我们要滚动到的视图是NavigationLink(标签不起作用,因为它在未显示时未实例化)。

注意

我偶尔遇到一些故障,可能是Playgrounds。此外,在Xcode 13 beta 4上,控制台发出警告,指示NavigationLink存在问题,我们应该提交错误报告。 好吧……

我怀疑在执行滚动动画和随后的推送导航时可能会出现问题。 需要更多的调查。

struct ContentView: View {
    @State var entries = [10, 11, 12, 13, 14, 15, 16, 17, 18, 19, 20, 21, 22, 23, 24, 25]
    @State var currentSelection: Int? = nil

    var body: some View {
        NavigationView {
            ScrollViewReader { proxy in
                Form {
                    ForEach(entries.sorted(), id: \.self) { entry in
                        NavigationLink(
                            destination: DetailView(entry: entry),
                            tag: entry,
                            selection: $currentSelection,
                            label: { Text("The number \(entry)") }
                        )
                        .id("-\(entry)-")
                    }
                }
                .onChange(of: currentSelection) { newValue in
                    withAnimation {
                        if let currentSelection = self.currentSelection {
                            proxy.scrollTo("-\(currentSelection)-")
                        }
                    }
                }
                .toolbar {
                    ToolbarItem(placement: ToolbarItemPlacement.navigationBarLeading) { Button("Add low") {
                        let newEntry = (entries.min() ?? 1) - 1
                        entries.insert(newEntry, at: 1)
                        currentSelection = newEntry
                    } }
                    ToolbarItem(placement: ToolbarItemPlacement.navigationBarTrailing) { Button("Add high") {
                        let newEntry = (entries.max() ?? 50) + 1
                        entries.append(newEntry)
                        currentSelection = newEntry
                    } }
                    ToolbarItem(placement: ToolbarItemPlacement.bottomBar) {
                        Text("The current selection is \(String(describing: currentSelection))")
                    }
                }
            }
        }
    }
}

struct DetailView: View {
    let entry: Int
    var body: some View {
        Text("It's a \(entry)!")
    }
}


我喜欢这个想法,但是从第三个新元素开始,它就停止工作了:
  • 添加高度、后退、向上滚动
  • 添加高度、后退、向上滚动
  • 添加高度:保持为Optional(28)
  • 向上滚动,添加高度:选择为空
- Jannik Arndt
@JannikArndt 我在Playgrounds中遇到了一些问题,就像你描述的那样。但是我无法在版本13.0 beta 4(13A5201i)上重现您的问题。我的怀疑是,我们需要清楚地分离这两个动画,并且只有在滚动动画完成后才开始导航。不幸的是,在动画完成后启动某些连续操作并没有简单的方法,就像在UIKit中一样。但至少有一个解决方案!我稍后会去检查一下。;) - CouchDeveloper

网页内容由stack overflow 提供, 点击上面的
可以查看英文原文,
原文链接