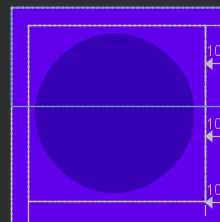
我想让我的ImageView中的任何图像都带有圆形边框。
我搜索了但没有找到有用的信息(任何我尝试的方法都不起作用)。
如何通过XML实现这一点:
创建一个具有特定src的ImageView并使其成为圆形边框?
我想让我的ImageView中的任何图像都带有圆形边框。
我搜索了但没有找到有用的信息(任何我尝试的方法都不起作用)。
如何通过XML实现这一点:
创建一个具有特定src的ImageView并使其成为圆形边框?
com.google.android.material:material中提供的ShapeableImageView。<com.google.android.material.imageview.ShapeableImageView
android:id="@+id/img_launcher_icon"
android:layout_width="wrap_content"
android:layout_height="wrap_content"
android:layout_centerHorizontal="true"
android:layout_margin="5dp"
android:adjustViewBounds="true"
android:background="@android:color/transparent"
android:elevation="5dp"
android:maxWidth="50dp"
android:maxHeight="50dp"
android:scaleType="fitXY"
android:src="@mipmap/ic_launcher"
app:shapeAppearance="?attr/actionButtonStyle"
app:shapeAppearanceOverlay="@style/imageViewRounded"
app:strokeColor="@android:color/white" />
imageViewRounded样式。<style name="imageViewRounded">
<item name="cornerFamily">rounded</item>
<item name="cornerSize">51%</item>
</style>
如未添加,可添加Material Design依赖。
implementation 'com.google.android.material:material:1.4.0'
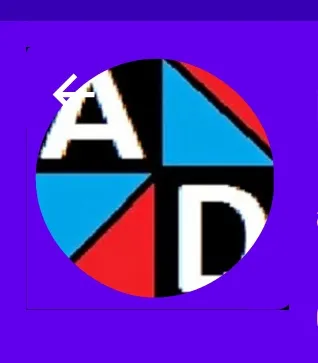
设计看起来像

<?xml version="1.0" encoding="UTF-8"?>
<shape xmlns:android="http://schemas.android.com/apk/res/android"
    android:shape="rectangle">
    <solid android:color="@android:color/transparent" />
    <padding android:bottom="-14dp" android:left="-14dp" android:right="-14dp" android:top="-14dp" />

</shape>
circle.xml
<shape xmlns:android="http://schemas.android.com/apk/res/android"
    android:innerRadius="0dp"
    android:shape="oval"

    android:useLevel="false" >
    <solid android:color="@android:color/transparent" />

    <stroke
        android:width="15dp"
        android:color="@color/verification_contact_background" />

</shape>
profile_image.xml(图层列表)
<?xml version="1.0" encoding="utf-8"?>
<layer-list xmlns:android="http://schemas.android.com/apk/res/android" >

    <item android:drawable="@drawable/rectangle" />
    <item android:drawable="@drawable/circle"/>

</layer-list>
 <ImageView
        android:id="@+id/profile_image"
        android:layout_width="match_parent"
        android:layout_height="match_parent"
        android:background="@drawable/default_org"
        android:src="@drawable/profile_image"/>
    implementation 'com.github.bumptech.glide:glide:4.11.0'
    annotationProcessor 'com.github.bumptech.glide:compiler:4.11.0'
XML
<ImageView
    android:id="@+id/vinyl"
    android:layout_width="match_parent"
    android:layout_height="match_parent"
    tools:ignore="ContentDescription" />
在代码中
    Glide.with(this)
            .load("https://images.pexels.com/photos/3828241/pexels-photo-3828241.jpeg")
            .transform(CircleCrop())
            .into(rootView.findViewById<ImageView>(R.id.vinyl))
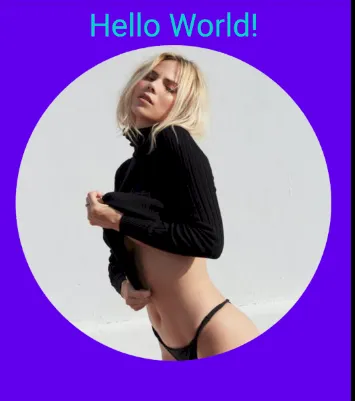
最佳解决方案由https://www.youtube.com/watch?v=0MHoNU7ytaw提供,卡片视图的宽度和高度决定了它包含的图像的大小,设置如下:
    implementation 'androidx.cardview:cardview:1.0.0'

   <androidx.cardview.widget.CardView
      android:layout_width="300dp"
      android:layout_height="270dp"
      android:layout_gravity="center"
      app:cardCornerRadius="150dp"
      app:cardBackgroundColor="@color/trans"
      >
    <ImageView
        android:id="@+id/resultImage"
        android:layout_width="match_parent"
        android:layout_height="match_parent"
        android:src="@drawable/congrats"
        android:layout_gravity="center">

    </ImageView>


  </androidx.cardview.widget.CardView>```
我使用 shape="oval" 代替下面的 ring。这对我有用。为了保持图片在范围内,我在我的 <ImageView> 中使用 <padding> 并将 <adjustViewBounds> 设置为 true。我尝试过大小在 50 x 50 像素到 200 x 200 像素之间的图像。
android:scaleType="fitCenter"。 - Ishrak@Jyotman Singh的答案很好(适用于扎实的背景),我想通过共享可重新着色的矢量可绘制对象来增强它,而且由于矢量单个形状很好地可缩放,因此非常方便。
这是矩形圆形形状(@drawable/shape_round_profile_pic):
<?xml version="1.0" encoding="utf-8"?>
<vector xmlns:android="http://schemas.android.com/apk/res/android"
    android:viewportWidth="284"
    android:viewportHeight="284"
    android:width="284dp"
    android:height="284dp">
    <path
        android:pathData="M0 142L0 0l142 0 142 0 0 142 0 142 -142 0 -142 0zm165 137.34231c26.06742 -4.1212 52.67405 -17.543 72.66855 -36.65787 11.82805 -11.30768 20.55487 -22.85153 27.7633 -36.72531C290.23789 158.21592 285.62874 101.14121 253.48951 58.078079 217.58149 9.9651706 154.68849 -10.125717 98.348685 8.5190299 48.695824 24.95084 12.527764 67.047123 3.437787 118.98655 1.4806194 130.16966 1.511302 152.96723 3.4990422 164.5 12.168375 214.79902 47.646316 256.70775 96 273.76783c21.72002 7.66322 44.26673 9.48476 69 5.57448z"
        android:fillColor="#ffffff" /> // you can change frame color
</vector>
使用方法相同:
<FrameLayout
        android:layout_width="70dp"
        android:layout_height="70dp">

        <ImageView
            android:layout_width="match_parent"
            android:layout_height="match_parent"
            android:background="@drawable/YOUR_PICTURE" />

        <ImageView
            android:layout_width="match_parent"
            android:layout_height="match_parent"
            android:background="@drawable/shape_round_profile_pic"/>

    </FrameLayout>
GlideApp.with(getApplicationContext()).asBitmap().load(profilePhotoUrl).circleCrop() - ekar这些代码就可以了:
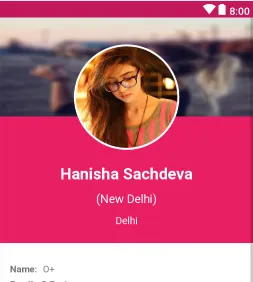
<de.hdodenhof.circleimageview.CircleImageView
            xmlns:app="http://schemas.android.com/apk/res-auto"
            android:clickable="true"
            app:civ_border_width="3dp"
            app:civ_border_color="#FFFFFFFF"
            android:id="@+id/profile"
            android:layout_width="200dp"
            android:layout_height="200dp"
            android:layout_below="@+id/header_cover_image"
            android:layout_centerHorizontal="true"
            android:layout_marginTop="-130dp"
            android:elevation="5dp"
            android:padding="20dp"
            android:scaleType="centerCrop"
            android:src="@drawable/profilemain" />
不要忘记导入:
import de.hdodenhof.circleimageview.CircleImageView;
compile 'de.hdodenhof:circleimageview:2.1.0'
另一种不使用任何库的方法是使用ImageFilterView,并将圆形百分比设置为视图将使圆形变成圆形
app:roundPercent="1"
  <androidx.constraintlayout.utils.widget.ImageFilterView
        android:id="@+id/ivProfile"
        android:layout_width="150dp"
        android:layout_height="150dp"
        android:src="@drawable/custom_button_1"
        app:roundPercent="1"
        android:scaleType="fitXY"
        app:layout_constraintTop_toTopOf="parent"
        app:layout_constraintStart_toStartOf="parent"
        app:layout_constraintEnd_toEndOf="parent"
        app:layout_constraintBottom_toTopOf="@+id/etName"/>
<com.google.android.material.card.MaterialCardView
            android:layout_width="75dp"
            android:layout_height="75dp"
            app:cardCornerRadius="50dp"
            app:strokeWidth="1dp"
            app:strokeColor="@color/black">
            <ImageView
                android:layout_width="fill_parent"
                android:layout_height="fill_parent"
                android:id="@+id/circular_image"
                android:scaleType="fitCenter"
                android:src="@drawable/your_img" />
        </com.google.android.material.card.MaterialCardView>
ic_bg_picture.xml
 <vector xmlns:android="http://schemas.android.com/apk/res/android"
    android:width="100dp"
    android:height="100dp"
    android:viewportWidth="100"
    android:viewportHeight="100">
  <path
      android:pathData="M100.6,95.5c0,-0.4 -0.1,-0.7 0,-1.1c-0.2,-0.7 -0.2,-1.4 -0.1,-2.1c0,-0.1 0,-0.2 0,-0.3c-0.1,-0.6 -0.1,-1.2 0,-1.8c-1,-1.3 -0.3,-2.9 -0.3,-4.3c-0.1,-28.7 -0.1,-57.3 -0.1,-86C68,-0.1 35.9,-0.1 3.8,-0.2C0.7,-0.2 0,0.5 0,3.6c0.1,32.1 0.1,64.2 0.1,96.2c31,0 62,-0.1 92.9,0.1c3.6,0 6.3,-0.2 7.5,-3.2C100.5,96.4 100.5,95.9 100.6,95.5zM46.3,95.2C26.4,94 2,74.4 3.8,46.8C5.1,27.2 24.4,2.7 52.6,4.6c20.2,1.4 43,21.3 41.5,45.1C96.1,72.4 73,96.8 46.3,95.2z"
      android:fillColor="#6200EE"/>
</vector>
  <ImageView
    android:id="@+id/iv_profile_image"
    android:layout_width="100dp"
    android:layout_height="100dp"
    android:contentDescription="@string/app_name"
    app:srcCompat="@color/colorPrimaryDark" />

<ImageView
    android:id="@+id/container_profile_image"
    android:layout_width="100dp"
    android:layout_height="100dp"
    android:contentDescription="@string/app_name"
    app:srcCompat="@drawable/ic_bg_picture"/>