在安卓中创建水平和垂直虚线

49

我想使用形状在Android中绘制水平和垂直虚线。

我想要绘制像这样的线条:

enter image description here

对于水平线:

<shape xmlns:android="http://schemas.android.com/apk/res/android"
    android:shape="line" >

    <stroke
        android:dashGap="6px"
        android:dashWidth="6px"
        android:color="#C7B299" />

</shape>

对于竖直线

<shape xmlns:android="http://schemas.android.com/apk/res/android"
    android:shape="line" >
<size
     android:height="400dp"/>
    <stroke
        android:dashGap="6px"
        android:dashWidth="6px"
        android:color="#C7B299" />

</shape>

但是垂直虚线没有显示,我的输出结果就像这样:

在这里输入图片描述

如何绘制垂直线。

12个回答

61

如果视图的宽度为1dp,则仅旋转水平线是不够的。垂直线的长度将为1dp,因为它首先是水平绘制,然后旋转。这里有一个解决此问题的技巧:

<layer-list xmlns:android="http://schemas.android.com/apk/res/android">
    <item
        android:left="-300dp"
        android:right="-300dp">
        <rotate
            android:drawable="@drawable/dash_line_divider_horizontal"
            android:fromDegrees="90"
            android:toDegrees="90"/>
    </item>
</layer-list>

如果您想要一个带虚线的垂直分隔符,您可以将此XML可绘制对象设置为您用作分隔符的视图的背景。 - Sfseyhan
2
@Sfseyhan,你能解释一下为什么将左右两侧设置为“-300dp”吗? - Sufian
3
@Sufian 因为这条线首先是水平绘制,然后再旋转,所以我们需要足够的水平空间来绘制它。在两侧使用-300dp,可以绘制600dp的水平线,然后将其旋转。在我的情况下,600dp已经足够了,但如果需要可以随意增加。 - Sfseyhan
你还不明白为什么需要具体设置为-300dp吗? - uberchilly
@uberchilly 300dp是任意的。如果你有一个竖直分割线的特定高度,你应该在左右设置至少(-height/2)的填充,这样在旋转后有足够的空间来绘制视图。 - Sfseyhan

61

我找到了解决方案

<rotate xmlns:android="http://schemas.android.com/apk/res/android"
    android:fromDegrees="90"
    android:toDegrees="90" >

    <shape android:shape="line" >
        <stroke
            android:dashGap="6px"
            android:dashWidth="6px"
            android:color="#C7B299" />
    </shape>

</rotate>
<rotate xmlns:android="http://schemas.android.com/apk/res/android"
    android:fromDegrees="90"
    android:toDegrees="90"
    android:drawable="@drawable/horizontal_line"/>

3
我不得不进行修改,以使竖线出现。我无法在此处放置正确格式的代码,因此我添加了新答案。https://dev59.com/vmIj5IYBdhLWcg3wJB9-#34856660 - Sfseyhan
1
这种旋转的方式更好:https://dev59.com/vmIj5IYBdhLWcg3wJB9-#34856660 - André Luiz Reis
1
对于垂直视图,您必须在宽度上使用“match_parent”。 - Pratik Butani
我遇到了同样的问题,而且行是不可见的。我在我的ImageView中添加了以下代码,它起作用了。android:adjustViewBounds="true" android:scaleType="fitXY" - Vaios
用户846316和ulix提出的自定义组件方法将适用于大多数Android系统,因为它遵循了官方的方法。我建议重新考虑正确的答案。 - Constantin Zagorsky

46
我认为我已经找到了一个更加简洁的解决方案——创建一个自定义视图,其中包含特定代码来绘制虚线(在垂直和水平方向上),以及一堆属性,使得从XML布局中使用它非常容易。这种方法相对于“旋转线”的方法的主要优点是,您可以像通常那样设置虚线视图的大小,而不必担心旋转后视图的行为方式(因为旋转应用于整个虚线视图,而不仅仅是正在绘制的线)。
所以,这是逐步解决方案:
1. 创建文件“/res/values/attrs.xml”,并将以下内容复制到该文件:
<?xml version="1.0" encoding="utf-8"?>
<resources>

<declare-styleable name="DividerView">
    <attr name="color" format="color" />
    <attr name="dashLength" format="dimension" />
    <attr name="dashGap" format="dimension" />
    <attr name="dashThickness" format="dimension" />
    <attr name="orientation" format="enum">
        <enum name="horizontal" value="0" />
        <enum name="vertical" value="1" />
    </attr>
</declare-styleable>

</resources>

这将创建控制自定义视图的属性。 注意:如果上述文件已经存在于您的项目中,请将“declare-stylable”块复制/粘贴到现有的“resources”块内。

  1. 创建一个名为DividerView的类并粘贴下面的内容:

public class DividerView extends View {
static public int ORIENTATION_HORIZONTAL = 0;
static public int ORIENTATION_VERTICAL = 1;
private Paint mPaint;
private int orientation;

public DividerView(Context context, AttributeSet attrs) {
    super(context, attrs);
    int dashGap, dashLength, dashThickness;
    int color;

    TypedArray a = context.getTheme().obtainStyledAttributes(attrs, R.styleable.DividerView, 0, 0);

    try {
        dashGap = a.getDimensionPixelSize(R.styleable.DividerView_dashGap, 5);
        dashLength = a.getDimensionPixelSize(R.styleable.DividerView_dashLength, 5);
        dashThickness = a.getDimensionPixelSize(R.styleable.DividerView_dashThickness, 3);
        color = a.getColor(R.styleable.DividerView_color, 0xff000000);
        orientation = a.getInt(R.styleable.DividerView_orientation, ORIENTATION_HORIZONTAL);
    } finally {
        a.recycle();
    }

    mPaint = new Paint();
    mPaint.setAntiAlias(true);
    mPaint.setColor(color);
    mPaint.setStyle(Paint.Style.STROKE);
    mPaint.setStrokeWidth(dashThickness);
    mPaint.setPathEffect(new DashPathEffect(new float[] { dashLength, dashGap, }, 0));
}

public DividerView(Context context) {
    this(context, null);
}

@Override
protected void onDraw(Canvas canvas) {
    if (orientation == ORIENTATION_HORIZONTAL) {
        float center = getHeight() * .5f; 
        canvas.drawLine(0, center, getWidth(), center, mPaint);
    } else {
        float center = getWidth() * .5f; 
        canvas.drawLine(center, 0, center, getHeight(), mPaint);
    }
}
}
  • 为了在布局文件中使用属性自动完成功能,请在顶层容器中添加以下名称空间定义:

  • xmlns:custom="http://schemas.android.com/apk/res/com.example"
    

    com.example替换为您的包名。您还可以更改custom为任何前缀,以更好地满足您的需求。 注意:在attrs.xml文件更改后,您可能需要重新启动Eclipse才能使自动完成功能正常工作。

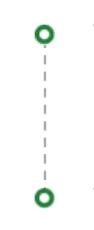
    1. 最后,通过在布局中插入以下元素来创建虚线,就像其他视图一样:

    <com.example.DividerView
        android:layout_width="1dp"
        android:layout_height="fill_parent"
        android:layerType="software" 
        custom:color="@color/grey"
        custom:orientation="vertical"
        custom:dashLength="1dp"
        custom:dashGap="1dp"
        custom:dashThickness="1dp" />
    

    希望这能有所帮助!


    4
    我想补充一点,在onDraw方法中,调用drawLine方法对我没有起作用!相反,我使用了canvas.drawPaint(mPaint)。看起来,我不是唯一遇到这个问题的人:https://code.google.com/p/android/issues/detail?id=29944 - JacksOnF1re
    你现在不需要执行第三步,你可以直接在XML中使用“app:…”标签。 - amitavk
    1
    最佳答案 - asitis
    作为一个新手,我在阅读了这篇答案后通过阅读 https://developer.android.com/guide/topics/ui/custom-components 找到了正确的方向。最近,我已经习惯了先阅读stackoverflow,然后再看文档... 这个答案是关于如何编写自定义组件的好的简短教程。我的建议是用 drawPath 替换 drawLine,这样你就可以使用硬件渲染。谢谢。 - Constantin Zagorsky
    谢谢。你节省了我的时间。 - Rabindra Acharya
    这个答案更像一个!因为它精确地绘制了每一条线,没有任何填充。 - Nikhil Solanki

    26

    enter image description here

    为了实现这个目标,您应该创建2个不同的drawable:

    1. 水平线: res/drawable/bg_horizontal_dotted_line.xml

    <?xml version="1.0" encoding="utf-8"?>
    <shape xmlns:android="http://schemas.android.com/apk/res/android"
      android:shape="line">
      <stroke
        android:width="0.8dp"
        android:color="@color/text_grey"
        android:dashWidth="4dp"
        android:dashGap="3dp" />
    </shape>
    

    2. 竖直可绘制对象: res/drawable/bg_dotted_line_vertical.xml

    <?xml version="1.0" encoding="utf-8"?>
    <layer-list xmlns:android="http://schemas.android.com/apk/res/android">
      <item
        android:left="-600dp"
        android:right="-600dp">
        <rotate
          android:drawable="@drawable/bg_horizontal_dotted_line"
          android:fromDegrees="90"
          android:visible="true" />
      </item>
    </layer-list>
    

    现在,你需要做的就是将上述垂直的XML应用于视图中。

    <View
                android:id="@+id/imageView7"
                android:layout_width="1dp"
                android:layout_height="0dp"
                android:background="@drawable/bg_dotted_line_vertical"
                android:layerType="software"/>
    

    完整代码:

    <androidx.constraintlayout.widget.ConstraintLayout
    xmlns:android="http://schemas.android.com/apk/res/android"
      xmlns:app="http://schemas.android.com/apk/res-auto"
      xmlns:tools="http://schemas.android.com/tools"
          android:id="@+id/ll_task_expanded"
          android:layout_width="match_parent"
          android:layout_height="200dp"
          android:orientation="vertical"
          app:canExpand="false"
          app:expanded="true">
    
    
          <ImageView
            android:id="@+id/imageView5"
            android:layout_width="wrap_content"
            android:layout_height="wrap_content"
            android:layout_marginStart="16dp"
            app:layout_constraintBottom_toBottomOf="@+id/textView3"
            app:layout_constraintStart_toStartOf="parent"
            app:layout_constraintTop_toTopOf="@+id/textView3"
            app:srcCompat="@drawable/ic_circle" />
    
          <ImageView
            android:id="@+id/imageView6"
            android:layout_width="wrap_content"
            android:layout_height="wrap_content"
            app:layout_constraintBottom_toBottomOf="@+id/textView4"
            app:layout_constraintEnd_toEndOf="@+id/imageView5"
            app:layout_constraintStart_toStartOf="@+id/imageView5"
            app:layout_constraintTop_toTopOf="@+id/textView4"
            app:srcCompat="@drawable/ic_circle" />
    
          <View
            android:id="@+id/imageView7"
            android:layout_width="1dp"
            android:layout_height="0dp"
            android:background="@drawable/bg_dotted_line_vertical"
            android:layerType="software"
            app:layout_constraintBottom_toTopOf="@+id/imageView6"
            app:layout_constraintEnd_toEndOf="@+id/imageView5"
            app:layout_constraintStart_toStartOf="@+id/imageView5"
            app:layout_constraintTop_toBottomOf="@+id/imageView5" />
    
          <TextView
            android:id="@+id/textView3"
            android:layout_width="wrap_content"
            android:layout_height="wrap_content"
            android:layout_marginStart="16dp"
            android:layout_marginTop="16dp"
            android:text="TextView"
            app:layout_constraintStart_toEndOf="@+id/imageView5"
            app:layout_constraintTop_toTopOf="parent" />
    
          <TextView
            android:id="@+id/textView4"
            android:layout_width="wrap_content"
            android:layout_height="wrap_content"
            android:layout_marginTop="50dp"
            android:text="TextView"
            app:layout_constraintEnd_toEndOf="@+id/textView3"
            app:layout_constraintStart_toStartOf="@+id/textView3"
            app:layout_constraintTop_toBottomOf="@+id/textView3" />
        </androidx.constraintlayout.widget.ConstraintLayout>
    

    感谢@Nanda Gopal的帮助。唯一的问题是硬编码的左右位置。我希望它在每个屏幕尺寸上都能正常工作。 - Raj Kanchan

    16

    这对我有效:

    vertical_line.xml

    <shape xmlns:android="http://schemas.android.com/apk/res/android" android:shape="rectangle">
        <solid android:color="@android:color/transparent"/>
        <stroke
            android:width="1px"
            android:color="#60000000"
            android:dashGap="5px"
            android:dashWidth="5px" />
    </shape>
    

    布局中:

    <View
            android:layout_width="1dp"
            android:layout_height="match_parent"
            android:layout_centerHorizontal="true"
            android:background="@drawable/vertical_line" />
    

    这是一个矩形,不是一条线。 - vrgrg

    3
    我尝试了很多方法,唯一有效的方法是这个:
    <layer-list xmlns:android="http://schemas.android.com/apk/res/android">
        <item
            android:left="-300dp"
            android:right="-300dp">
            <rotate
                android:fromDegrees="90"
                android:toDegrees="90">
                <shape android:shape="line" >
                    <stroke
                        android:width="2dp"
                        android:dashGap="3dp"
                        android:dashWidth="3dp"
                        android:color="@color/disable" />
                </shape>
            </rotate>
        </item>
    </layer-list>
    

    成功了,做得很棒。 - undefined

    2
    这个方法很好地解决了问题 创建可绘制的line_dash.xml文件。
    <?xml version="1.0" encoding="utf-8"?>
    <layer-list xmlns:android="http://schemas.android.com/apk/res/android">
        <item
            android:bottom="-1dp"
            android:left="-1dp"
            android:right="-1dp"
            android:top="0dp">
    
            <shape android:shape="rectangle">
                <stroke
                    android:width="1dp"
                    android:color="@color/grey_20"
                    android:dashGap="3dp"
                    android:dashWidth="3dp" />
    
                <solid android:color="@android:color/transparent" />
    
                <padding
                    android:bottom="10dp"
                    android:left="10dp"
                    android:right="10dp"
                    android:top="10dp" />
            </shape>
        </item>
    </layer-list>
    

    Use it like this

     <View
           android:layout_width="match_parent"
           android:layout_height="1dp"
           android:layout_margin="@dimen/spacing_middle"
           android:background="@drawable/line_dash" />
    

    1
    <rotate
    xmlns:android="http://schemas.android.com/apk/res/android"
    android:fromDegrees="90"
    android:toDegrees="90"
    android:pivotX="50%"
    android:pivotY="50%">
        <shape android:shape="line">
                <stroke
                    android:width="20dp"
                    android:color="@color/blue"
                    android:dashWidth="20dp"
                    android:dashGap="20dp" />
        </shape>
    

    您的答案可以通过添加更多支持信息来改进。请[编辑]以添加进一步的详细信息,例如引用或文档,以便他人可以确认您的答案是正确的。您可以在帮助中心中找到有关如何撰写良好答案的更多信息。 - Community

    0

    对于竖线:

    <rotate xmlns:android="http://schemas.android.com/apk/res/android"
        android:fromDegrees="90"
        android:toDegrees="90">
        <shape
            android:shape="line">
            <stroke
                android:width="2dp"
                android:color="#ff00ff"
                android:dashWidth="8dp"
                android:dashGap="5dp" />
            <size android:width="120dp" />
        </shape>
    </rotate>
    

    对于水平线:

    <?xml version="1.0" encoding="utf-8"?>
    <rotate xmlns:android="http://schemas.android.com/apk/res/android">
        <shape
            android:shape="line">
            <stroke
                android:width="2dp"
                android:color="@color/accent_color"
                android:dashWidth="3dp"
                android:dashGap="2dp" />
        </shape>
    </rotate>
    

    0
    请使用以下的可绘制代码。
    <?xml version="1.0" encoding="utf-8"?>
    <layer-list xmlns:android="http://schemas.android.com/apk/res/android">
        <item>
            <rotate
                android:fromDegrees="90"
                android:visible="true">
                <shape android:shape="line">
                    <stroke
                        android:width="1dp"
                        android:color="@color/black"
                        android:dashWidth="8dp"
                        android:dashGap="3dp"
                        />
                </shape>
            </rotate>
        </item>
    </layer-list>
    

    网页内容由stack overflow 提供, 点击上面的
    可以查看英文原文,
    原文链接