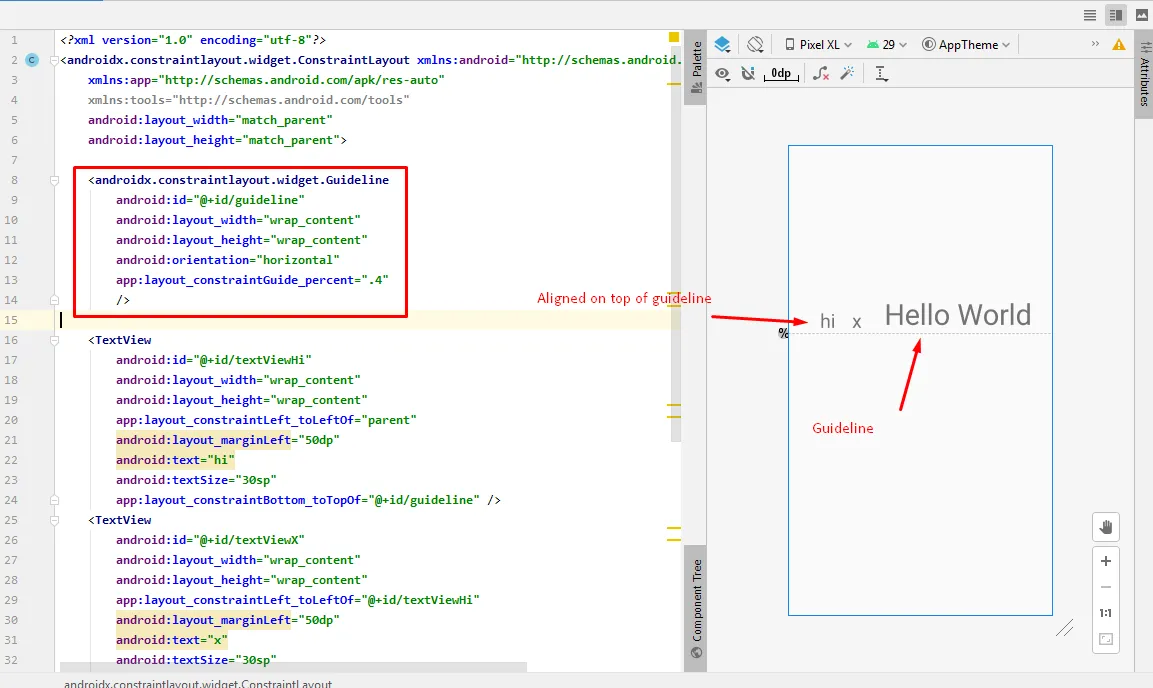
第二次更新:这是另一种从
Stack Overflow answer中采用的第一种解决方案,也适用于
ConstraintLayout。此解决方案使用自定义
TextView。自定义
TextView从
getBaseline()函数返回
TextView中最后一行文本的基线,而不是默认操作的第一行的基线。这是一个很好的、干净的解决方案(在我看来),它考虑了多行
TextViews以及重力等因素。
BaselineLastLineTextView的Kotlin版本
class BaselineLastLineTextView @JvmOverloads constructor(
    context: Context, attrs: AttributeSet? = null
) : AppCompatTextView(context, attrs) {

    override fun getBaseline(): Int {
        val layout = layout ?: return super.getBaseline()
        val baselineOffset = super.getBaseline() - layout.getLineBaseline(0)
        return baselineOffset + layout.getLineBaseline(layout.lineCount - 1)
    }
}
第一次更新:这是对我下面答案的更新,该答案仍然是有效的解决方案(在我看来)。这是一种不涉及任何Java / Kotlin代码的替代方法,只需使用XML即可完成。
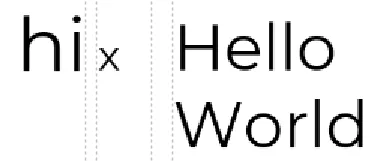
创建一个不可见的wrap_content TextView,其字体大小与“Hello World!”TextView相同。(根据实际布局,您可能还需要考虑填充和边距。)将此新视图约束到“Hello World!”底部,使其不可见,并将内容设置为某些短语,保证仅占用一行。这将为您提供具有与“Hello World!”视图的最后一行相同基线的目标视图。
将“hi”和“x”的基线约束到新的不可见视图。所有视图现在都共享相同的基线,而无需编码。
<androidx.constraintlayout.widget.ConstraintLayout
    android:id="@+id/layout"
    android:layout_width="match_parent"
    android:layout_height="match_parent"
    tools:context=".MainActivity">

    <TextView
        android:id="@+id/hiddenView"
        android:layout_width="wrap_content"
        android:layout_height="wrap_content"
        android:text="A"
        android:textSize="50sp"
        android:visibility="invisible"
        app:layout_constraintBottom_toBottomOf="@id/helloView"
        app:layout_constraintEnd_toEndOf="parent" />

    <TextView
        android:id="@+id/hiView"
        android:layout_width="wrap_content"
        android:layout_height="wrap_content"
        android:text="hi"
        android:textSize="46sp"
        app:layout_constraintBaseline_toBaselineOf="@id/hiddenView"
        app:layout_constraintEnd_toStartOf="@+id/xView"
        app:layout_constraintStart_toStartOf="parent"
        app:layout_constraintTop_toTopOf="@id/helloView" />

    <TextView
        android:id="@+id/xView"
        android:layout_width="wrap_content"
        android:layout_height="wrap_content"
        android:text="x"
        android:textSize="36sp"
        app:layout_constraintBaseline_toBaselineOf="@id/hiddenView"
        app:layout_constraintEnd_toStartOf="@+id/helloView"
        app:layout_constraintStart_toEndOf="@+id/hiView"
        app:layout_constraintTop_toTopOf="@id/helloView" />

    <TextView
        android:id="@+id/helloView"
        android:layout_width="wrap_content"
        android:layout_height="wrap_content"
        android:text="Hello\nWorld!"
        android:textSize="50sp"
        app:layout_constraintBottom_toBottomOf="parent"
        app:layout_constraintEnd_toEndOf="parent"
        app:layout_constraintStart_toEndOf="@+id/xView"
        app:layout_constraintTop_toTopOf="parent" />

    <Button
        android:id="@+id/button"
        android:layout_width="wrap_content"
        android:layout_height="wrap_content"
        android:layout_marginTop="24dp"
        android:onClick="onClick"
        android:text="Adjust Base Lines"
        app:layout_constraintEnd_toEndOf="parent"
        app:layout_constraintStart_toStartOf="parent"
        app:layout_constraintTop_toBottomOf="@+id/helloView" />


</androidx.constraintlayout.widget.ConstraintLayout>
< p >< em >第一个答案:正如另一个答案中所提到的,仅使用
ConstraintLayout约束无法实现此目标。您需要采用编程解决方案。
在每个TextView中,都有一个StaticLayout,它可以揭示文本的排版信息。通过参考静态布局,可以向适当的视图添加填充以使基线对齐。
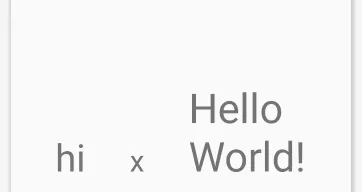
在此演示中,三个TextViews只需将其顶部对齐即可。最初,视图如下所示:

当按钮被点击时,将计算基线位置并向“hi”和“x”
TextViews的顶部添加填充。
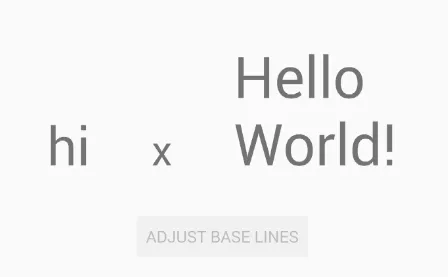
具体实现可能会有所不同,但这是一般的技术。
MainActivity.kt
class MainActivity : AppCompatActivity() {
override fun onCreate(savedInstanceState: Bundle?) {
super.onCreate(savedInstanceState)
setContentView(R.layout.activity_main)
}
fun onClick(view: View) {
button.isEnabled = false
val layout = helloView.layout
val helloBaseLIne = layout.getLineBaseline(layout.lineCount - 1)
val hiBaseLine = hiView.layout.getLineBaseline(0)
val xBaseLine = xView.layout.getLineBaseline(0)
hiView.updatePadding(top = helloBaseLIne - hiBaseLine)
xView.updatePadding(top = helloBaseLIne - xBaseLine)
}
}
activity_main.xml
<androidx.constraintlayout.widget.ConstraintLayout
    android:layout_width="match_parent"
    android:id="@+id/layout"
    android:layout_height="match_parent"
    tools:context=".MainActivity">

    <TextView
        android:id="@+id/hiView"
        android:layout_width="wrap_content"
        android:layout_height="wrap_content"
        android:text="hi"
        android:textSize="46sp"
        app:layout_constraintTop_toTopOf="@id/helloView"
        app:layout_constraintEnd_toStartOf="@+id/xView"
        app:layout_constraintStart_toStartOf="parent"/>

    <TextView
        android:id="@+id/xView"
        android:layout_width="wrap_content"
        android:layout_height="wrap_content"
        android:text="x"
        android:textSize="36sp"
        app:layout_constraintTop_toTopOf="@id/helloView"
        app:layout_constraintEnd_toStartOf="@+id/helloView"
        app:layout_constraintStart_toEndOf="@+id/hiView" />

    <TextView
        android:id="@+id/helloView"
        android:layout_width="wrap_content"
        android:layout_height="wrap_content"
        android:text="Hello\nWorld!"
        android:textSize="50sp"
        app:layout_constraintBottom_toBottomOf="parent"
        app:layout_constraintEnd_toEndOf="parent"
        app:layout_constraintStart_toEndOf="@+id/xView"
        app:layout_constraintTop_toTopOf="parent" />

    <Button
        android:id="@+id/button"
        android:layout_width="wrap_content"
        android:layout_height="wrap_content"
        android:layout_marginTop="24dp"
        android:text="Adjust Base Lines"
        android:onClick="onClick"
        app:layout_constraintEnd_toEndOf="parent"
        app:layout_constraintStart_toStartOf="parent"
        app:layout_constraintTop_toBottomOf="@+id/helloView" />


</androidx.constraintlayout.widget.ConstraintLayout>